1. Recurring Collections
1.1 Dashboard
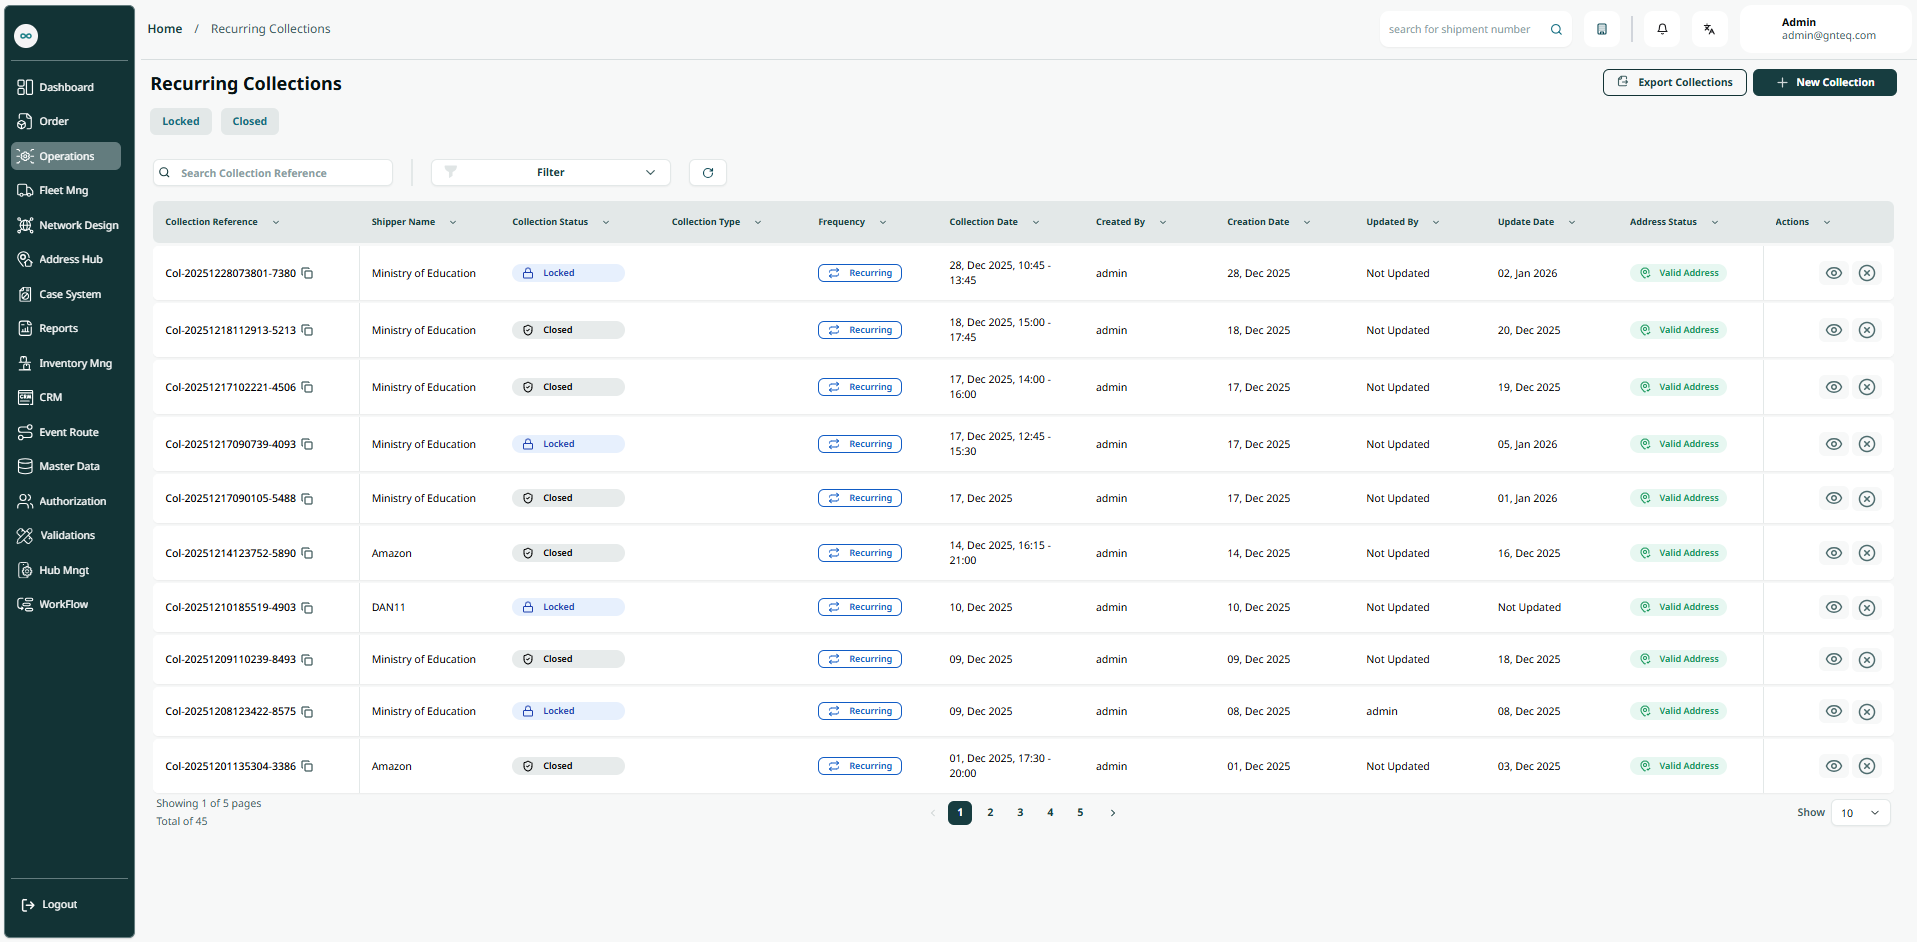
The user can view the defined collections in the system by navigating to the ‘Recurring Collections’ screen in the Operations module from the left navigation panel as follows:
-
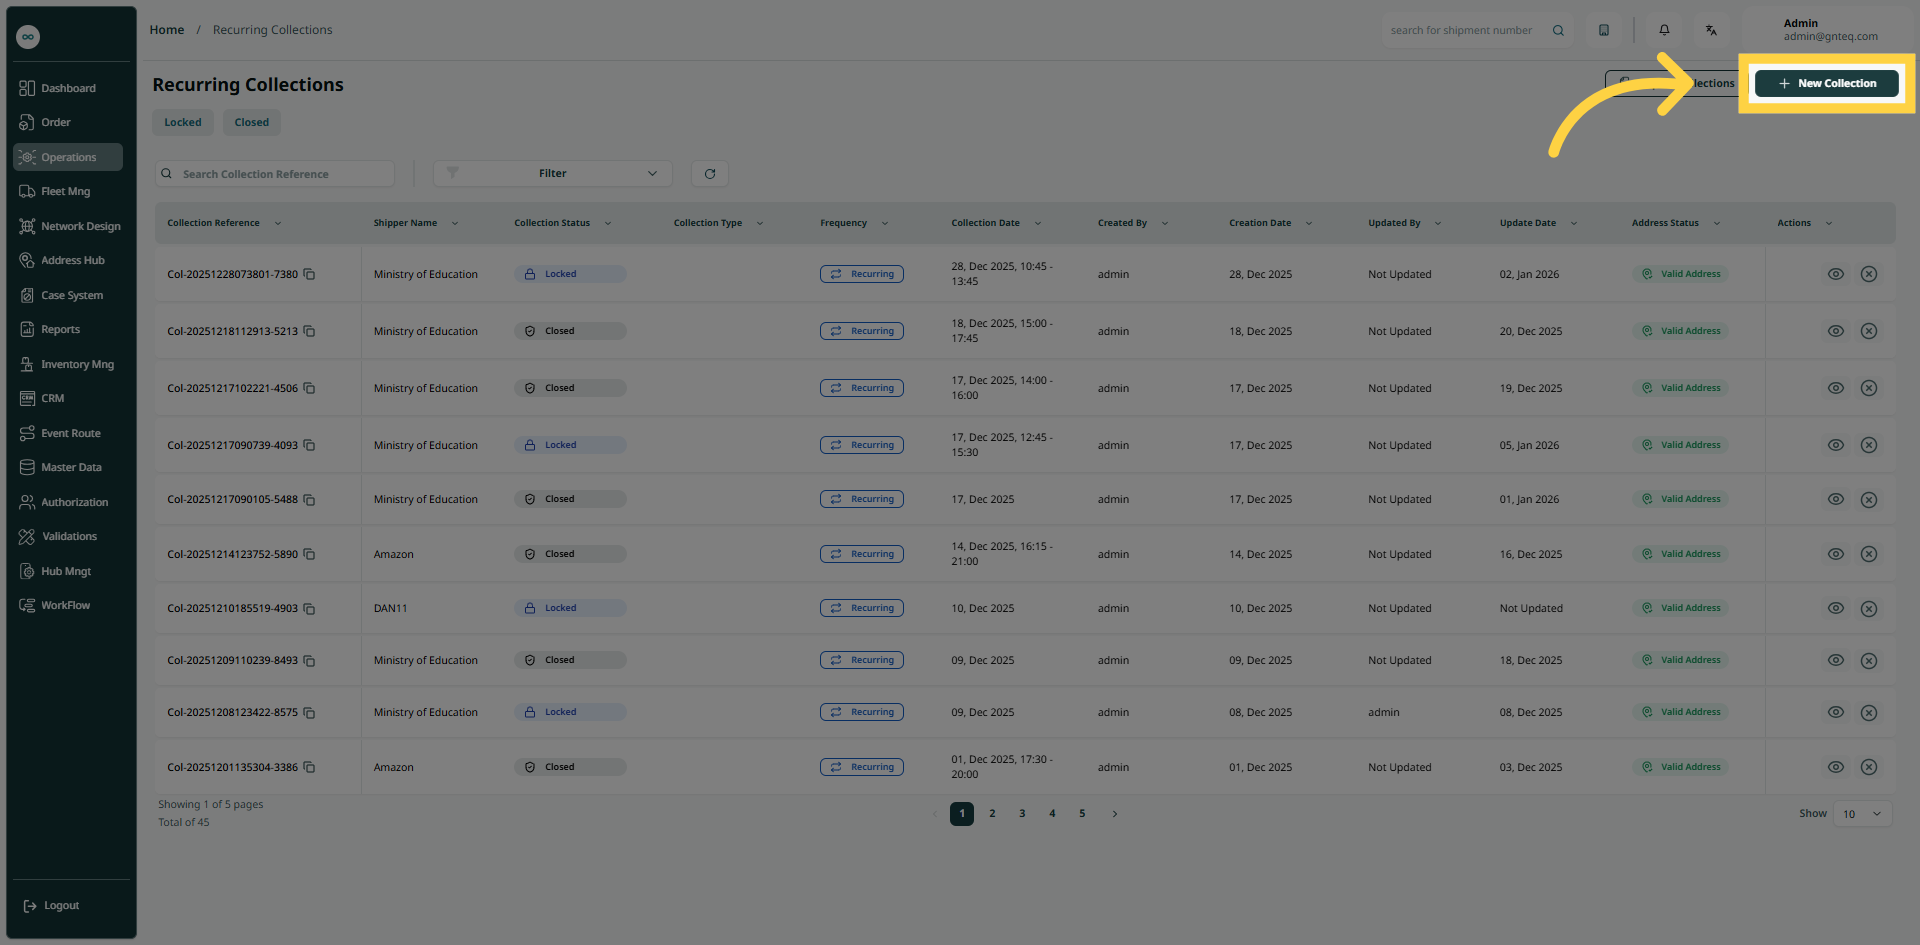
New Collection: the user can create a new collection by clicking on “New Collection.”
-
Export Collections: the user can export a collection as an Excel file.
-
Locked: the user can go to the locked collection screen by clicking on “Locked.”
-
Closed: the user can go to the closed screen by clicking on “Closed.”
-
Search: the user can search for a collection by typing the collection reference.
-
Filters: the user can search for a collection by address validation, collection date, creation date……etc.
-
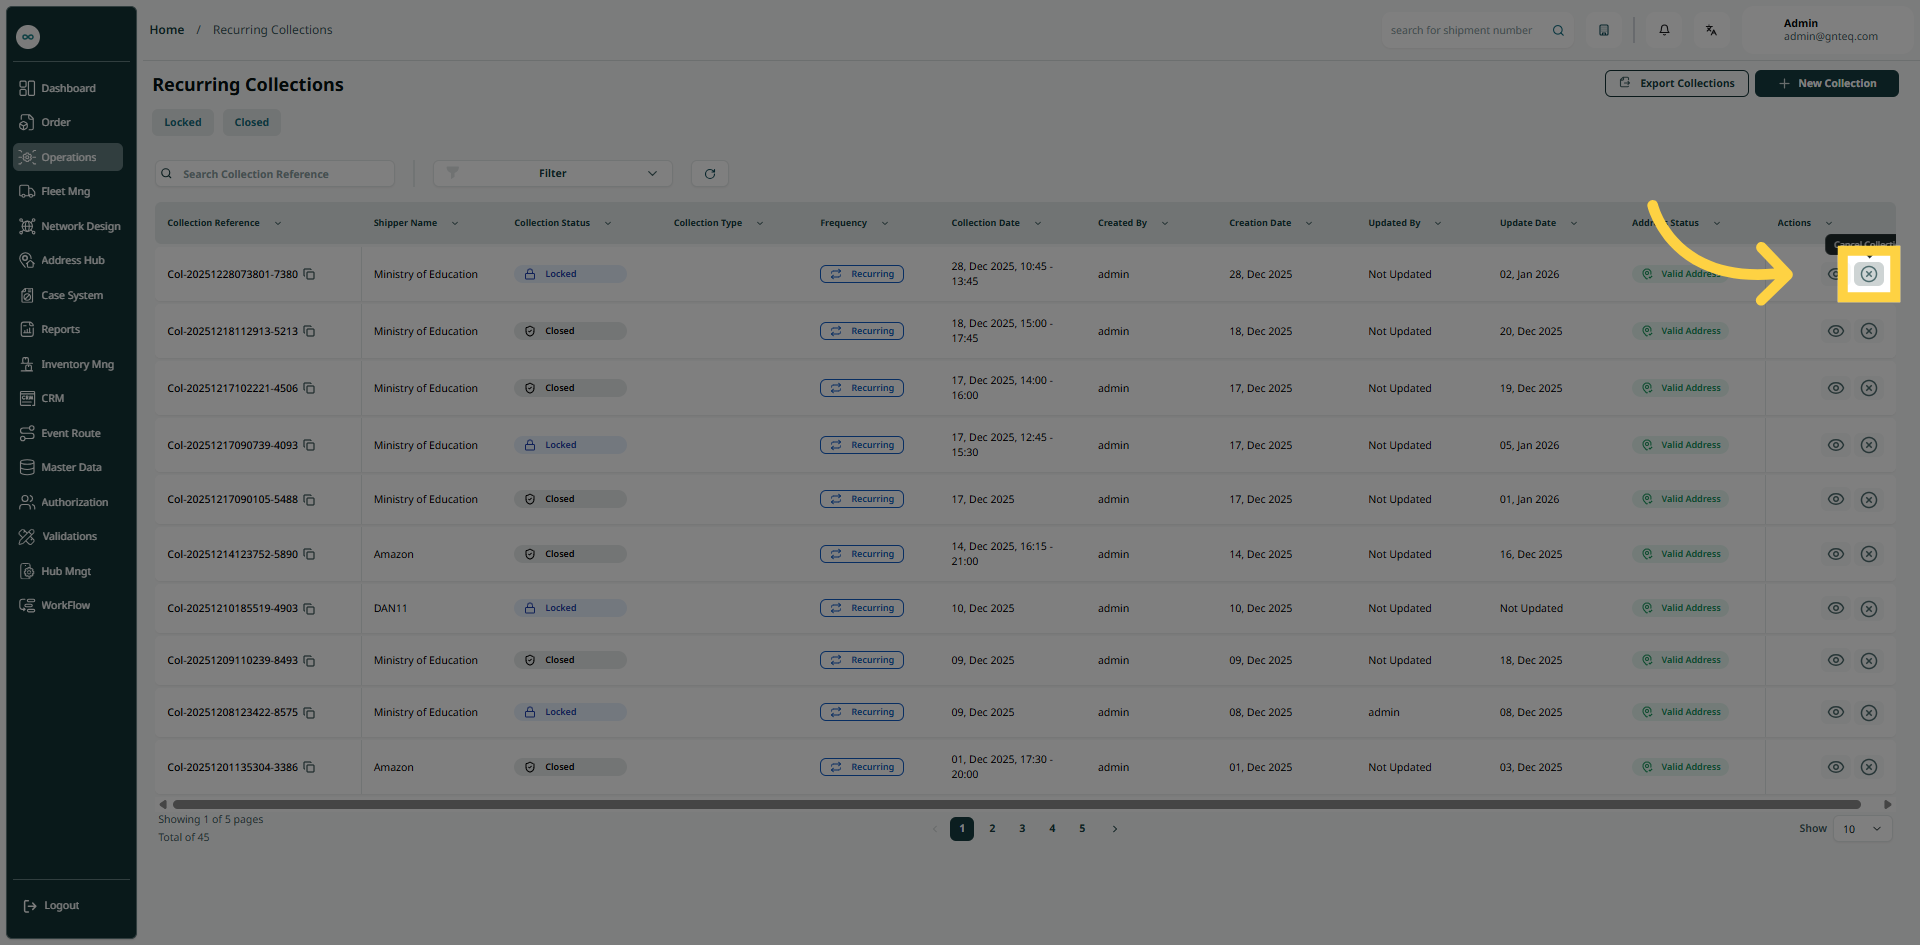
Actions: by clicking on Actions, the user can view collection details or cancel the collection.
1.1.1 Edit Information
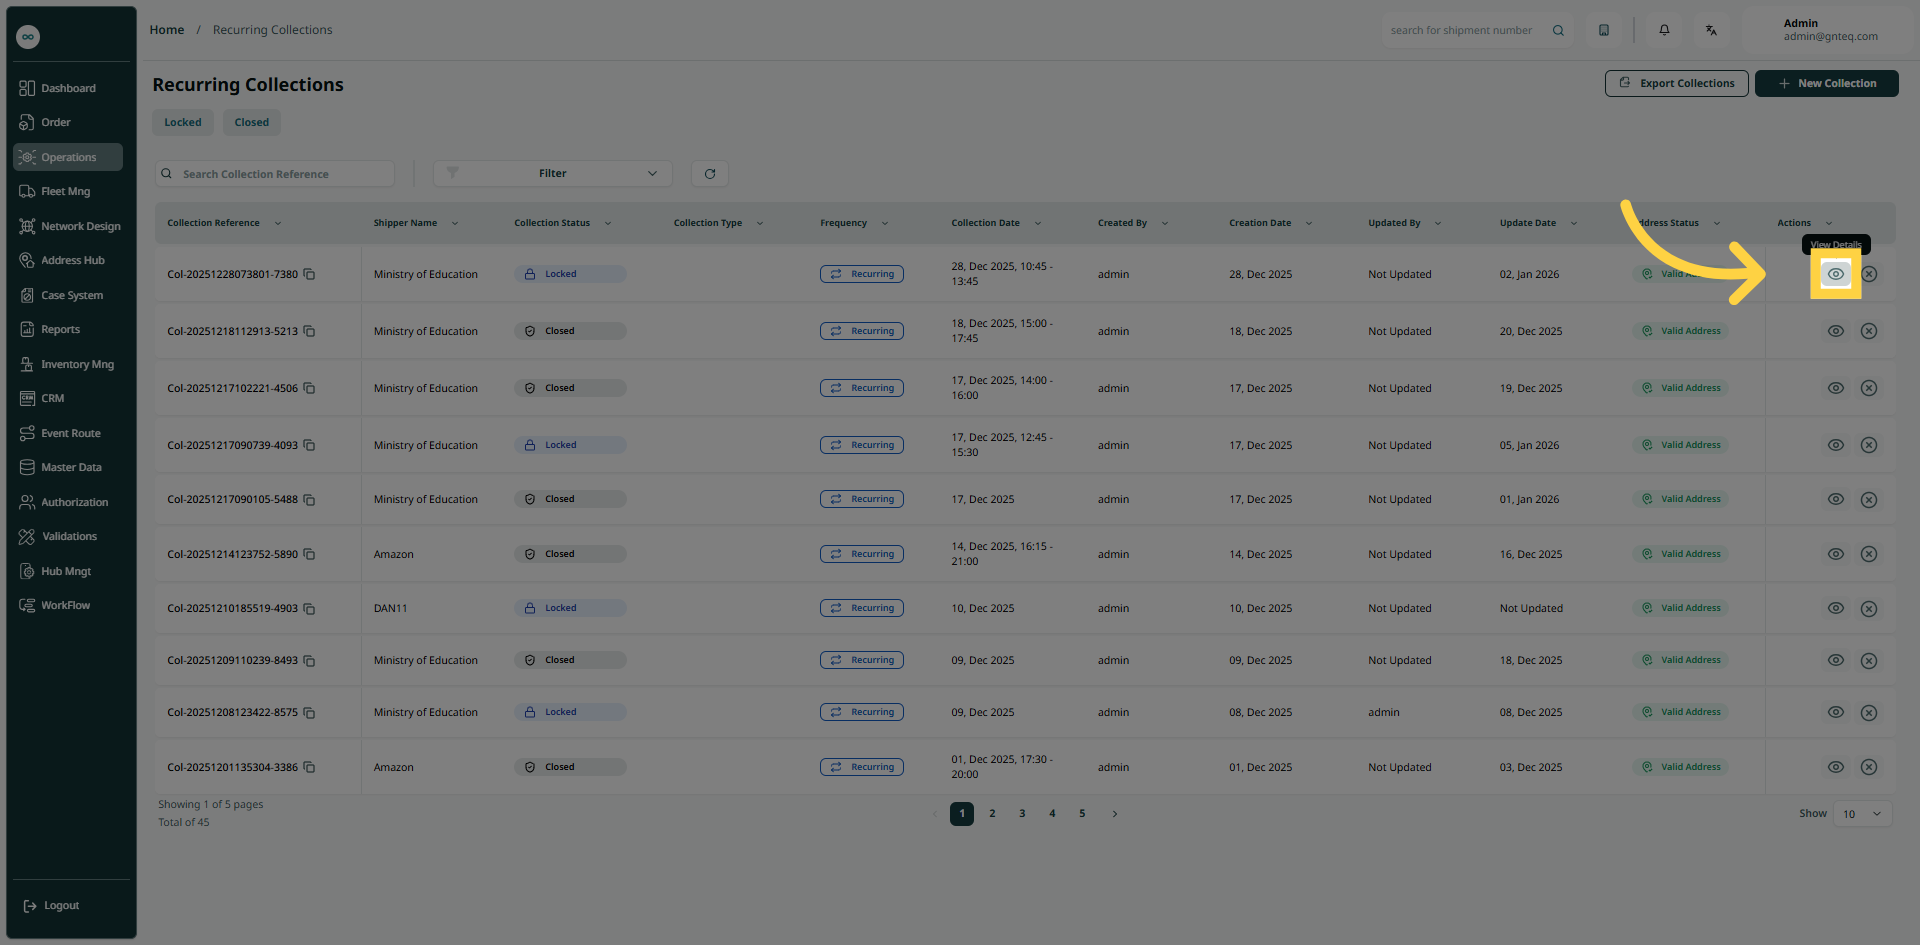
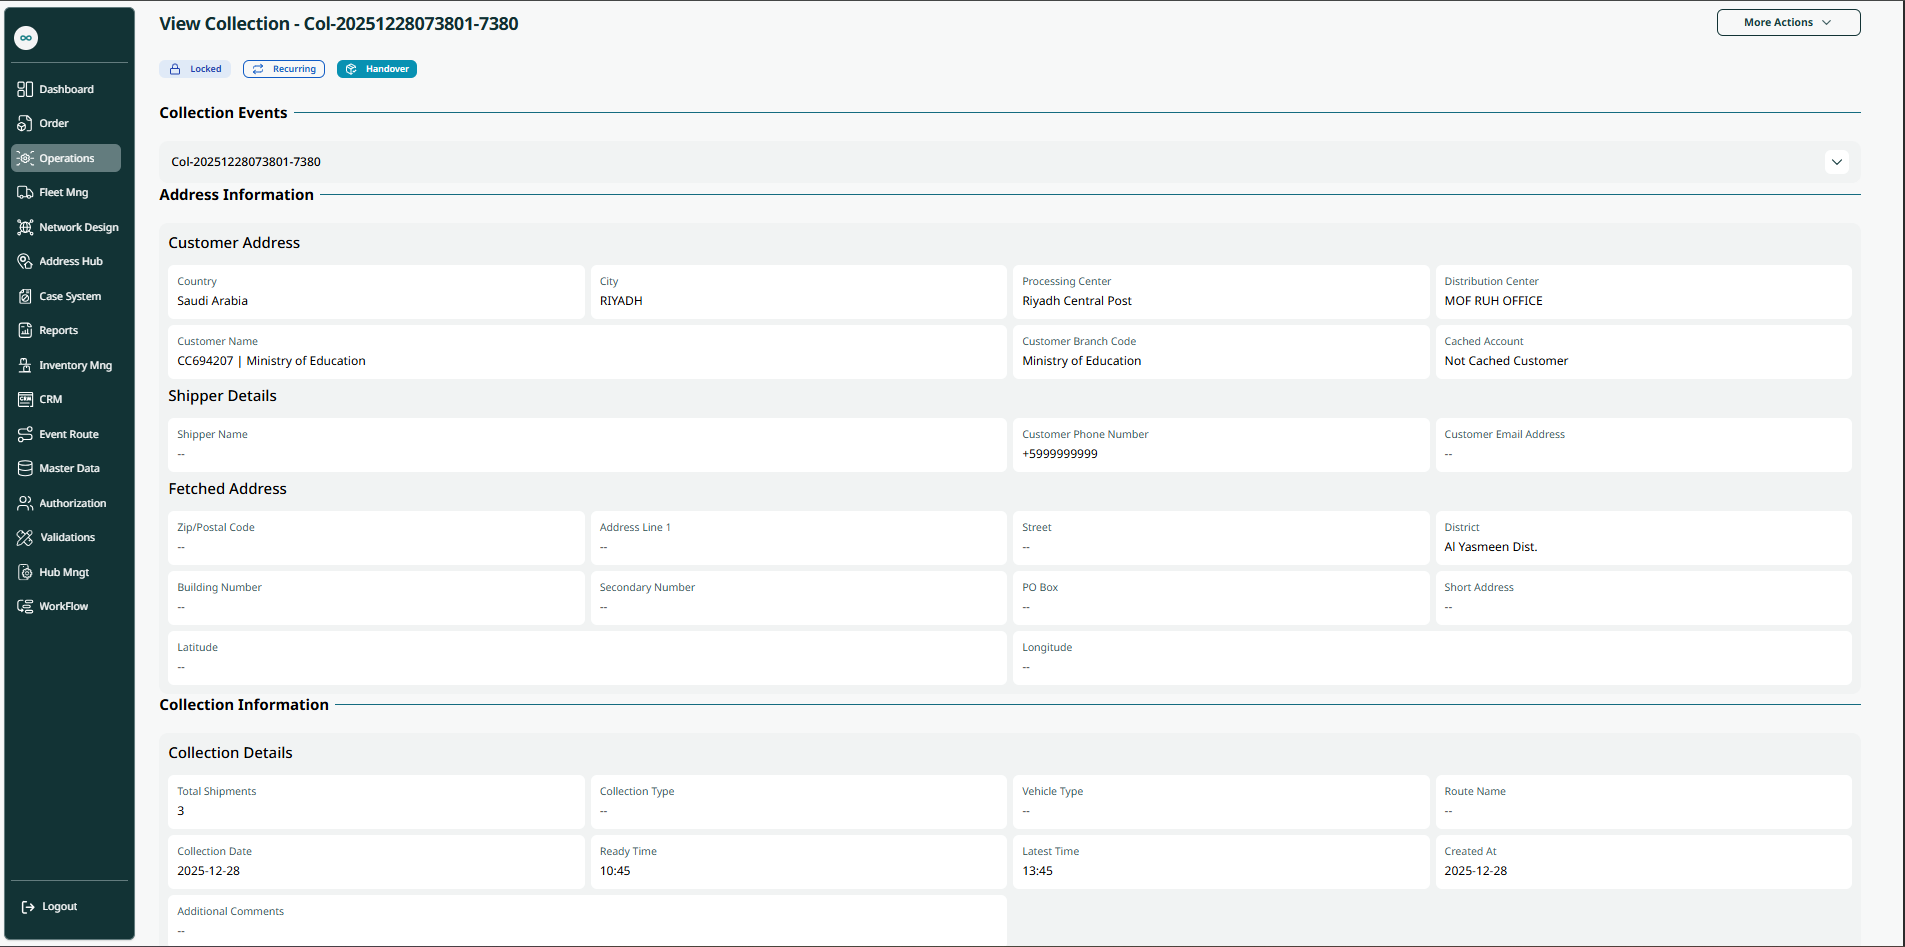
The user can view the details of the recurring collection by navigating to the "Recurring Collections" screen via the Operations module and clicking on View Details from Actions as follows:
1.1.1.1 More Actions
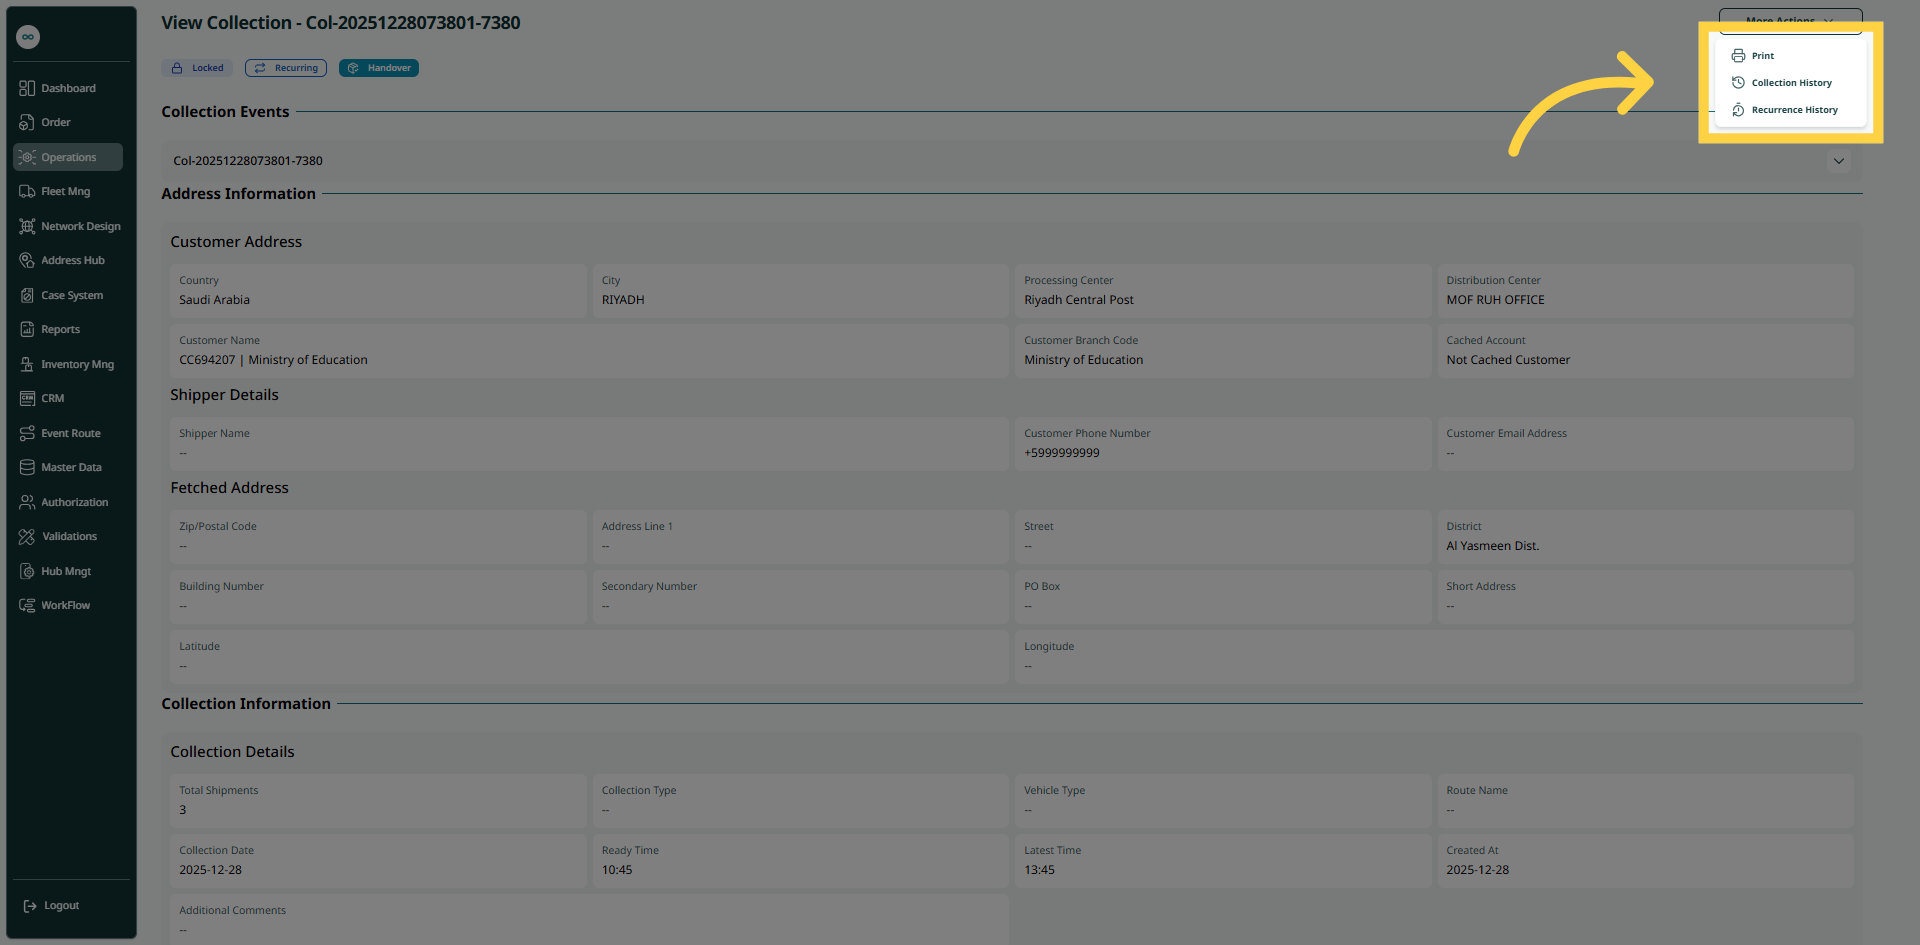
The user can print the label, collection history, and recurrence history by navigating to the "Recurring Collections" screen via the Operations module, clicking on View Details of Actions, and then clicking on "More Actions" as follows:
1.1.2 Cancel Collection
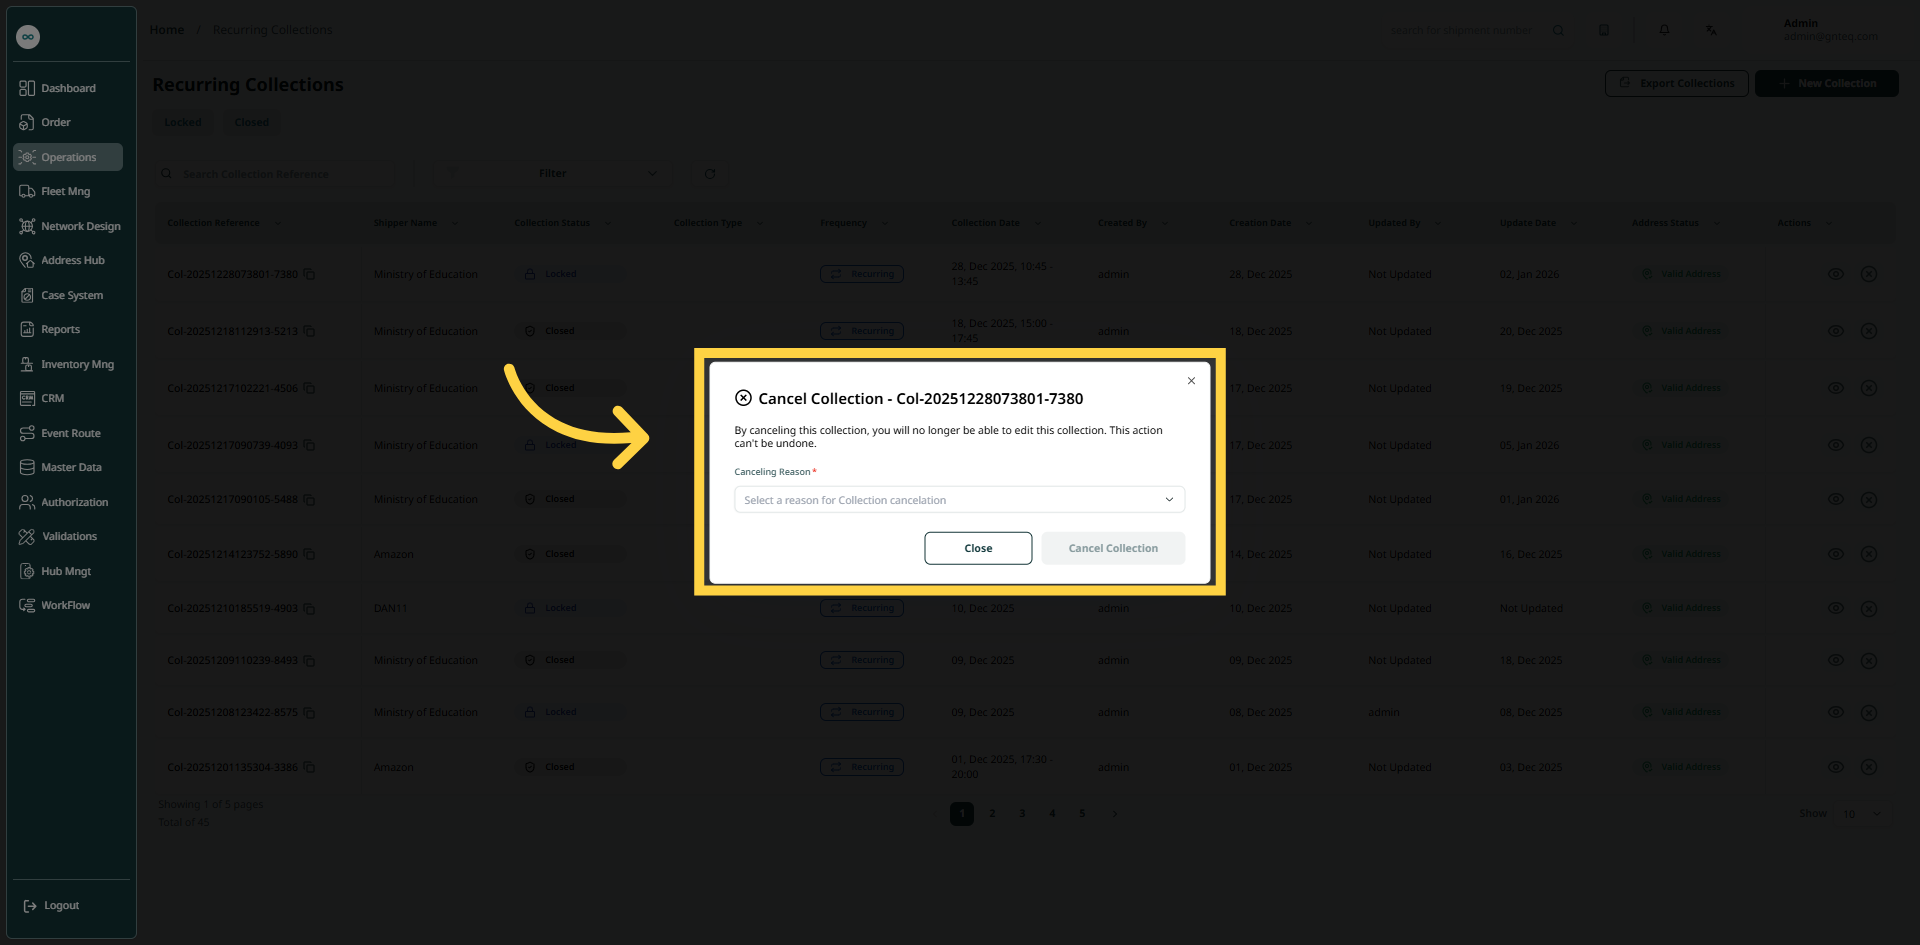
The user can cancel collection of the recurring collection by navigating to the "Recurring Collections" screen via the Operations module and clicking on Cancel Collection from Actions as follows:
-
Cancel Reason: this field represents the reason for cancellation.
By clicking on Cancel Collection, the collection will be canceled successfully in the system.
1.2 Add New Collection
The user can add a new collection by going to the "Recurring Collections" screen via Operations and clicking on the New Collection button:
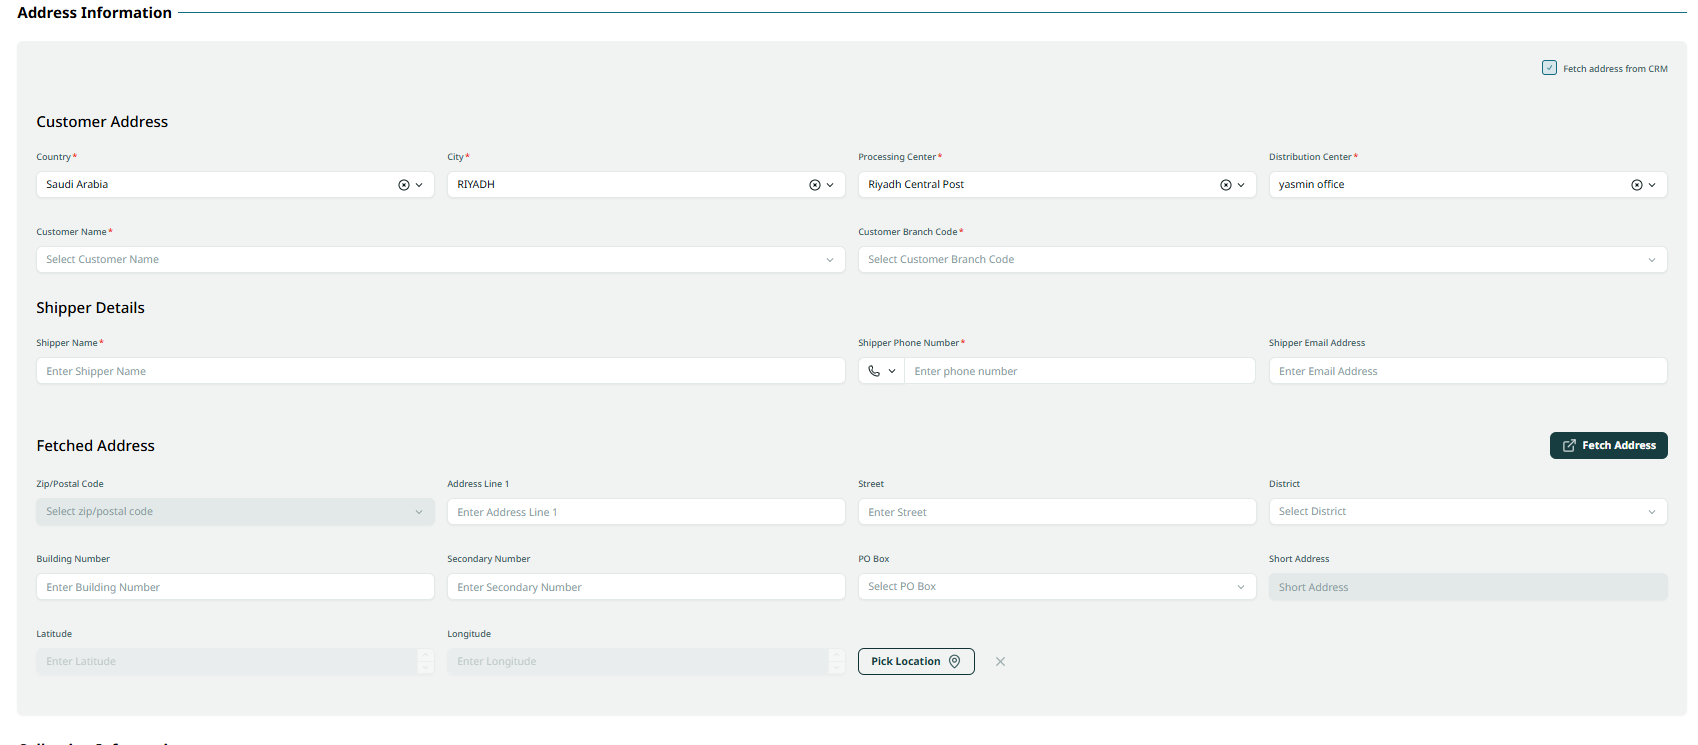
Customer Address
-
Country: this field represents the customer's country.
-
City: this field represents the customer's city.
-
Main Center: this field represents the terminal where the shipment will arrive.
-
Branch: this field represents the name of the distribution center.
-
Customer Name: this field represents the customer's full name.
-
Customer Branch Code: this field represents the branch code.
Shipper Details
-
Shipper Name: this field represents the customer's full name.
-
Shipper Phone Number: this field represents the shipper’s phone number.
-
Shipper Email: this field represents the shipper’s email address.
Fetched Address
-
Zip\Postal Code: this field represents a series of letters and numbers appended to the mailing address for mail sorting and classification.
-
Address Line 1: this field represents the address location.
-
Street: this field represents the street name.
-
District: this field represents a location, district, or region associated with the address.
-
Building Number: this field represents the building number.
-
Secondary Number: this field represents a second phone number.
-
PO Box: this field represents the postal code.
-
Short Address: this field represents a nearby location.
-
Longitude: this field represents the longitude of the address to pinpoint its location.
-
Latitude: this field represents the latitude of the address to pinpoint its location.
-
Pick Location: the user can select a location from the map, and the latitude and longitude will be automatically filled in.
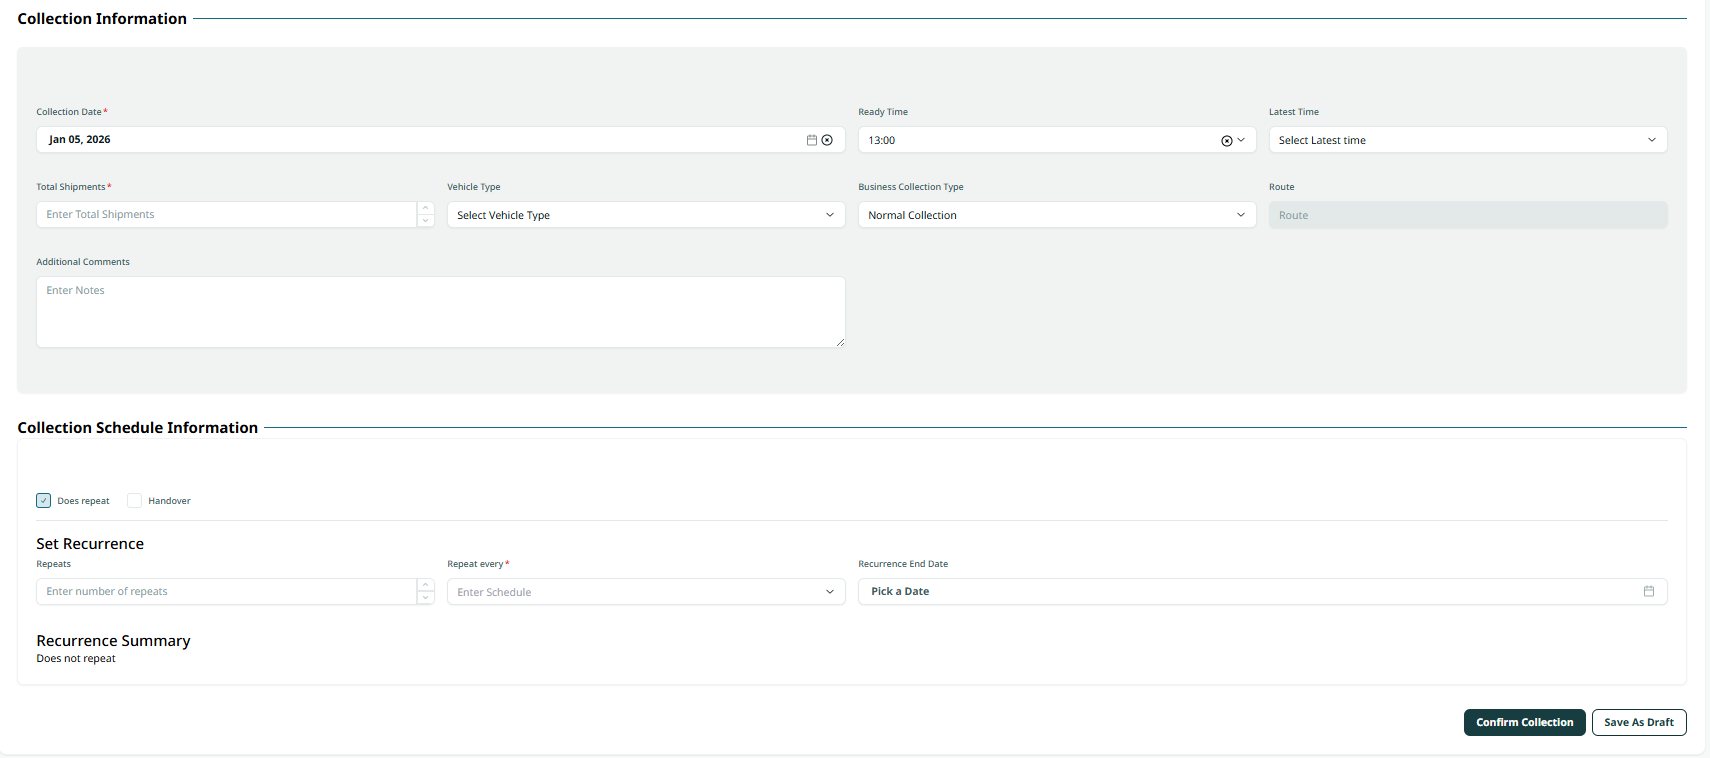
Collection Information
-
Collection Date: this field represents the date the shipment collection began.
-
Ready Time: this field represents the time available for shipment collection.
-
Latest Time: this field represents the latest time for shipment collection.
-
Total Shipments: this field represents the total number of shipments.
-
Vehicle Type: this field represents the vehicle type.
-
Business Collection Type: this field represents the type of collection.
-
Route: this field represents the destination of the shipment collection.
-
Additional Comments: this field represents additional comments related to the shipment collection.
Collection Schedule Information
Does Repeat (Checkbox): if selected, a list of recurring schedules will appear, and the collection will repeat at specified times.
Repeats: this field represents the number of iterations for the grouping.
Repeat Every: This field represents the iteration schedule (day, week, month, year).
Recurrence End Date: This field represents the final date for the iteration.
Clicking "Confirm Collection" will successfully create the group.
Clicking "Save as Draft" will keep the group in the creating state.