
1. Manifests
1.1 Dashboard
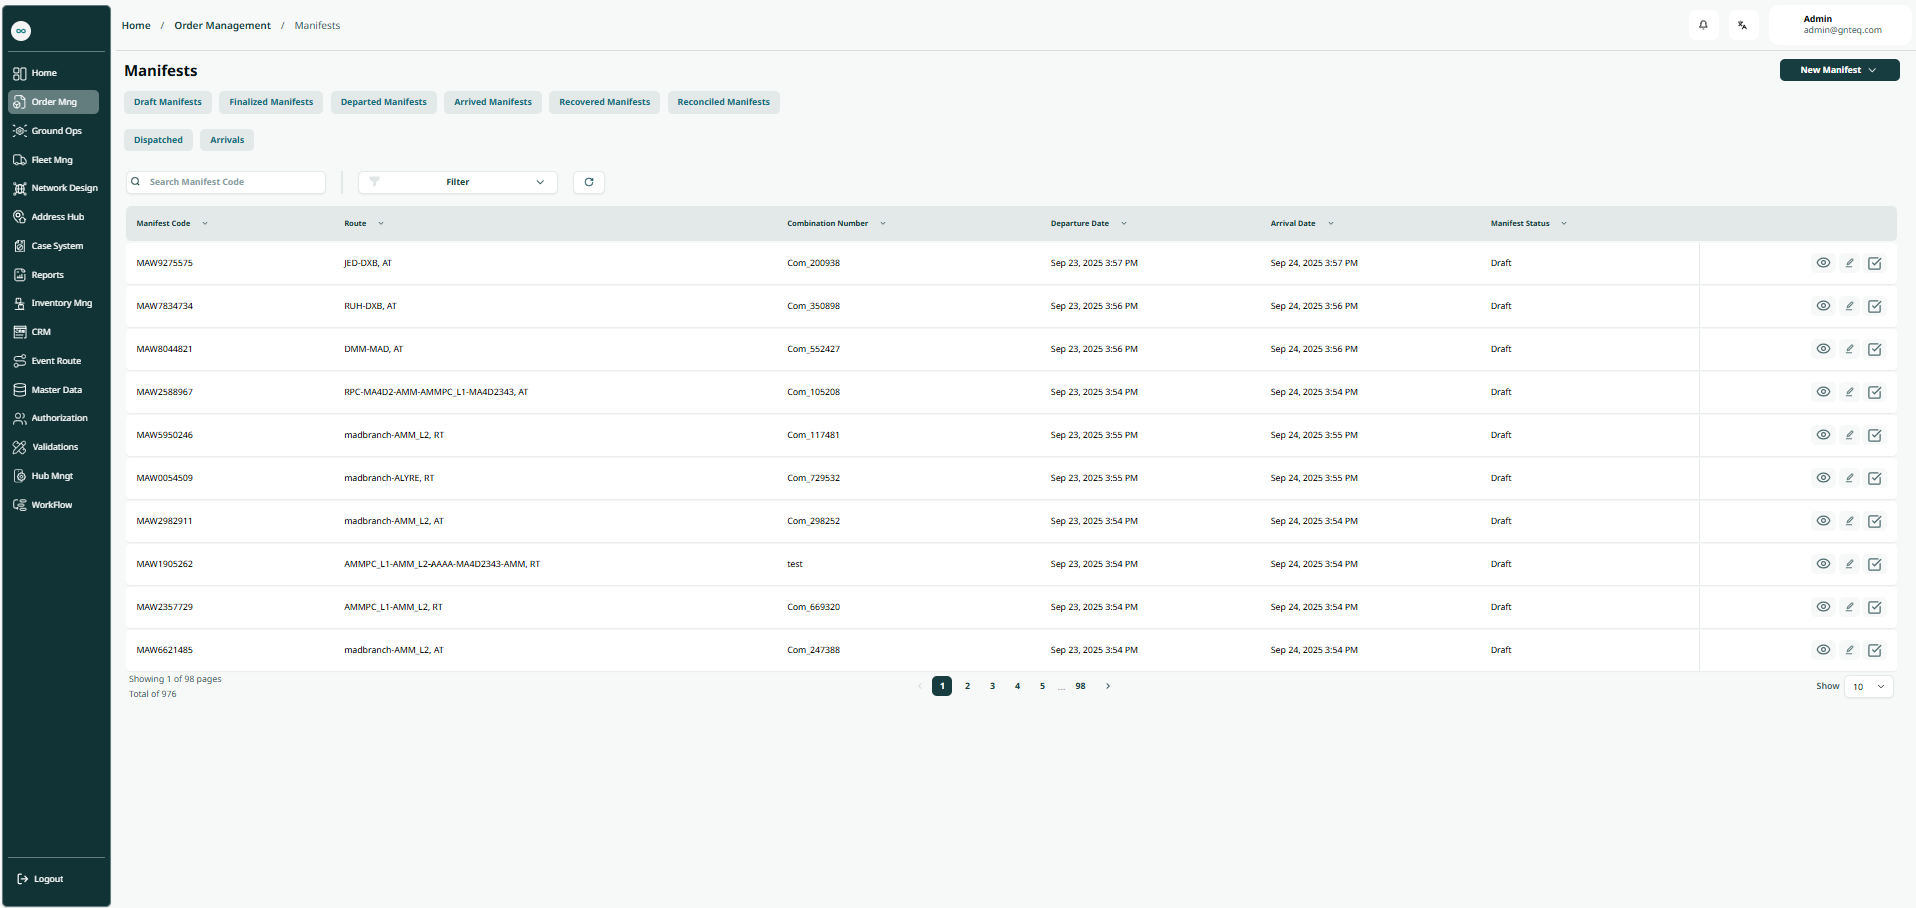
The user can view the defined manifests in the system by navigating to the ‘Manifests’ screen in the Operations Module from the left navigation panel as follows:
-
Create Manifests: the user can add new manifests by clicking on “New Manifests”.
-
Filters: the user can search for the master airwaybill by the origin country, destination country, arrival date, … etc.
-
Draft Manifests: The user can access the draft manifests screen by clicking "Draft Manifests".
-
Finalized Manifests: The user can access the finalized manifests screen by clicking "Finalized Manifests".
-
Arrived Manifests: The user can access the arrived manifests screen by clicking "Arrived Manifests".
-
Recovered Manifests: The user can access the recovered manifests screen by clicking "Recovered Manifests".
-
Reconciliation Manifests: The user can access the reconciliation manifests screen by clicking "Reconciliation Manifests".
-
Search: The user can search for manifests by entering the manifest’s code.
-
Rows Per Page: the user can select the number of items to show on each page.
-
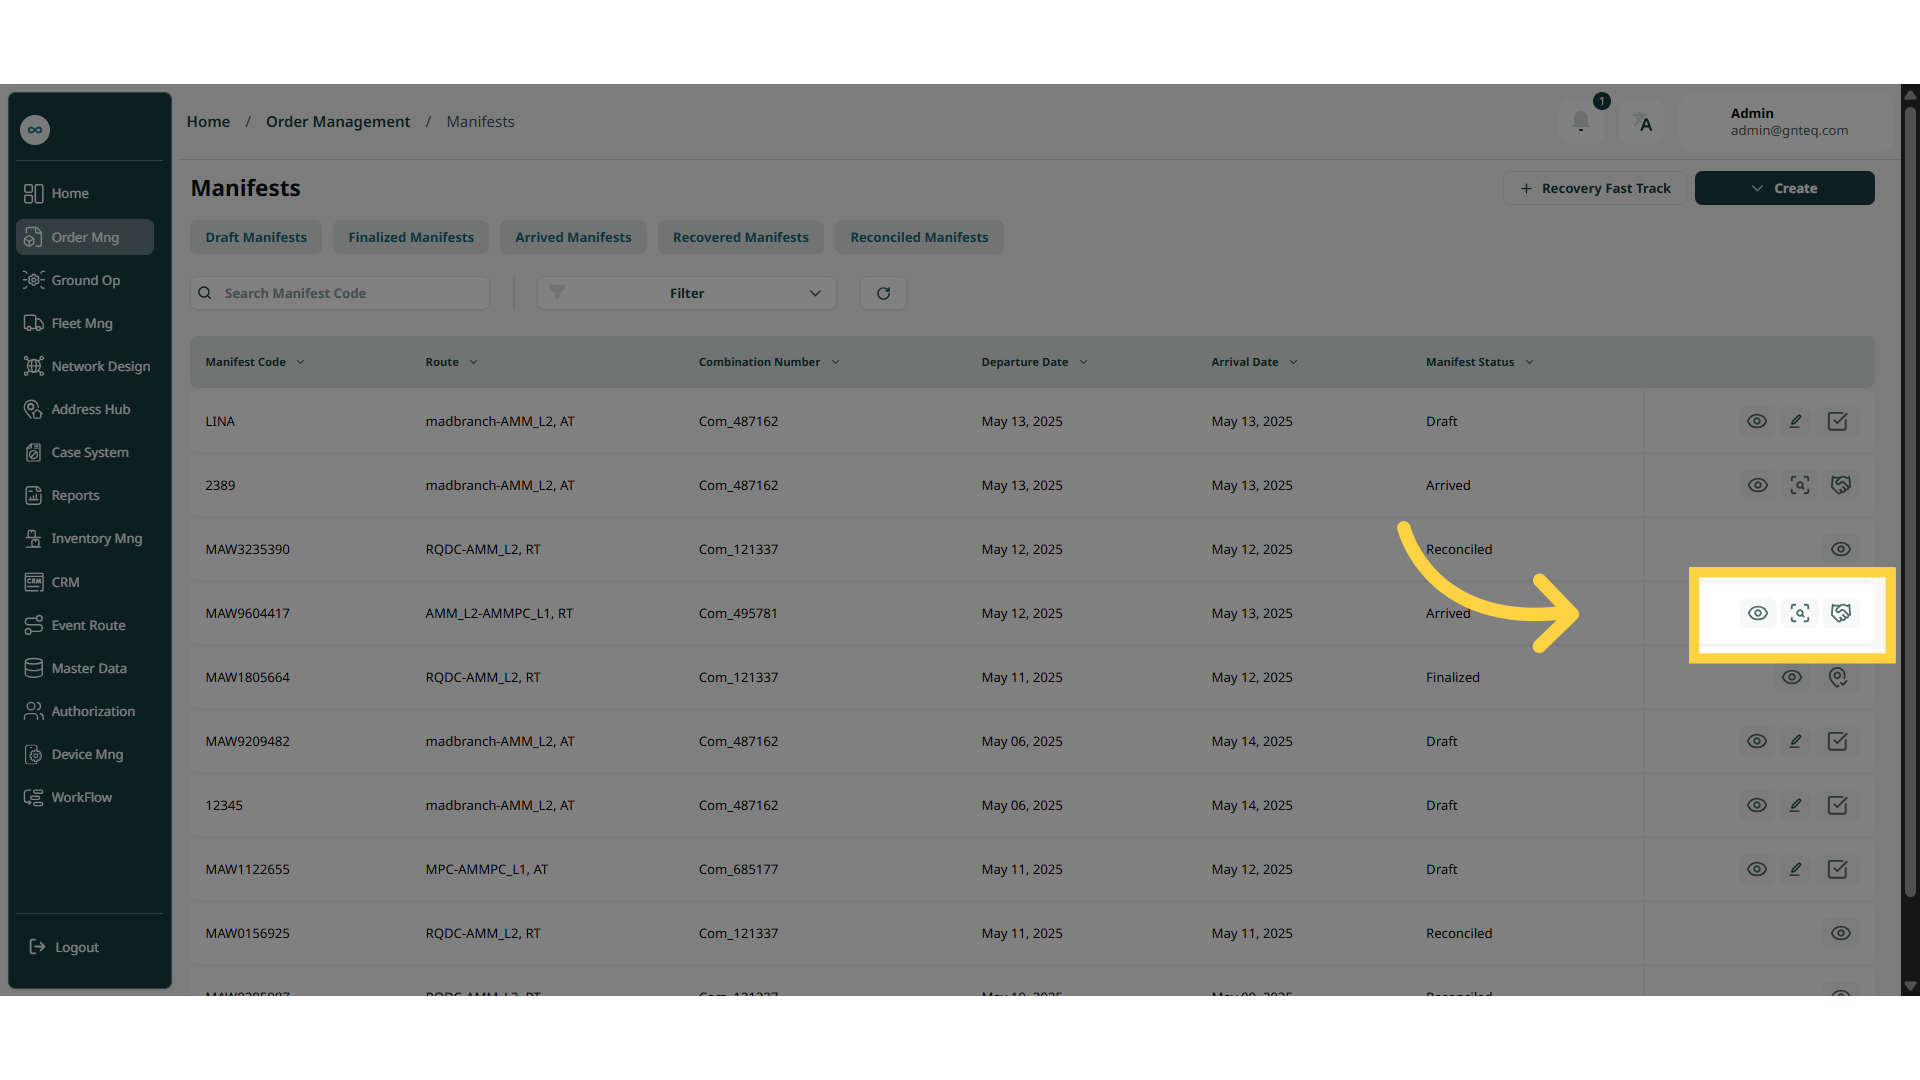
Actions: by clicking on Actions, the user can edit the manifests by going to the edit manifests section, or delete the manifests, recover , reconcile
1.1.1 View Details
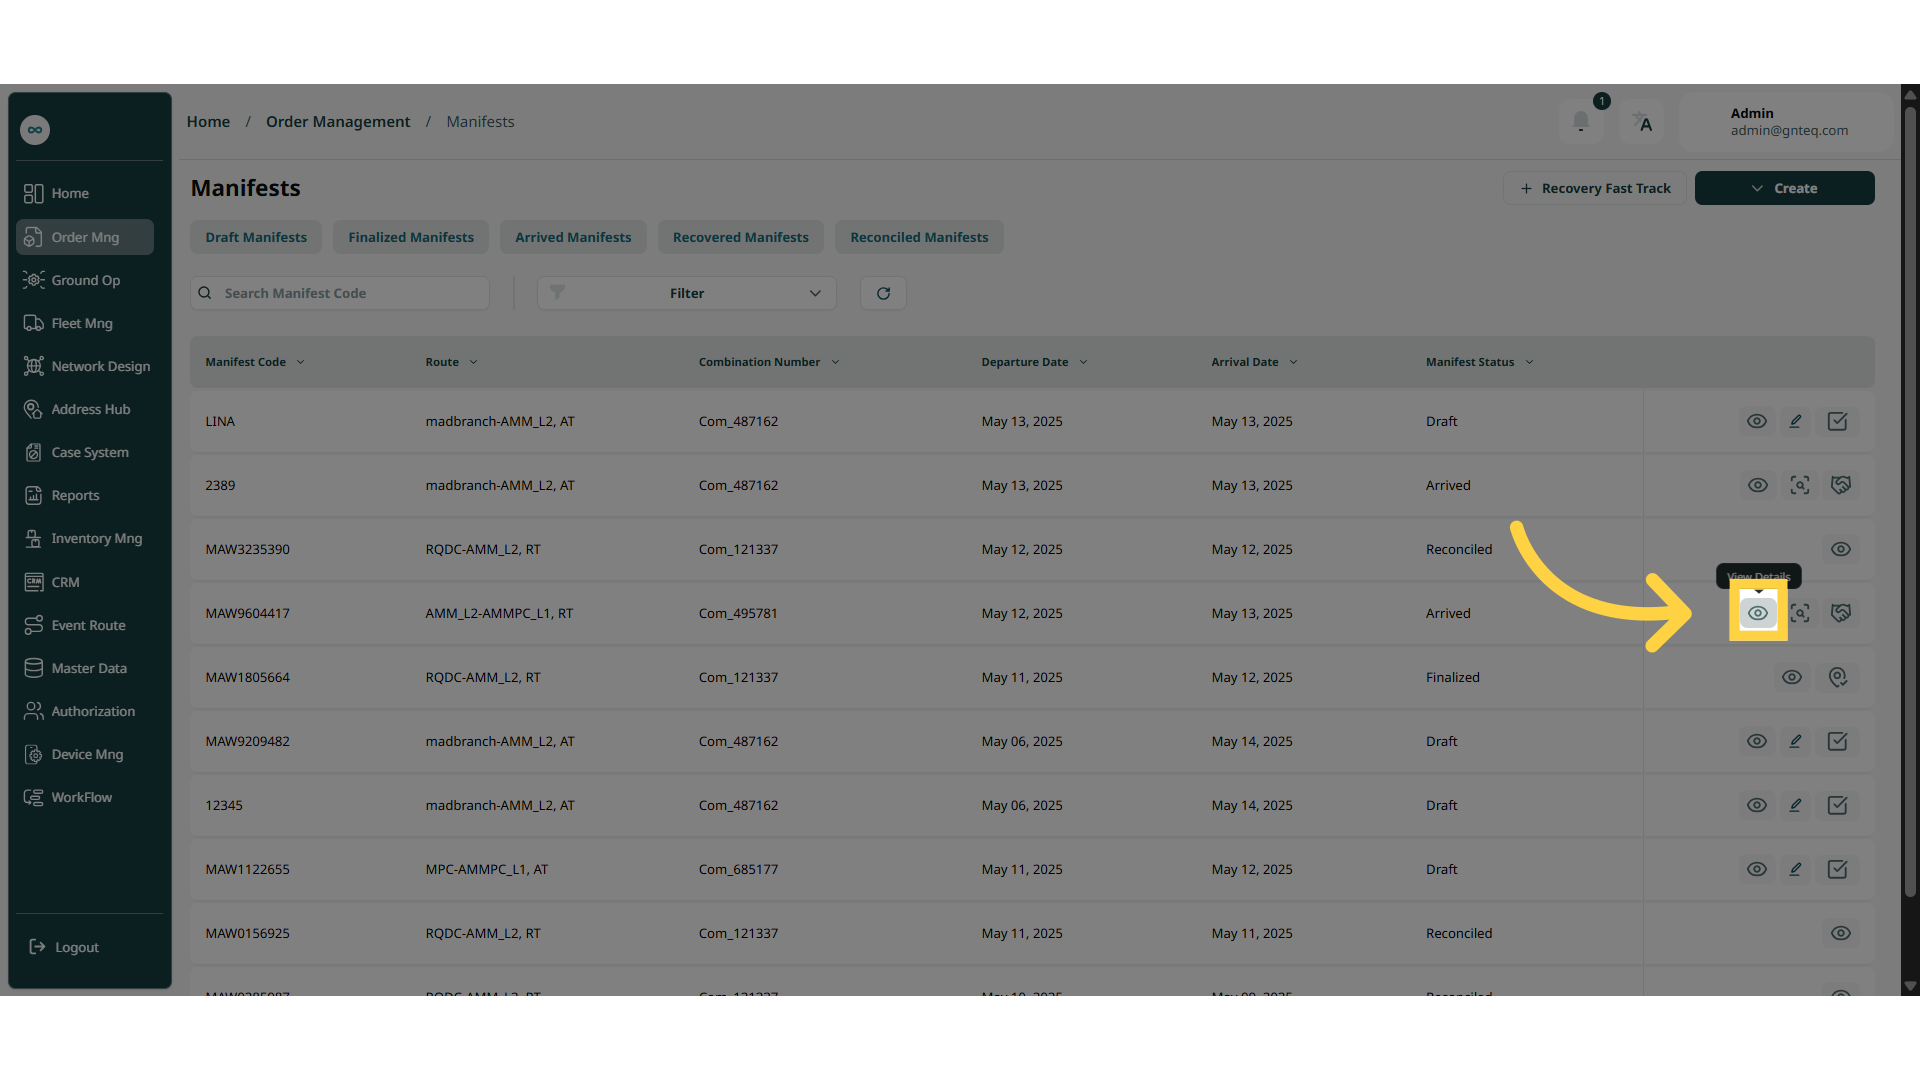
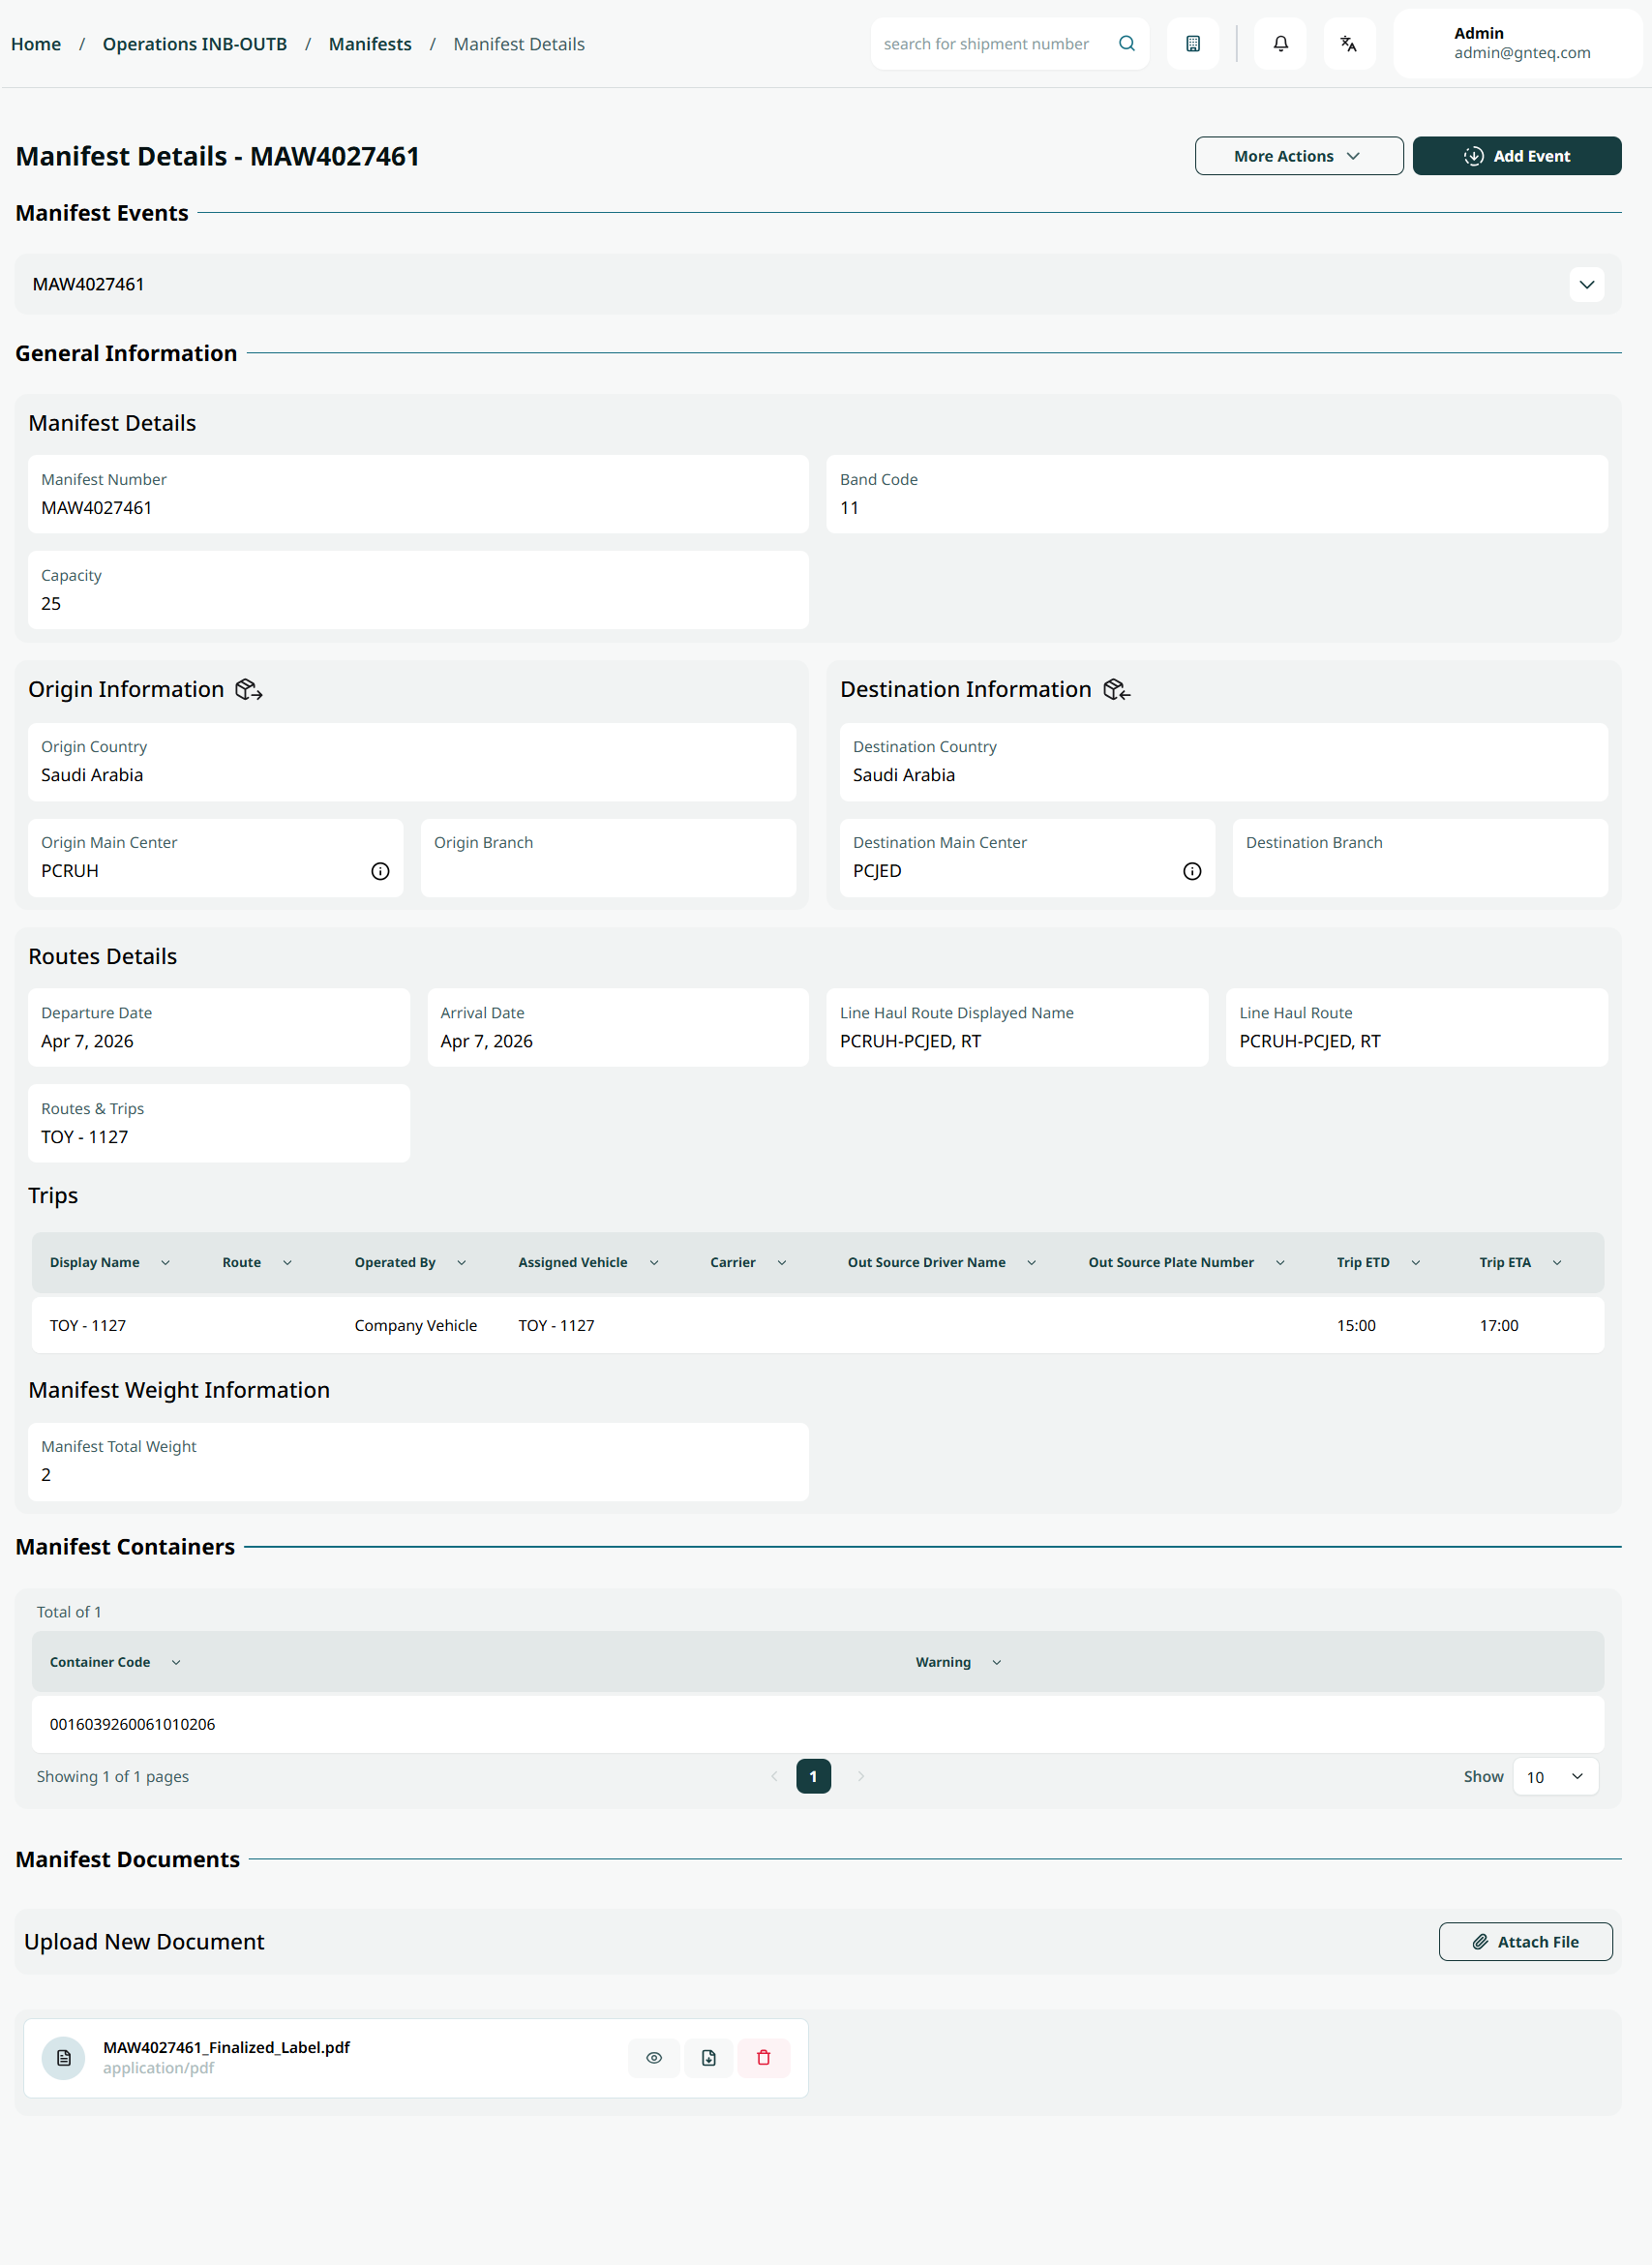
The user can view the manifest's details by navigating to the ‘Manifests’ screen via the Operations Module and clicking on View Details from Actions as follows:
1.1.1.1 Add Event
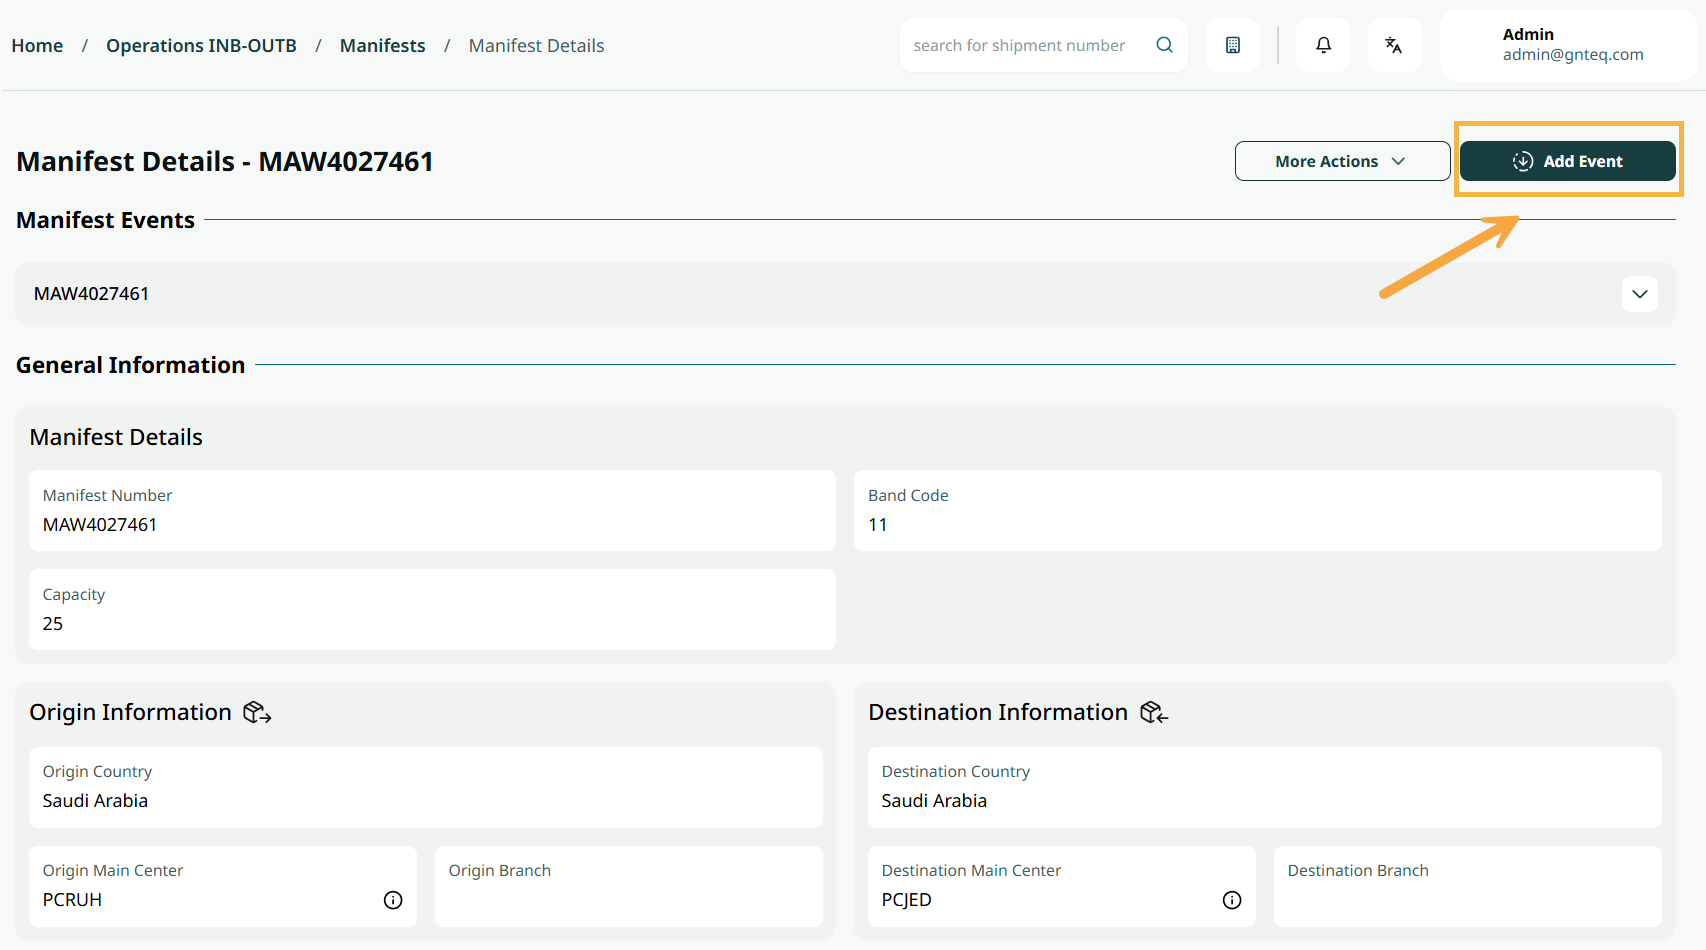
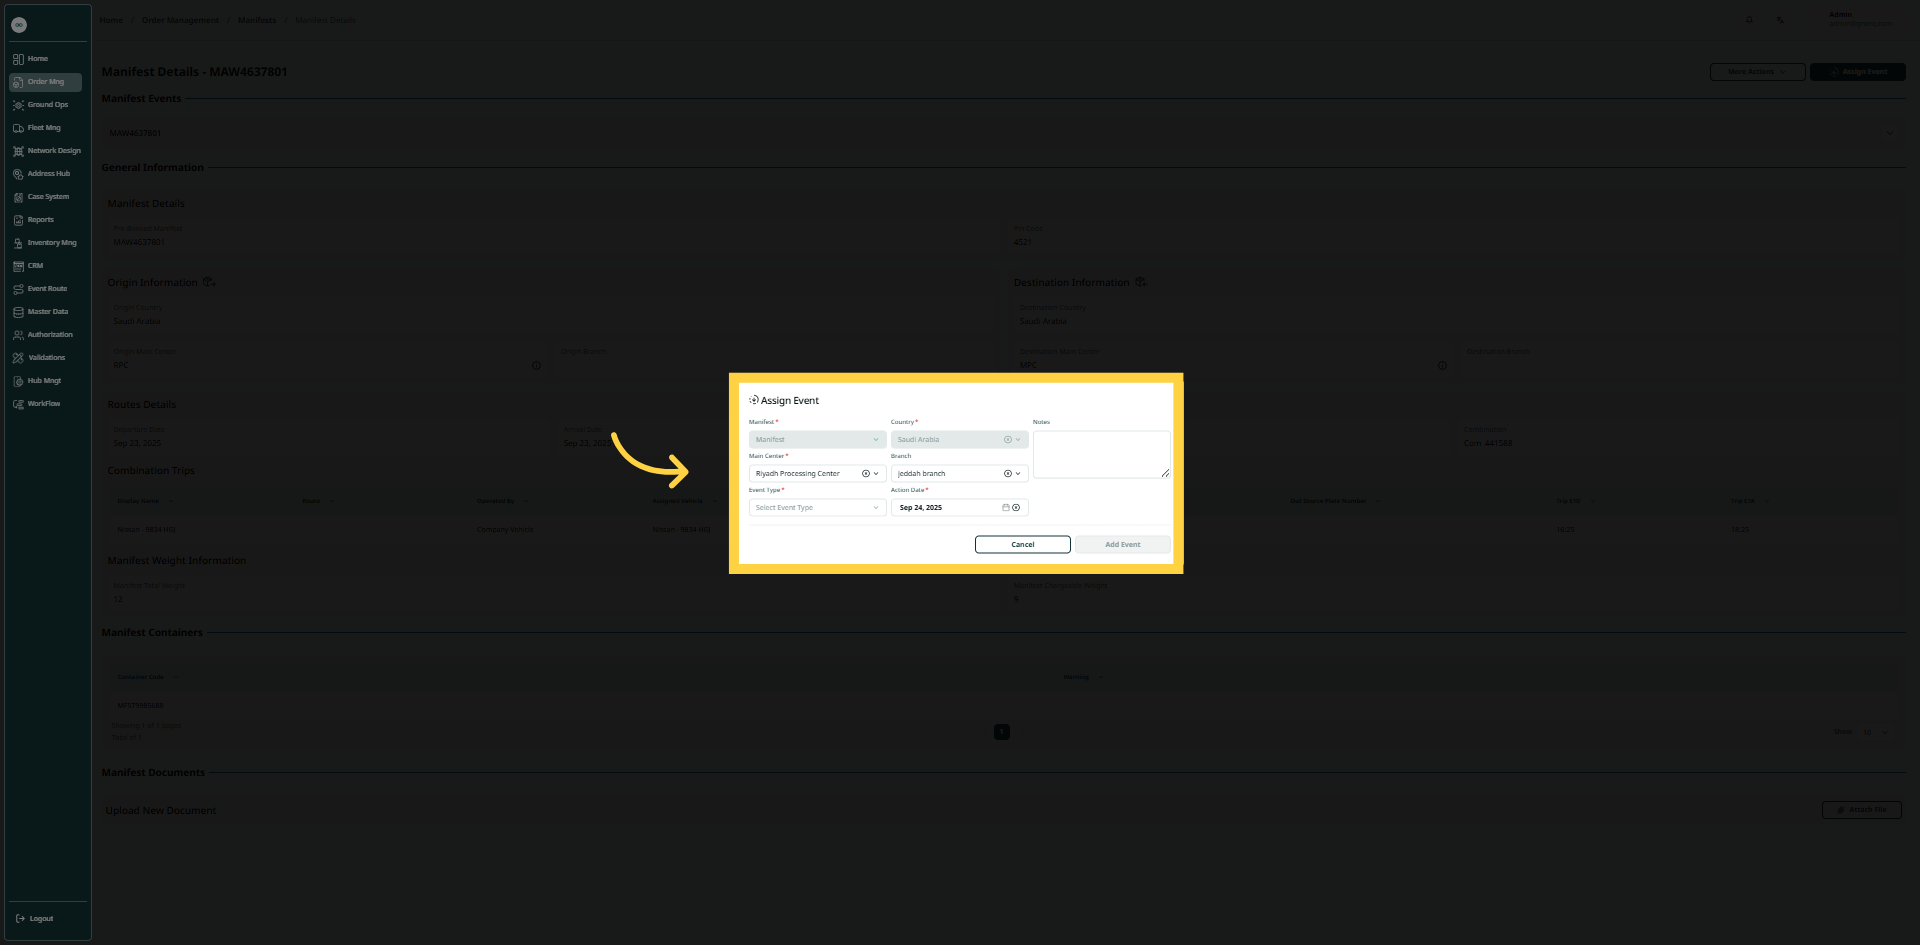
The user can assign event to manifests by navigating to the ‘Manifests’ screen via the Operations Module and clicking on View Details from Actions, then clicking on Add Event as follows:
-
Manifests: this field represents the manifest's airwaybill number.
-
Country: this field represents the name of the country.
-
Main Centre: this field represents the city where the shipment will arrive.
-
Branch: this field represents the station or route where the shipment will arrive.
-
Event Type: this field represents the type of the event.
-
Action Date: this field represents the start date of the event.
-
Notes: this field represents notes about the event.
By clicking on Add Event, the event will be successfully assigned.
1.1.1.2 More Actions
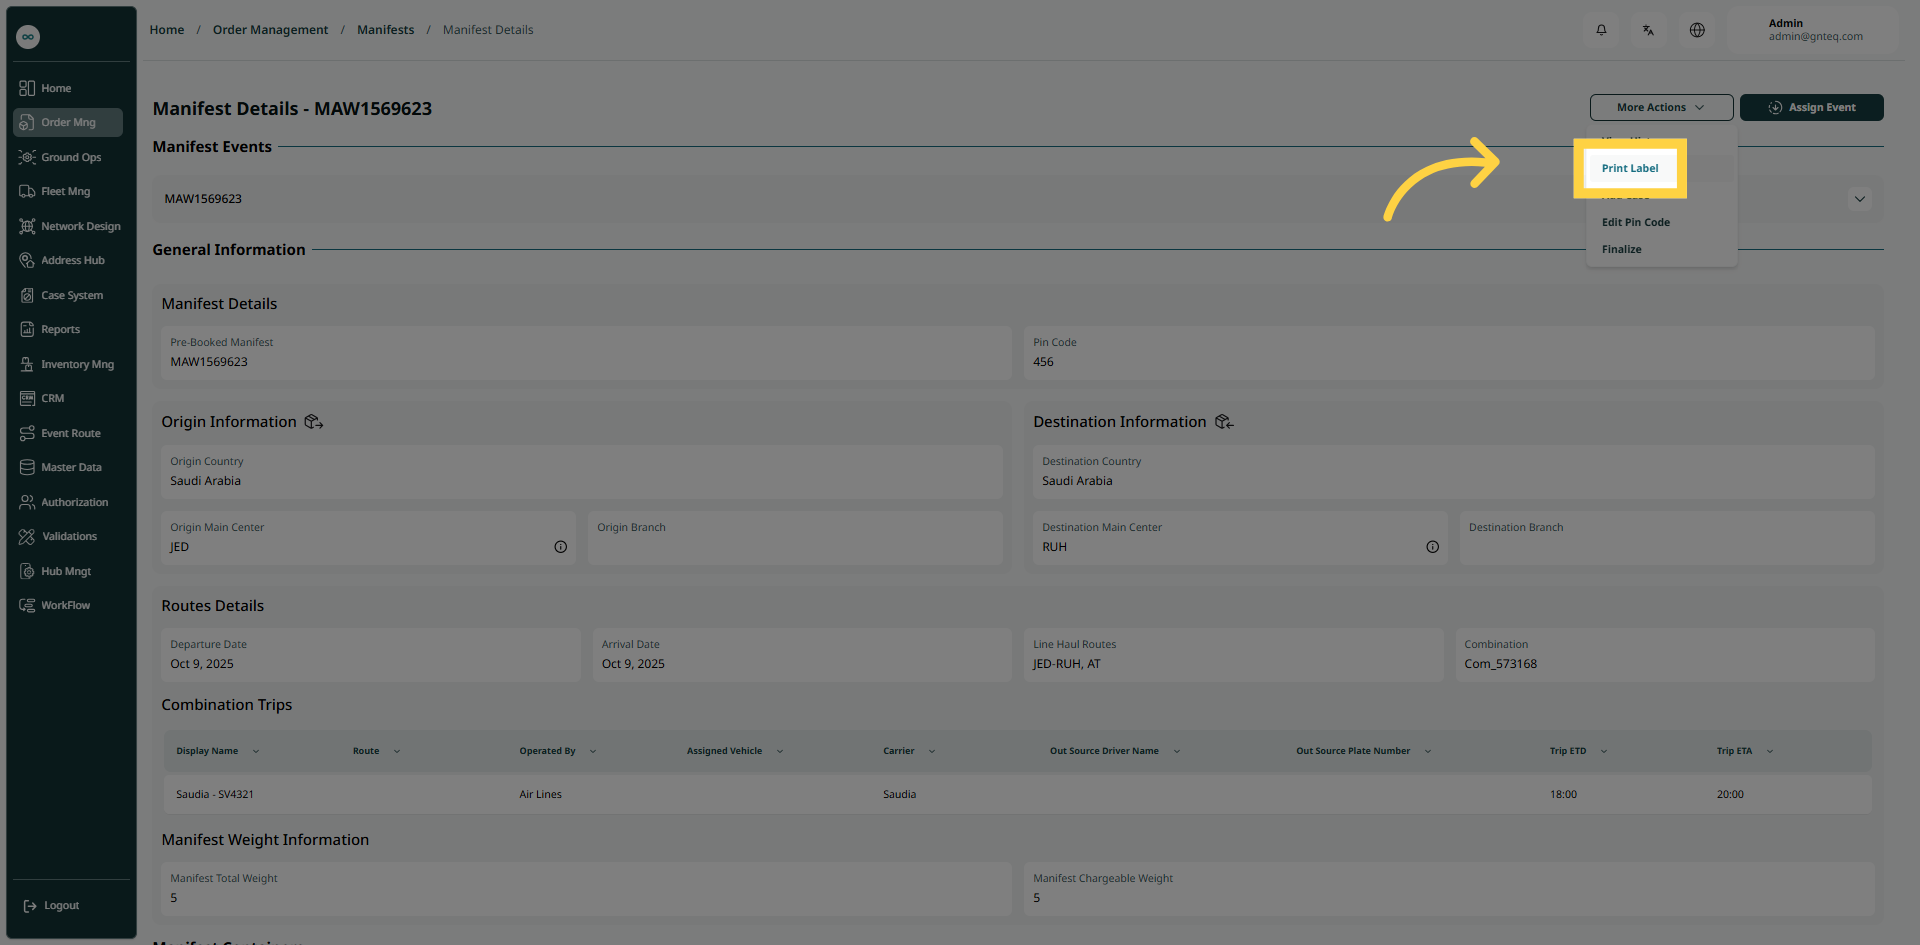
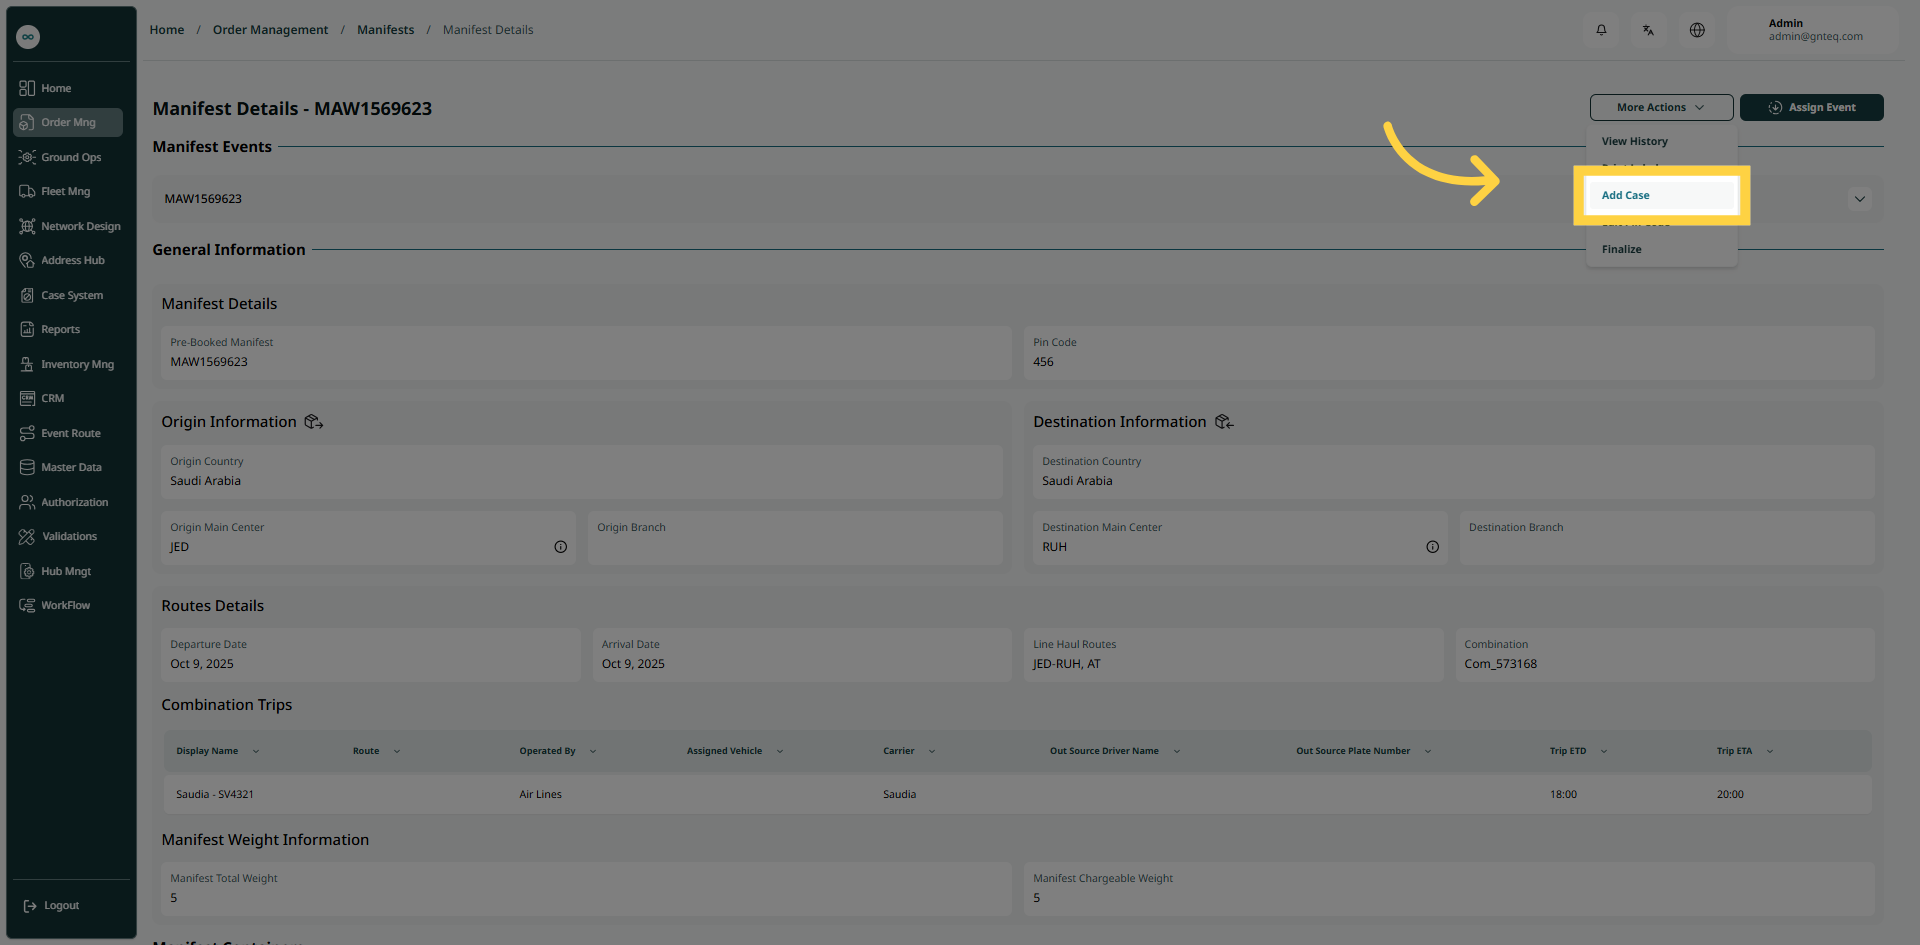
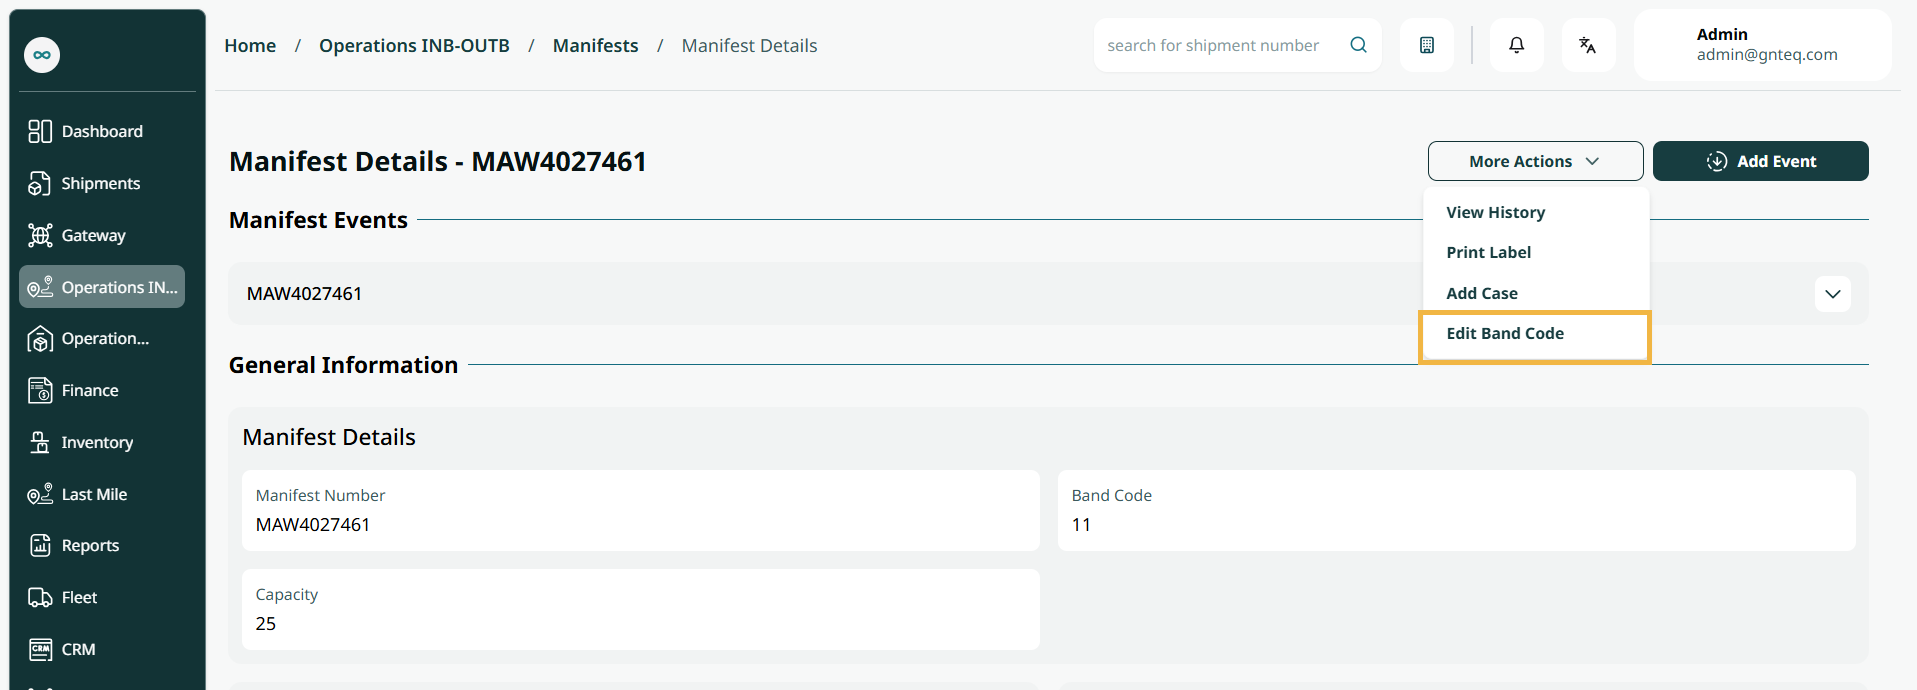
The user can print labels, add cases, edit band code and view manifest history by navigating to the ‘Manifests’ screen via Operations Module, clicking View Details from Actions, and then selecting More Actions as follows:
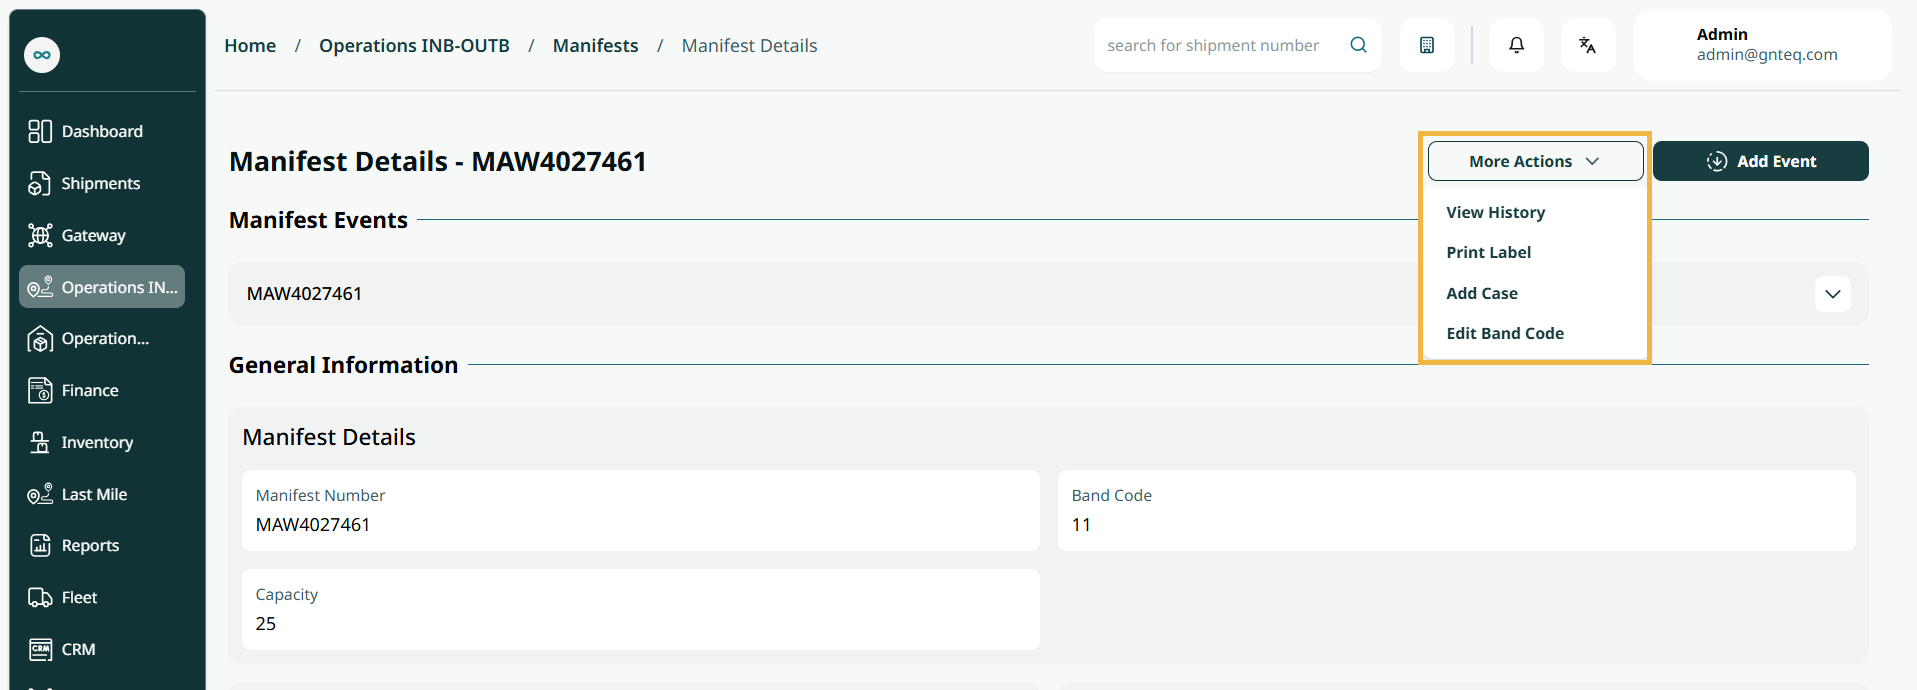
View History: The user can view the history of the manifest by clicking on the “More Actions” button.
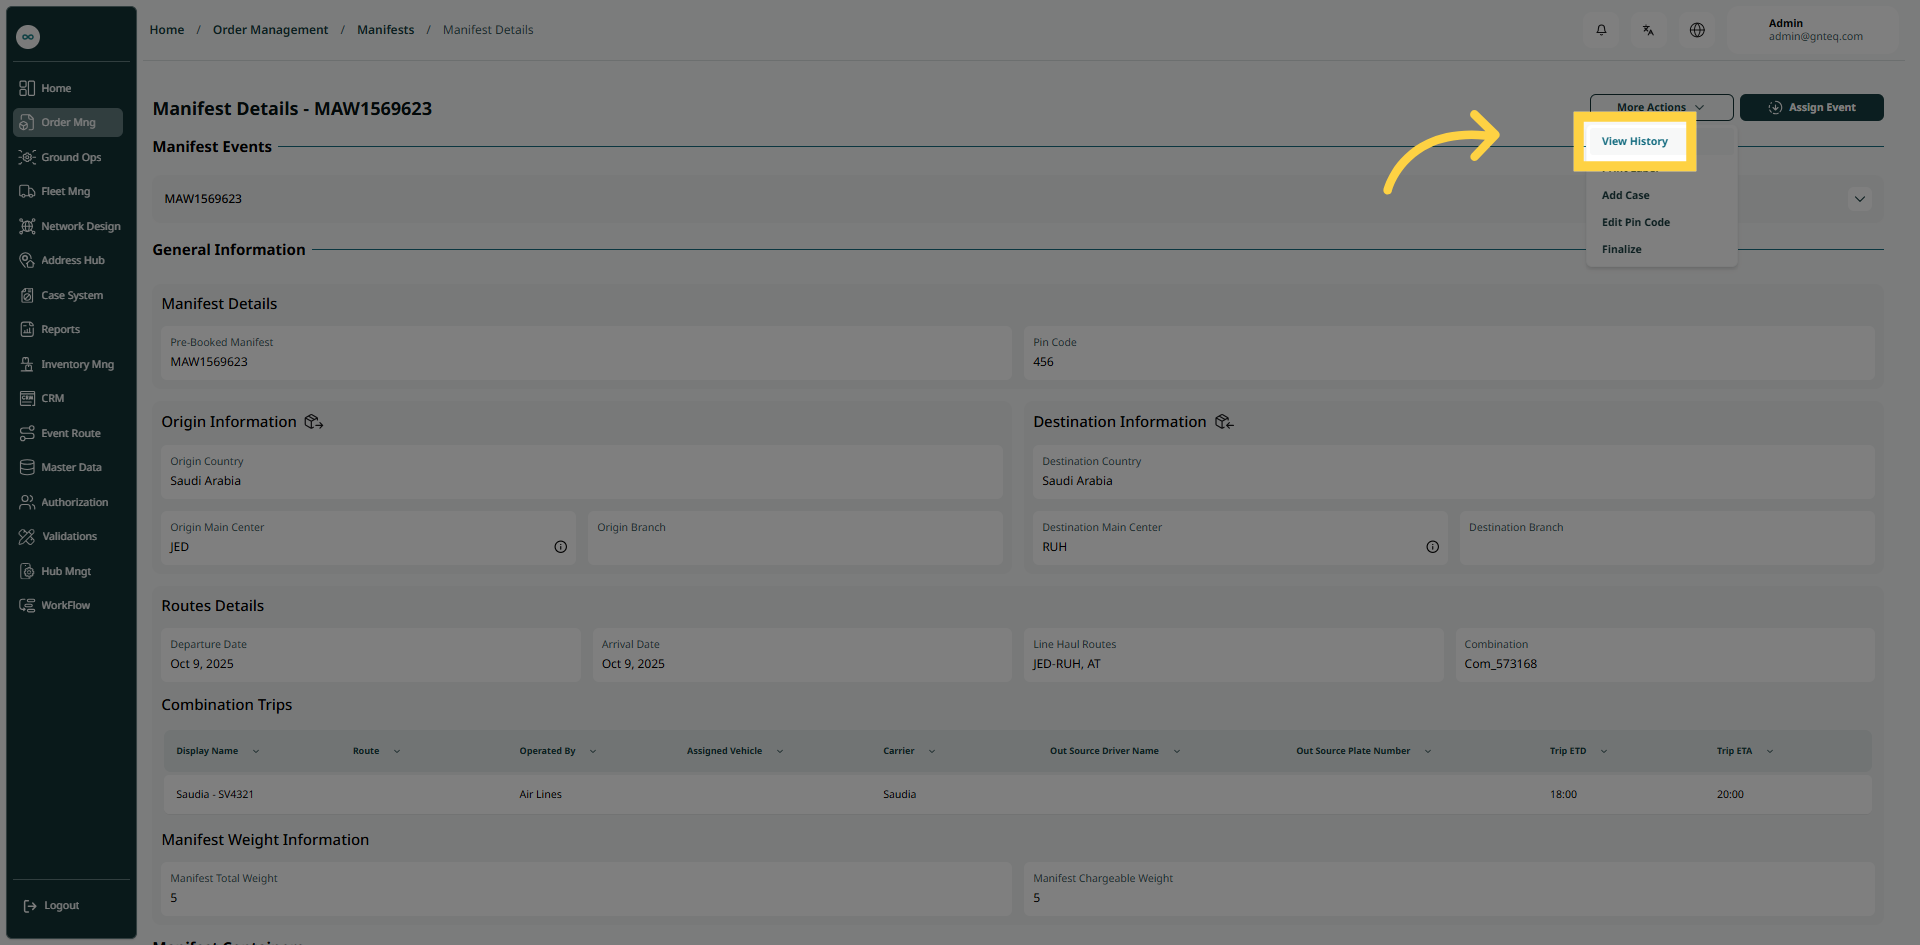
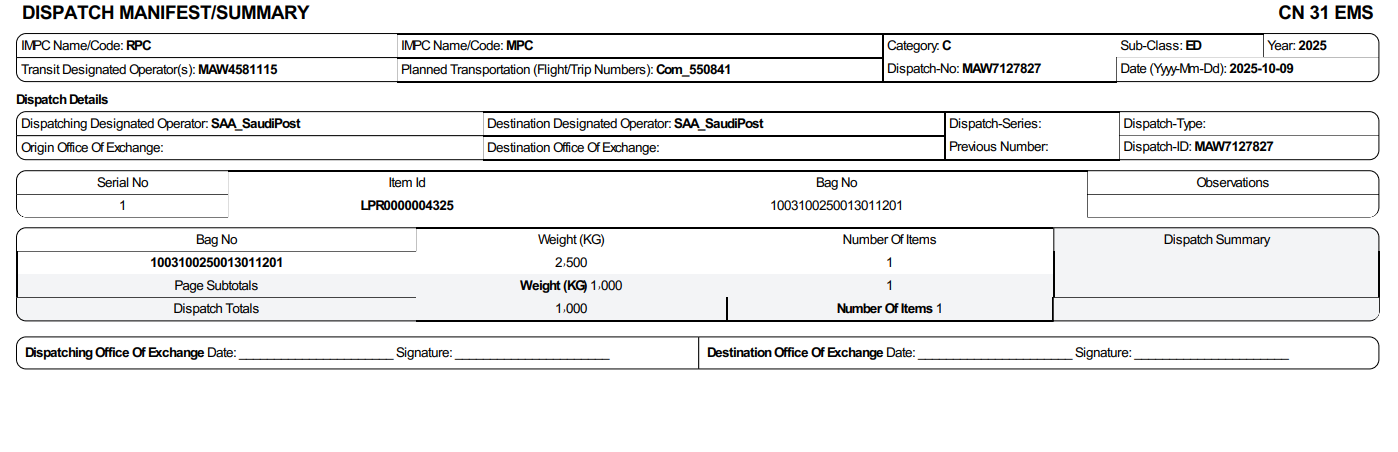
Print Label: The user can print the label for the manifest by clicking on the “More Actions” button.
Add Case: The user can add case that related to the manifest by clicking on the “More Actions” button.
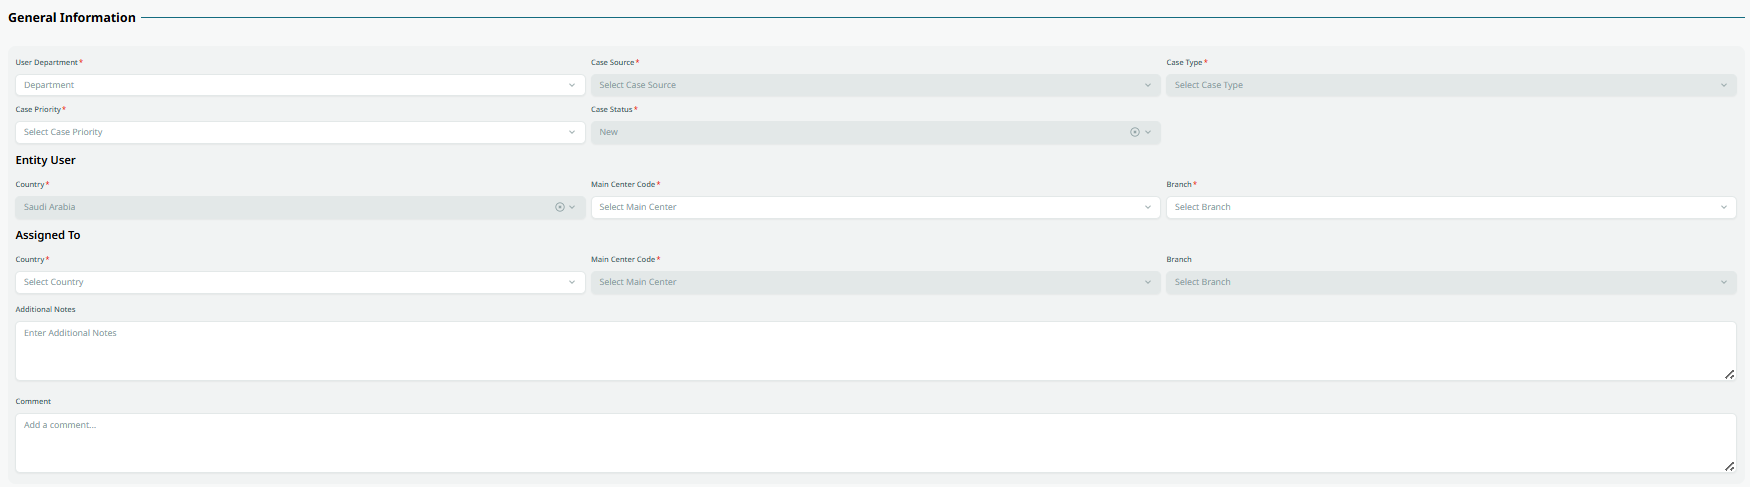
General Information
-
User Department: this field represents the user department.
-
Case Type: this field represents the type of the case (damaged shipment, process violation….etc.)
-
Case Source: this field represents the source of the case ( call center, operation……etc.)
-
Case Priority: this field represents the priority of the case (low, medium, high, critical)
-
Case Status: this field represents the status of the case (active, inactive).
Entity User
-
Country: this field represents the place that the case discovered.
-
Main Centre code: this field represents the city where the case is registered or primarily operates.
-
Branch Code: this field represents the station or route that the case discovered.
Assigned To
-
Country: this field represents the place that the case discovered.
-
Main Centre code: this field represents the city where the case is registered or primarily operates.
-
Branch Code: this field represents the station or route that the case discovered.
-
Additional Notes: this field represents extra notes about the case.
-
Comments: this field represents comments from the that the case assigned to.
-
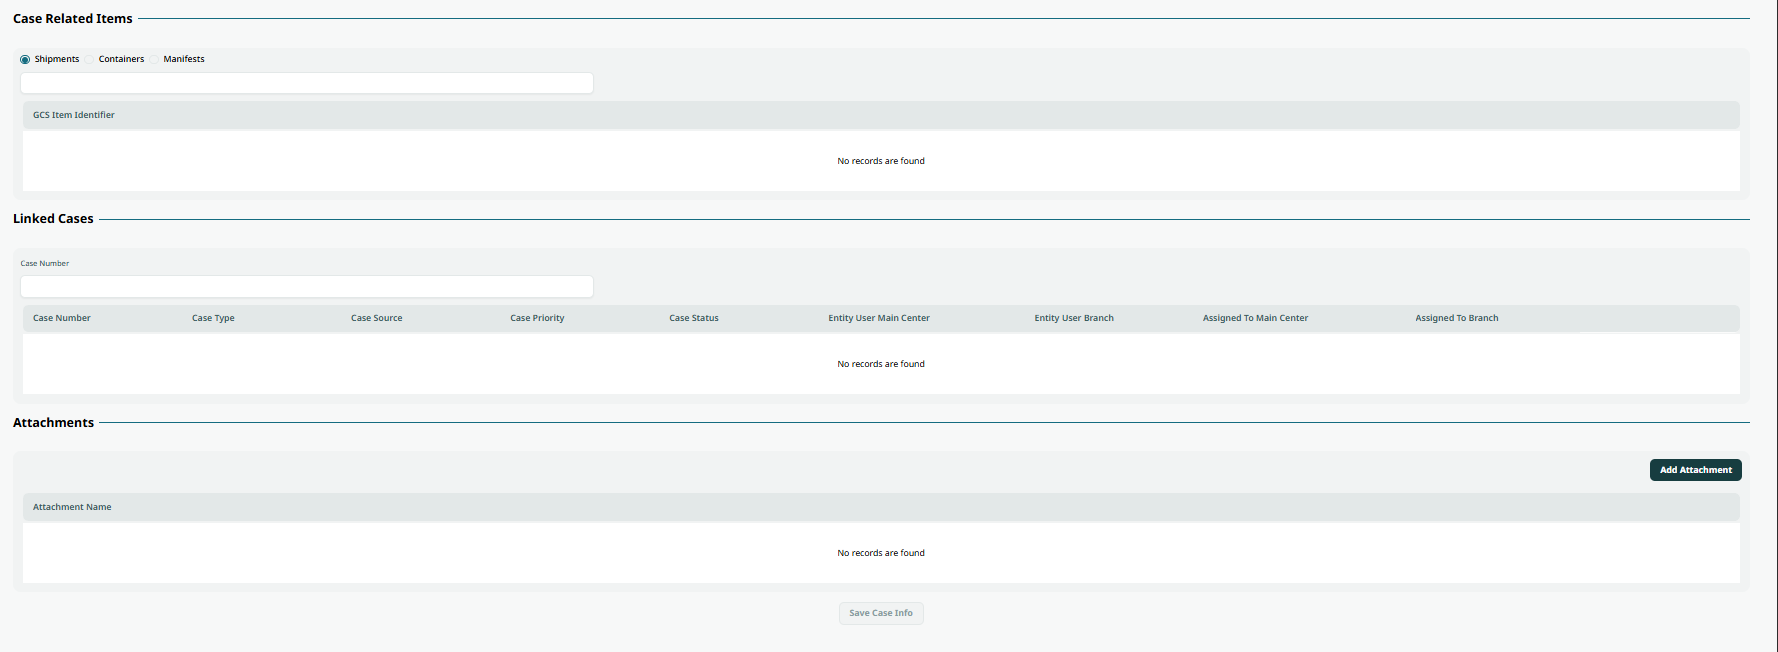
Case Related Items: this field represents the case associated with a shipment, container, or manifest. When selecting the related case, the user must enter the corresponding Air Waybill (AWB) number.
-
Case Number: if there are any related cases, the user must enter the corresponding case number in this field.
-
Add Attachment: this button allows the user to upload any attachments relevant to the case.
By clicking on Save Case Info the case will be added successfully.
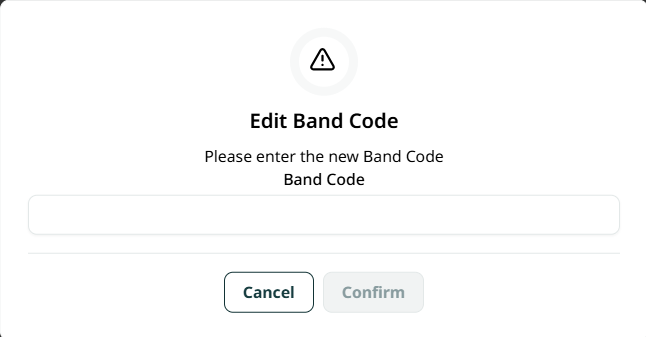
Edit Pin Code: the user can edit the band code of the manifest by clicking on the “More Actions” button.
1.1.2 Edit Manifests
The user can edit the manifests by clicking on Edit from Actions by navigating to the ‘Manifests’ screen via the Operations Module.
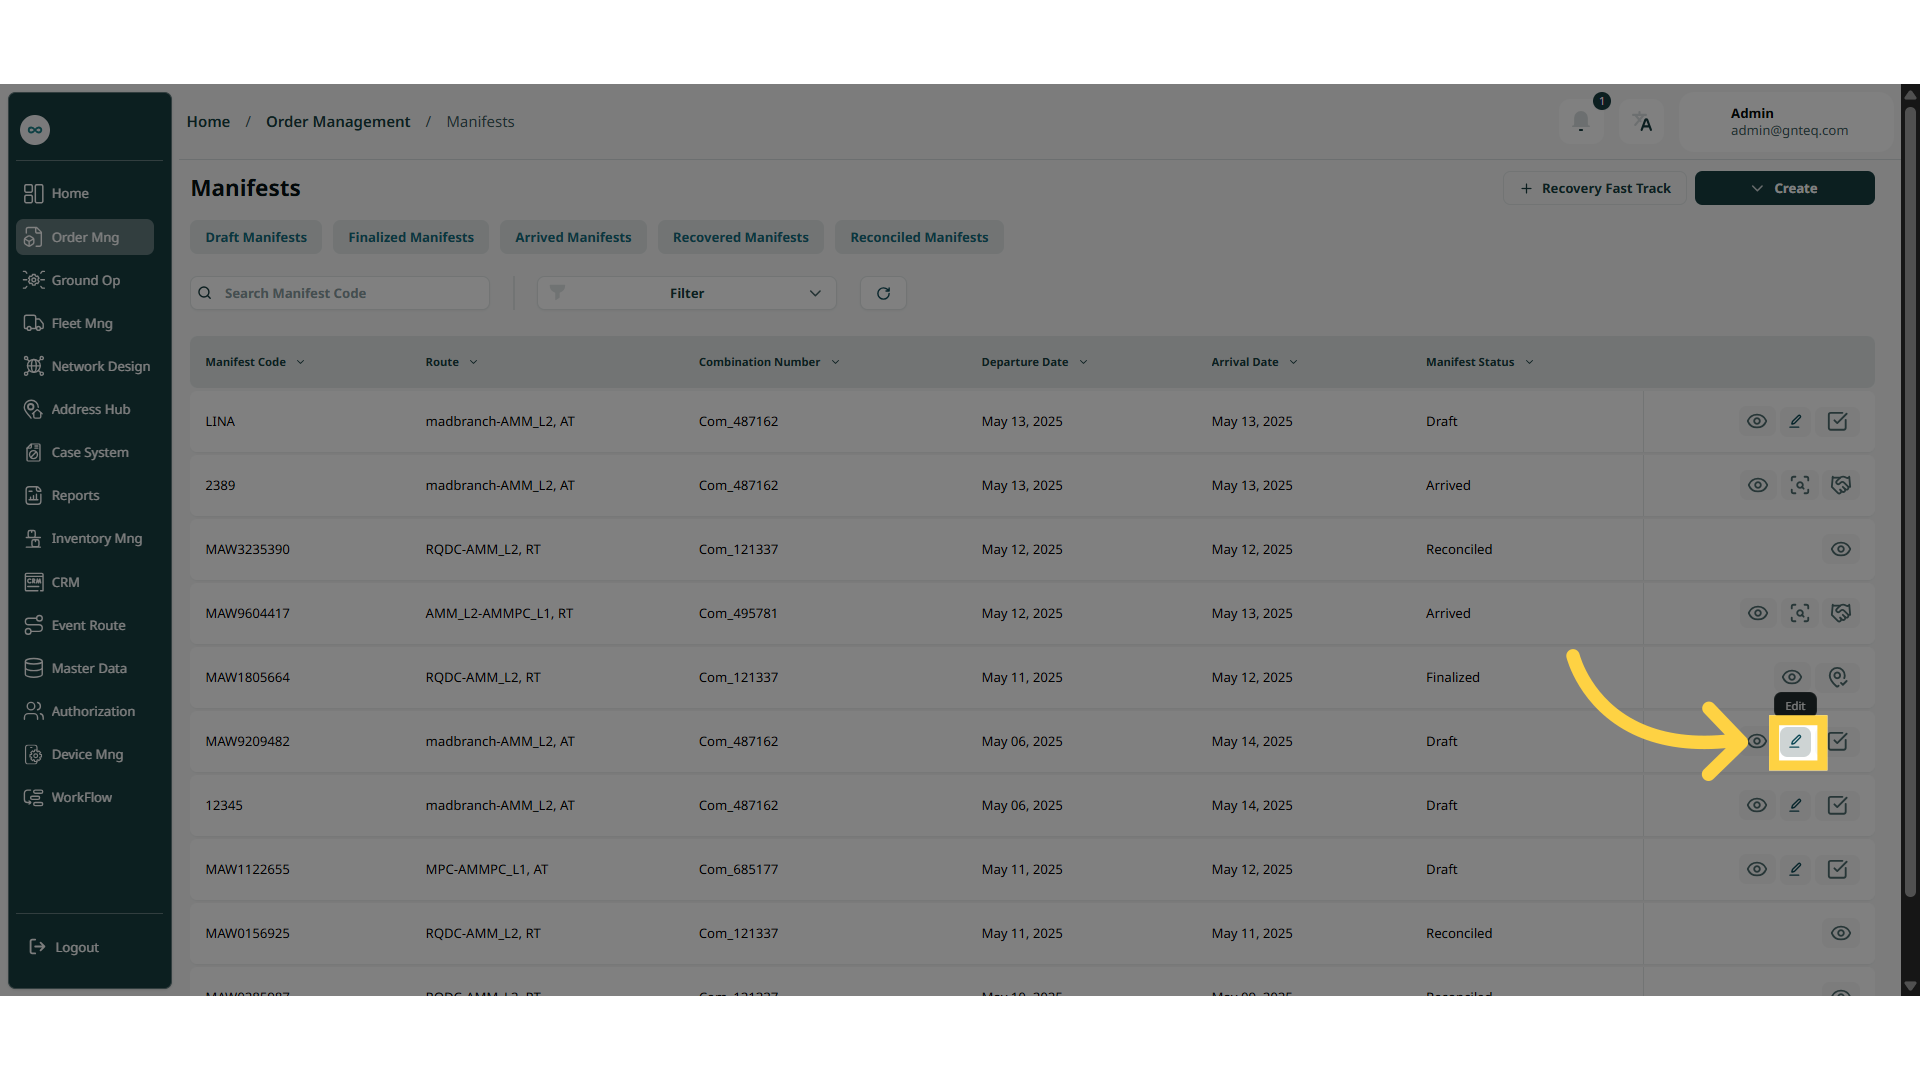
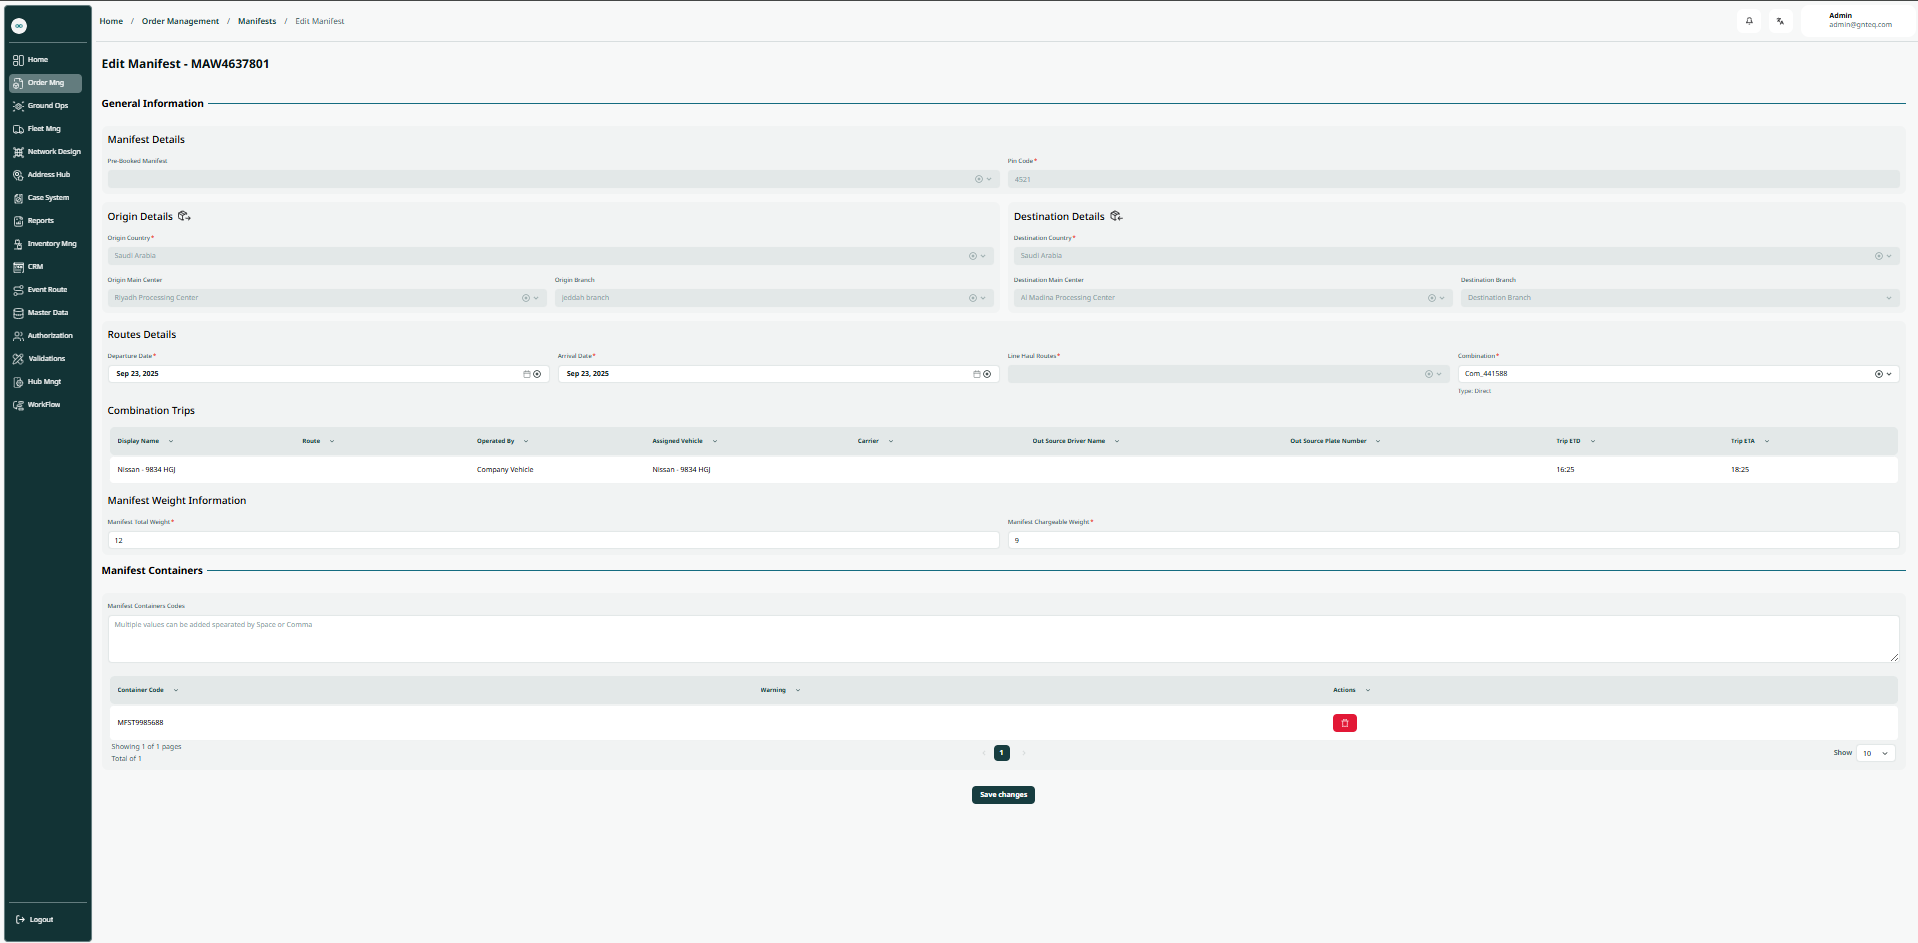
By clicking on Save Changes, the information will be updated successfully.
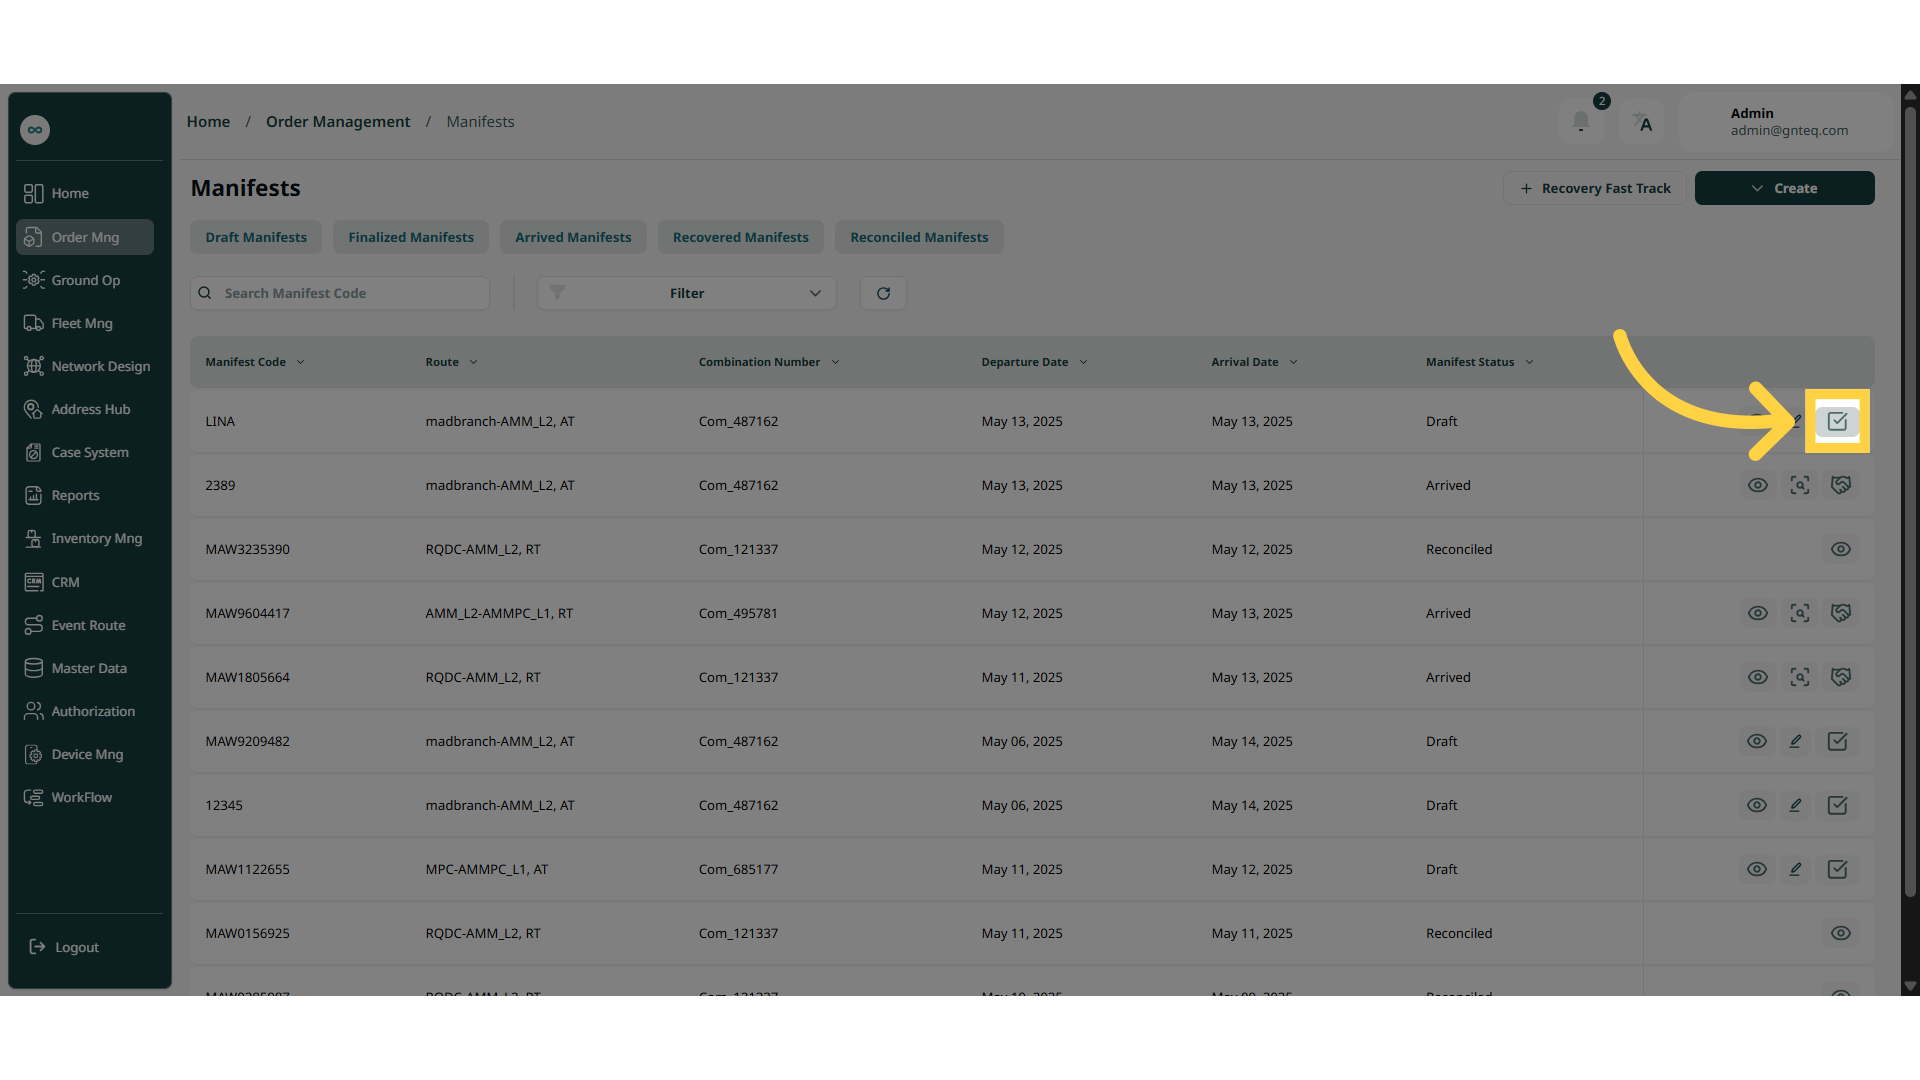
1.1.3 Finalize
The user can finalize a manifest by navigating to the Manifests screen via Operations Module and selecting Finalize from Actions, if the container status is Arrived.
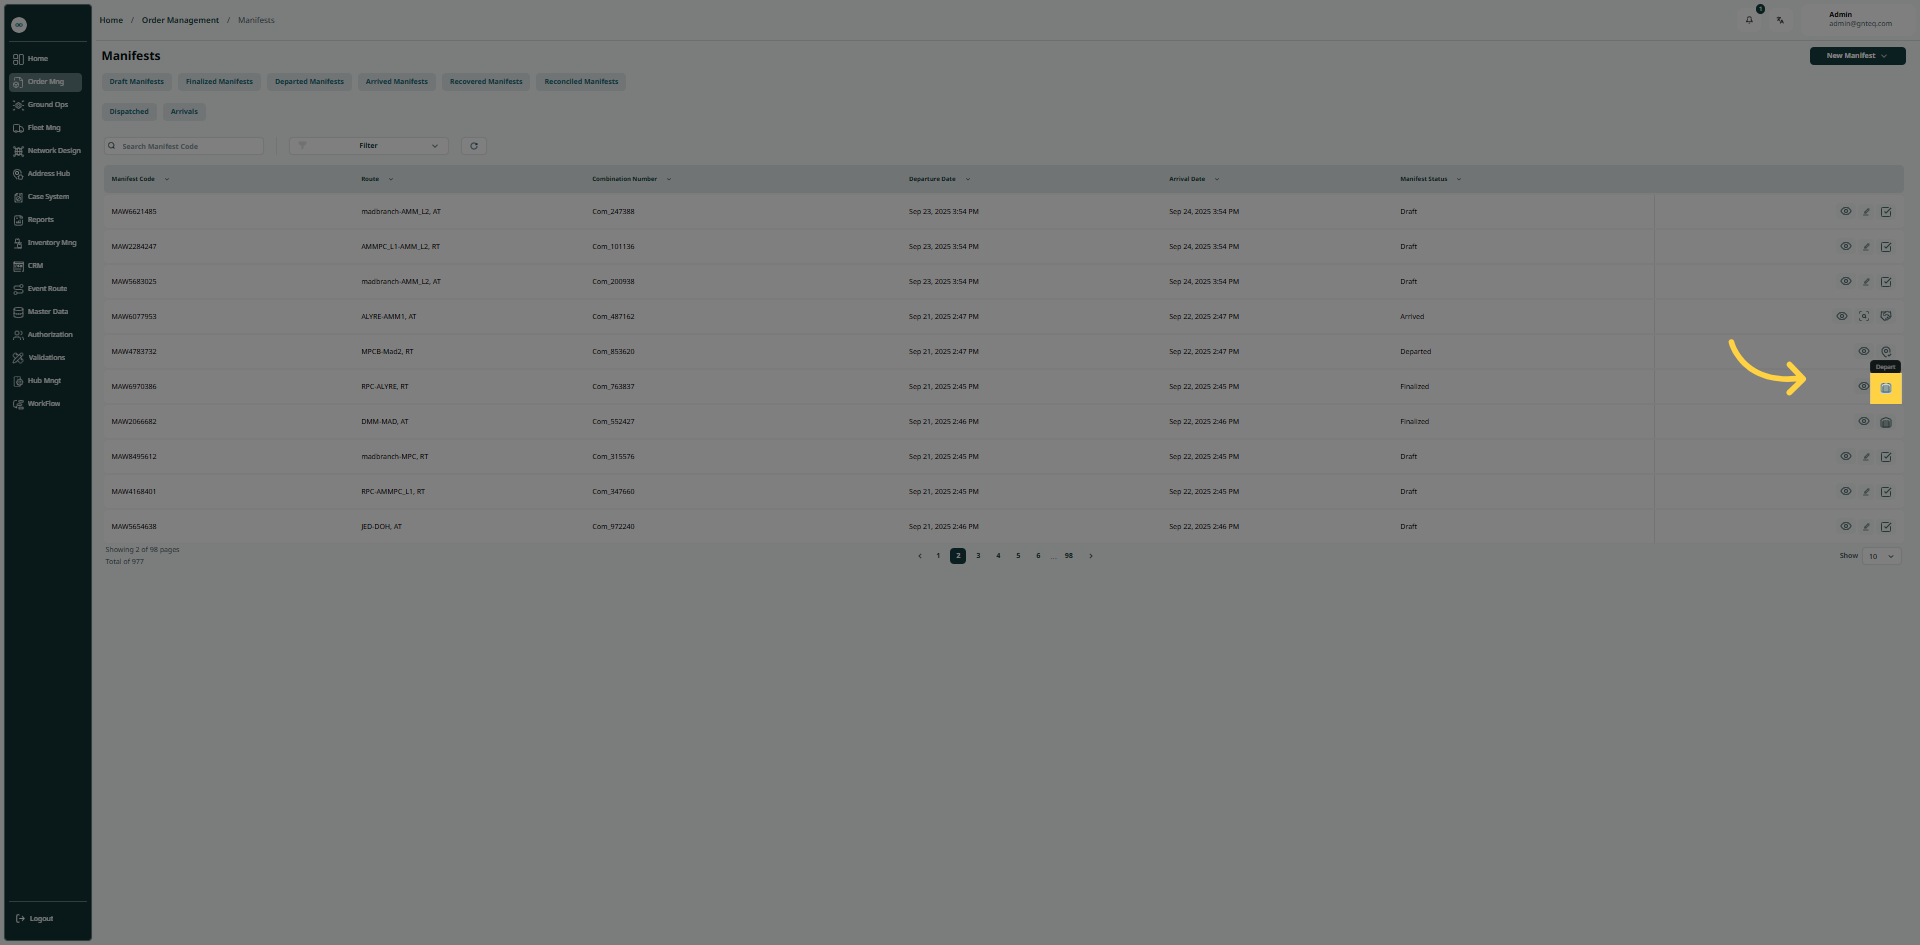
1.1.4 Departed
The user can assign a manifest as departed by clicking on Depart from Actions by navigating to the ‘Manifests’ screen via the Operations Module.
1.1.6 Recover and Reconcile
To recover the master airwaybill, the user must follow these steps:
-
Navigate to the Manifests screen and ensure the manifest has arrived.
-
Click on Recover from the Actions button.
-
Fill in the container code number.
-
Click on Scan to add the containers to the system.
By clicking on Recover, the container will be recovered successfully.

To reconcile the master airwaybill, the user must follow these steps:
-
Navigate to the Manifests screen and ensure the manifest has recovered.
-
Click on Reconcile from the Actions button.
-
Fill in the shipment number.
-
Click on Add Shipment to add the shipments to the system.
By clicking on Reconcile, the shipments will be reconciled successfully.

1.2 Add New Manifests
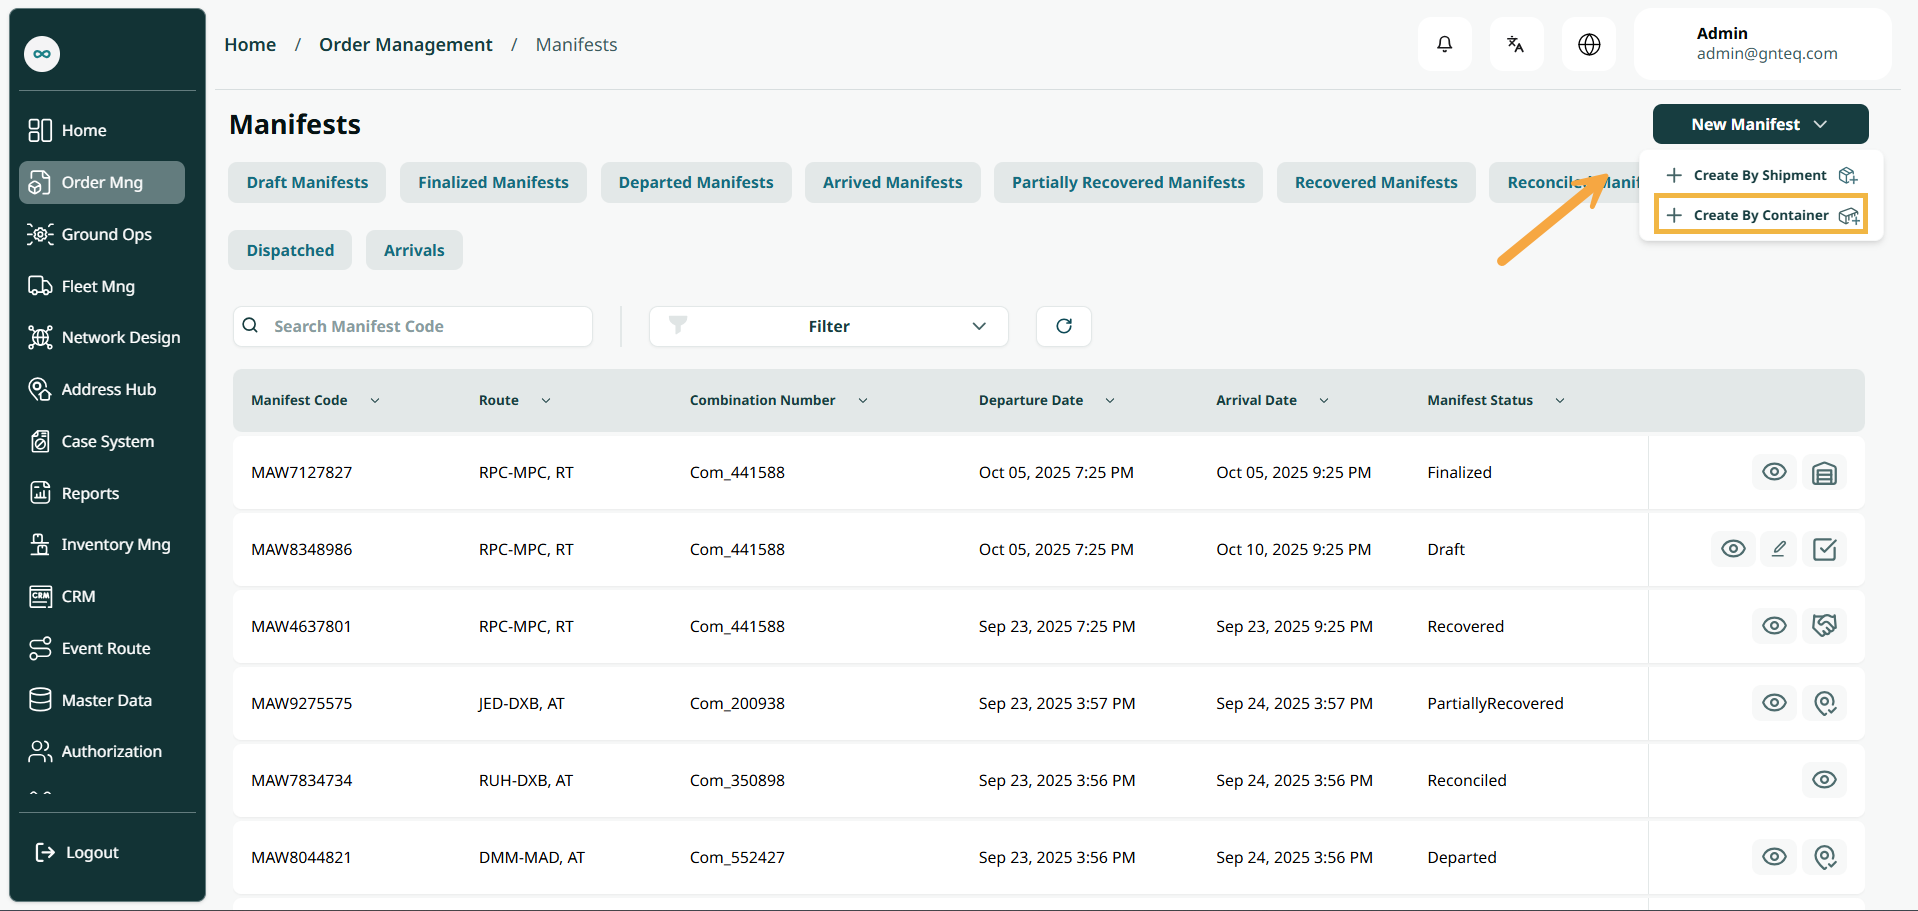
1.2.1 Add New Manifests By Container
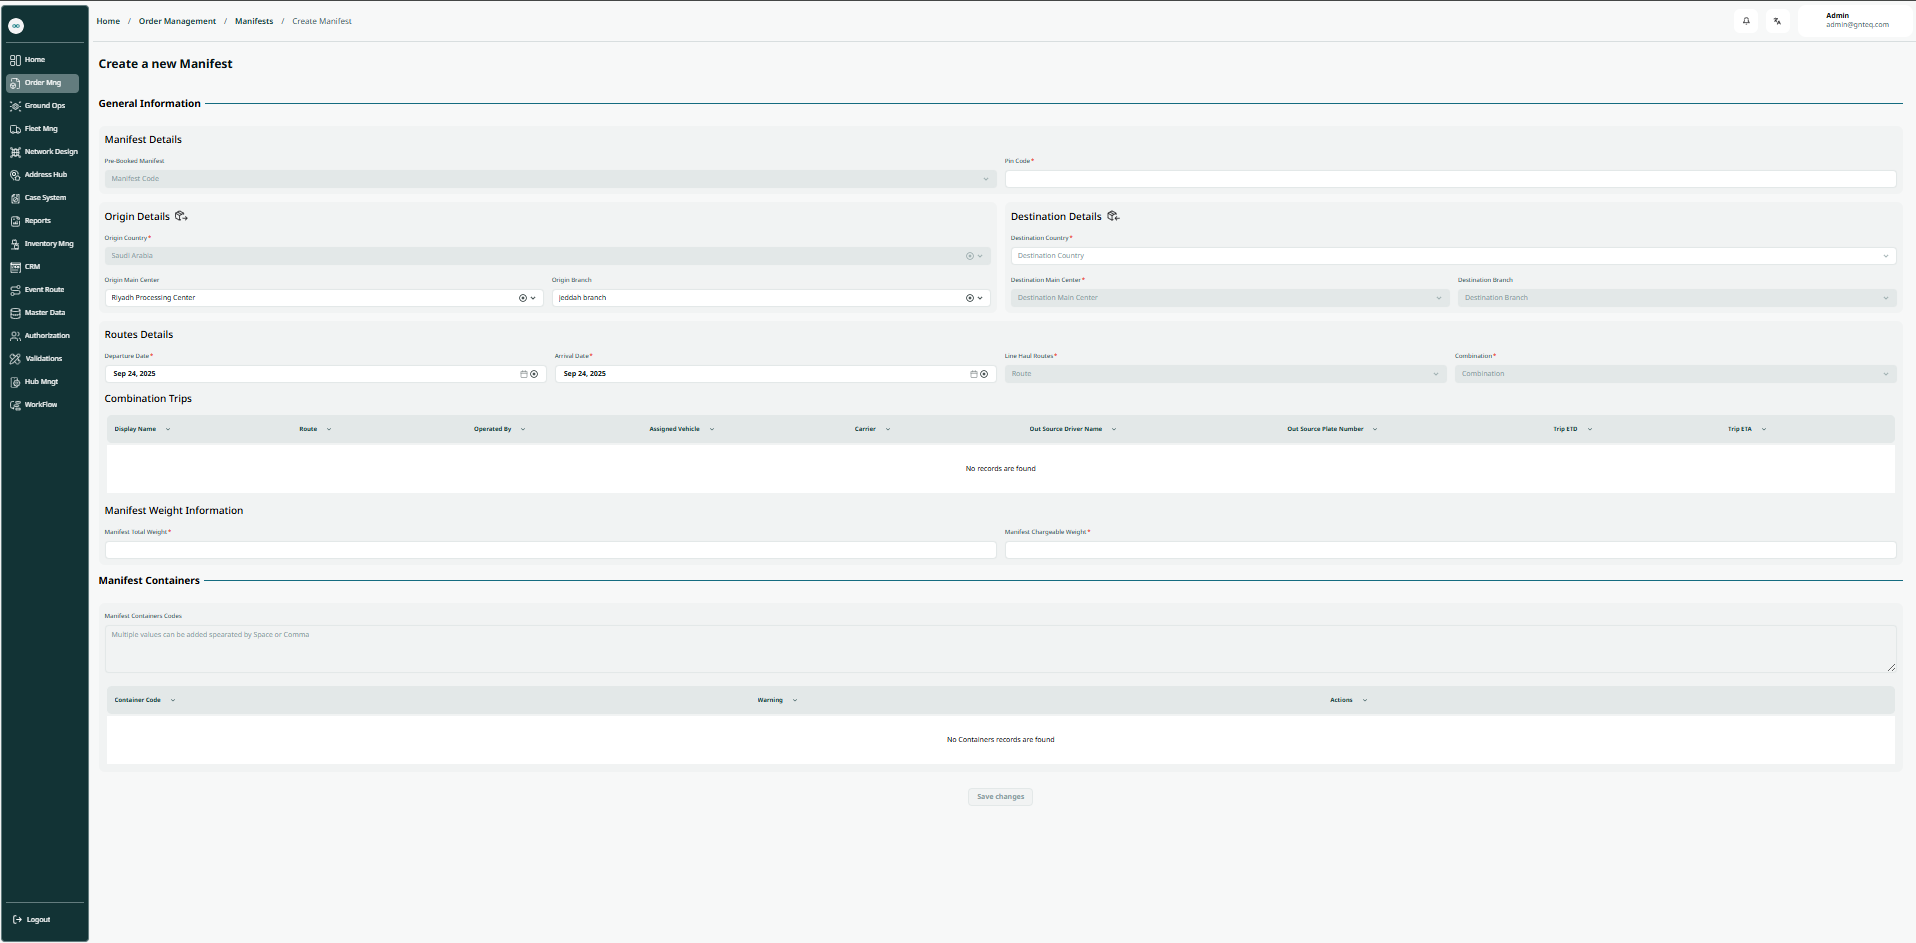
The user can add a new manifest by container by navigating to the ‘Manifests’ screen via the Operations Module and clicking on Add New Manifests by Container as follows:
-
Manifest Number: this field represents the manifest special number.
-
Capacity: this field represents the manifest capacity.
-
Origin Country: this field represents the manifest’s origin country.
-
Destination Country: this field represents the manifest’s arrival country.
-
Origin Main Centre: this field represents the manifest’s origin processing center.
-
Origin Branch: this field represents the manifest’s origin delivery center.
-
Destination Country: this field represents the manifest’s arrival country.
-
Destination Main center: this field represents the manifest’s destination processing center.
-
Destination Branch: this field represents the manifest’s destination delivery center.
-
Departure Date: this field represents the departure date of the manifests from the origin port.
-
Arrival Date: this field represents the arrival date of the manifest’s at the next airport stop.
-
Line Haul Route: this field represents the route that the manifest will serve.
-
Route & Trip: this field represents the route and trip the manifest.
-
Manifest Total Weight: this field represents the total weight of all shipments within a container that is included in the manifest.
-
Manifests Container Code: this is used to add the container numbers within a manifest as a validation that the container is not present in any other MAWB.
By clicking on Save Changes, the manifests will be added successfully.
1.2.2 Add New Manifests By Shipment
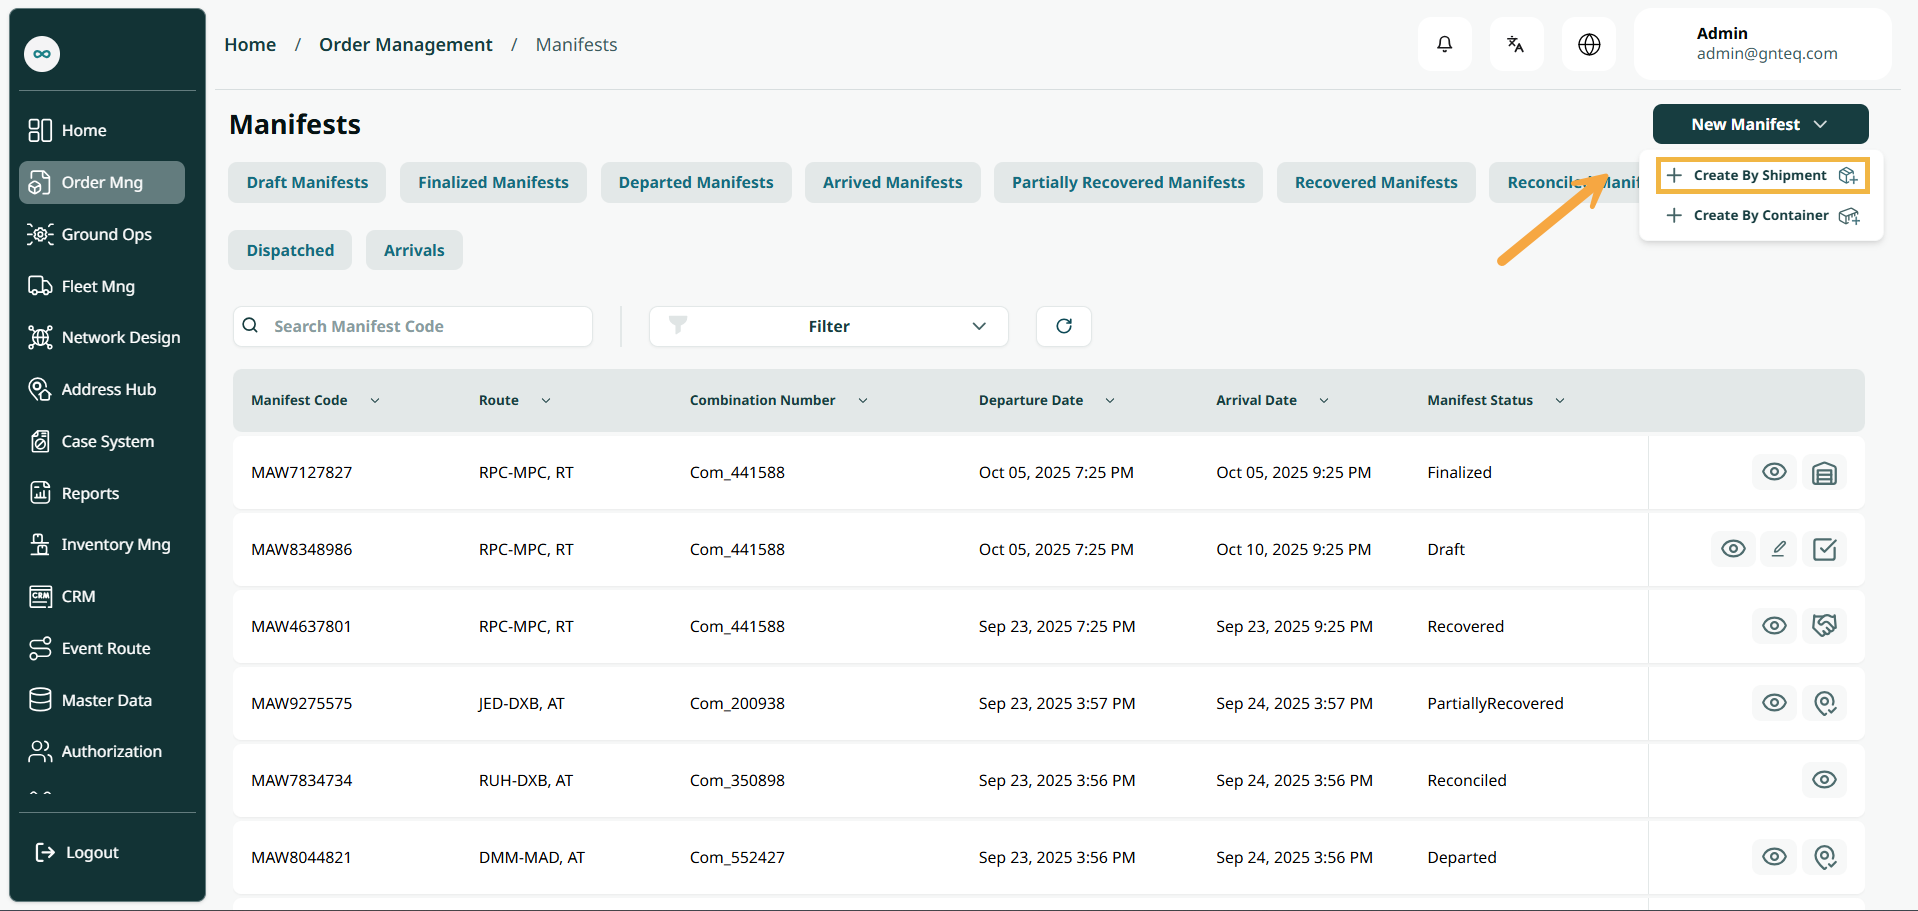
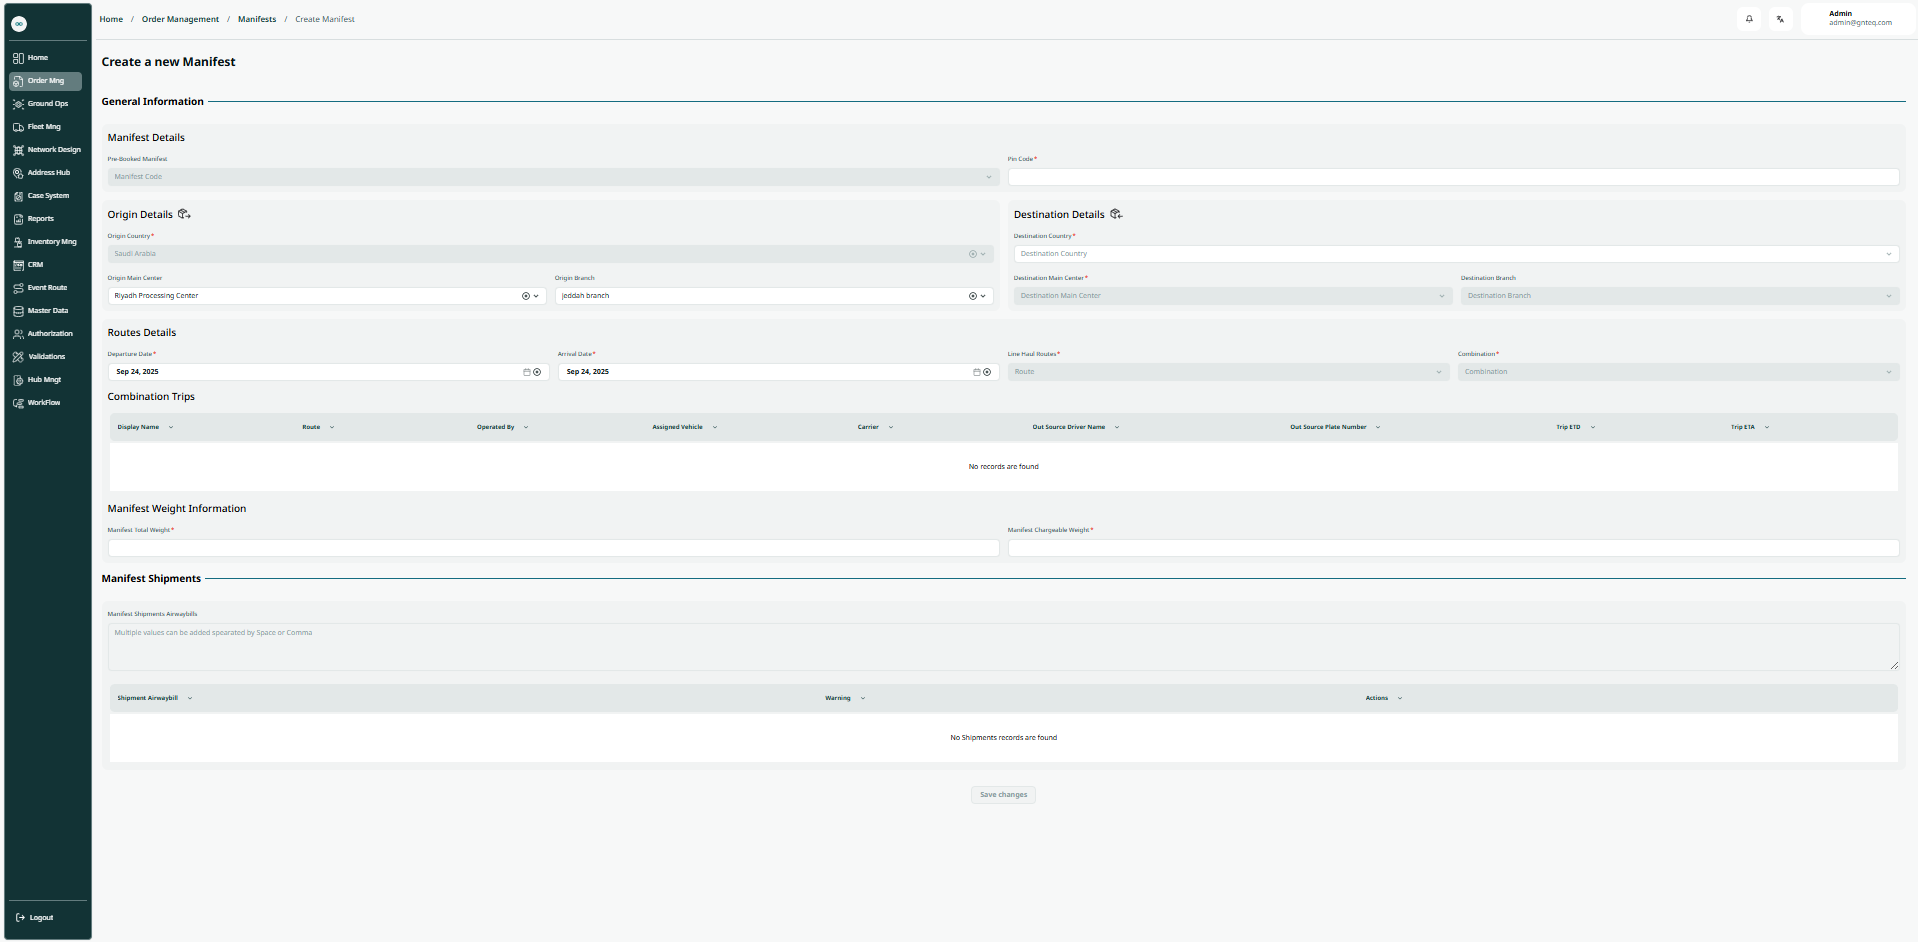
The user can add a new manifests by Shipment by navigating to the ‘Master Airwaybills’ screen via the Operations Module and clicking on Add New Manifests by Shipments as follows:
-
Manifest Number: this field represents the manifest special number.
-
Capacity: this field represents the manifest capacity.
-
Origin Country: this field represents the manifest’s origin country.
-
Origin Main center: this field represents the manifest’s origin processing center.
-
Origin Branch: this field represents the manifest’s origin delivery center.
-
Destination Country: this field represents the manifest’s arrival country.
-
Destination Main center: this field represents the container destination processing center.
-
Destination Branch: this field represents the container destination delivery center.
-
Departure Date: this field represents the departure date of the manifest from the origin port.
-
Arrival Date: this field represents the arrival date of the manifest at the next airport stop.
-
Line Haul Route: this field represents the specific route that the manifest will serve.
-
Route & Trip: this field represents the route and trip the manifest.
-
Manifest Total Weight: this field represents the total weight of all shipments within a container that is presented in the MAWB.
-
Manifest Shipment Code: this is used to add the shipment numbers within a manifest as a validation that the shipment is not present in any other manifests.
By clicking on “Save Changes” the manifests will be added Successfully.