
1. Container Creation Overview
1.1 Dashboard
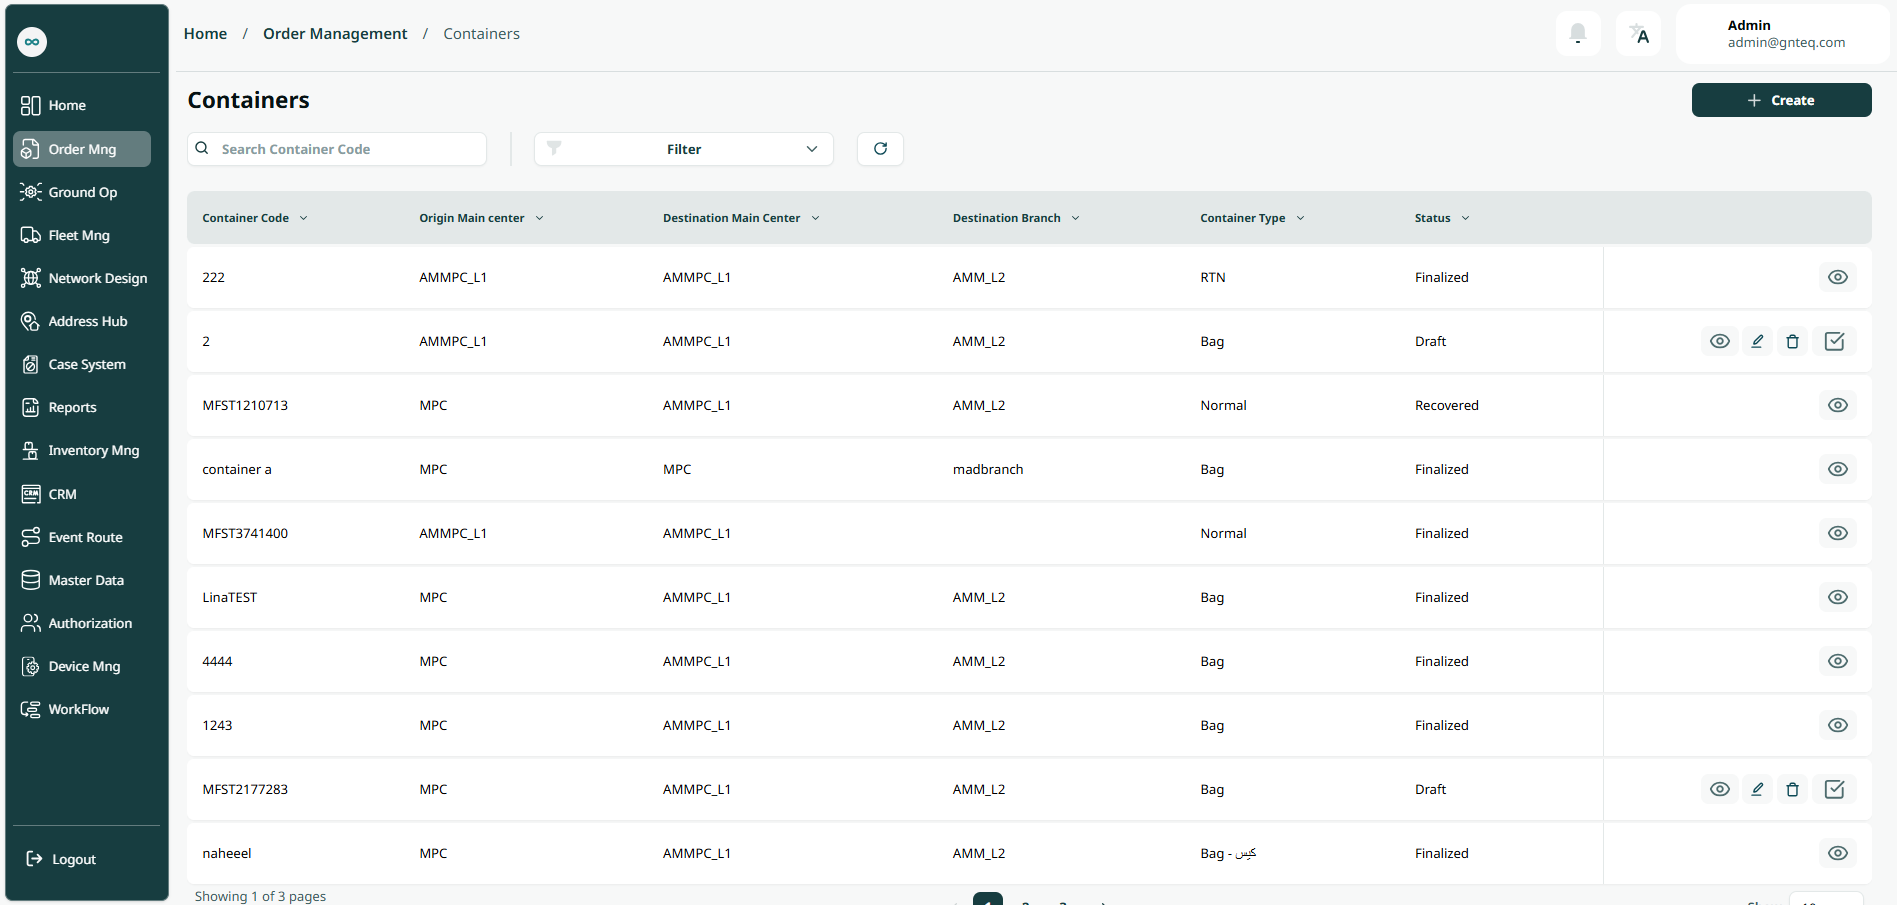
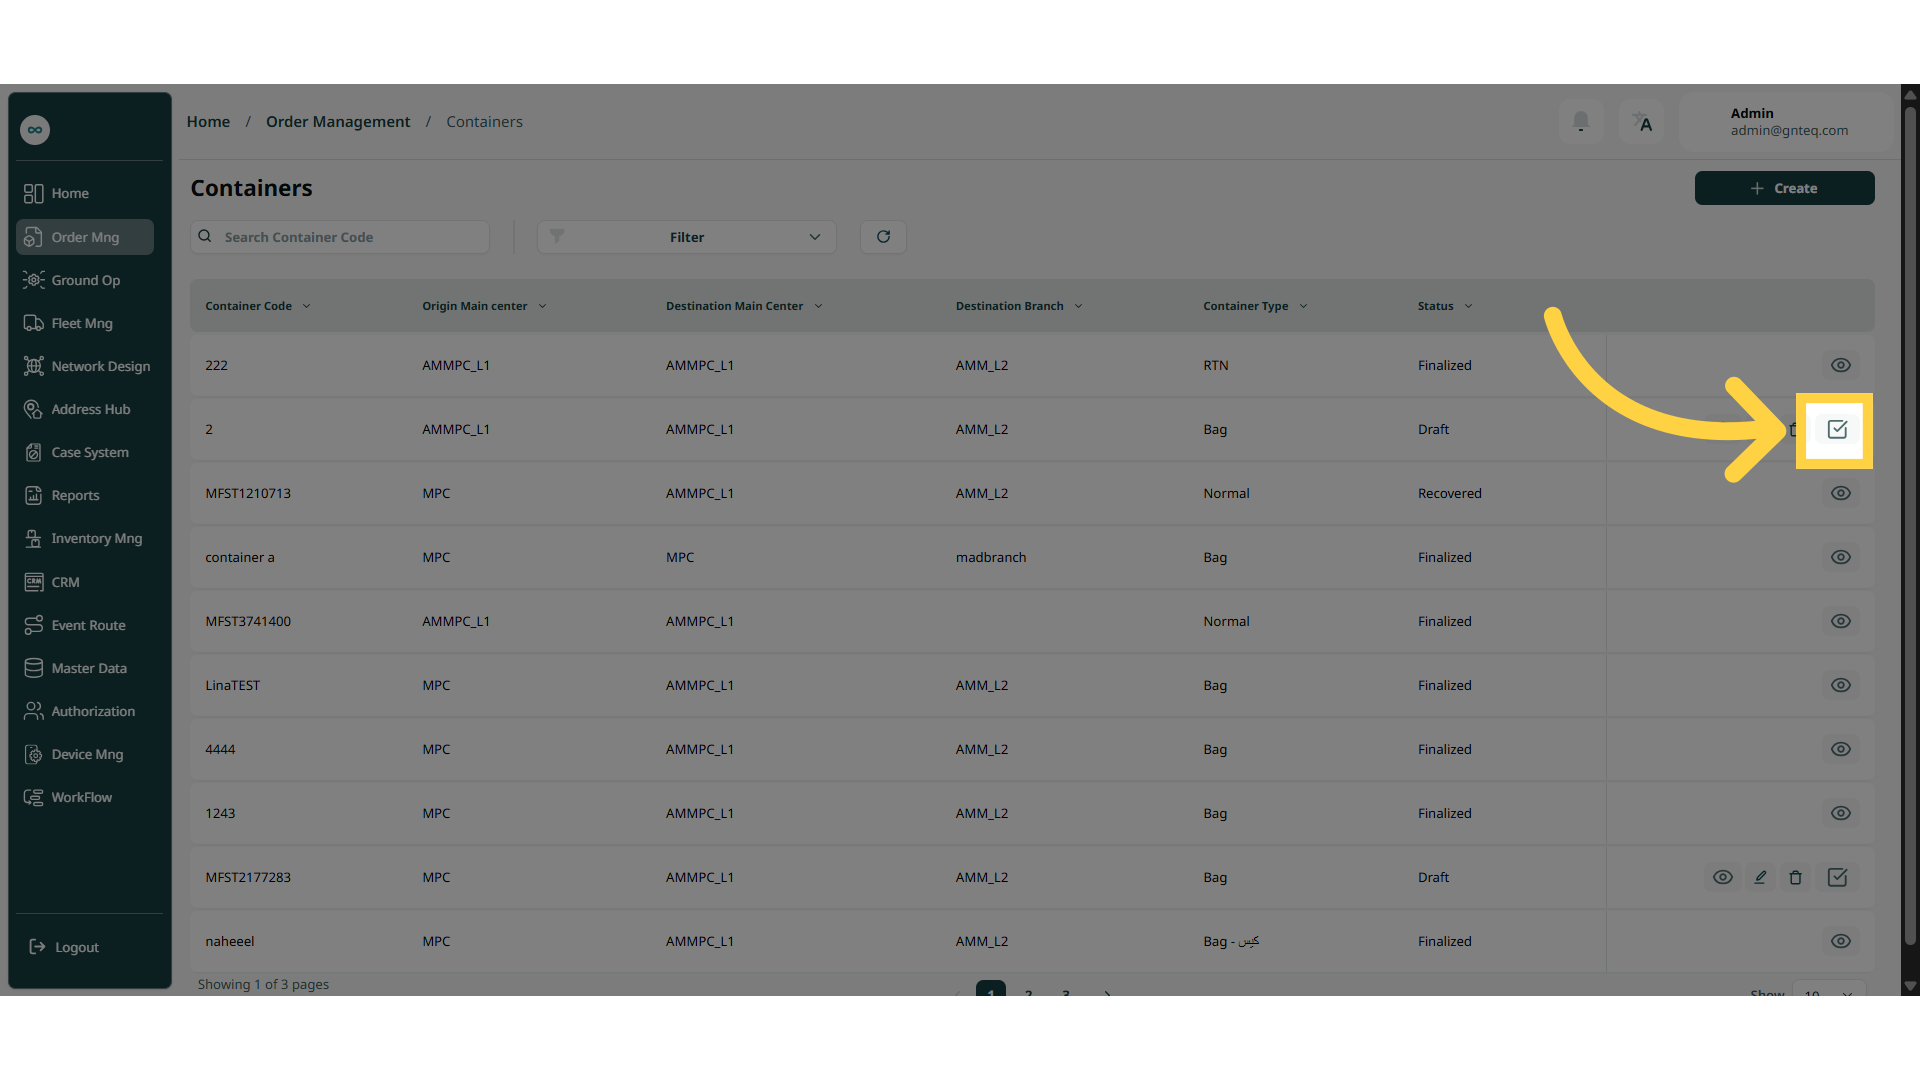
The user can view the defined containers in the system by navigating to the ‘Containers’ screen in the Operations Module from the left navigation panel as follows:
-
Create Container: the user can add new container by clicking on “Create”.
-
Filters: the user can search for the container’s by the origin country, destination country,… etc.
-
Search: The user can search for containers by entering the container code.
-
Rows Per Page: the user can select the number of items to show on each page.
-
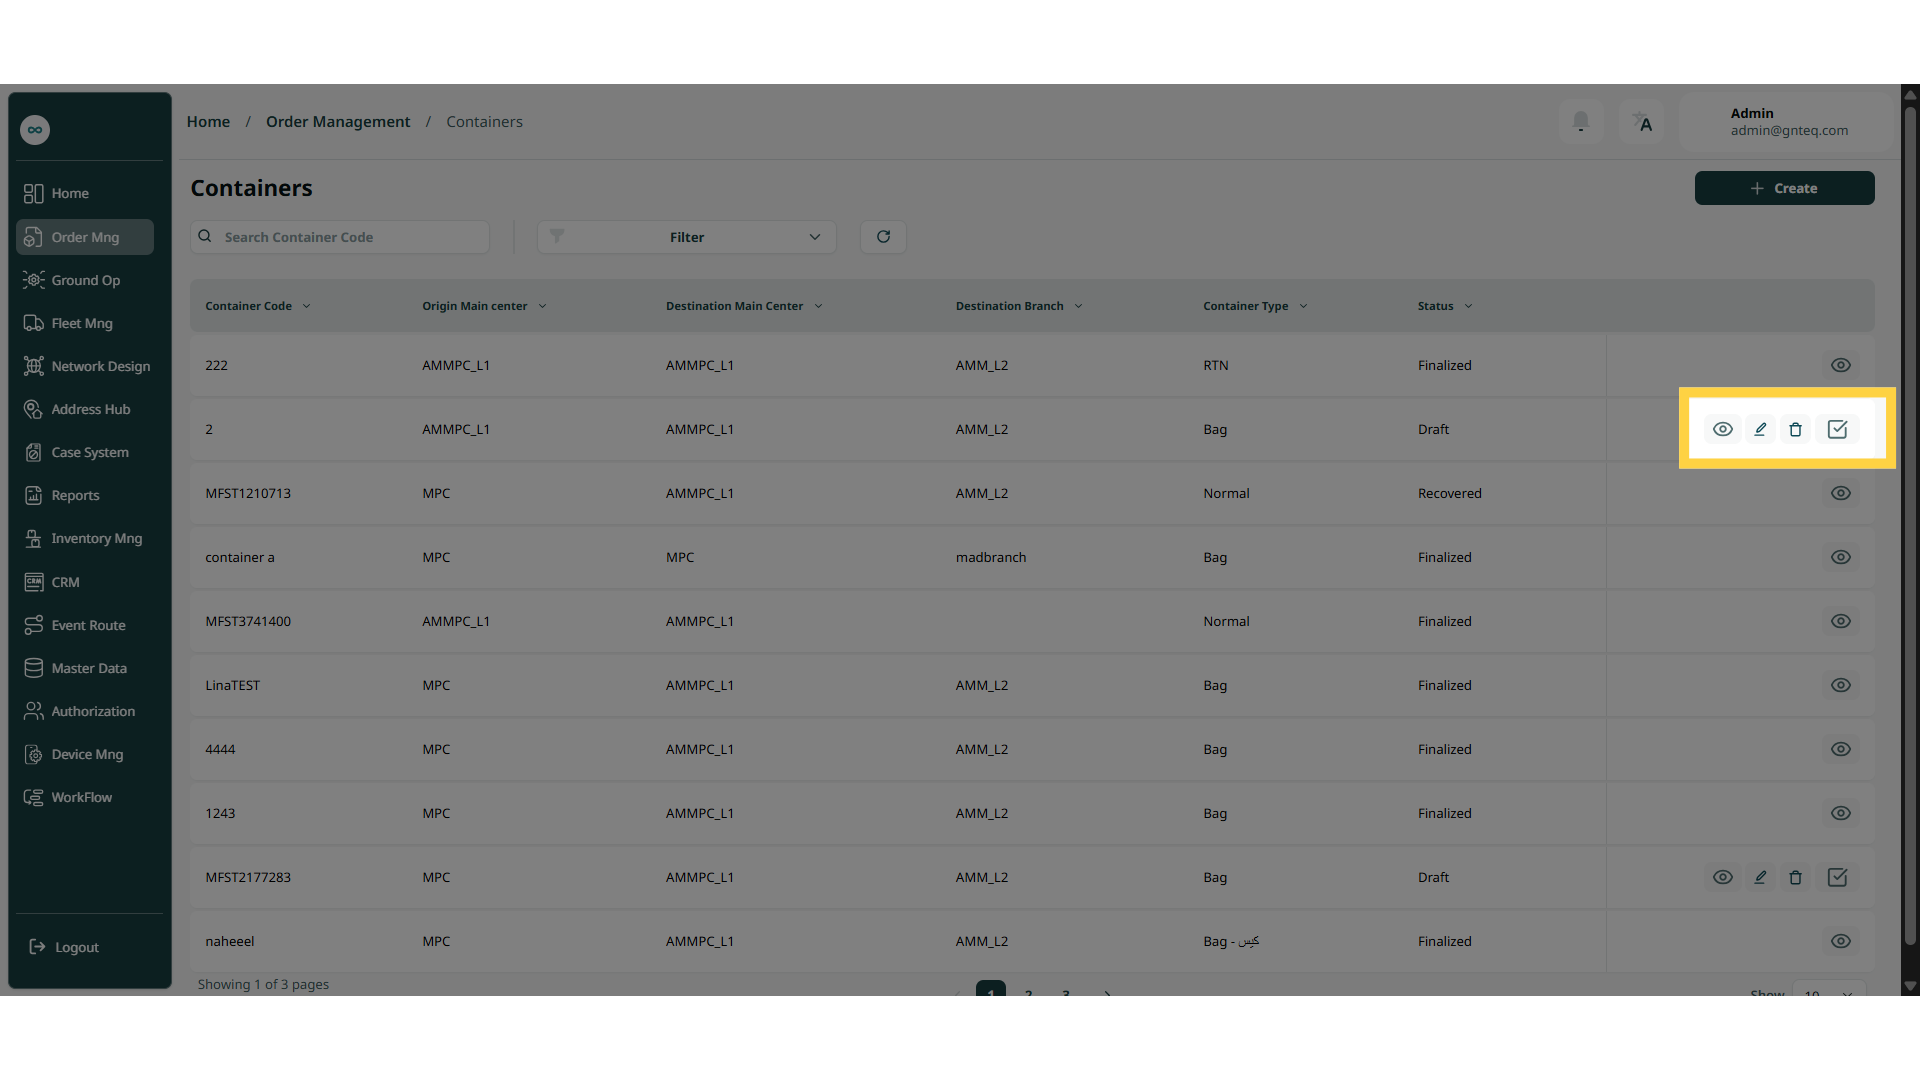
Action: by clicking on this button the user can view details, edit, delete, finalize for the container.
1.1.1 View Details
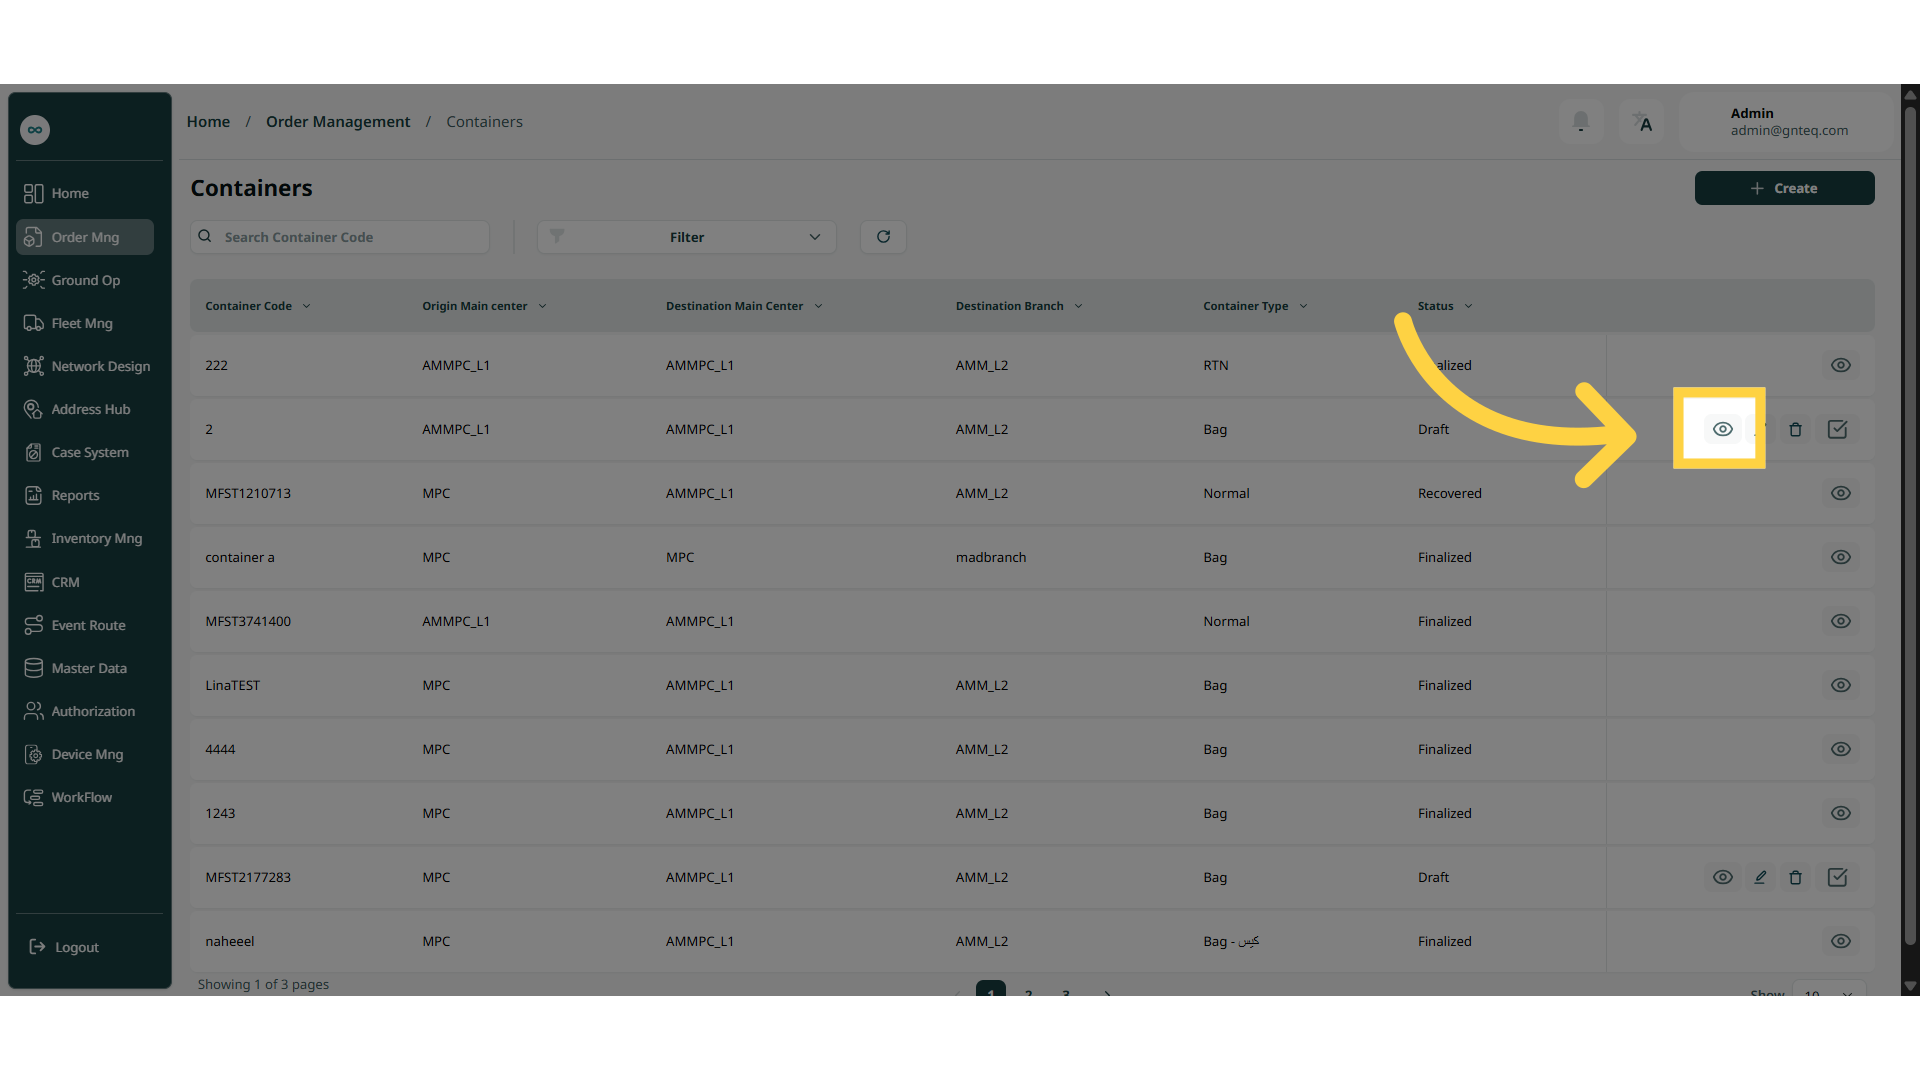
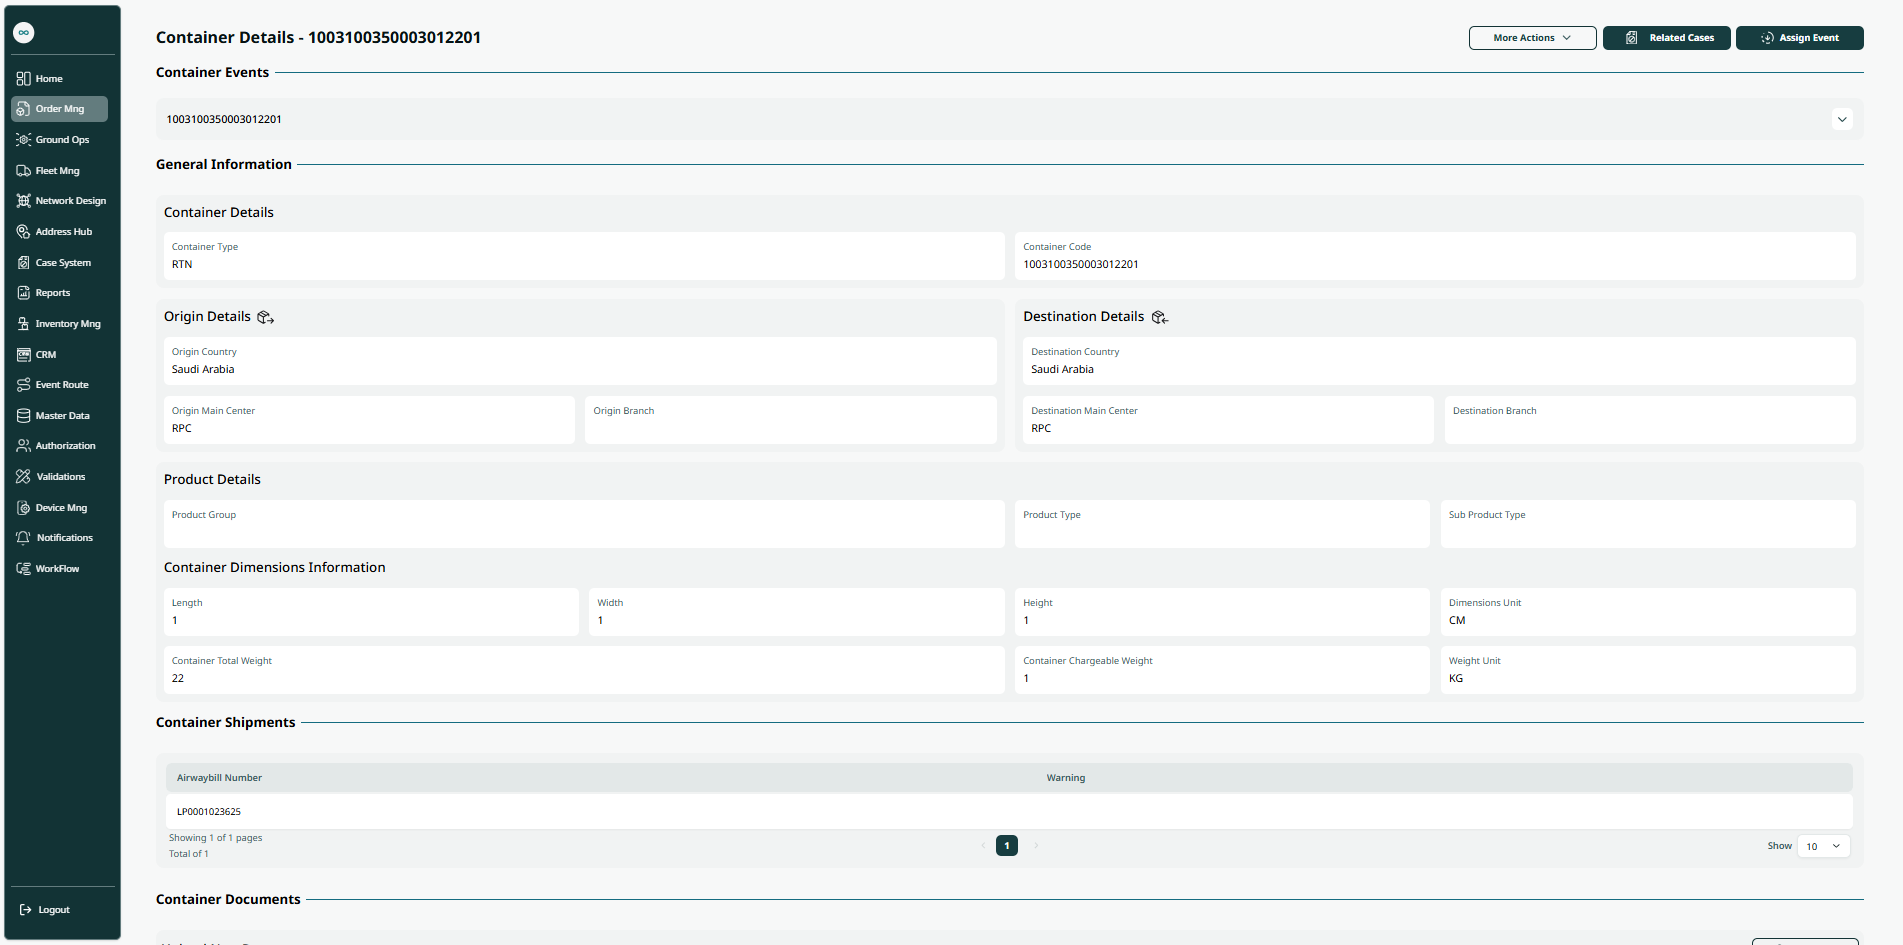
The user can view the container details by navigating to the ‘Container’ screen via the Operations Module and clicking on View Details from Actions as follows:
1.1.1.1 Add Event
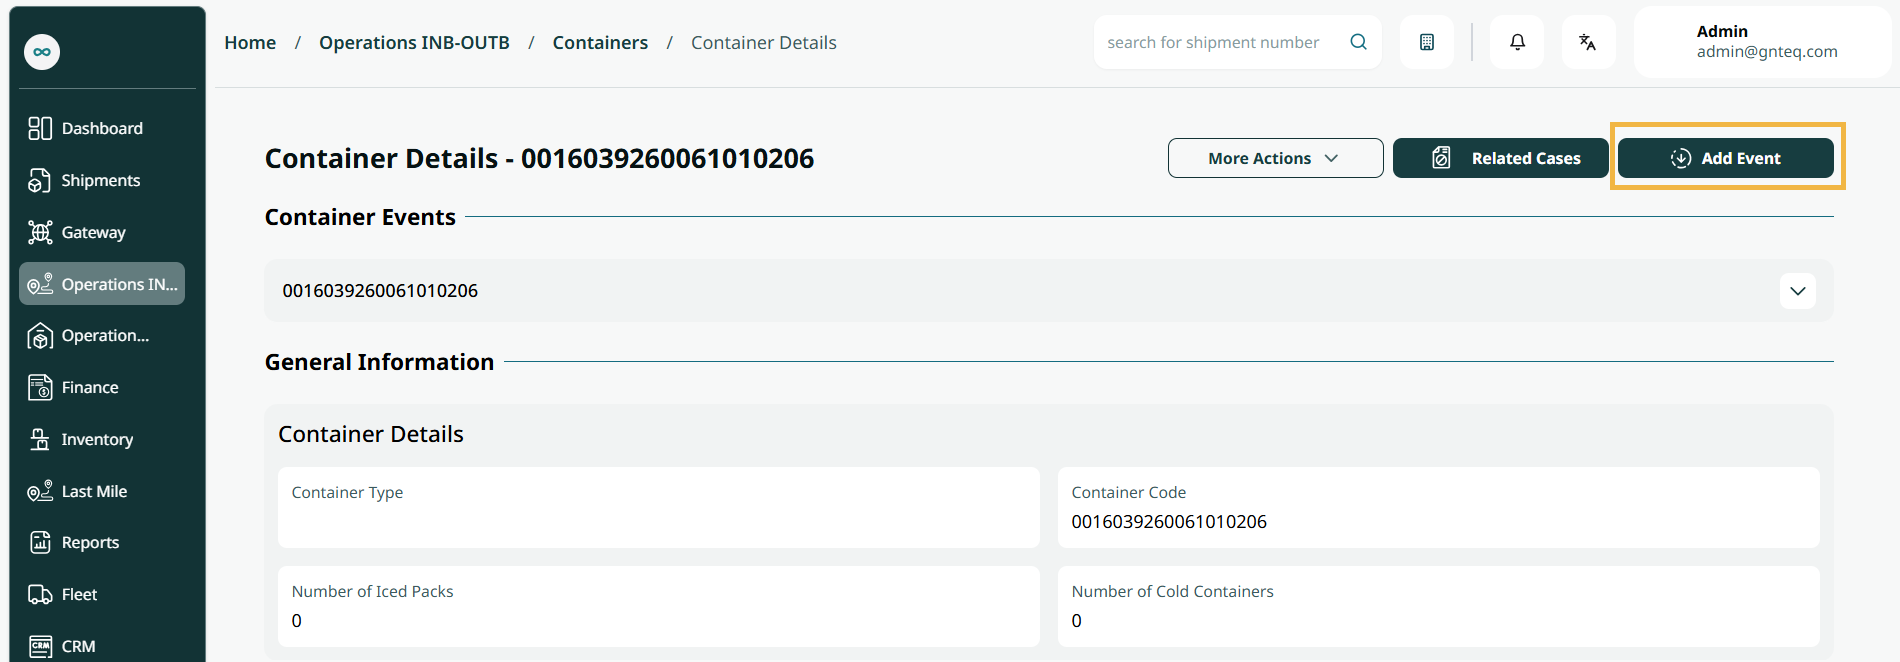
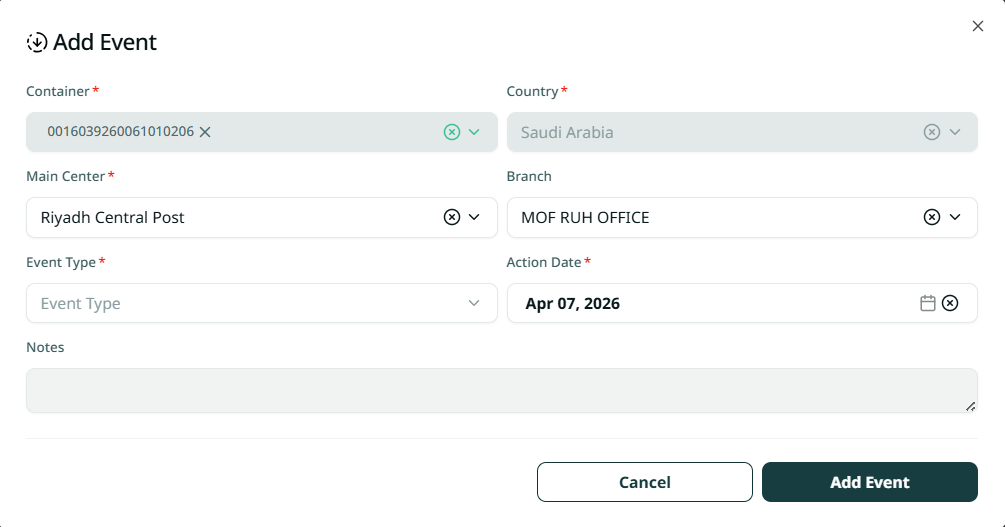
The user can add an event to a container by navigating to the ‘Containers’ screen via the Operations Module and clicking on View Details from Actions, then clicking on Add Event as follows:
-
Container: this field represents the shipment airwaybill number.
-
Country: this field represents the name of the country.
-
Main Centre: this field represents the city where the container will arrive.
-
Branch: this field represents the station or route where the container will arrive.
-
Event Type: this field represents the type of the event.
-
Action Date: this field represents the start date of the event.
-
Notes: this field represents notes about the event.
By clicking on Add Event, the event will be successfully assigned.
1.1.1.2 Related Cases
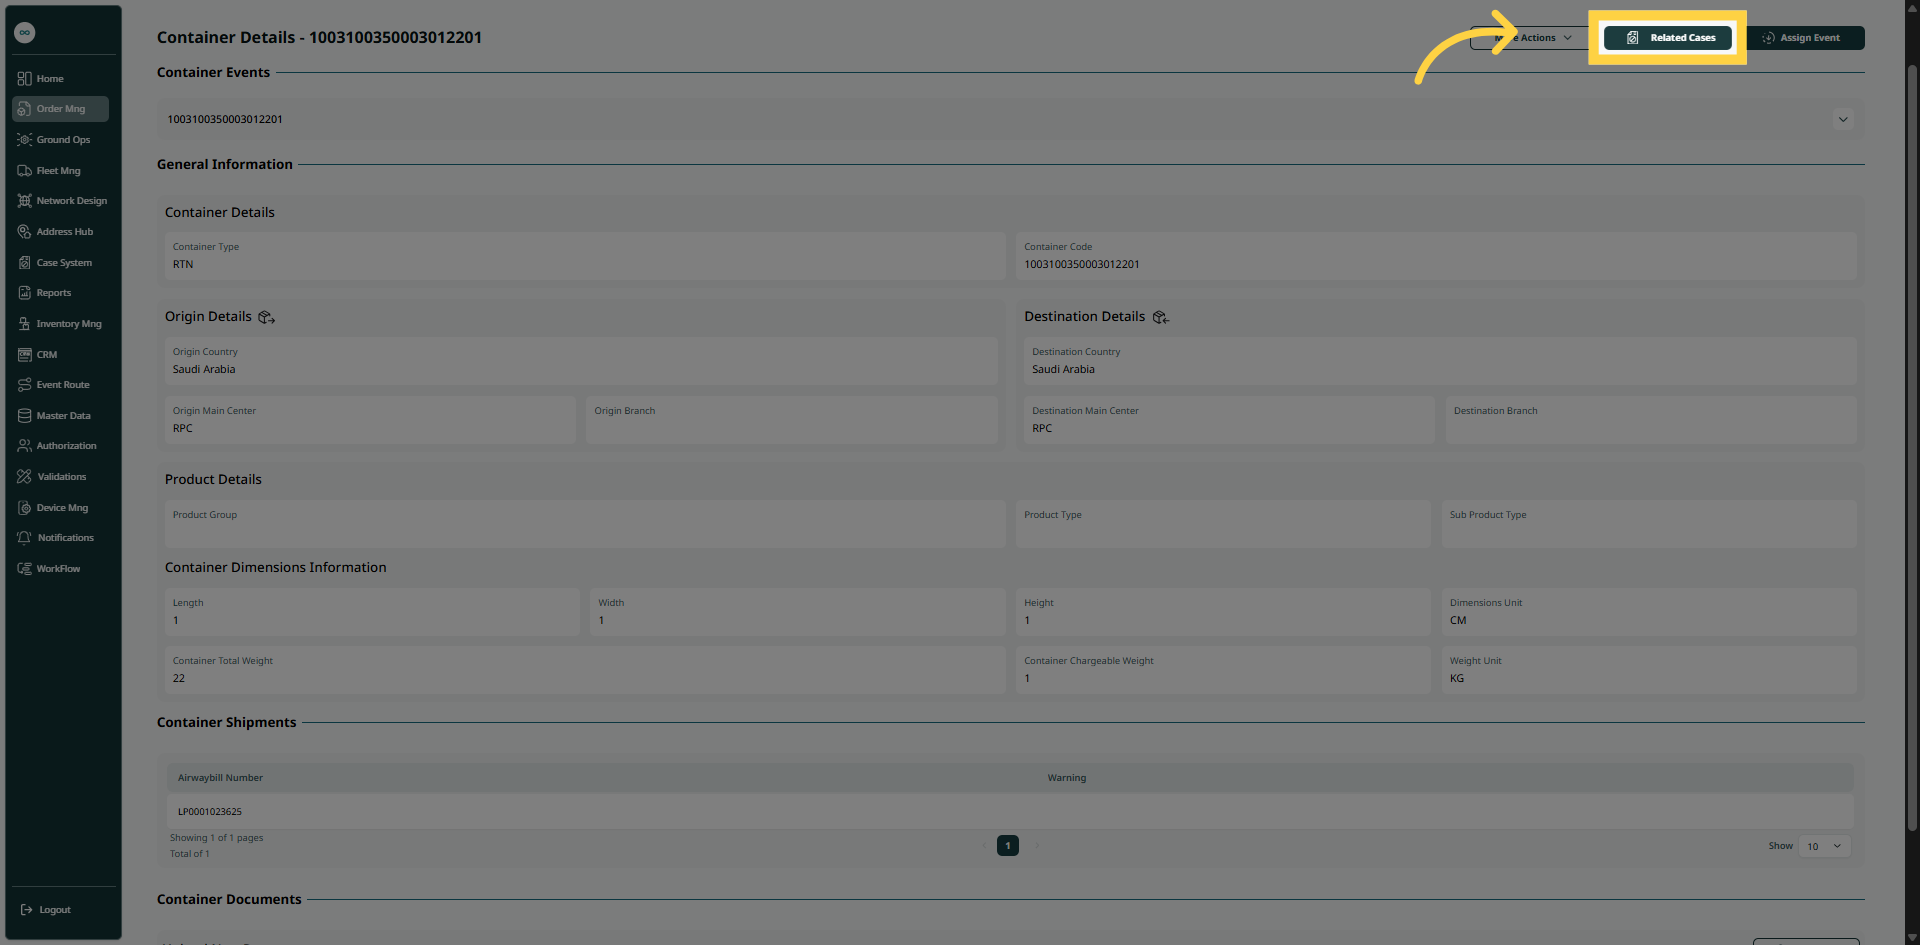
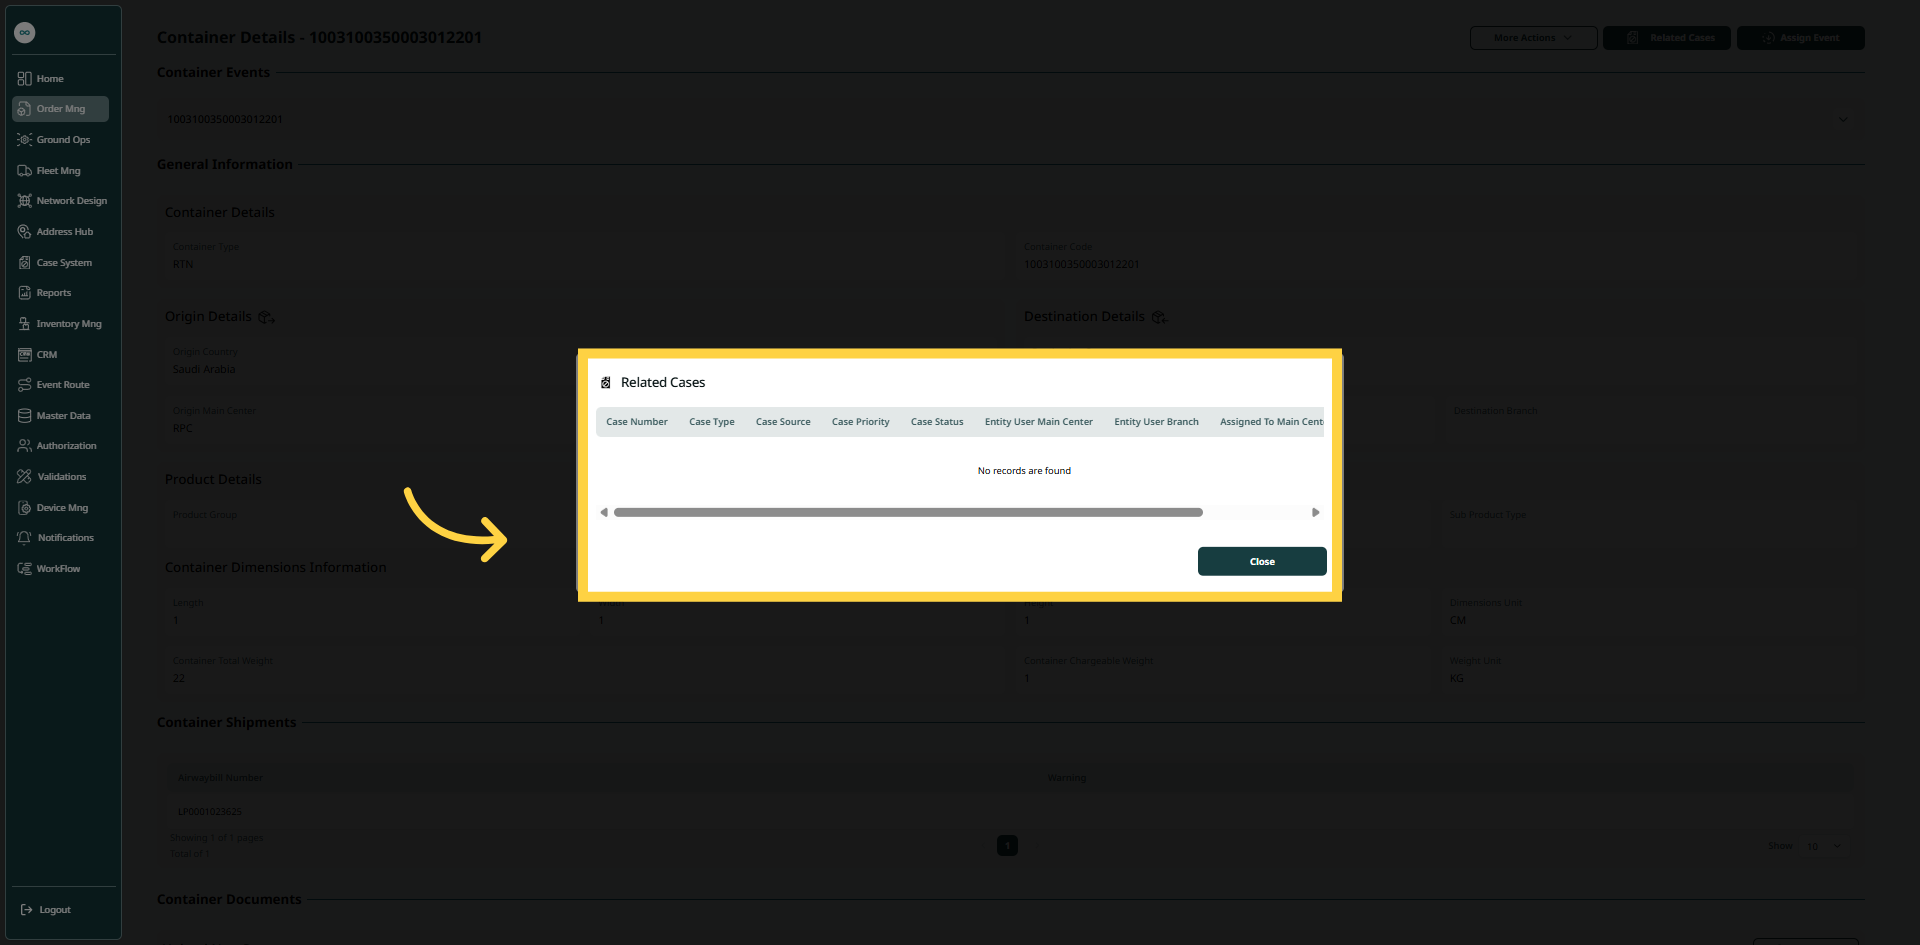
The user can check whether a container has any cases or issues by navigating to the ‘Containers’ screen via Operations Module, clicking on View Details from Actions, and then selecting Related Cases as follows:
1.1.1.3 More Actions
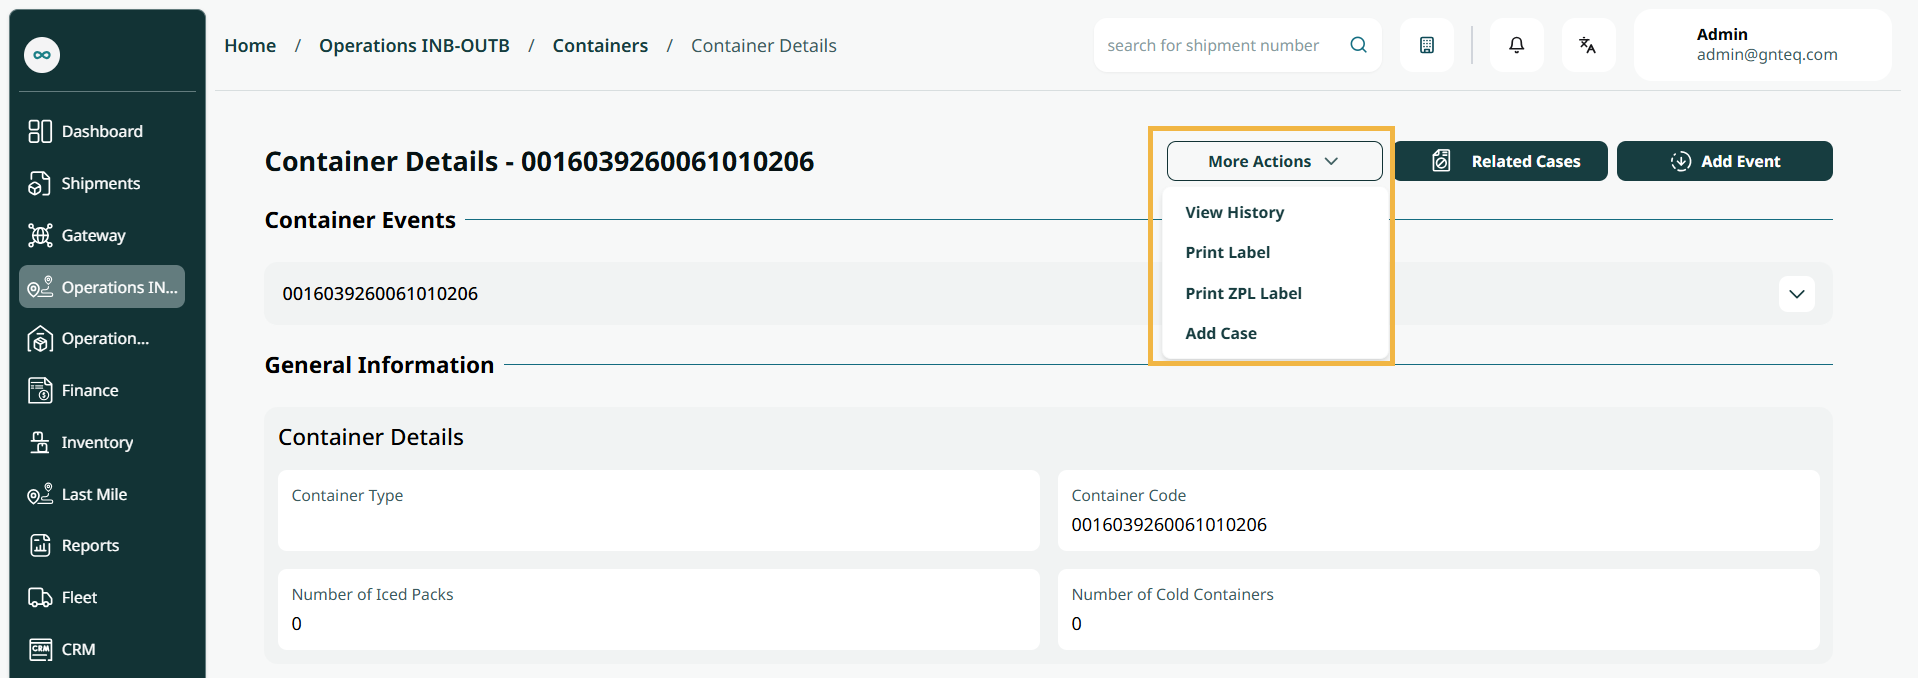
The user can print labels, add cases, print ZPL Label and view containers' history by navigating to the ‘Containers’ screen via Operations Module, clicking View Details from Actions, and then selecting More Actions, as follows:
1.1.2 Edit Information
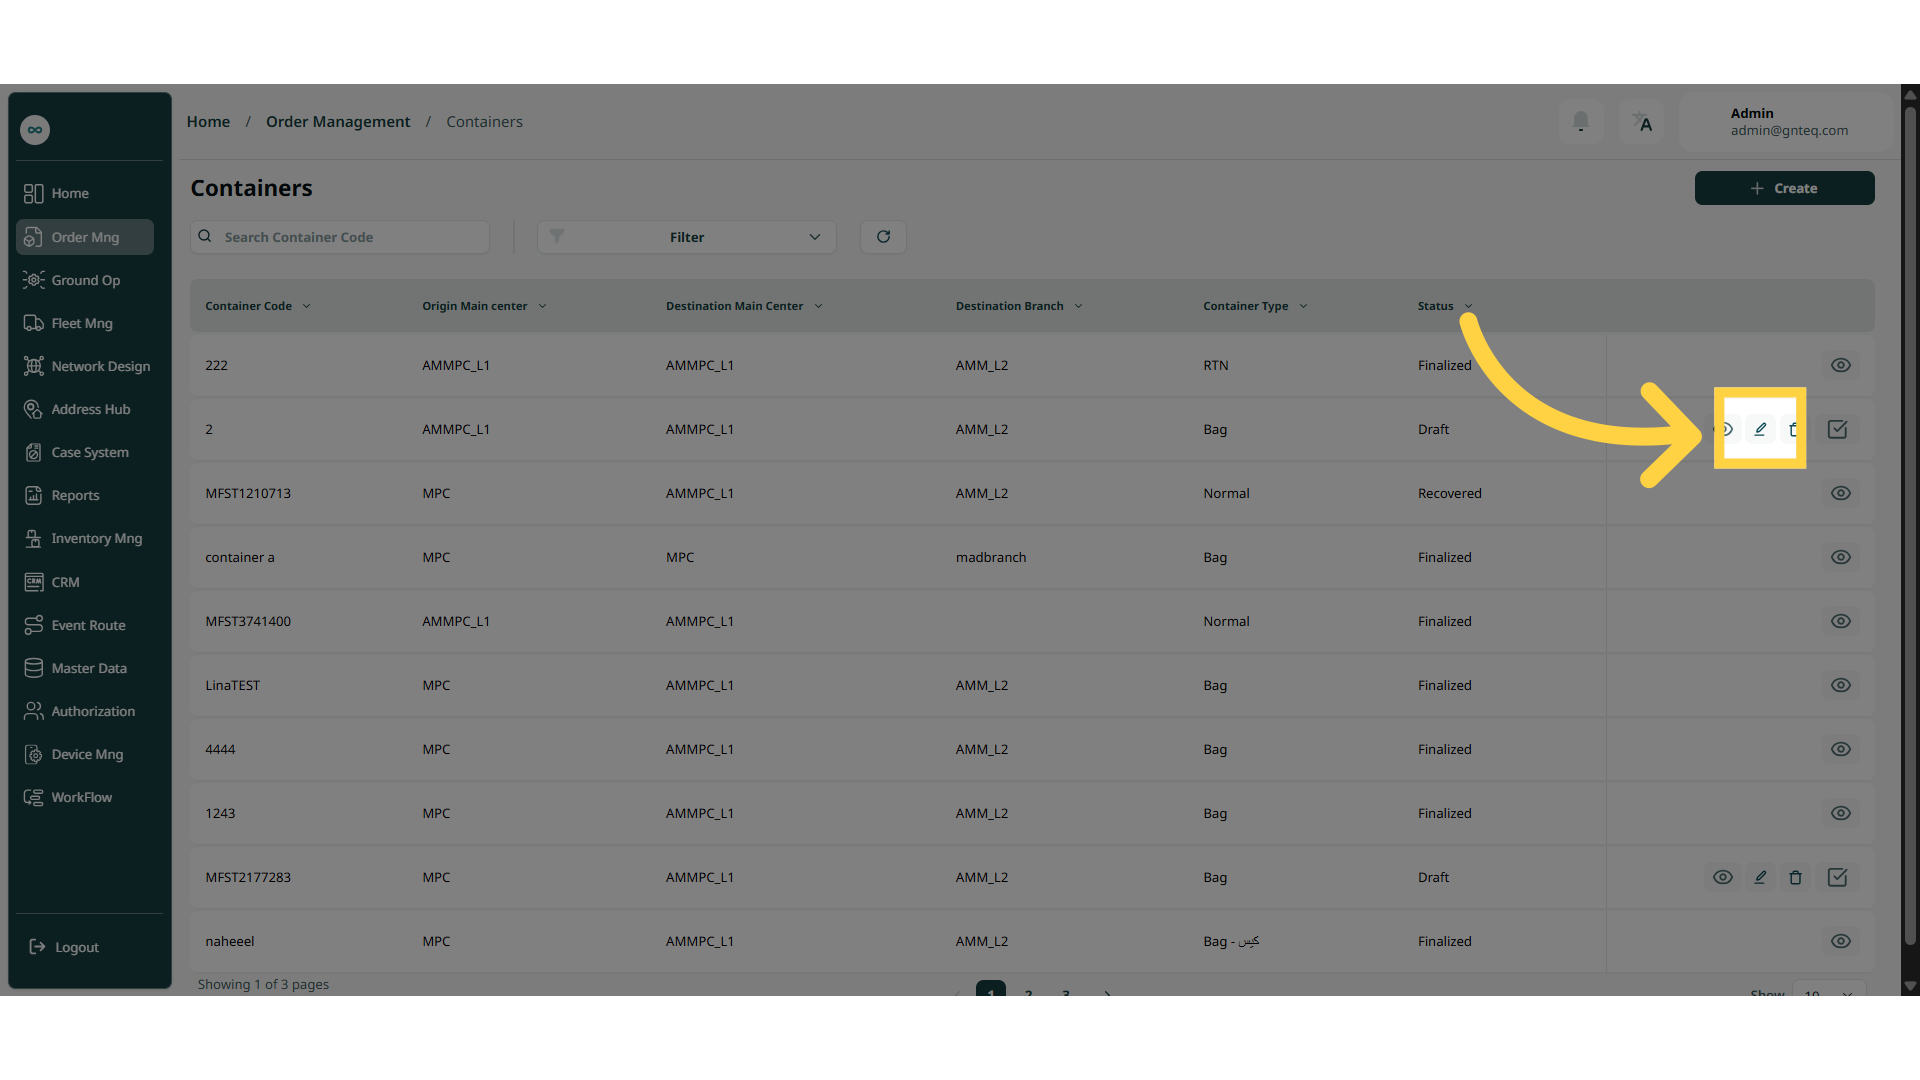
The user can edit the info of an existing container by clicking on Edit Info from Actions, by navigating to the ‘Containers’ screen via the Operations Module.
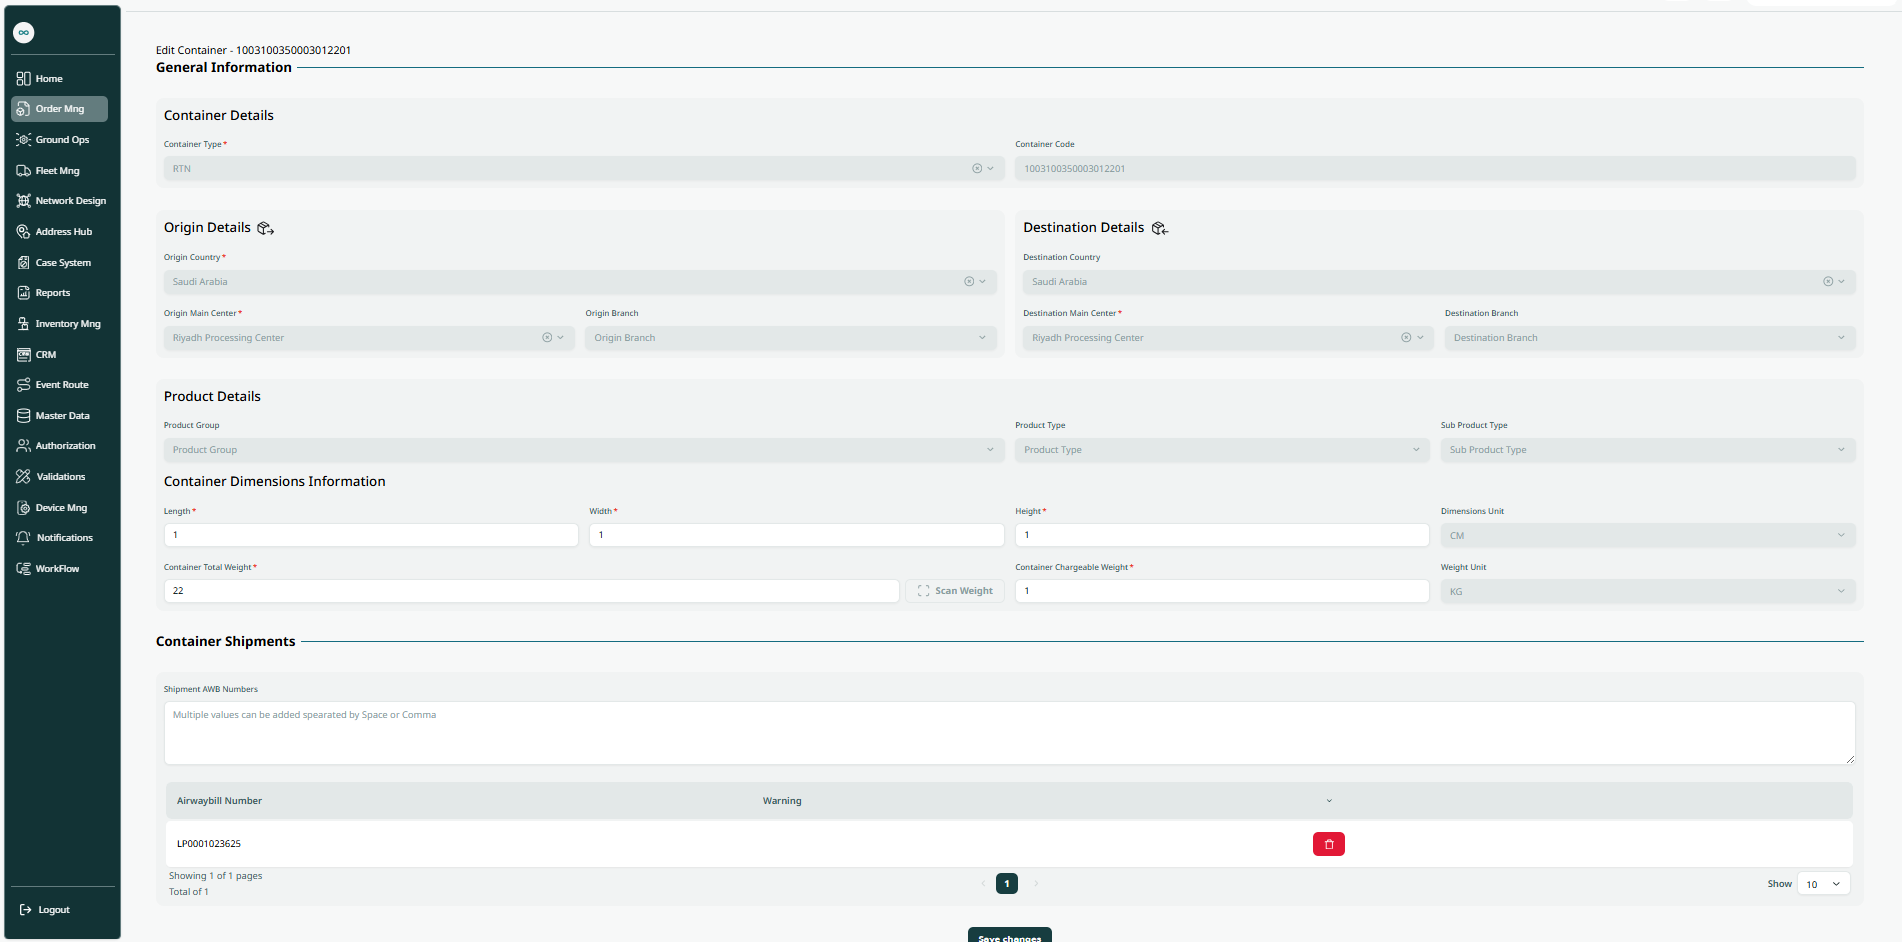
By clicking Save Changes, the information will be successfully edited in the system.
1.1.3 Delete Container
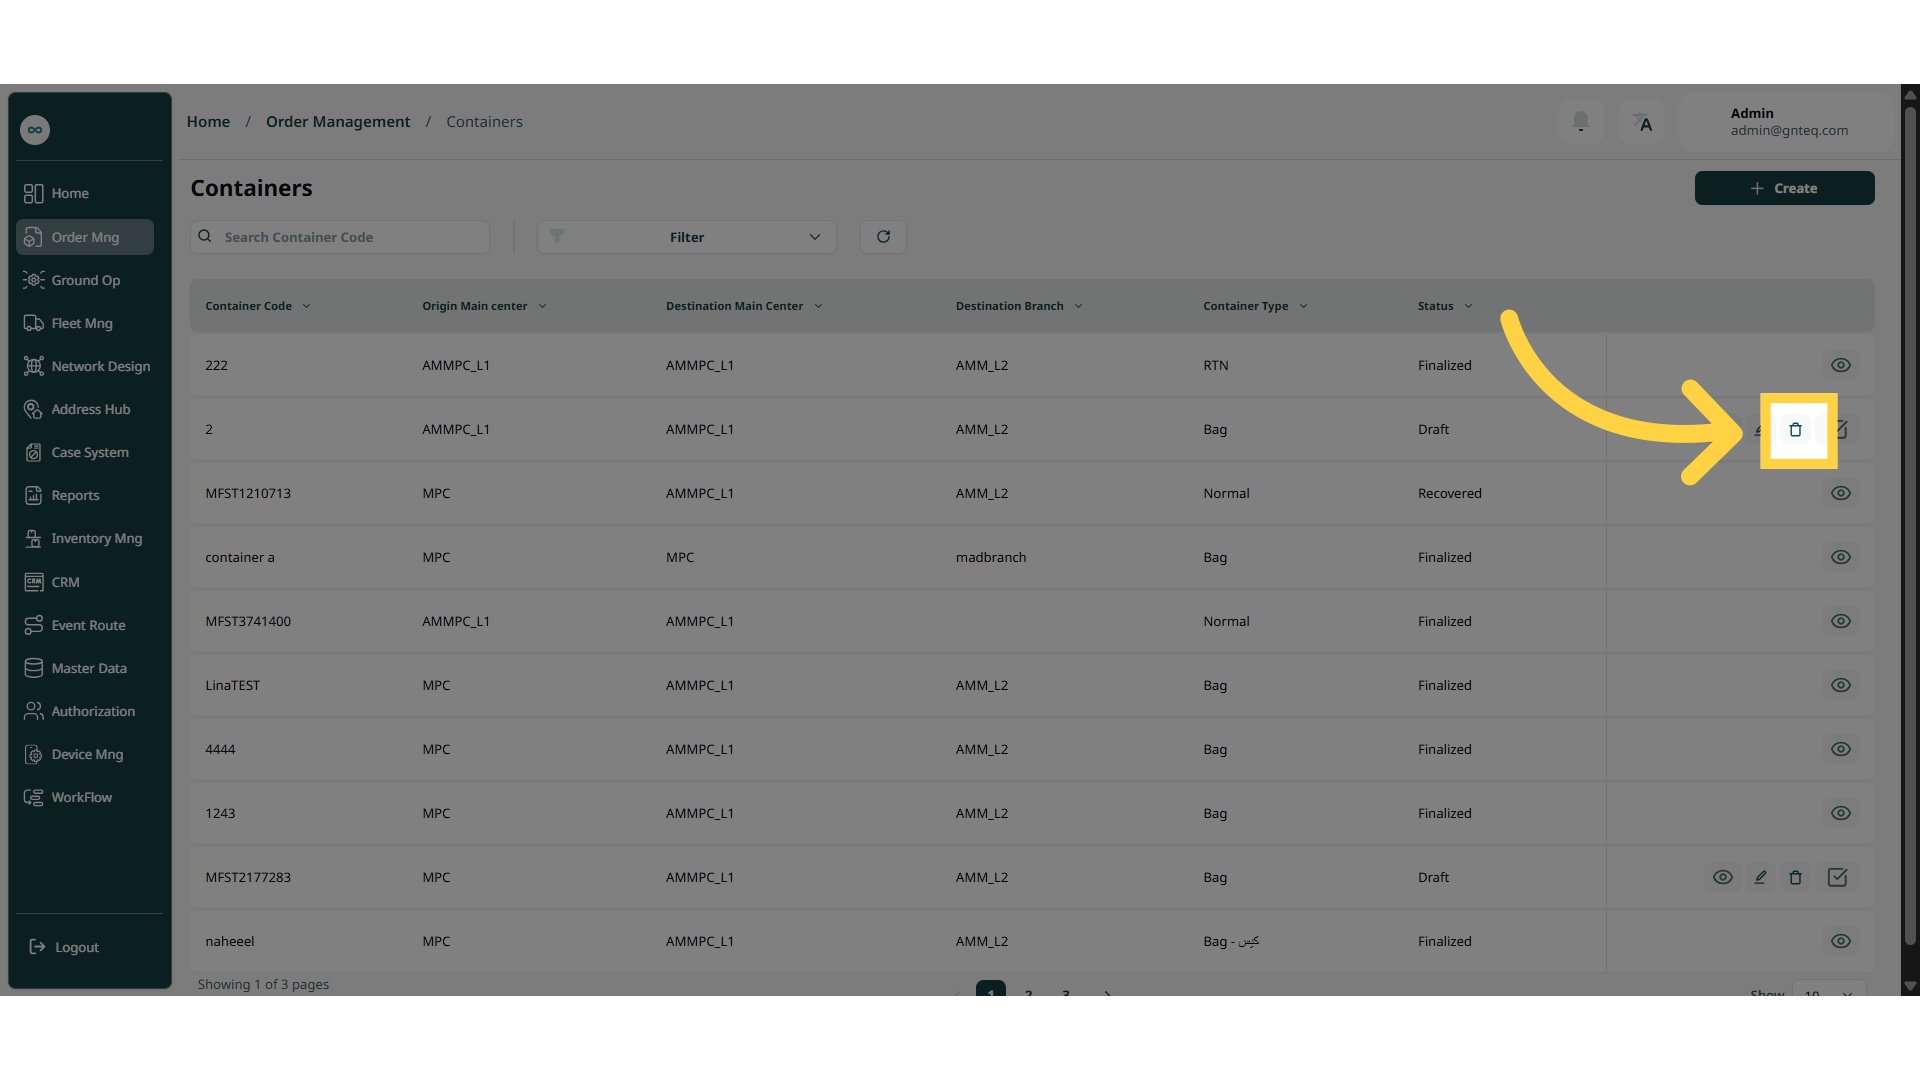
The user can delete a container by clicking on Delete Container from Actions, or by navigating to the ‘Containers’ screen via Operations Module.
1.1.4 Finalize Container
The user can finalize the container by clicking on Finalize from Actions, by navigating to the ‘Containers’ screen via the Operations Module if the status of the container is Draft.
1.2 Add New Container
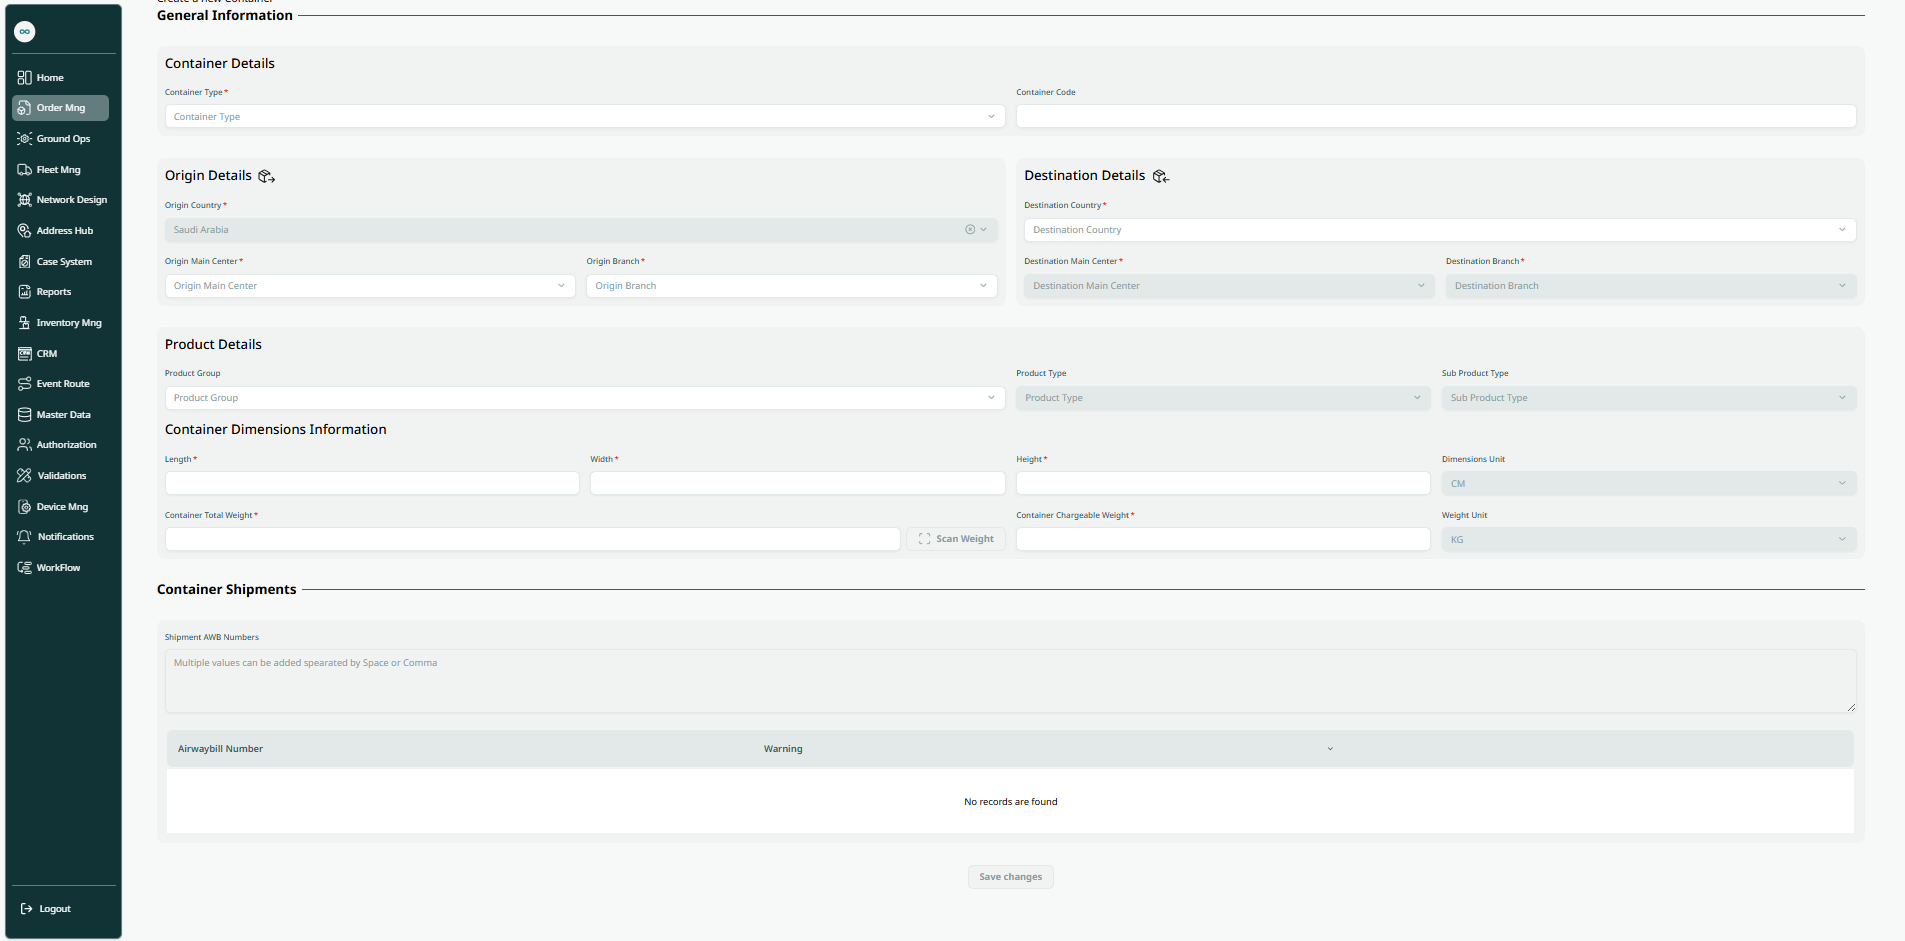
The user can create a container by clicking on Create, by navigating to the ‘Containers’ screen via the Operations Module.
-
Container Type: this field represents the container’s type; this is the LIS container types
check the coreops options -
Container Code: this field represents the container’s external code, used for integration purposes.
-
Origin Country: this field represents the container’s origin country.
-
Origin Main center: this field represents the container’s origin processing center.
-
Origin Branch: this field represents the container’s origin delivery center.
-
Destination Country: this field represents the container’s arrival country.
-
Destination Main center: this field represents the container destination processing center.
-
Destination Branch: this field represents the container’s destination delivery center.
-
Product Group: this field represents the delivery service.
-
Product Type: this field represents the delivery service type e(express DOM, express international..etc.)
-
Sub Product Type: this field represents the delivery service subtype (banks, government
-
documents, …….etc.).
-
Length: this field represents the container’s length.
-
Width: this field represents the container’s width.
-
Height: this field represents the container’s height.
-
Dimension Unit: this field represents the unit of measurement for the container (e.g., CM = centimeters, M = meters).
-
Weight Unit: this field represents the unit used to measure the container’s weight (e.g., KG = kilograms, LB = pounds).
-
Container Total Weight: this field represents the total weight of all shipments within a container.
-
Container Chargeable Weight: this field represents the chargeable weight used to calculate the shipment cost.
-
Shipment AWB Numbers: this field allows the user to enter all AWB numbers to be included in the container, with validation to ensure that a shipment has not already been added to another container.
By clicking on Save Changes, the container will be added successfully.