
1. Event Creation Overview
2. Dashboard
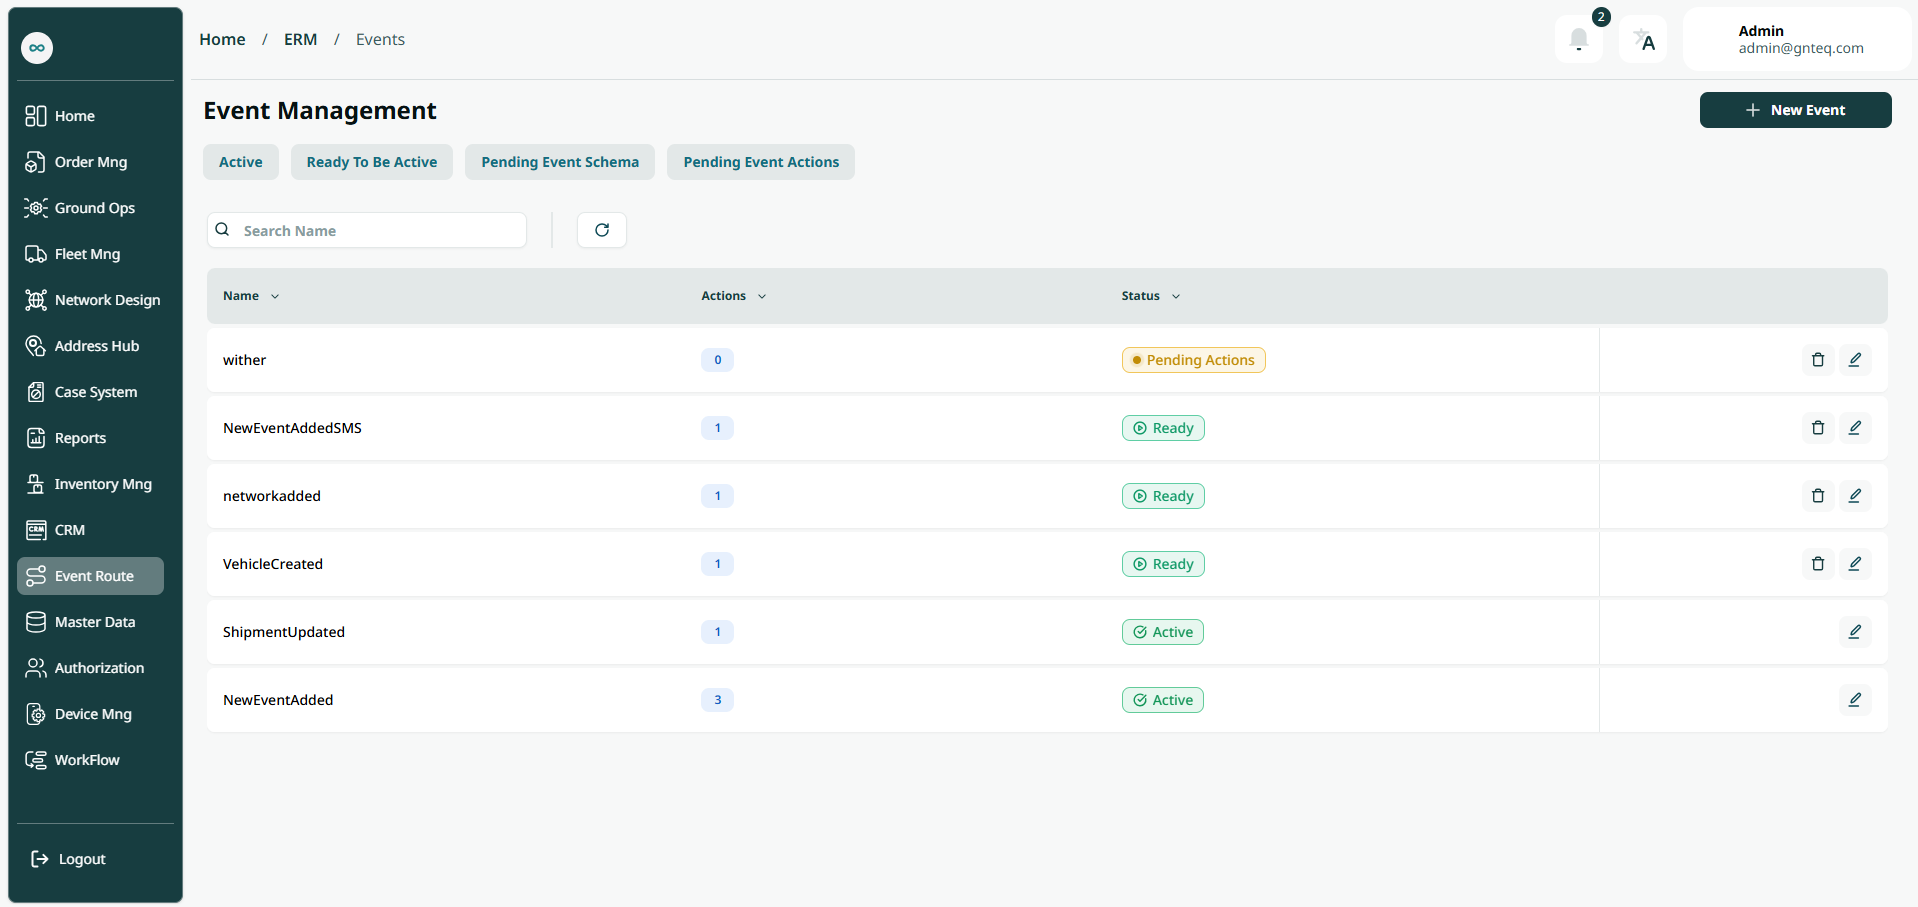
The user can view the defined events in the system by navigating to the ‘Event Management’ screen in the Event Route from the left navigation panel as follows:
-
New Event: the user can add a new event to the system by clicking "New Event."
Search: The user can search for an event by typing the event name.
Rows per Page: the user can specify the number of items to display on each page.
Active: the user can navigate to the active event screen by clicking "Active."
Ready to Activate: the user can navigate to the event screen ready for activation by clicking "Ready to Activate."
Pending Event Schema: the user can navigate to the pending event schema screen by clicking "Pending Event Schema."
Pending Event Actions: the user can navigate to the pending event action screen by clicking "Pending Event Actions."
Actions: by clicking on Actions, the user can edit the event by going to the edit event section or delete the event.
2.1 Edit Event
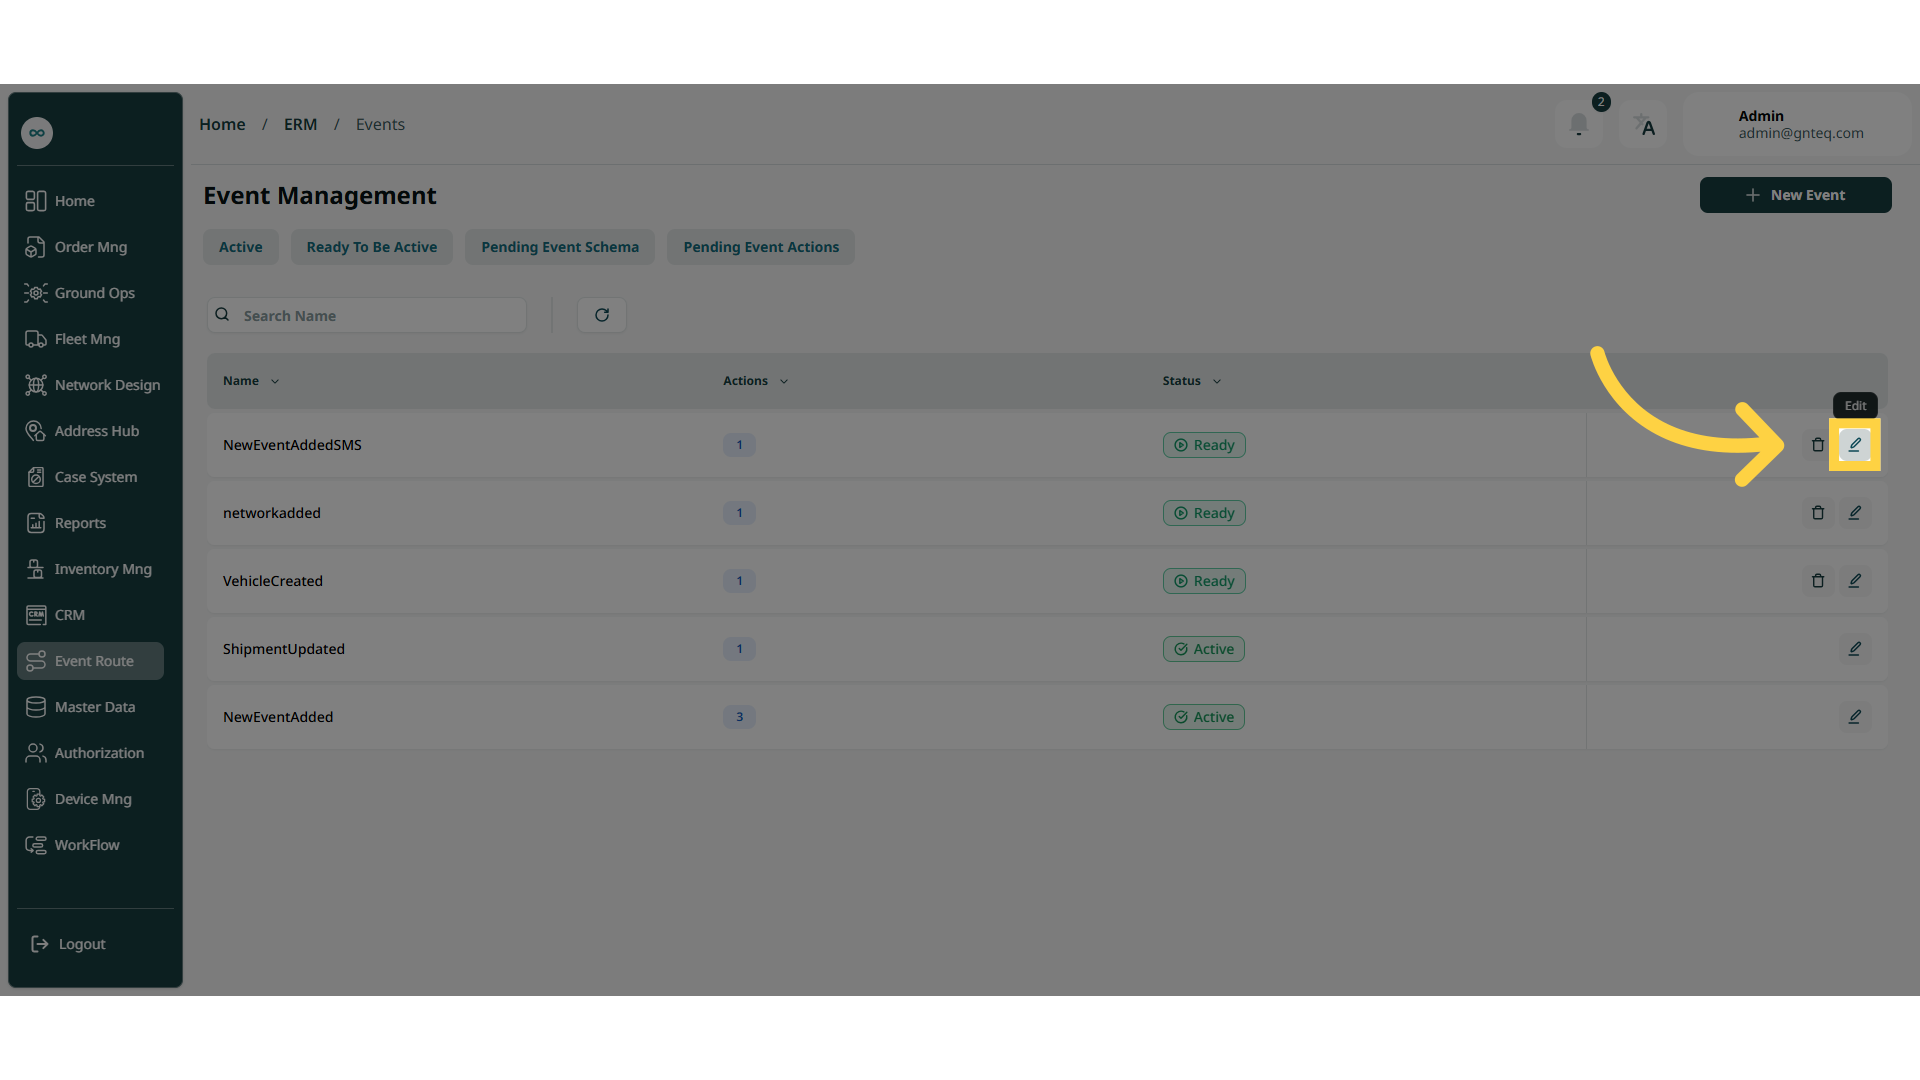
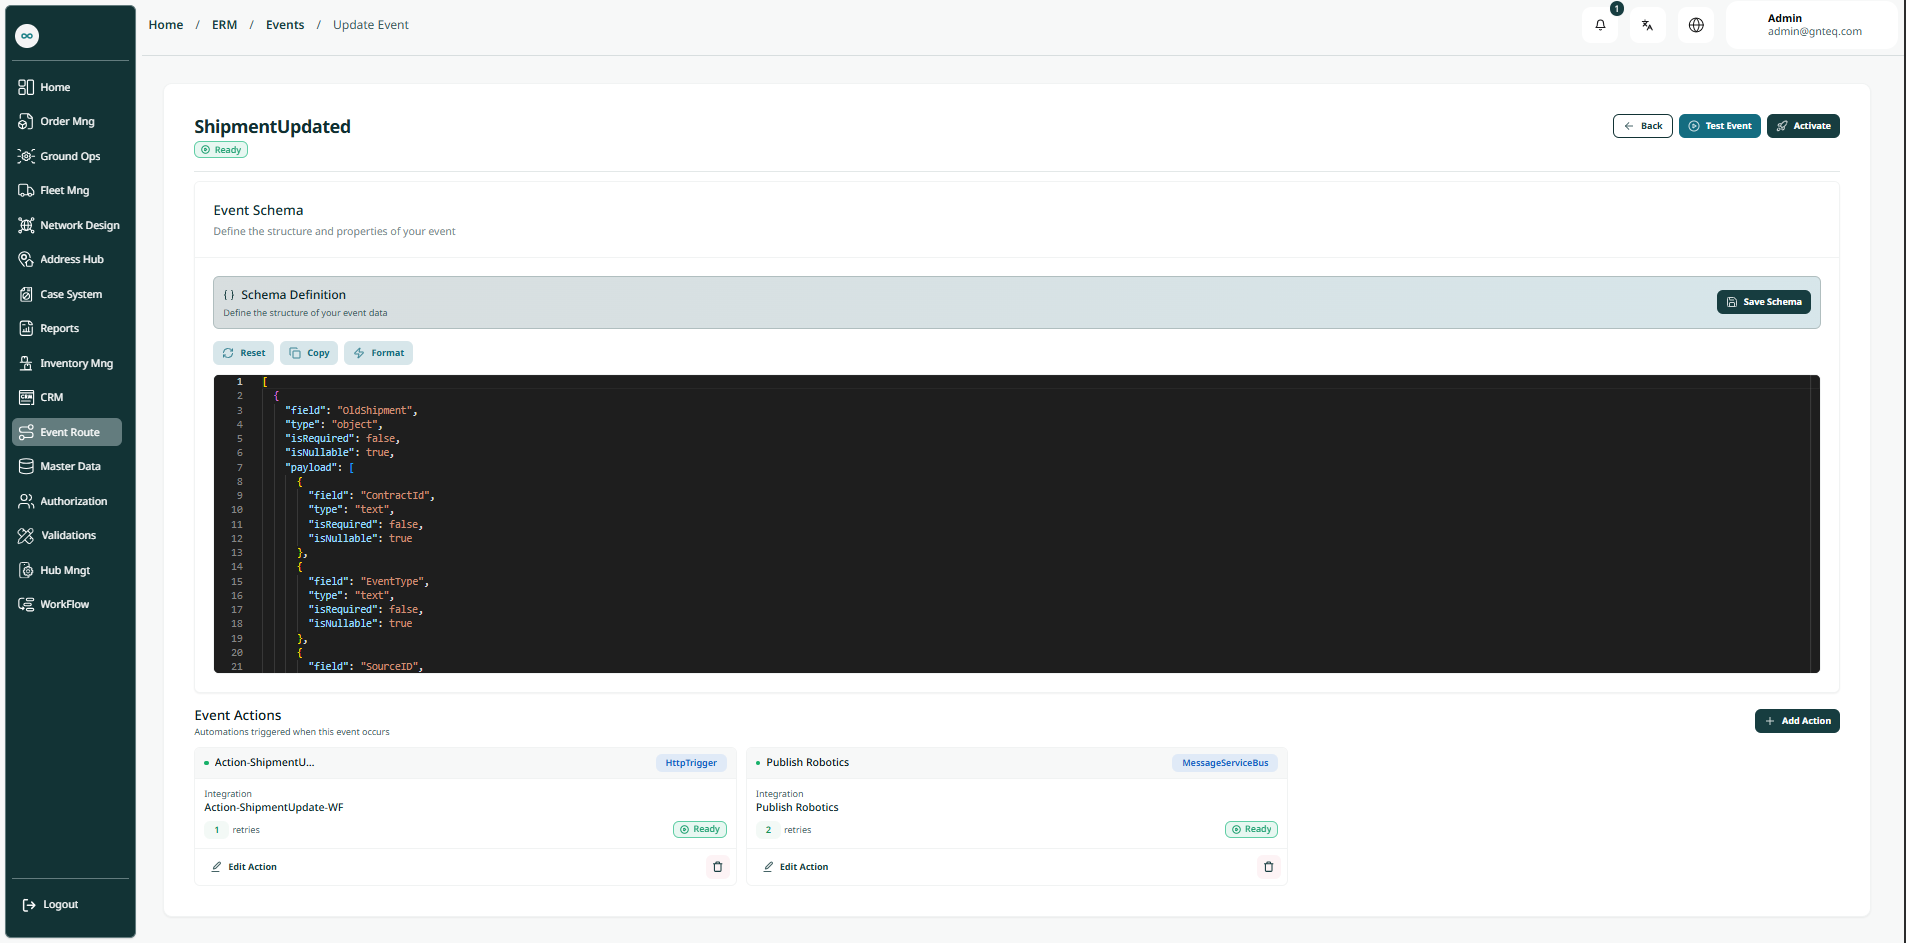
The user can edit an existing event by navigating to the ‘Validations Management’ screen via the Event Route and clicking on Edit Event button:
2.1.1 Activate
The user can activate an existing event in the system by going to the “Validations Management” screen via the Event Route module, clicking on the Edit button from the Actions, and then clicking on Activate as follows:
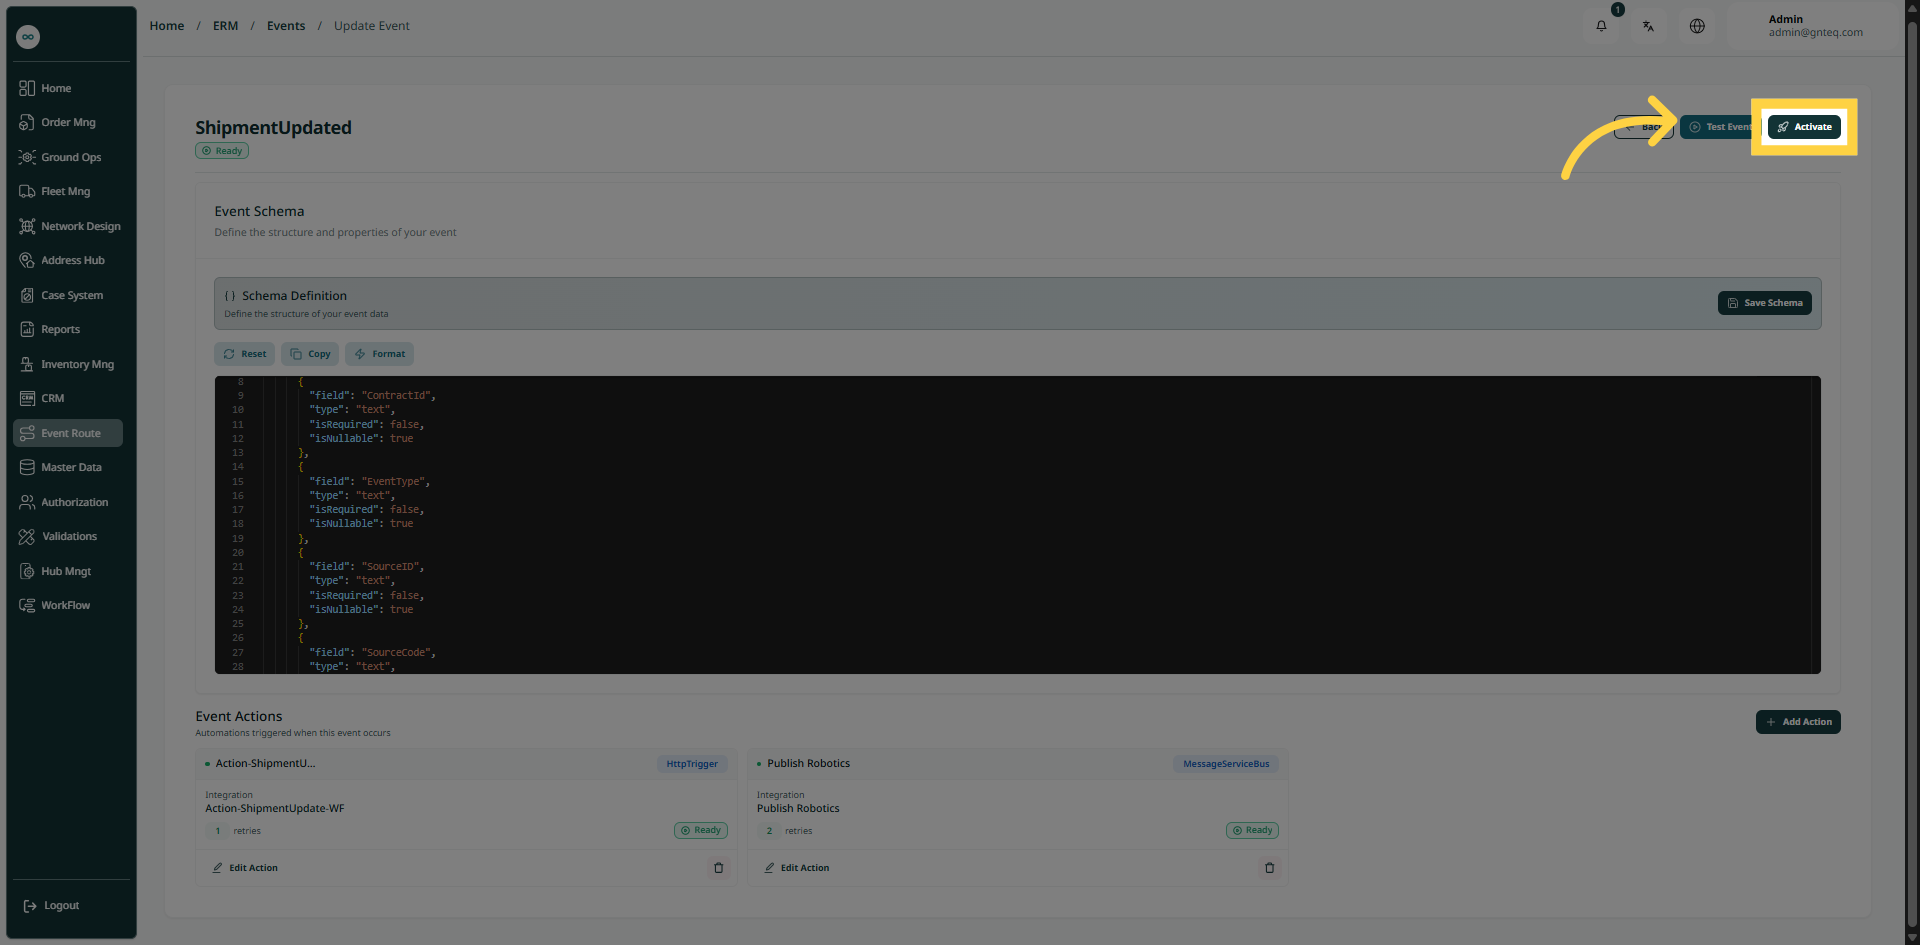
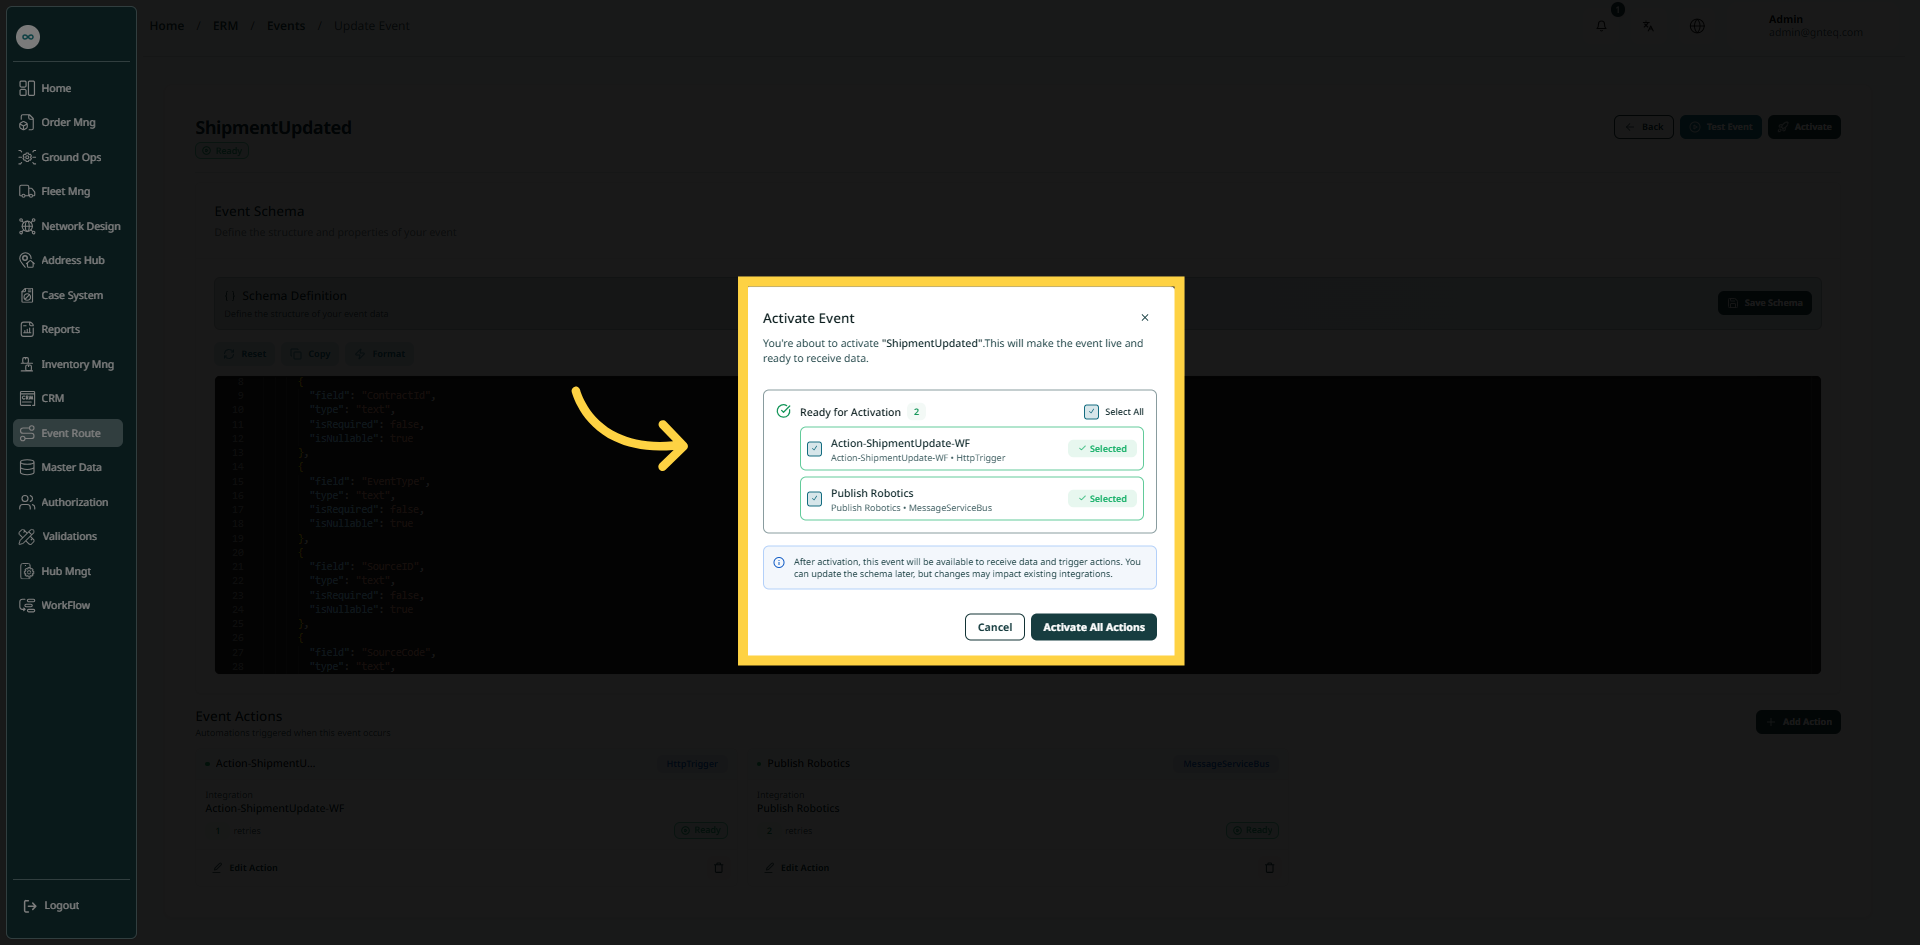
By clicking on Activate All Actions, the event will be activated successfully.
2.1.2 Test Event
The user can test the event that has been added to the system by going to the “Validations Management” screen via the Event Route module, clicking on the Edit button from the Actions, and then clicking on Test Event as follows:
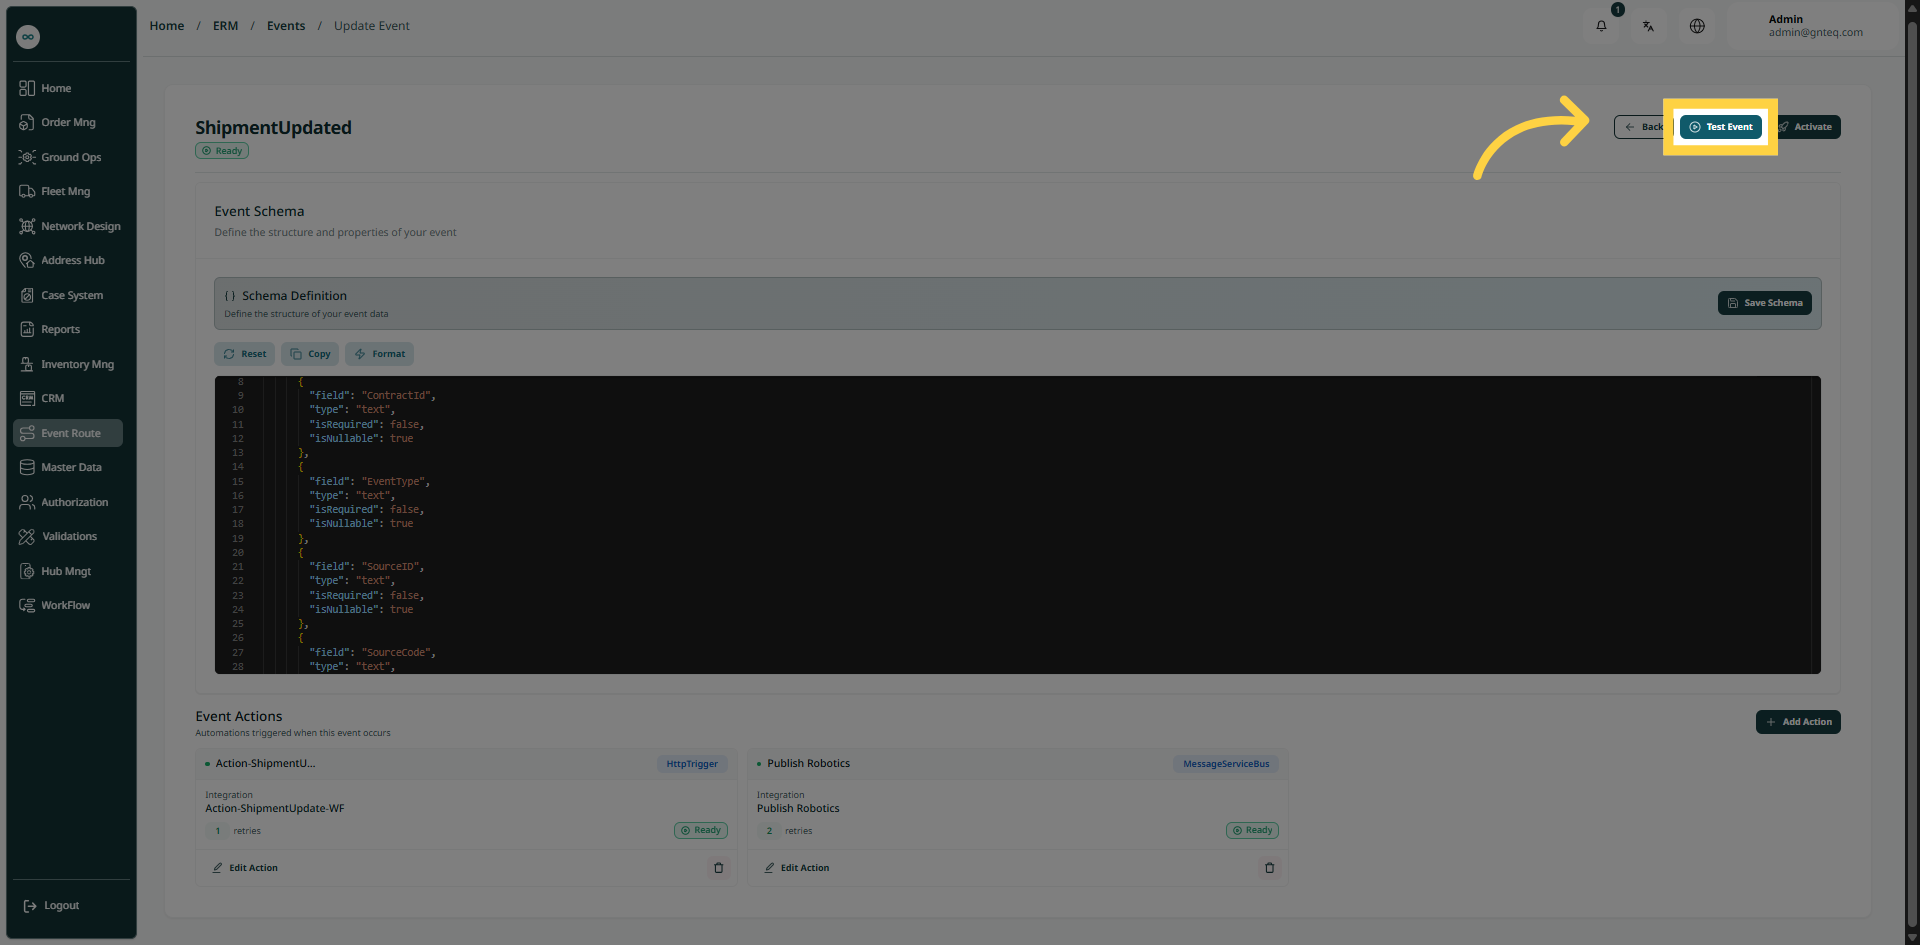
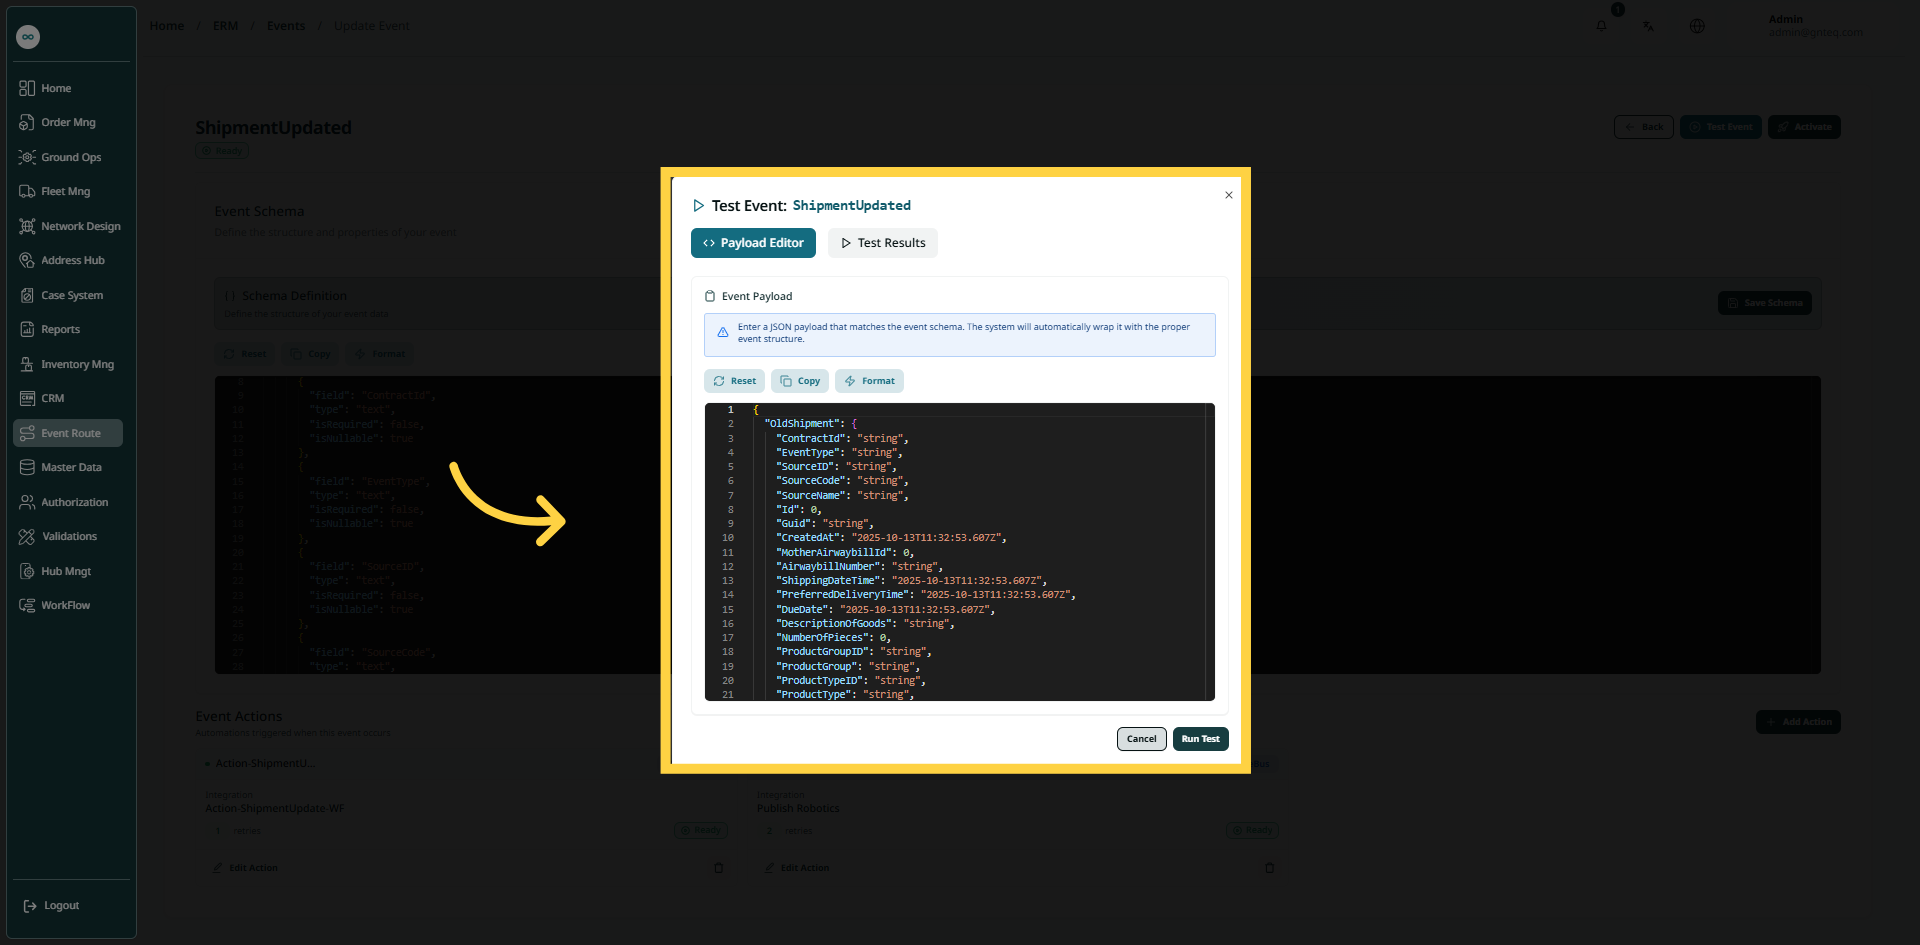
By clicking on Run Test, the event will be tested successfully.
2.1.3 Add Action
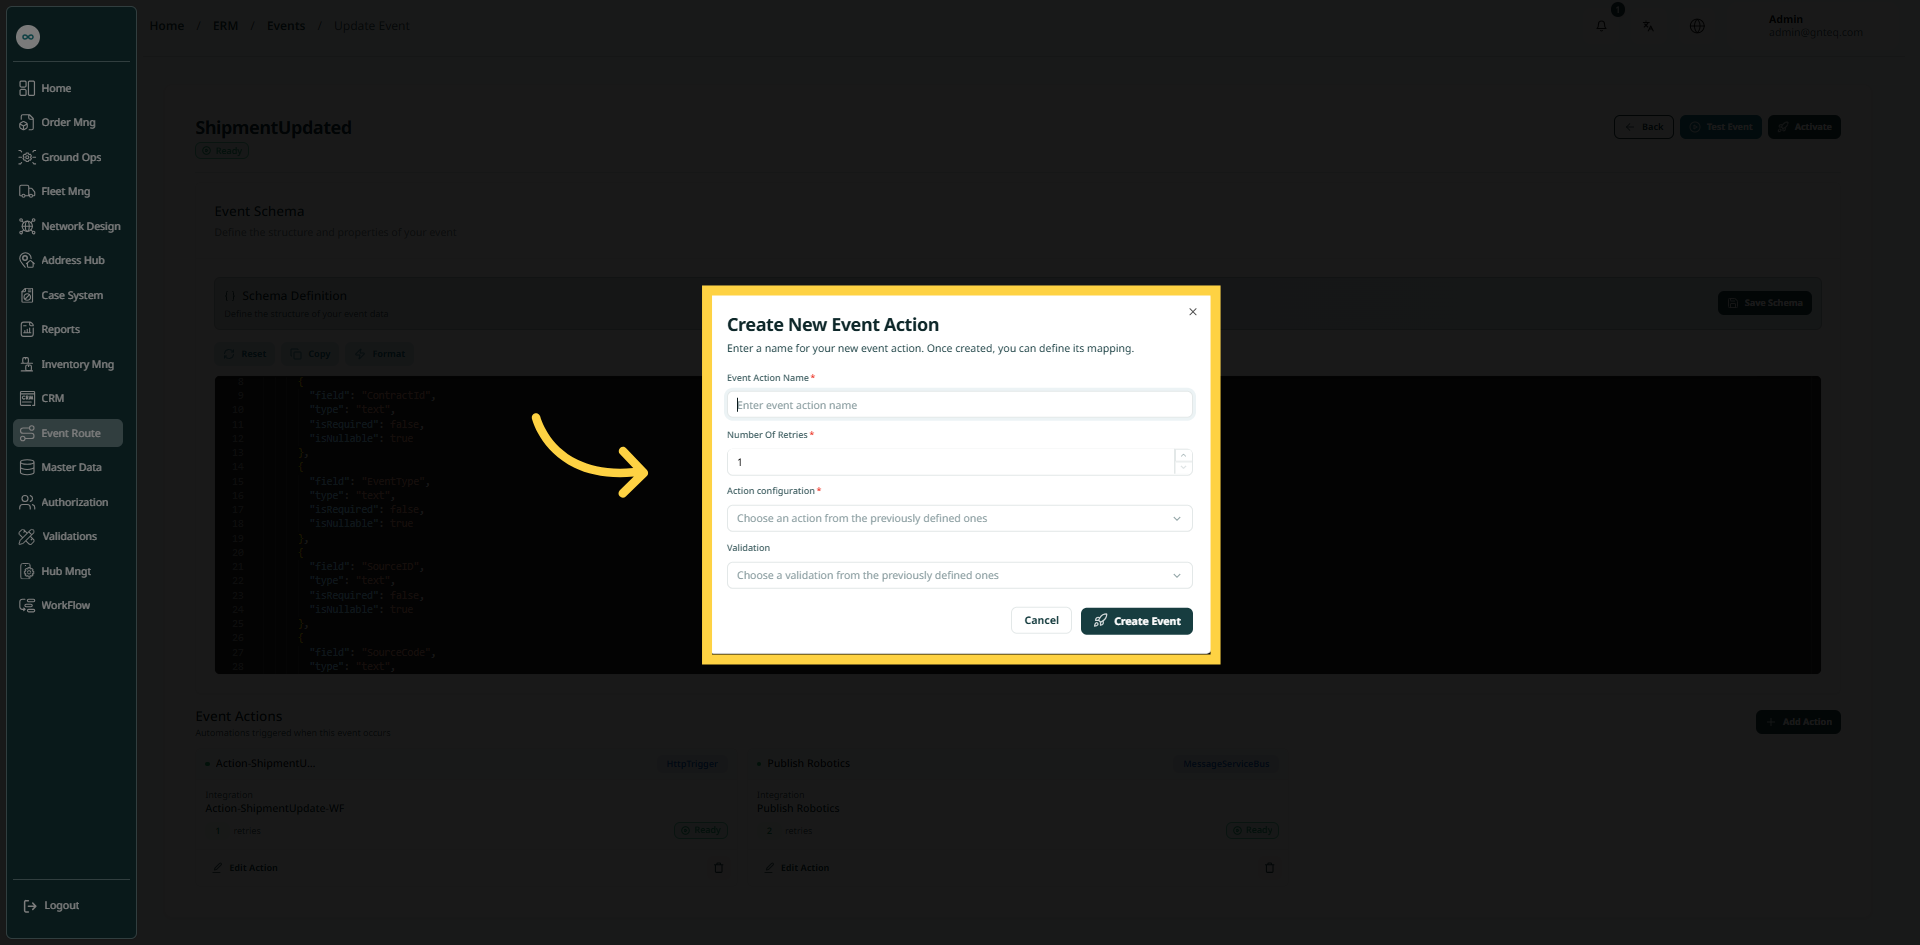
The user can add a new action by going to the “Validations Management” screen via the Event Route module, clicking on the Edit button from the Actions, and then clicking on Add Action as follows:
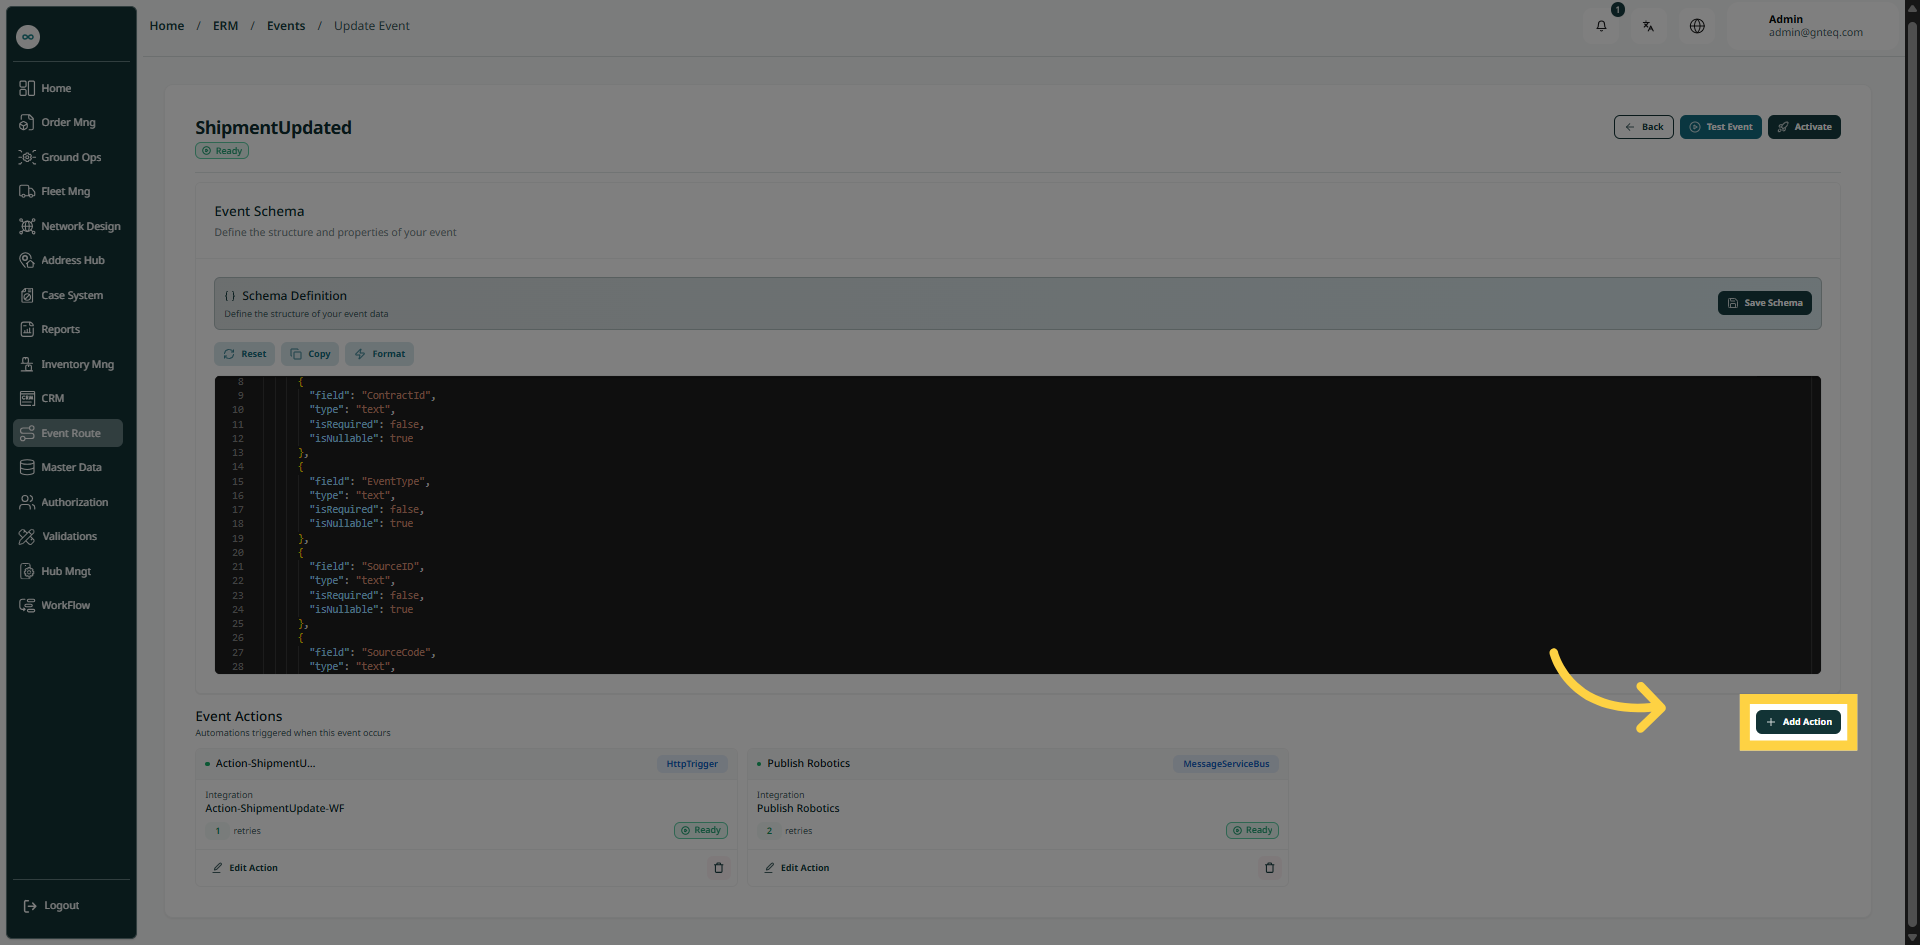
-
Event Action Name: this field represents the name of the action associated with the event.
-
Number of Retries: this field represents the number of retry attempts.
-
Action Configuration: this field represents the name of the action, which is one of the actions defined in the system.
-
Validation: this field represents the name of the validation, which is one of the validations defined in the system.
By clicking on Create Event, the system will successfully create a new event action.
2.2 Delete Event
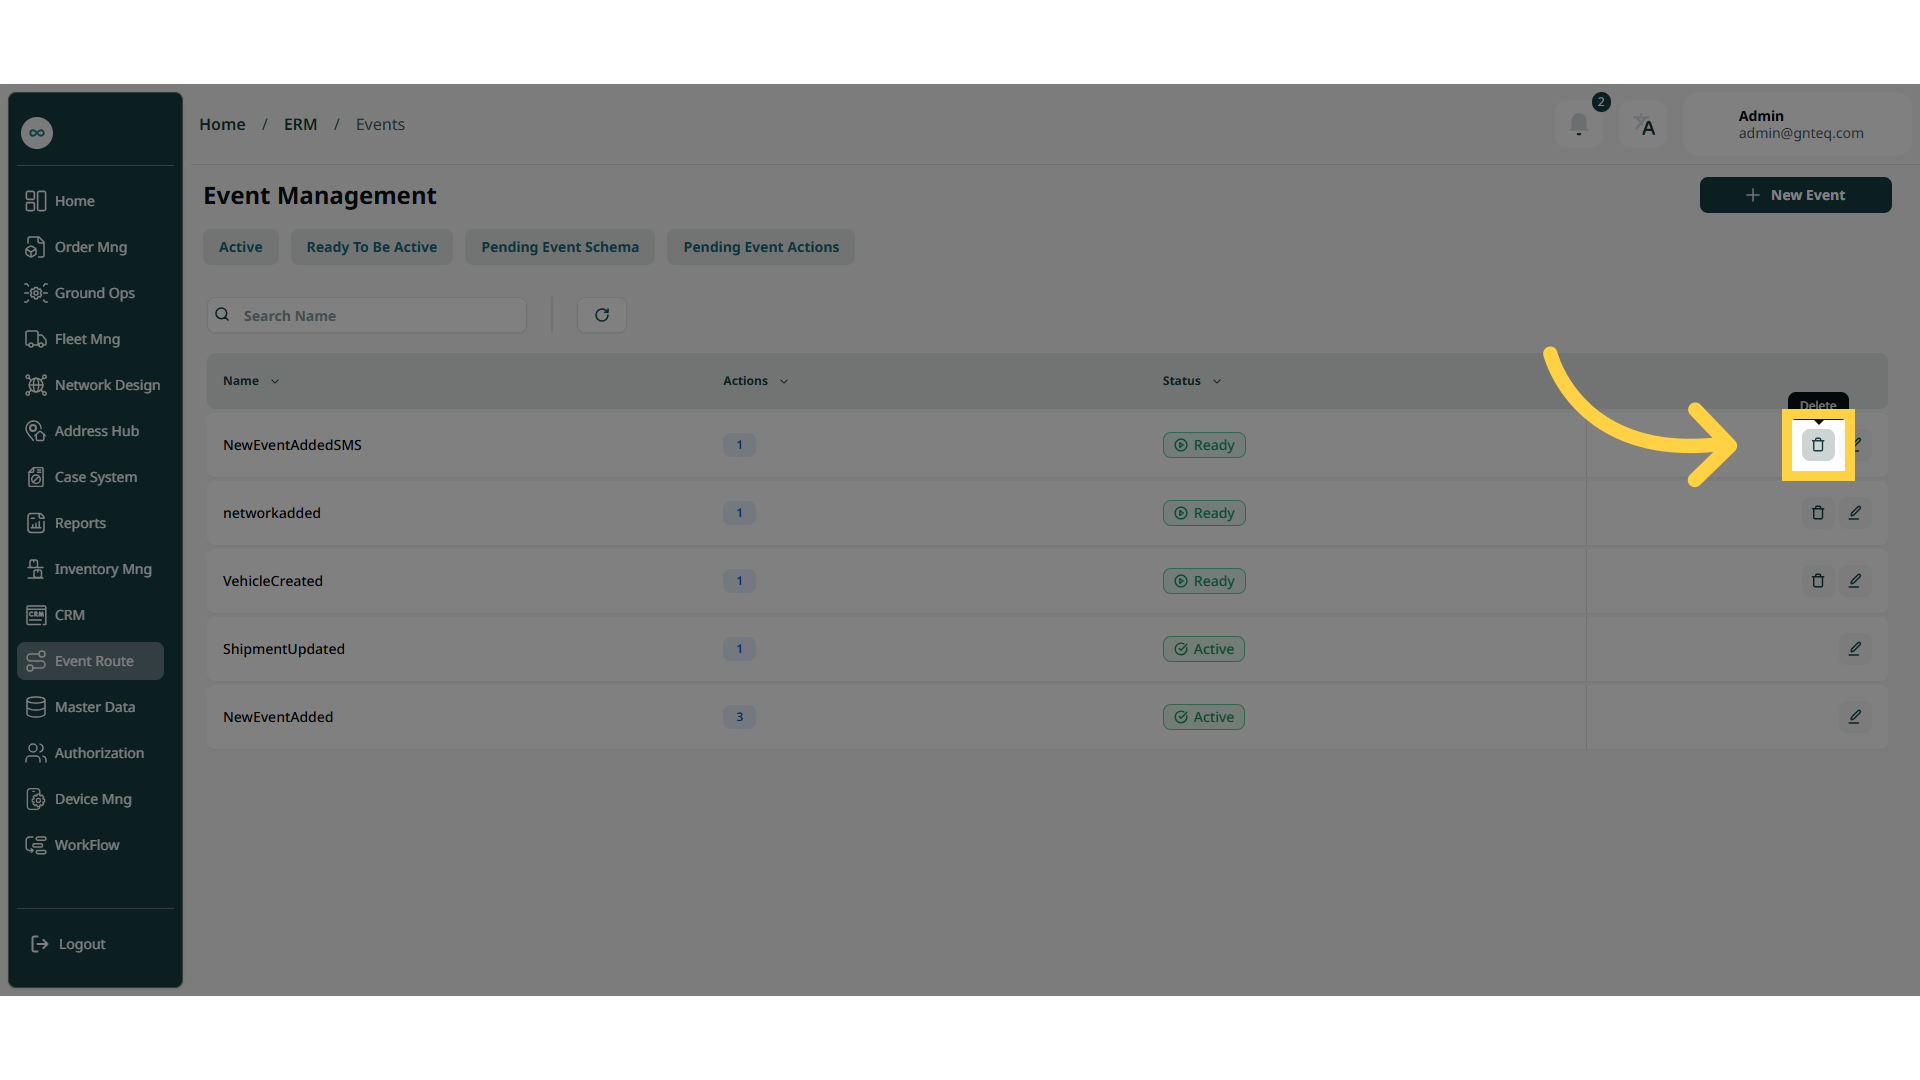
The user can delete an existing event by navigating to the ‘Validations Management’ screen via the Event Route and clicking on the Delete Event button:
2.3 Add New Event
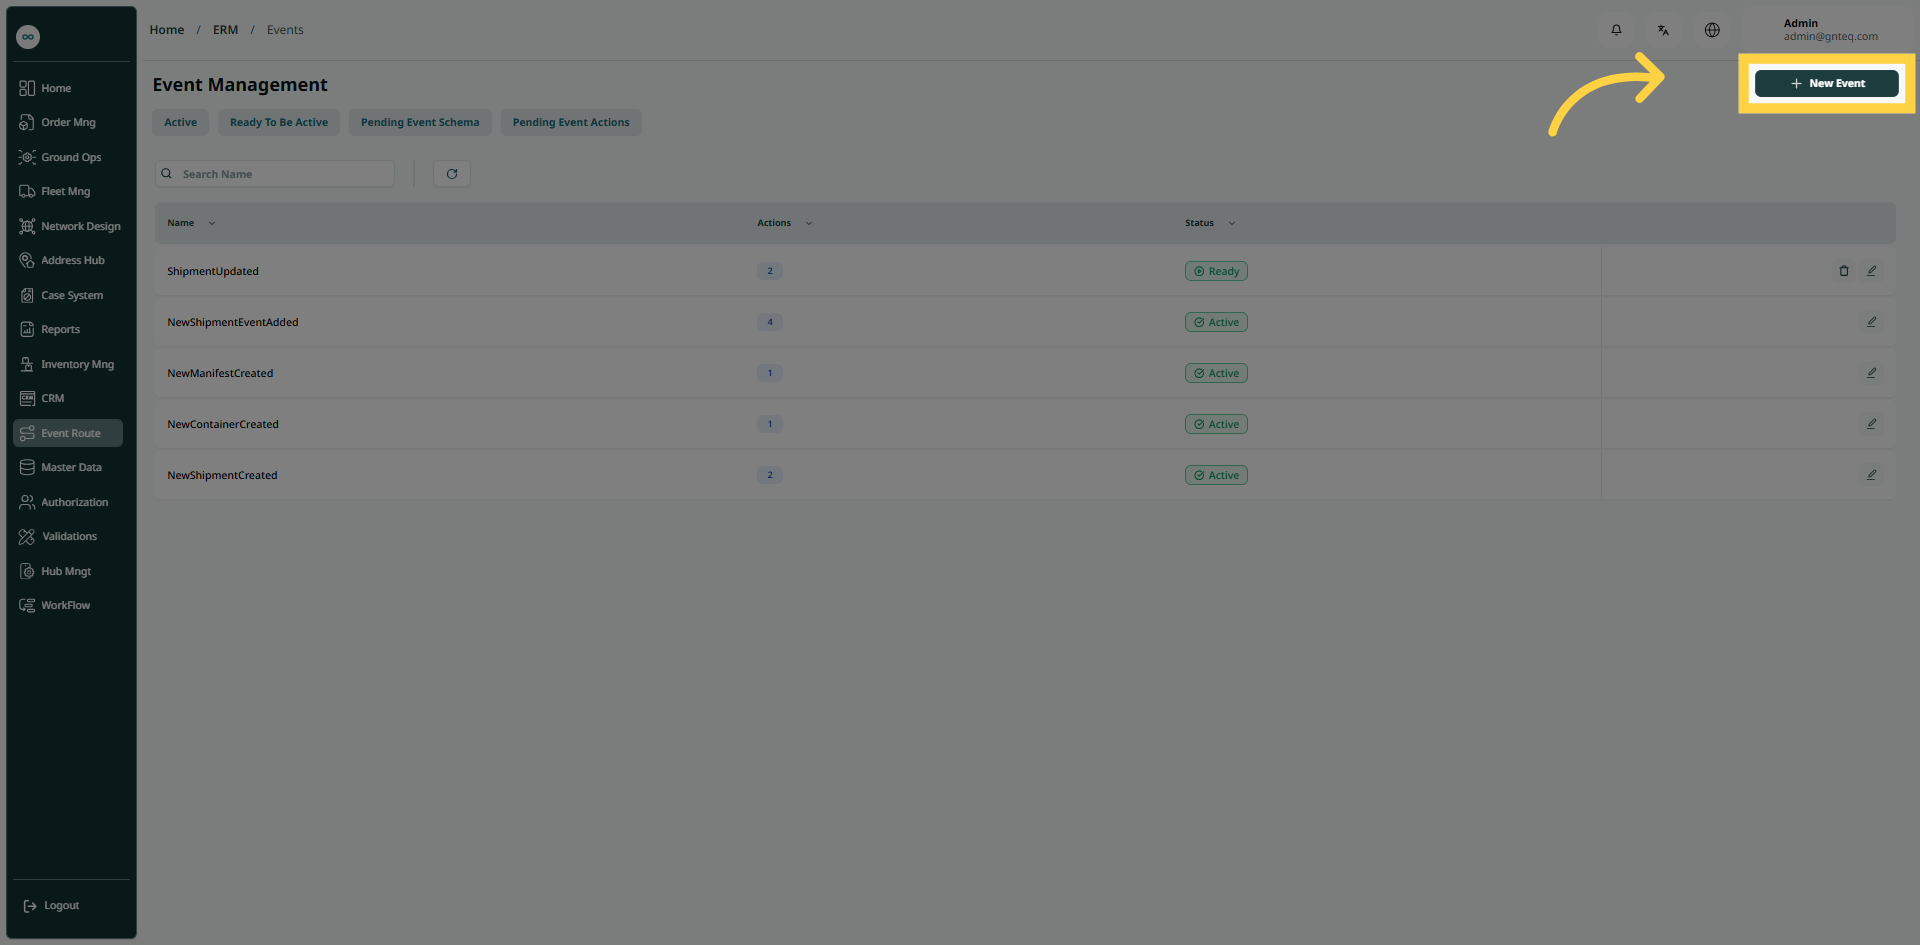
The user can add a new event to the system by clicking the Create Event button, by going to the “Event Management” screen via the Validations module.
-
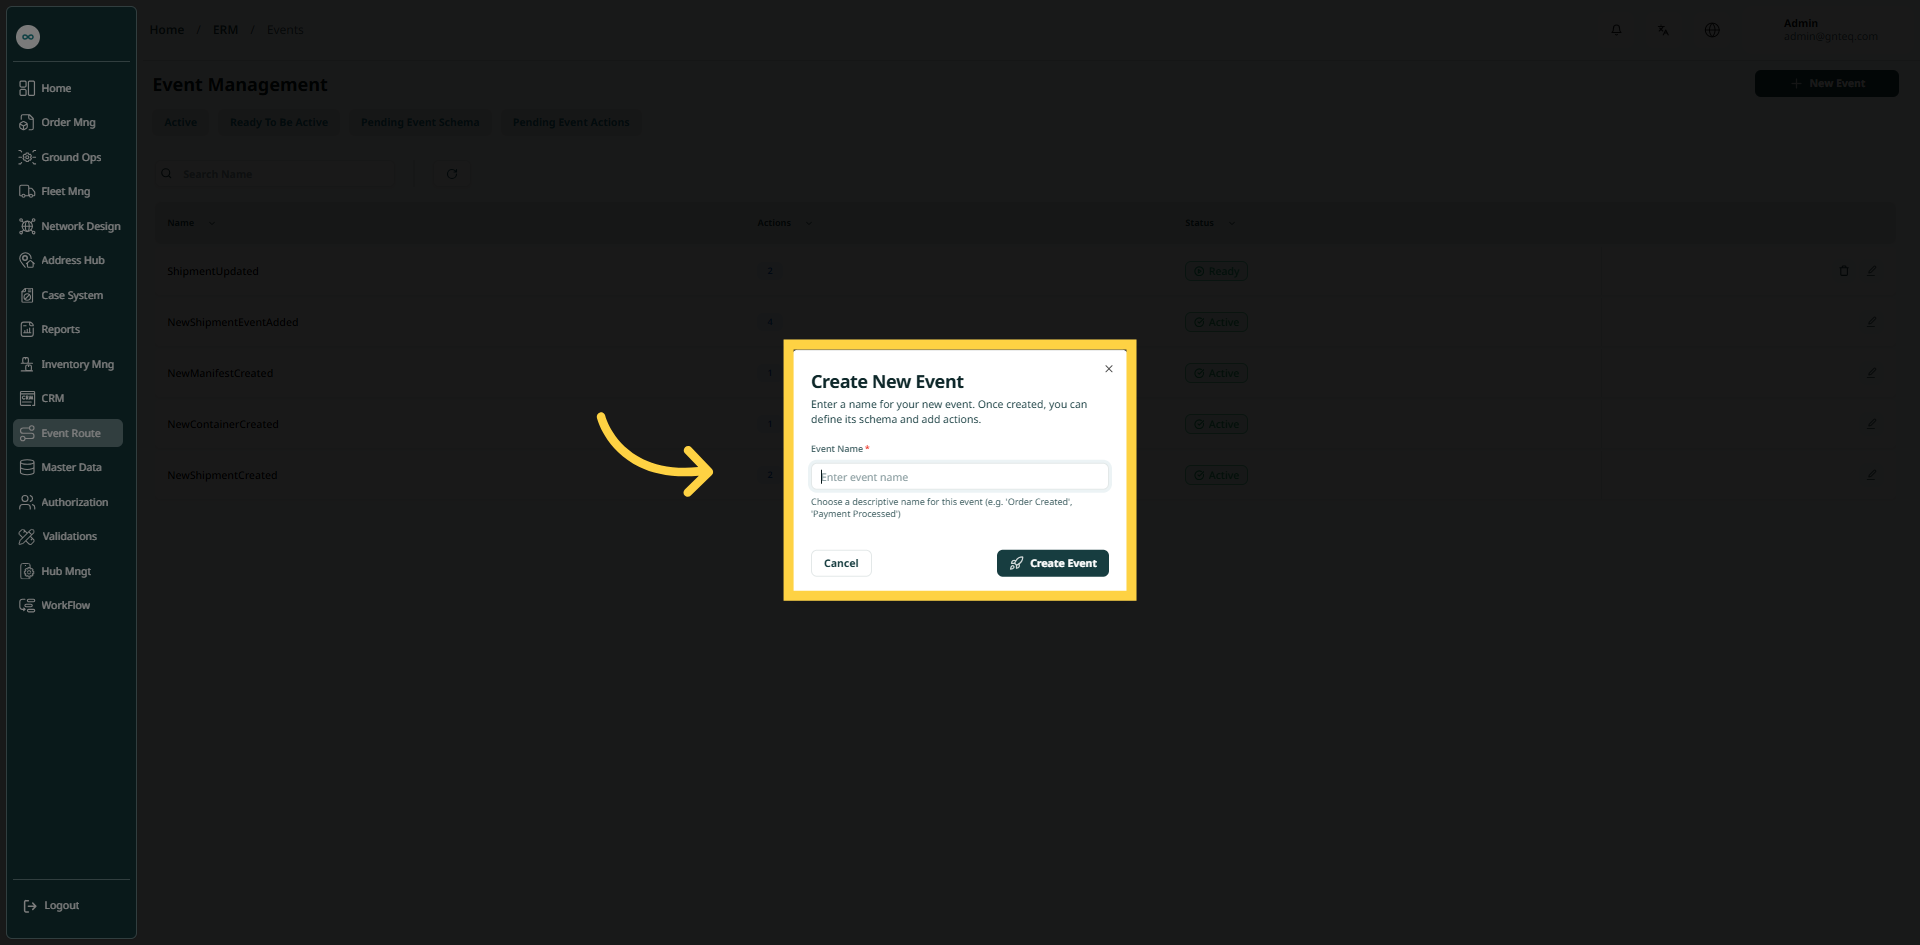
Event Name: this field represents the name of the event that will be added to the system.
By clicking on Create Event, the event will be created successfully.