
1. Shipment Creation Overview
1.1 Dashboard
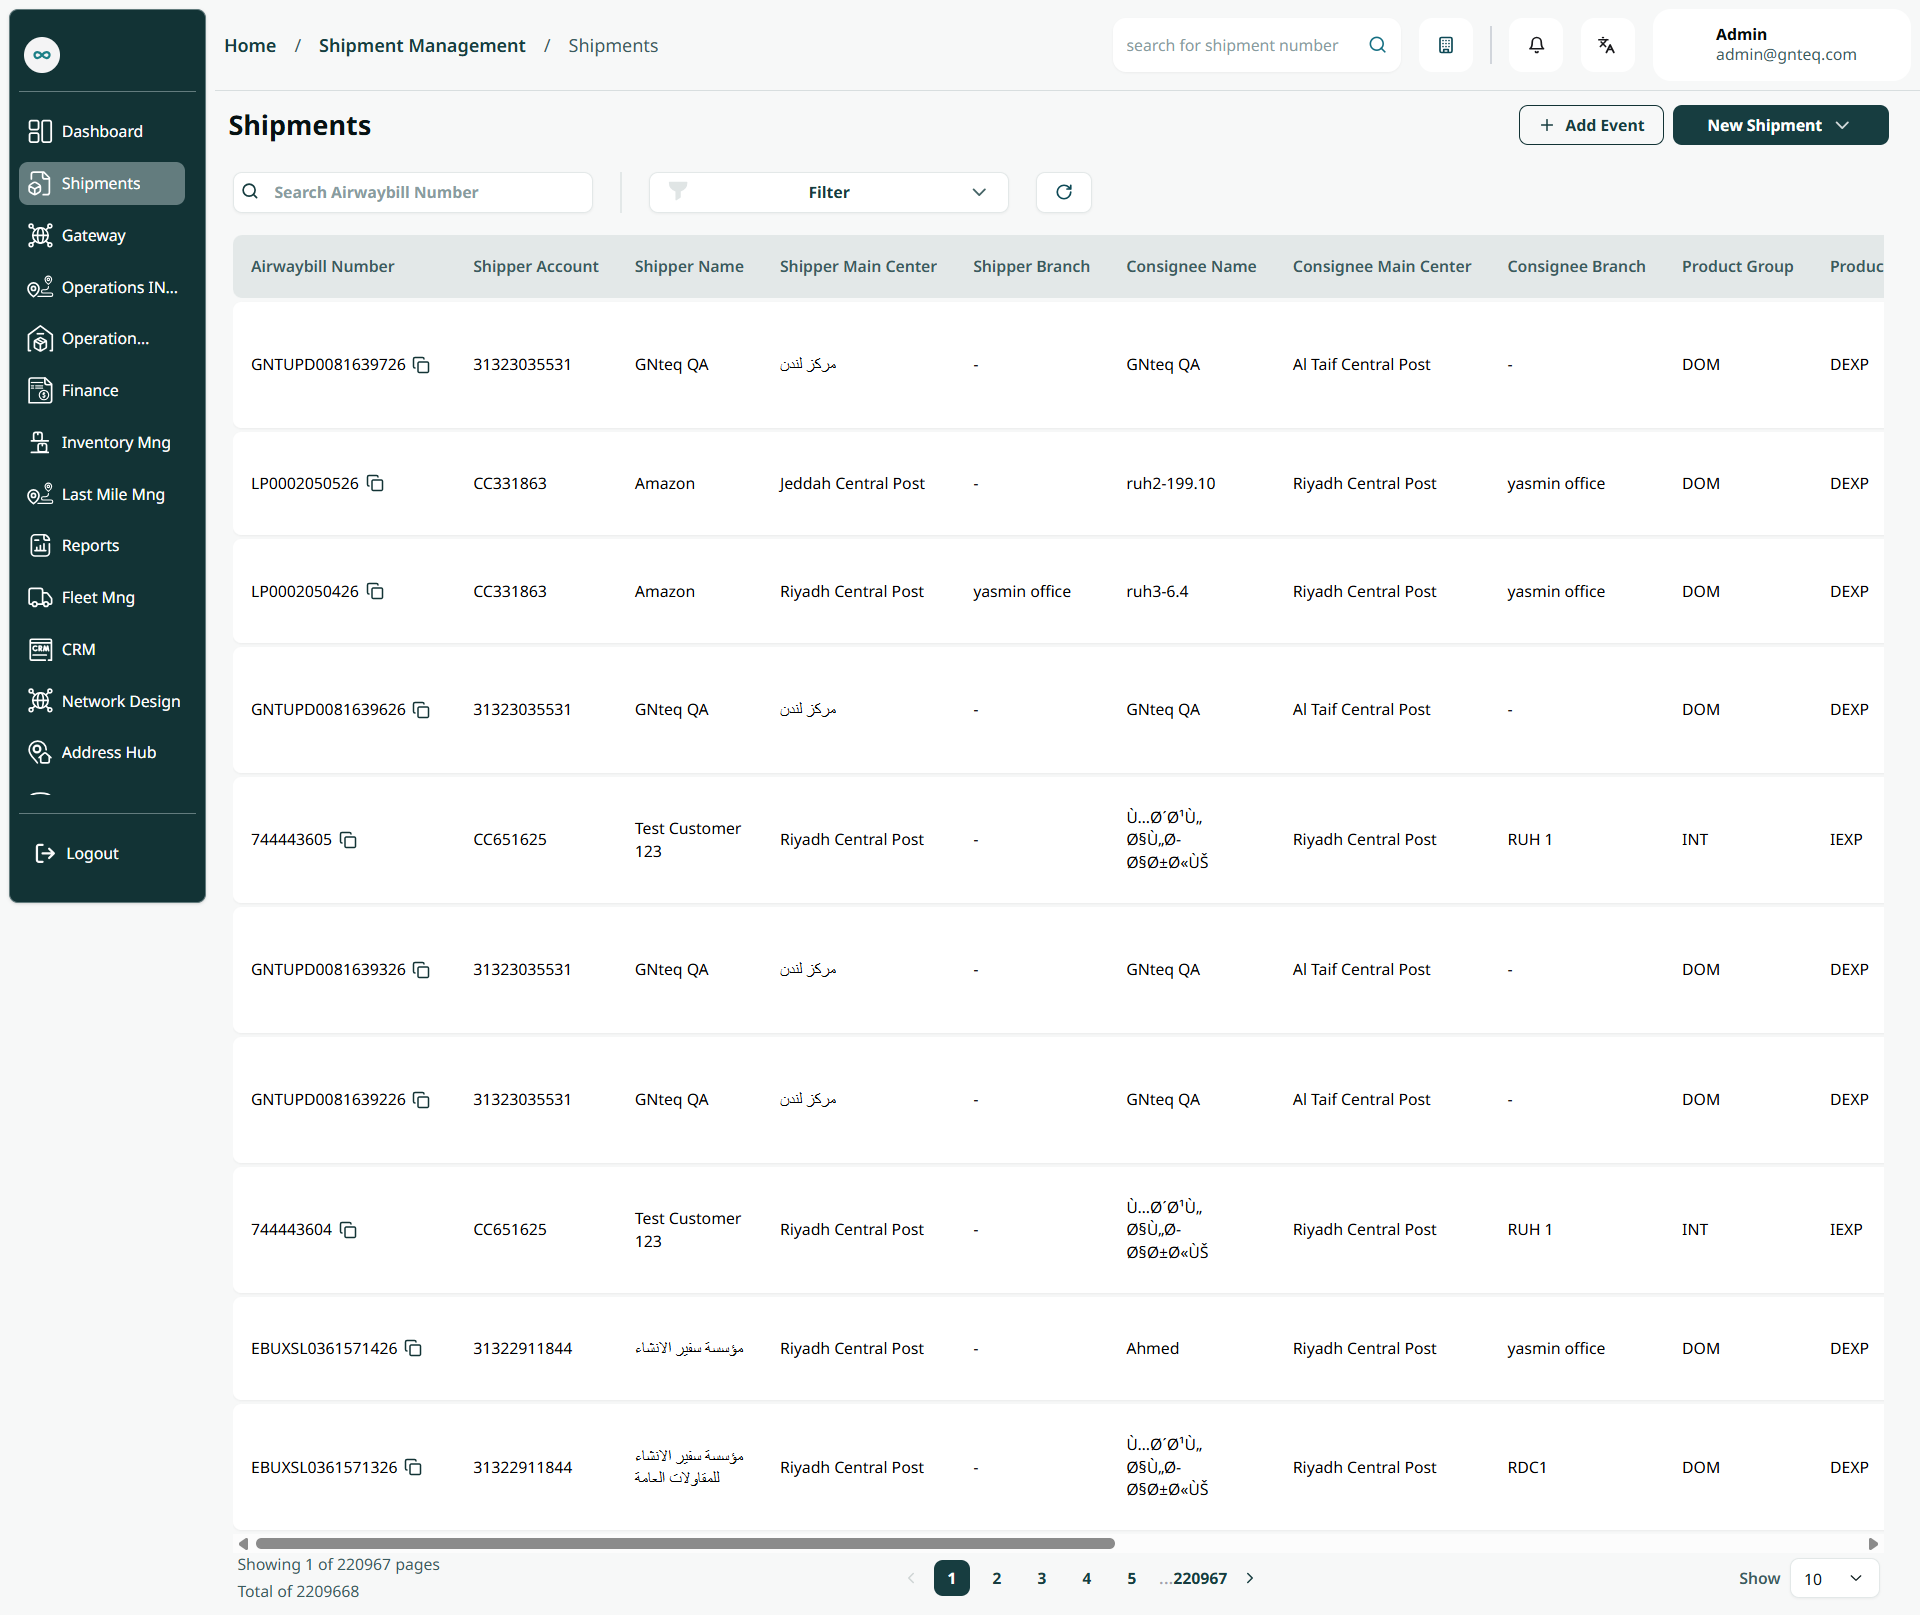
The user can view the defined shipment in the system by navigating to the ‘Shipments’ screen in the Shipment Management from the left navigation panel as follows:
-
Create Shipment: the user can add new normal shipment, maslahi, NOREG shipment by clicking on “New Shipment” button.
-
Add Event: the user add new event to the shipments be clicking on “Add Event” button.
-
Search: The user can search for shipments by entering the airwaybill number.
-
Filters: the user can search for the shipment by the shipper name, shipper main center, consignee name…….etc.
-
Rows Per Page: the user can select the number of items to show on each page.
-
Action: by clicking on this button the user can view details, edit information, edit items, delete Shipment.
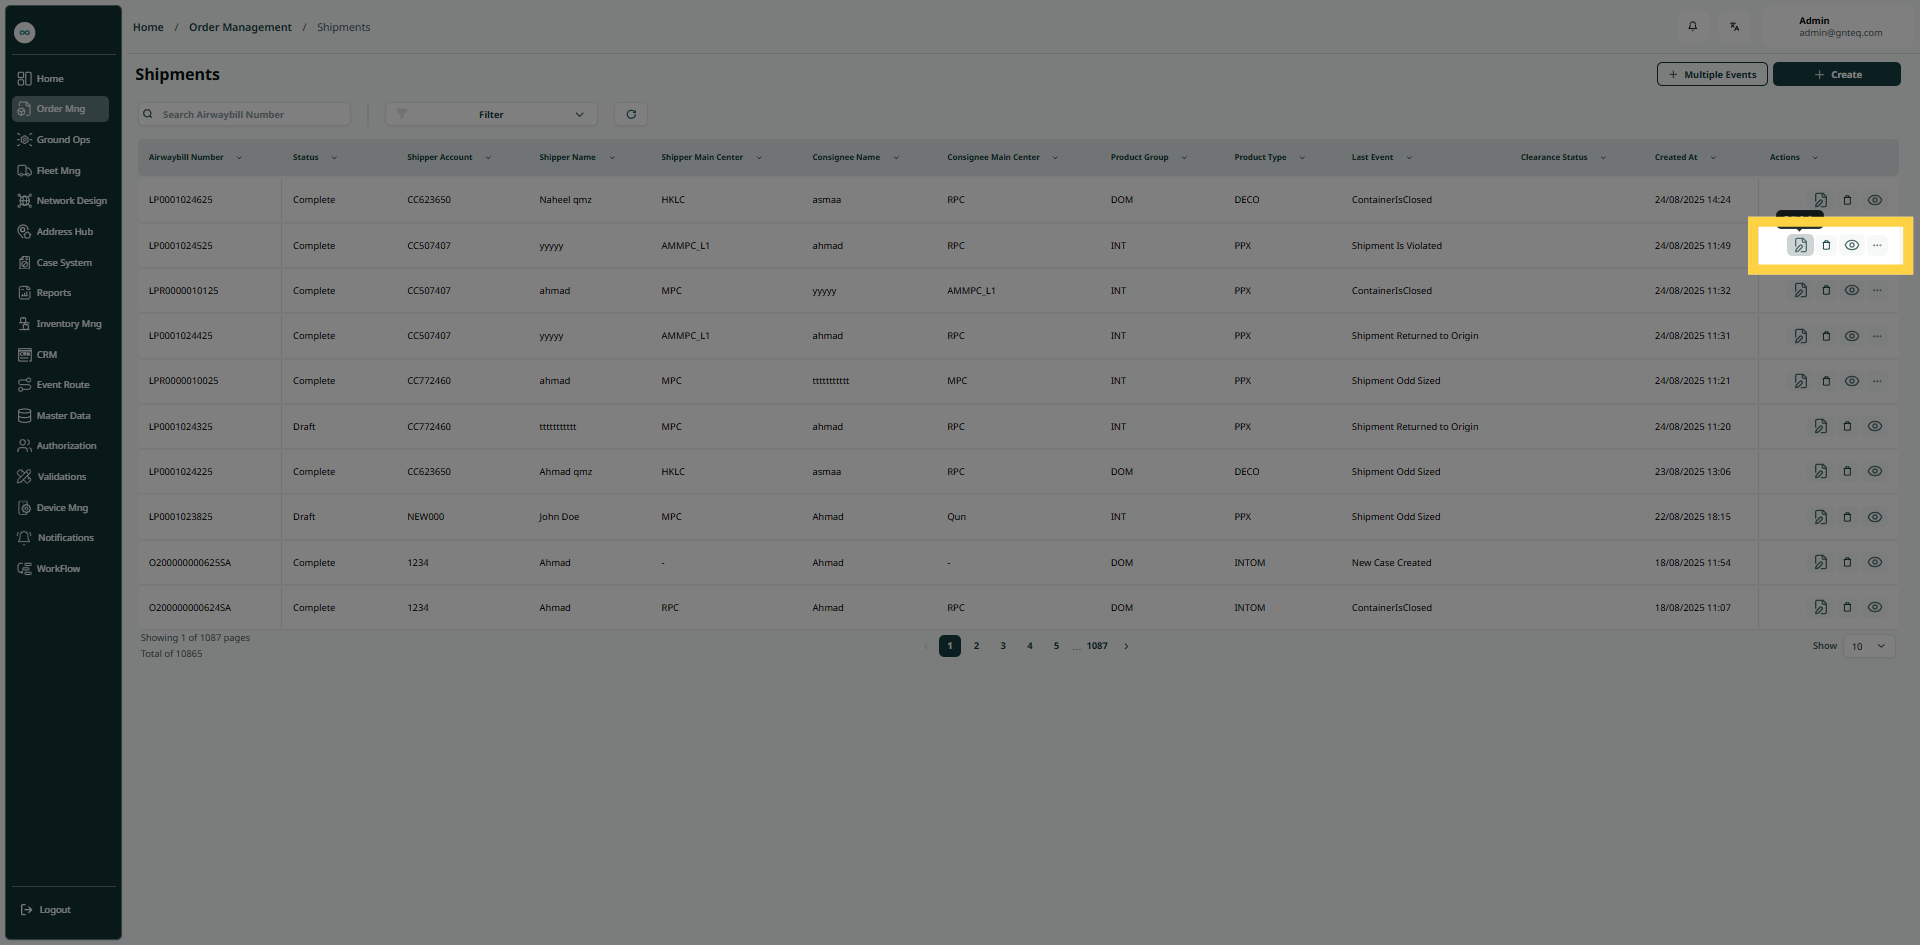
1.1.1 View Details
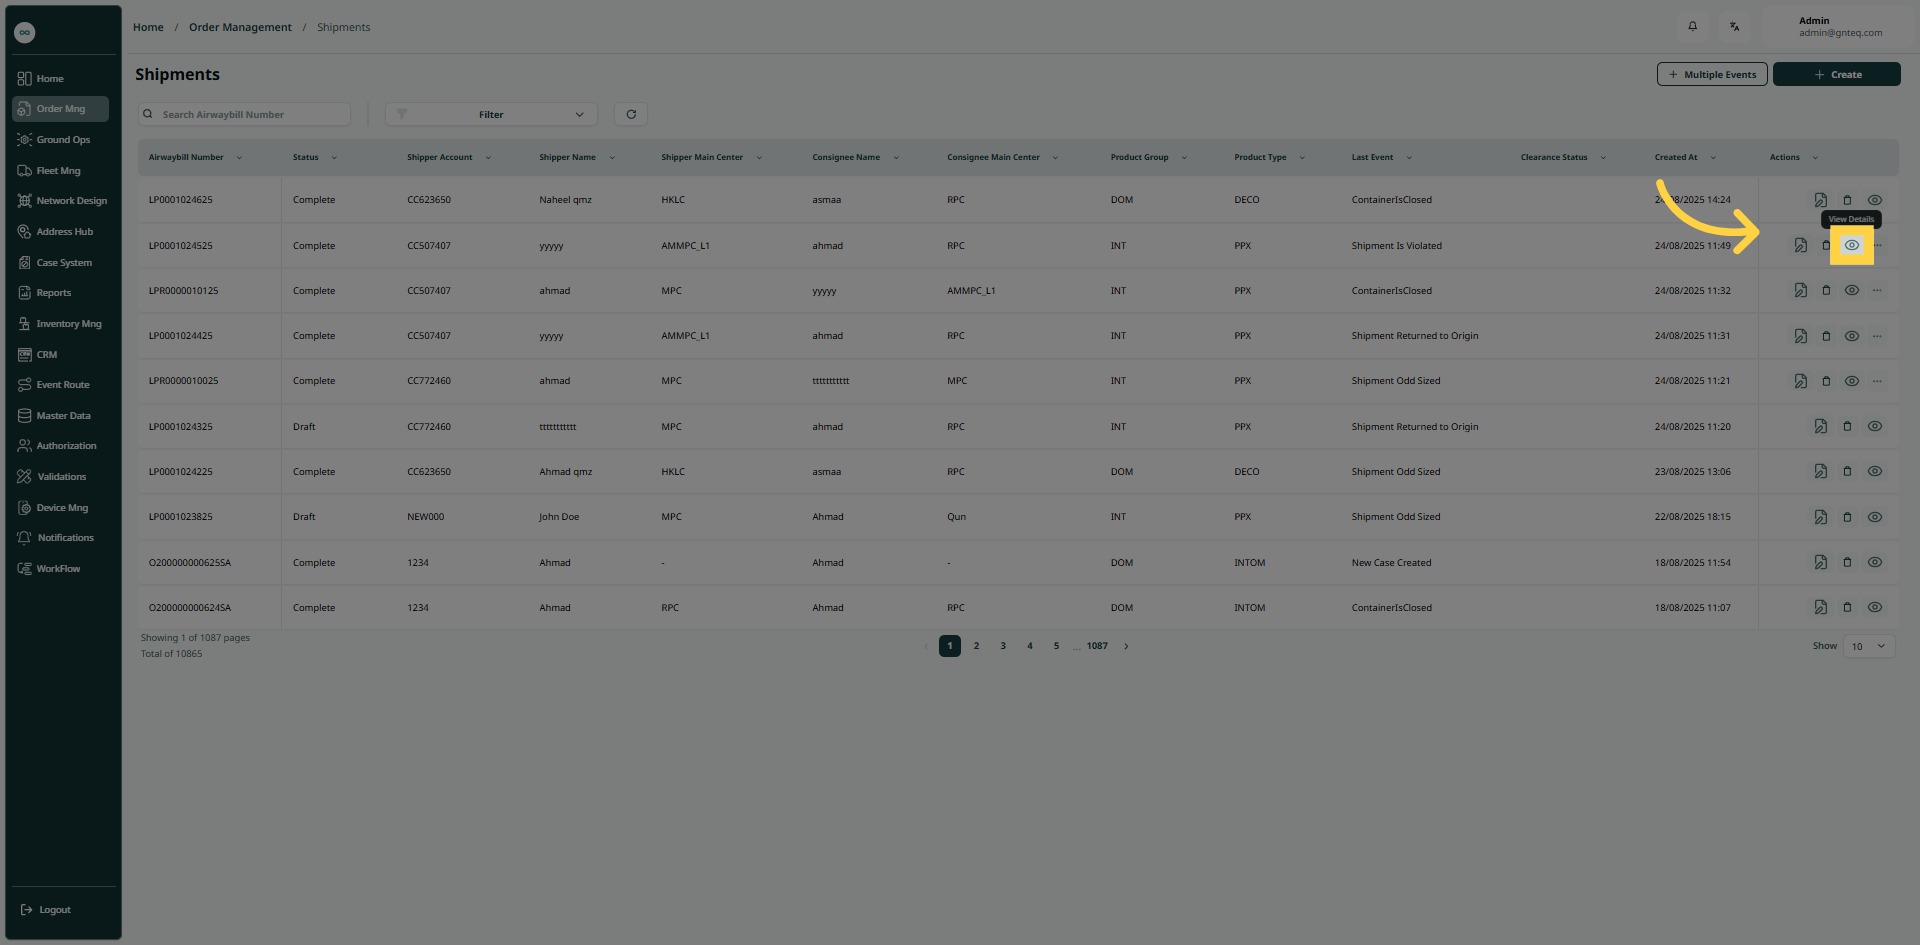
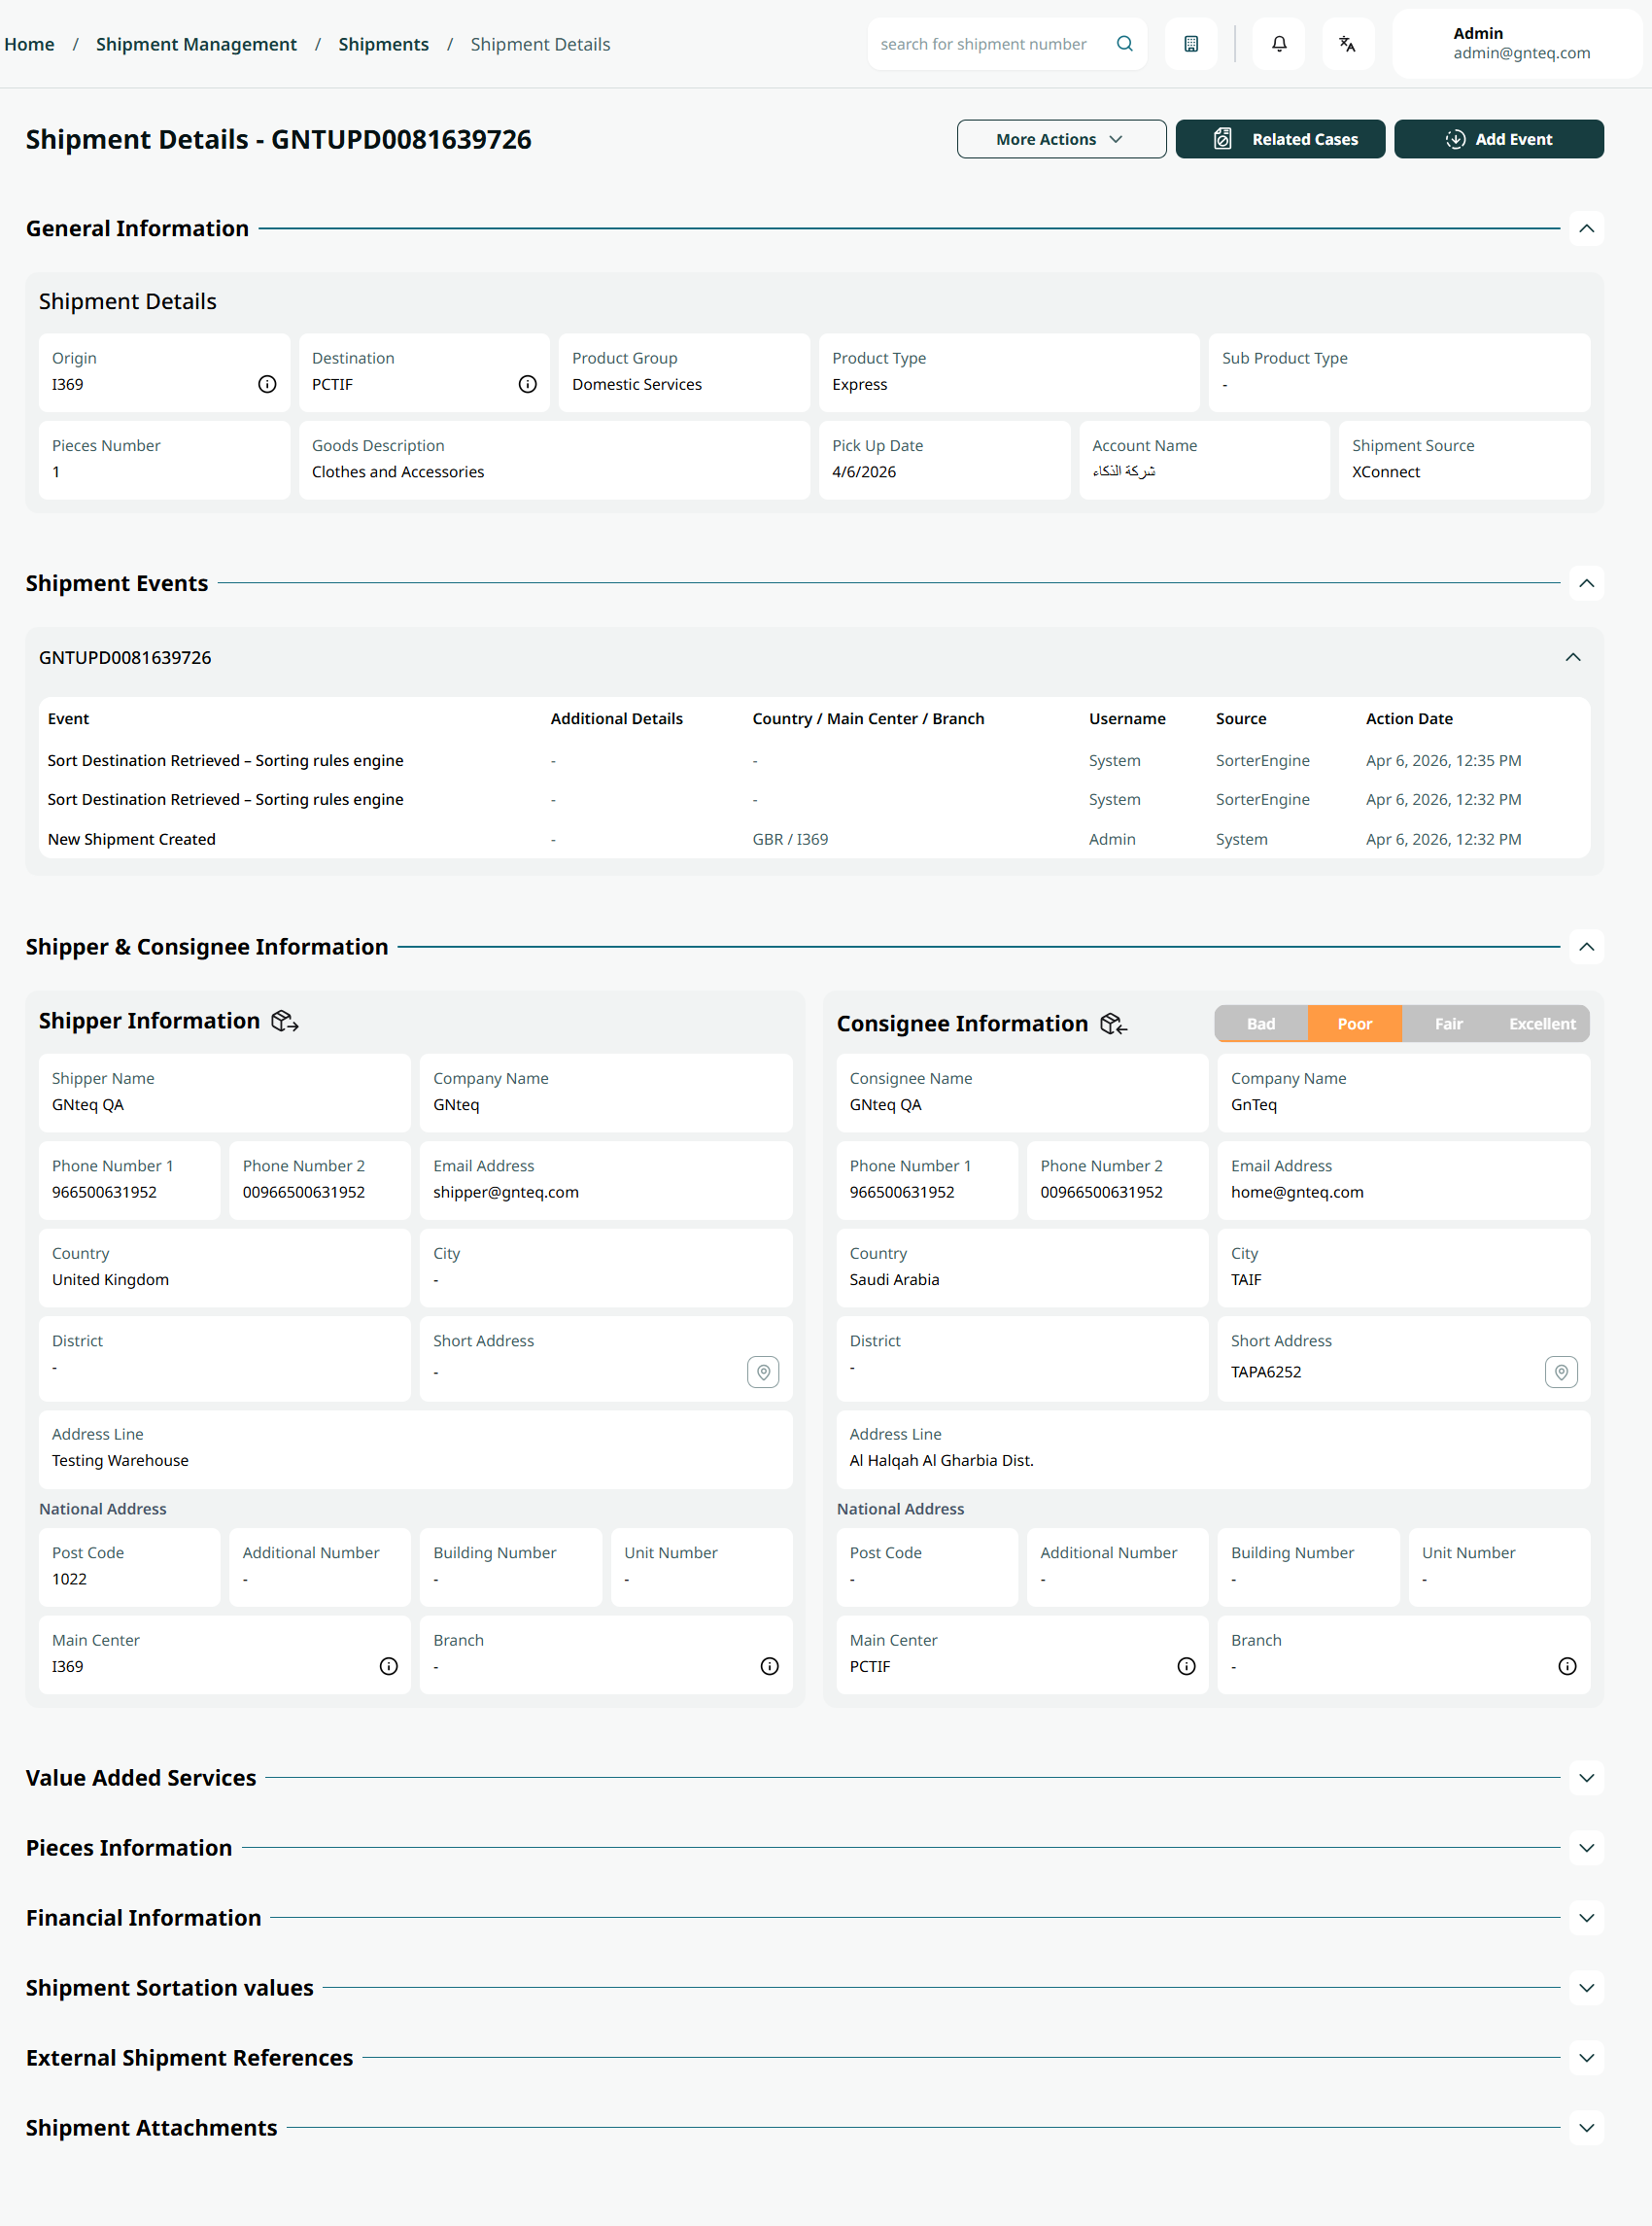
The user can view the shipment details by navigating to the ‘Shipments’ screen via the Shipment Management and clicking on View Details from Actions as follows:
1.1.1.1 More Actions
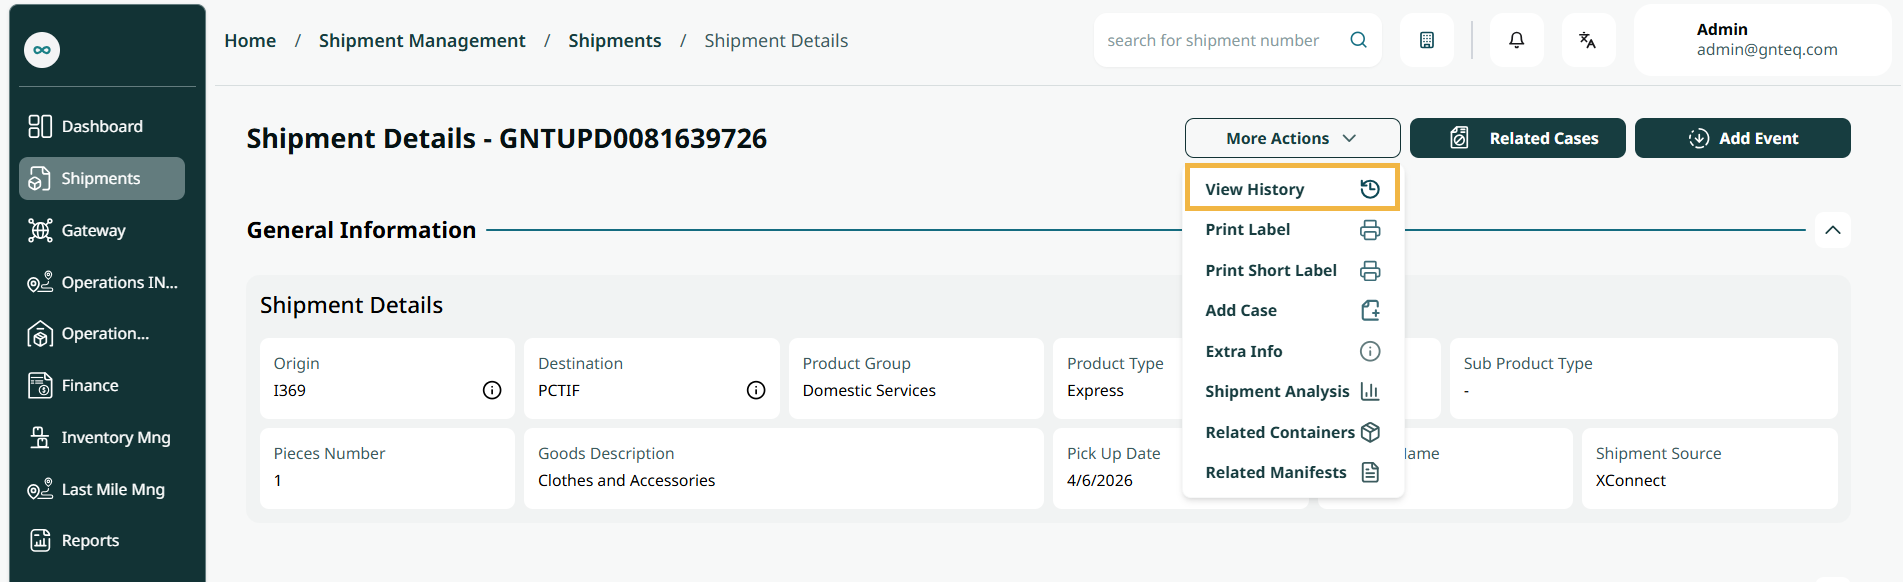
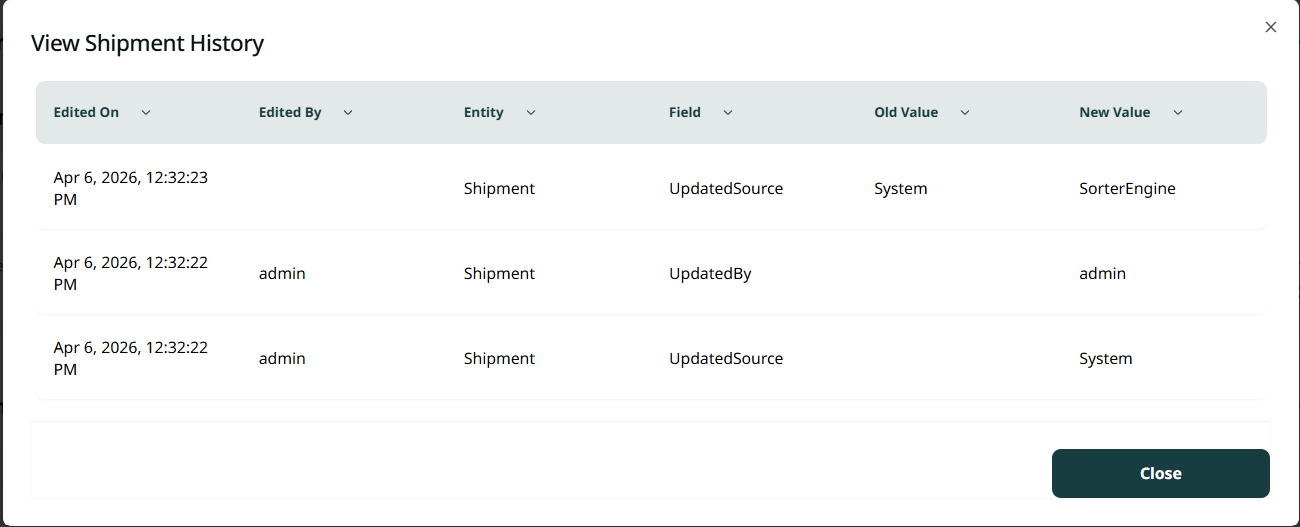
The user can view the shipment history by clicking the View History option from the More Actions menu.
-
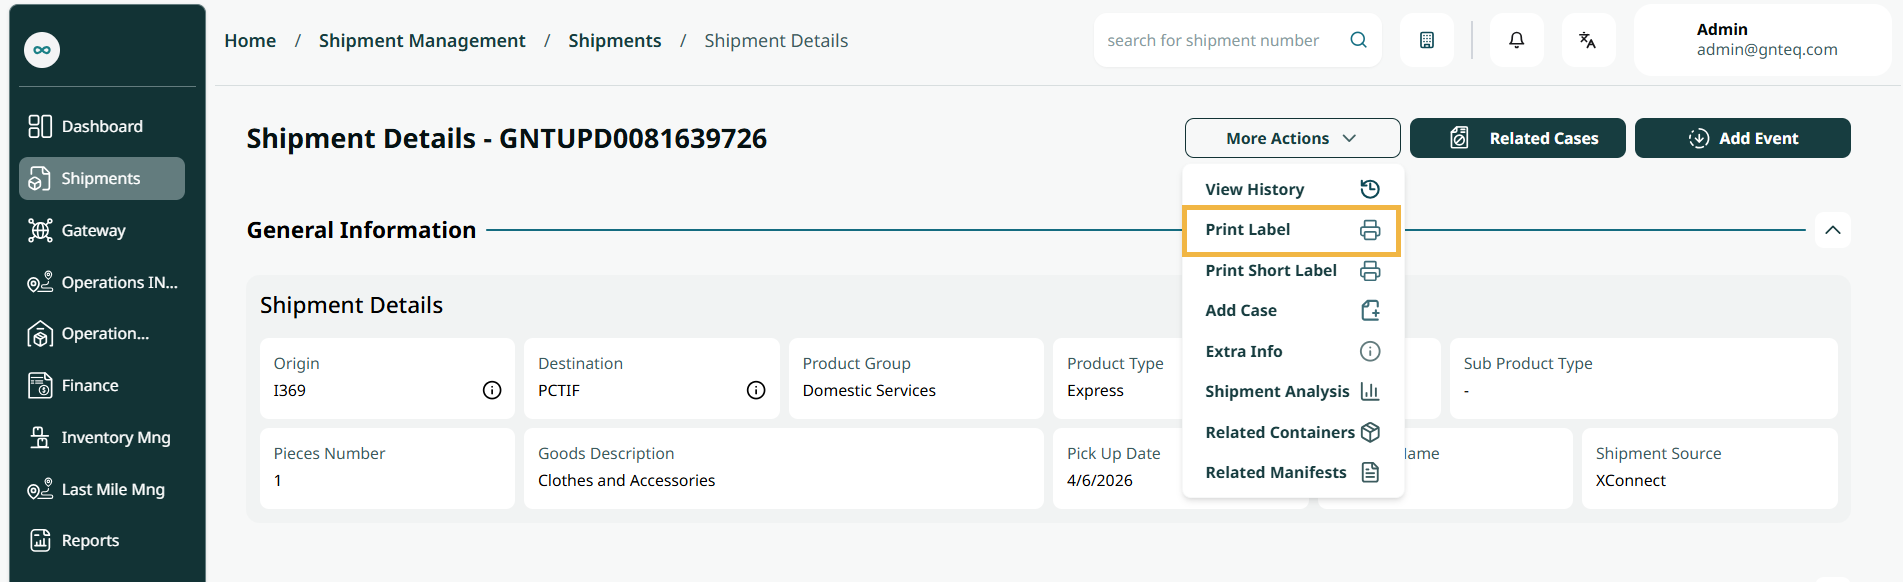
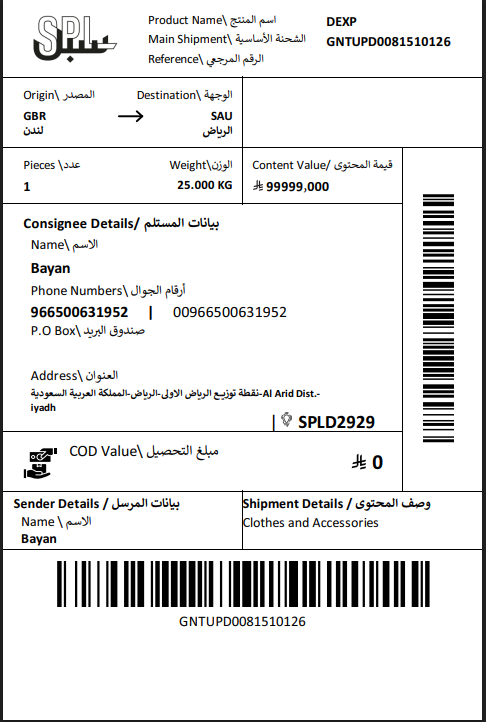
The user can print the shipment details label by clicking the Print Label option from the More Actions menu.
-
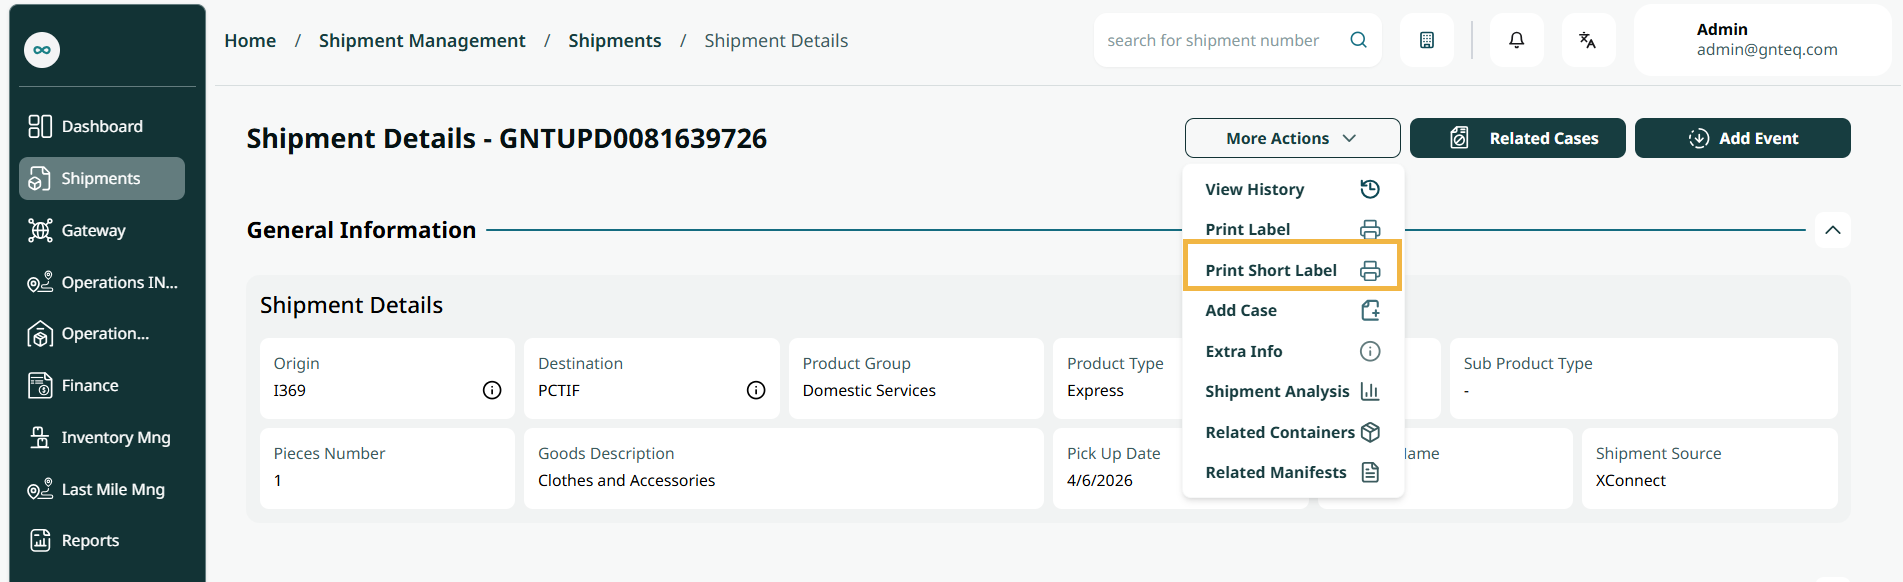
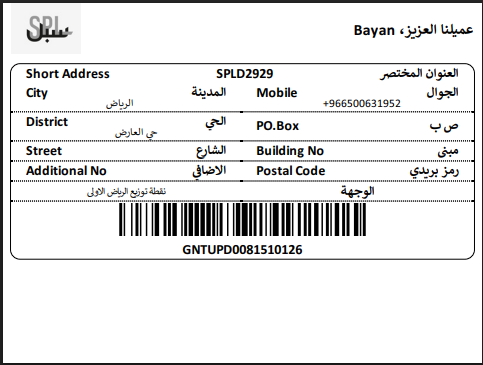
The user can print the short shipment label by clicking the Print Short Label option from the More Actions menu.
-
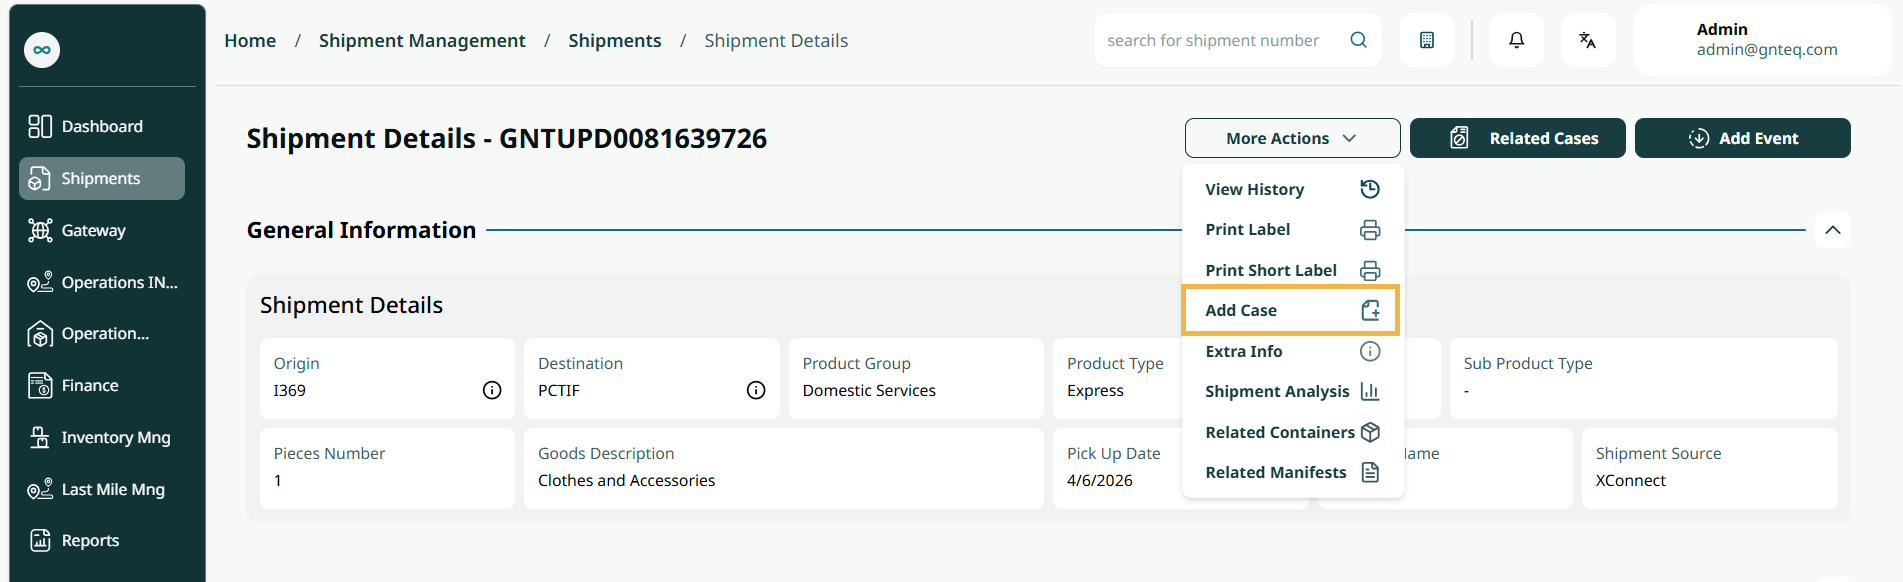
The user can register a violation by clicking the Add Case option from the More Actions menu.
-
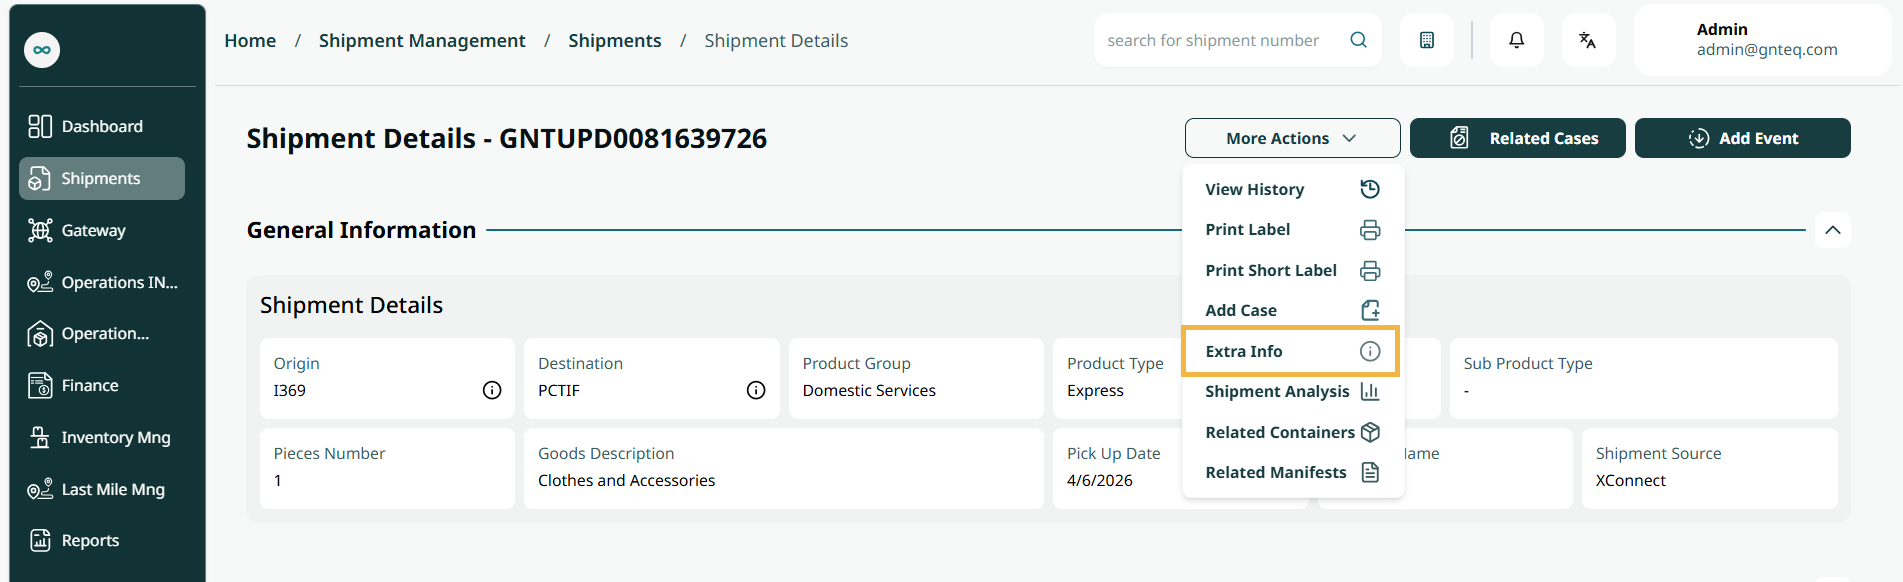
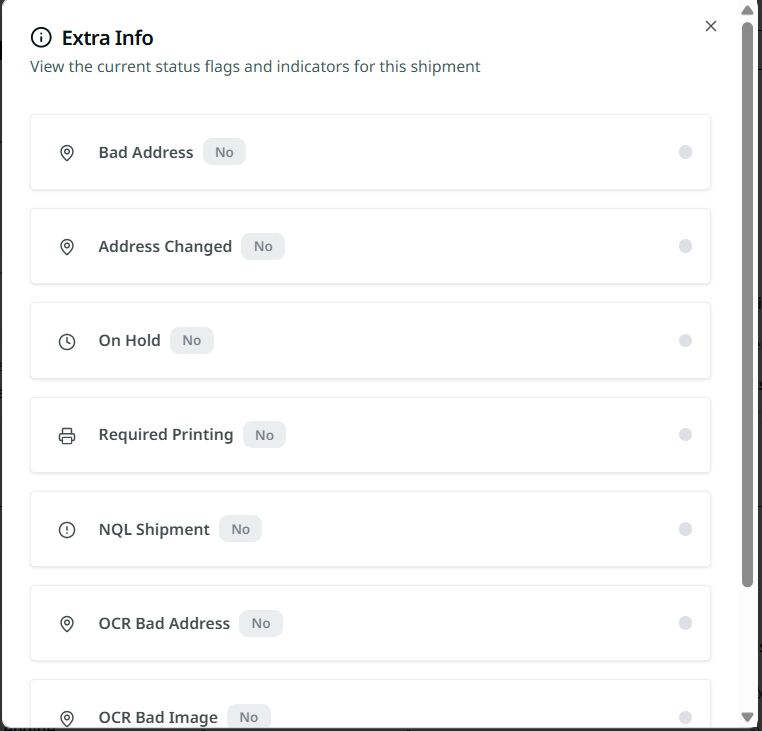
The user can view additional shipment information by clicking the Extra Information option from the More Actions menu.
-
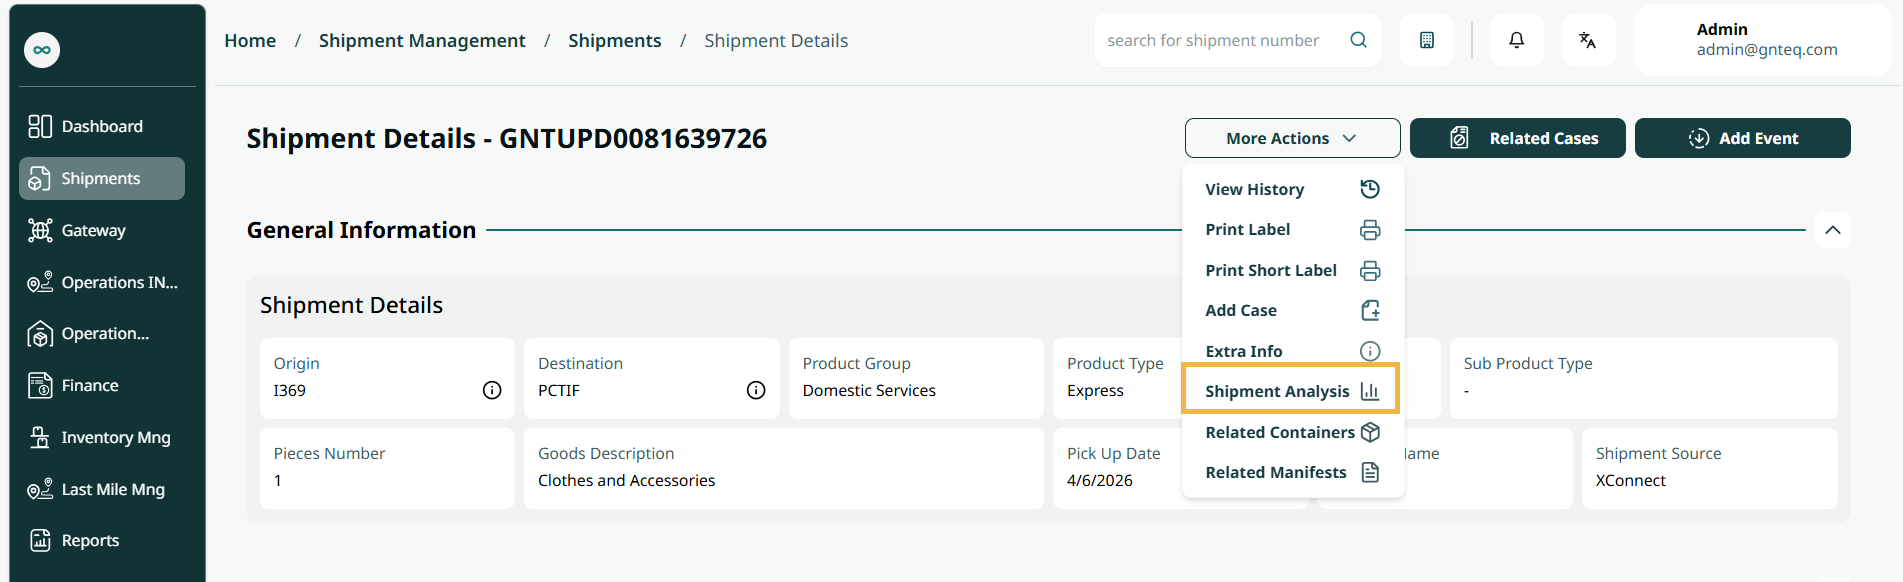
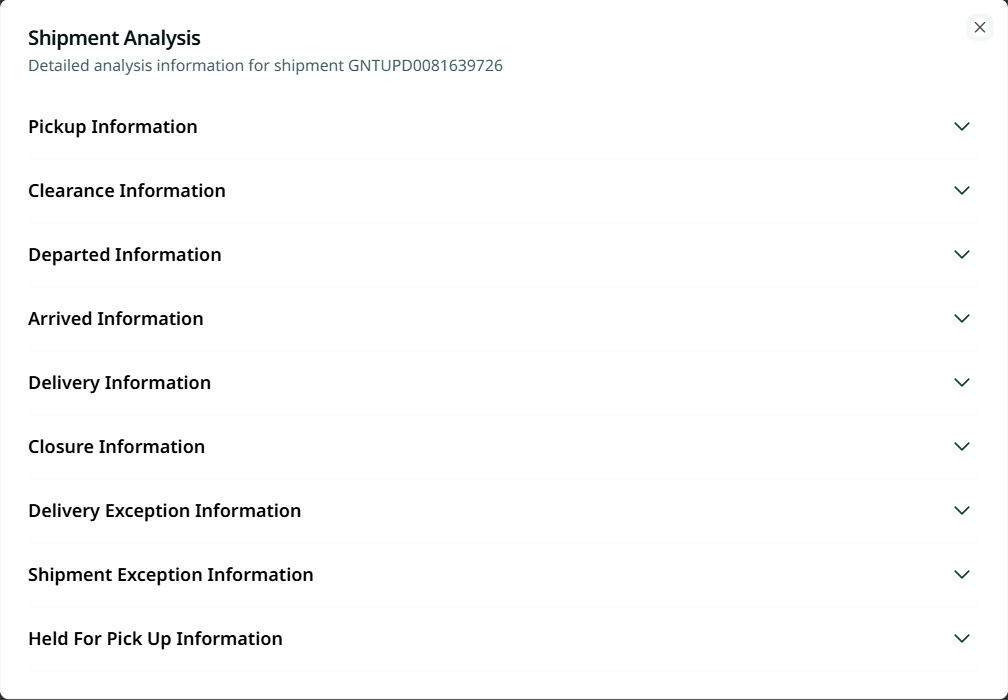
The user can view a detailed shipment analysis by clicking the Shipment Analysis option from the More Actions menu.
-
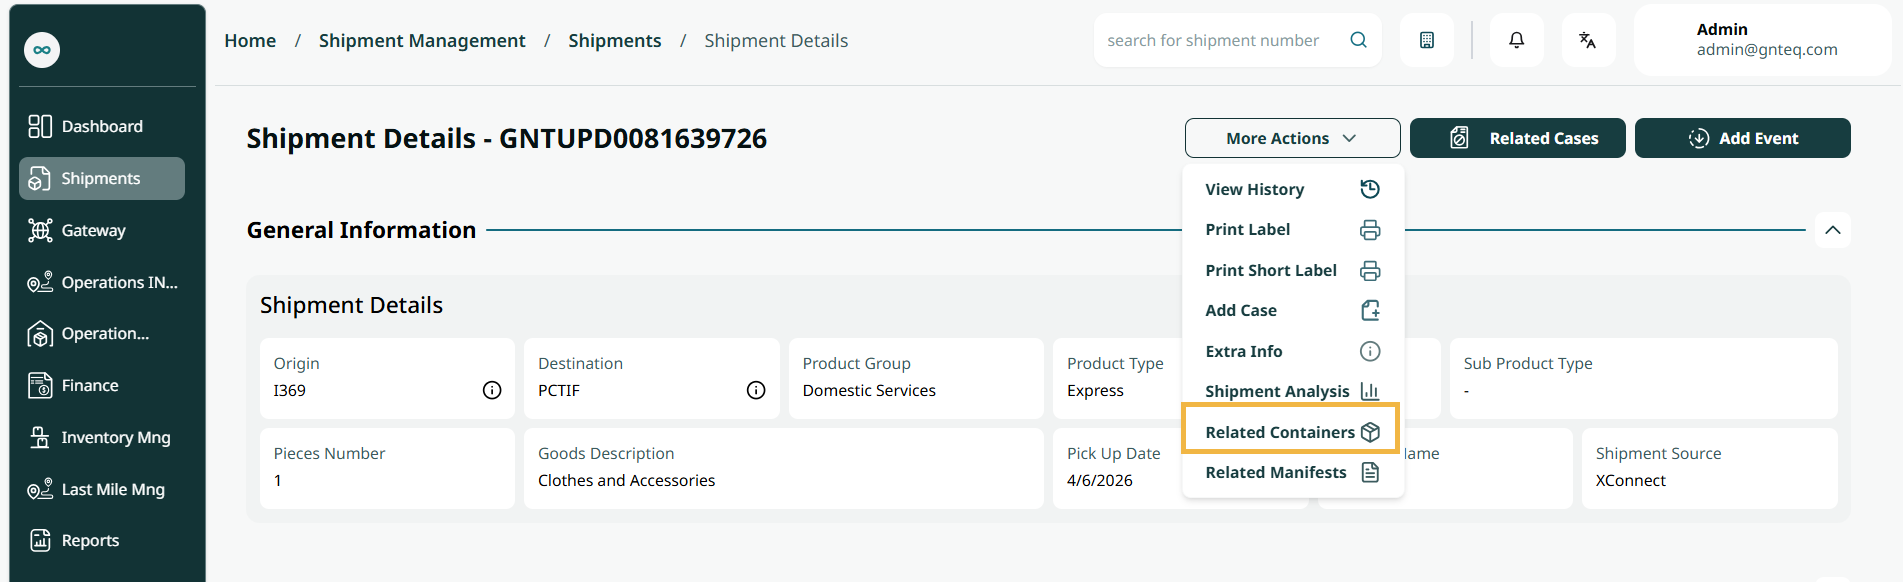
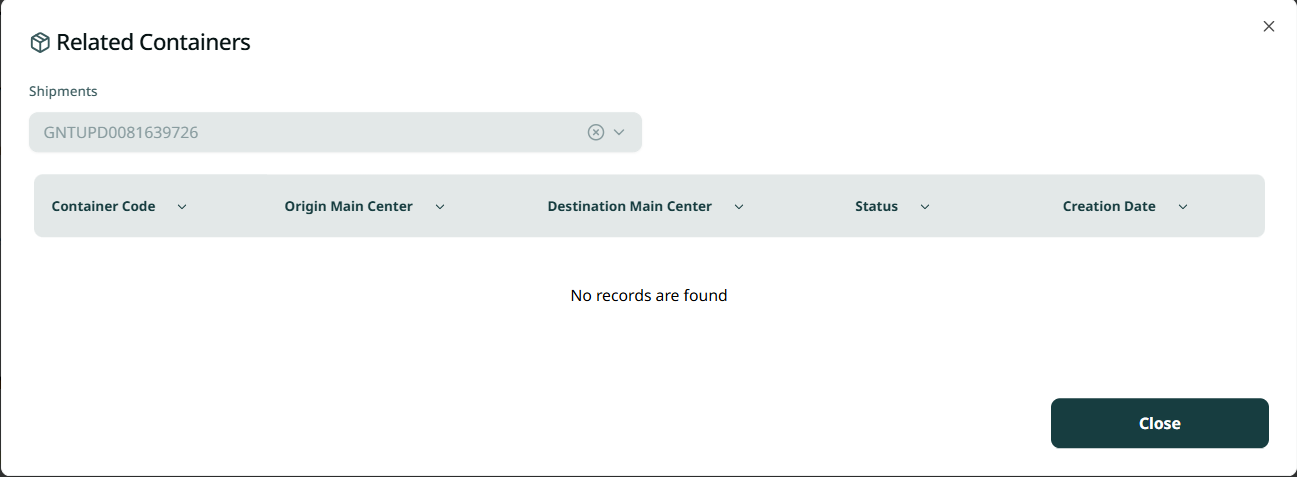
The user can view the list of related container linked to the shipment by clicking the Related Containers option from the More Actions menu.
-
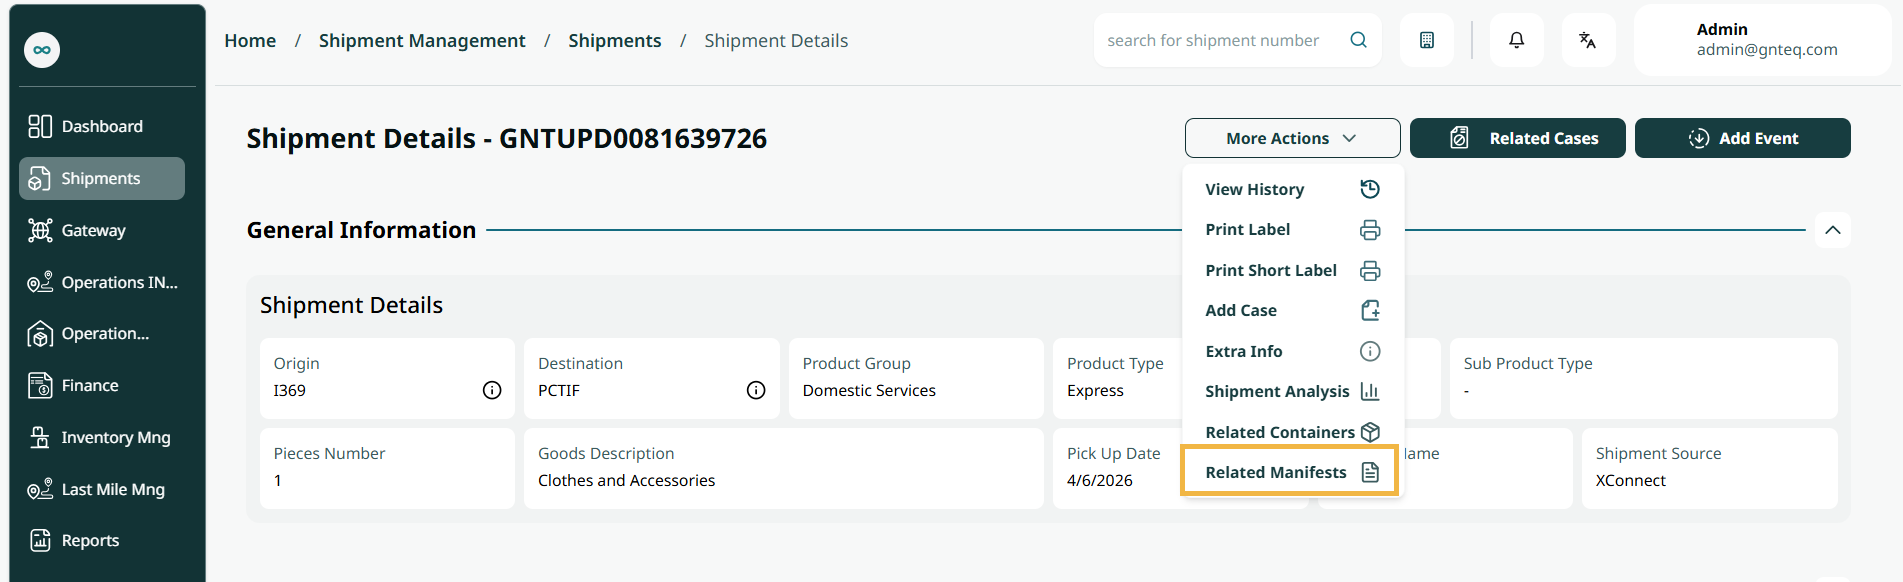
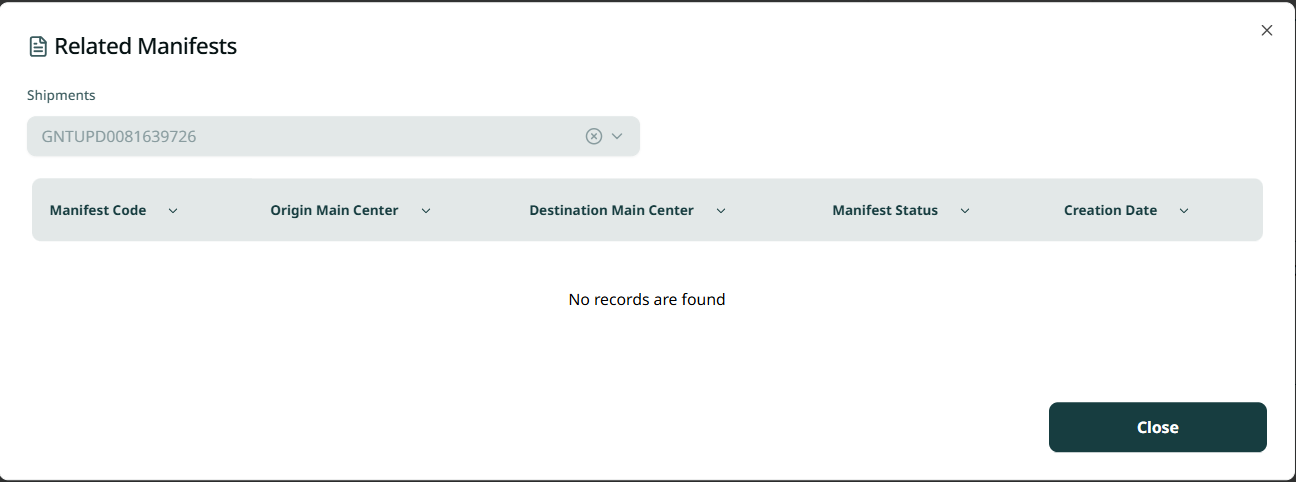
The user can view the waybills associated with the shipment by clicking the Related Manifest option from the More Actions menu.
-
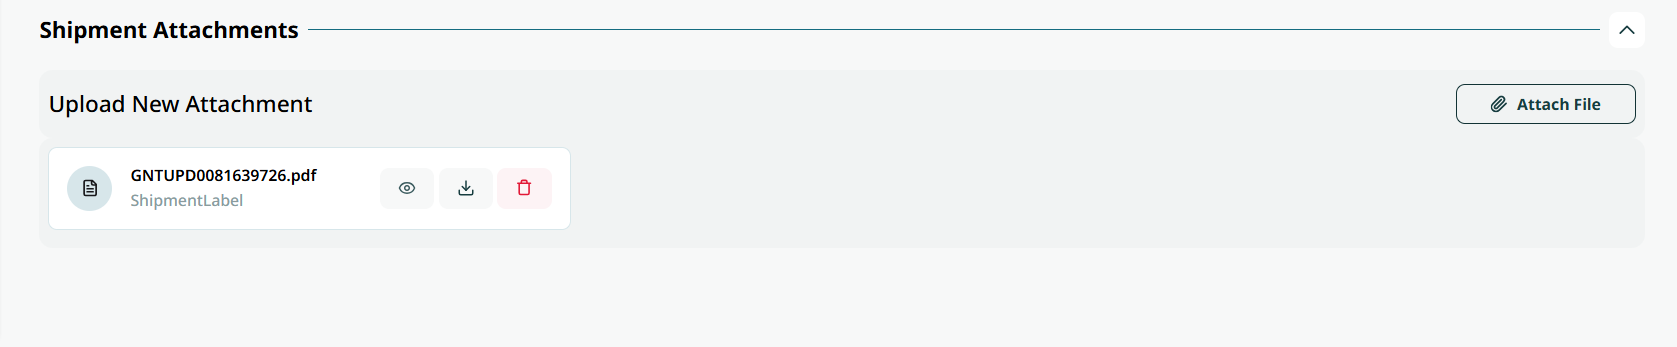
Attach File: the user can attach a file related to the shipment in the Shipment Attachments section by clicking the Attach File button.
1.1.1.2 Related cases
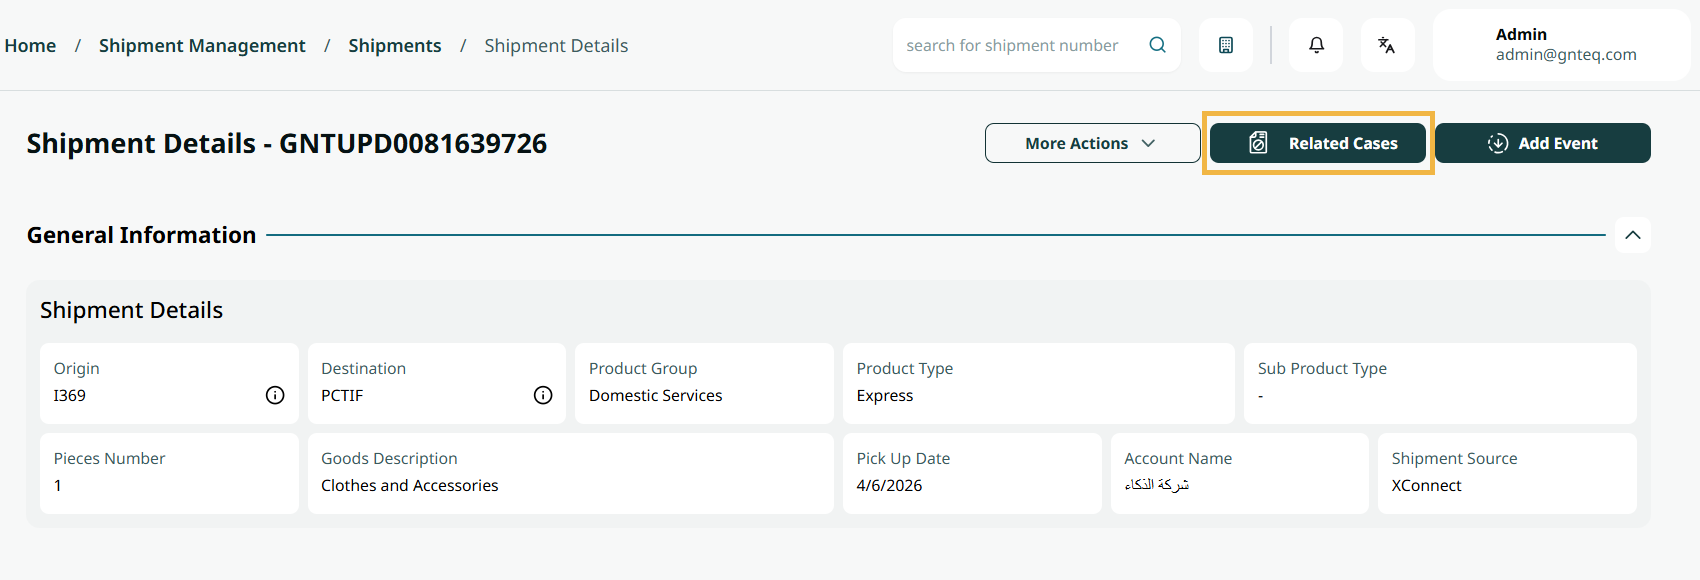
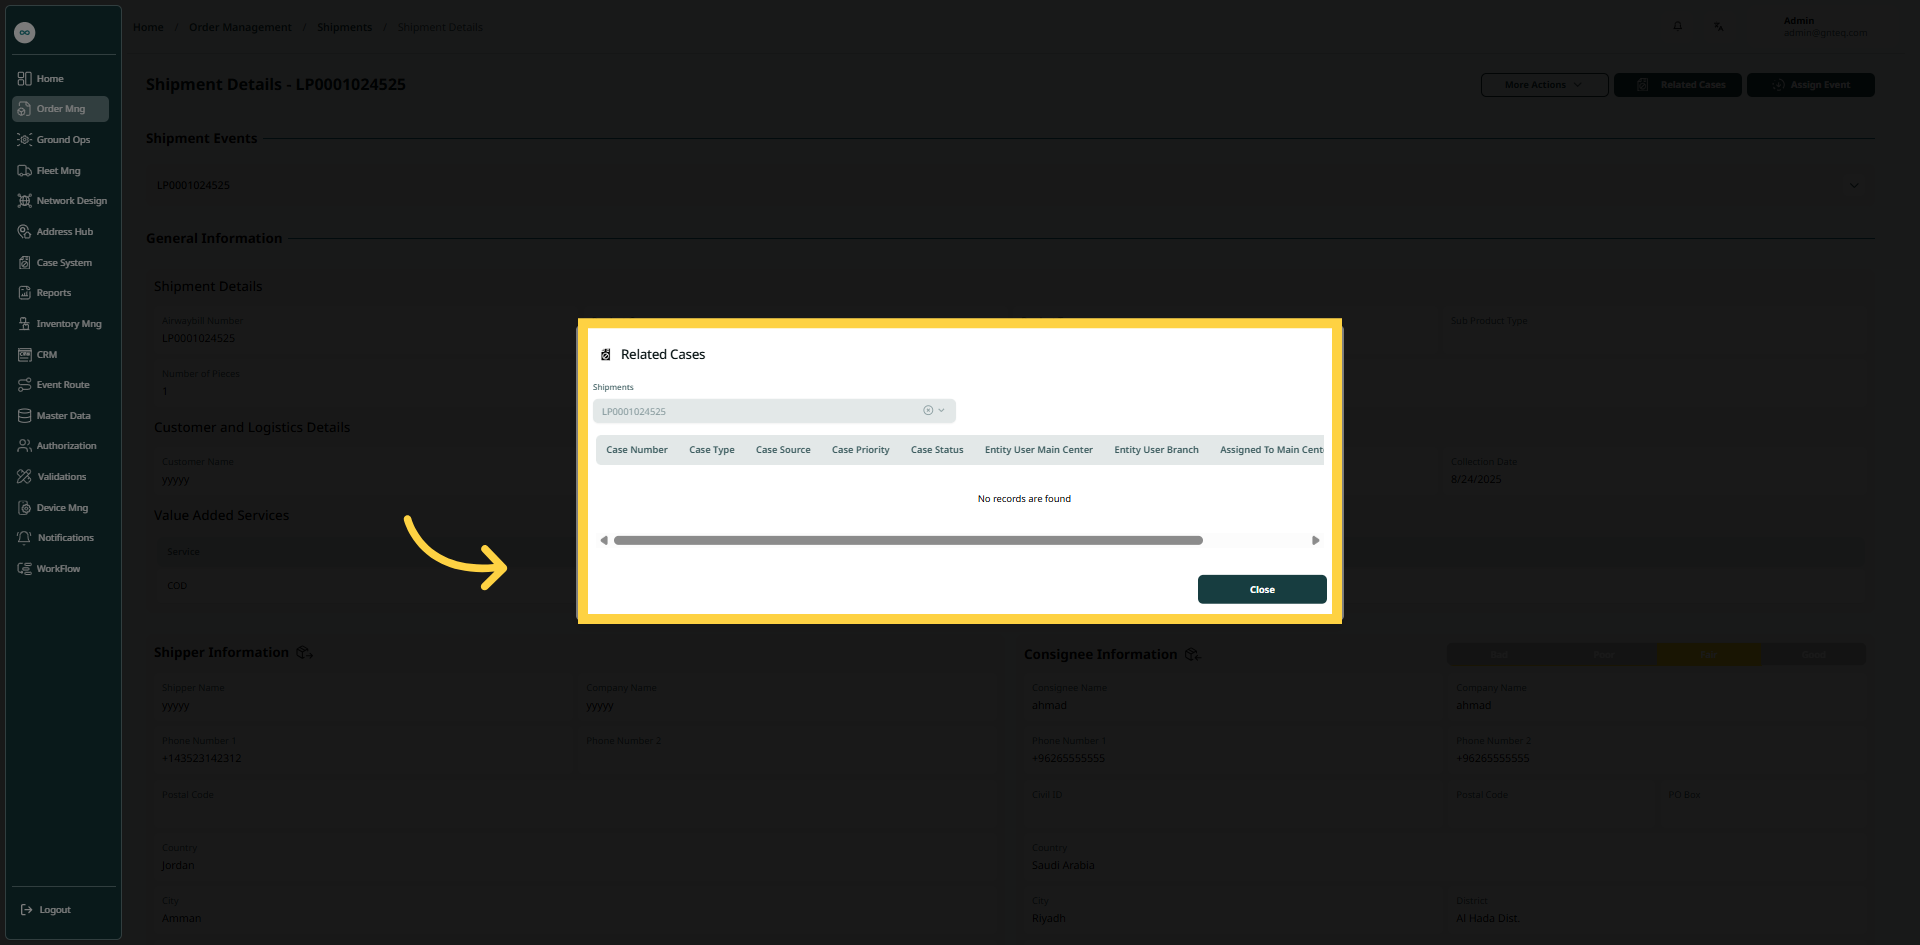
The user can check the related cases with a shipment has any cases or issues by navigating to the “Shipments” screen via Shipment Management, clicking View Details from Actions, and then selecting Related Cases as follows:
1.1.1.3 Add Event
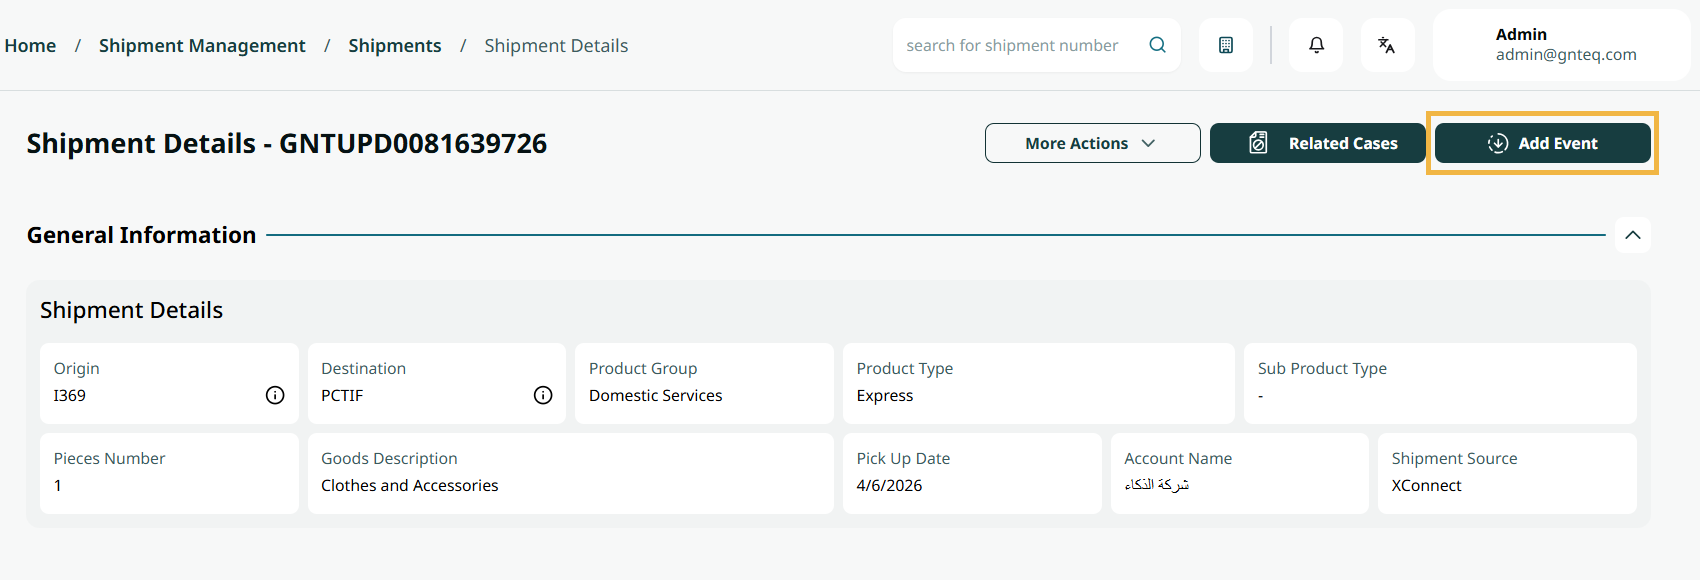
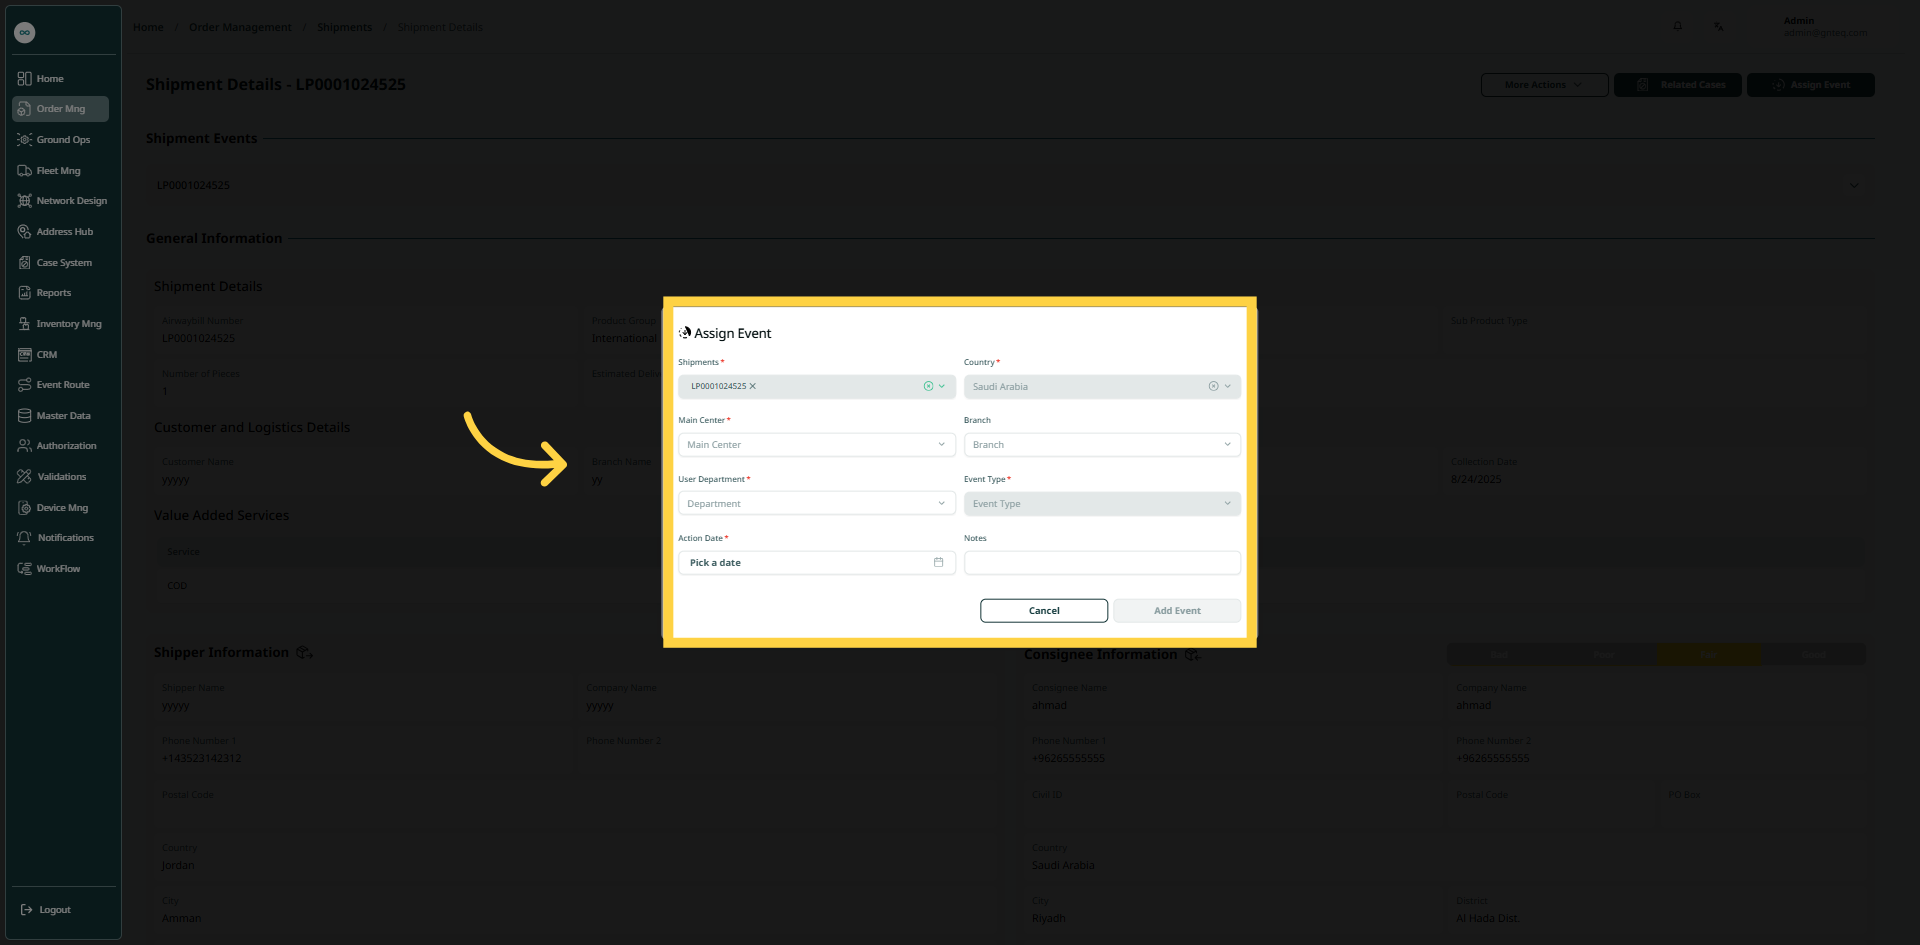
The user can add an event to the shipment by navigating to the “Shipments” screen via Shipment Management, clicking View Details from Actions, and then selecting Add Event as follows:
-
Shipments: this field represents the shipment airwaybill number.
-
Country: this field represents the name of the country.
-
Main Centre: this field represents the city where the shipment will arrive.
-
Branch: this field represents the station or route where the shipment will arrive.
-
User Department: this field represents the user section.
-
Event: this field represents the type of the event.
-
Action Date: this field represents the start date of the event.
-
Notes: this field represents notes about the event.
By clicking on Add Event, the event will be successfully assigned.
1.1.2 Edit Information
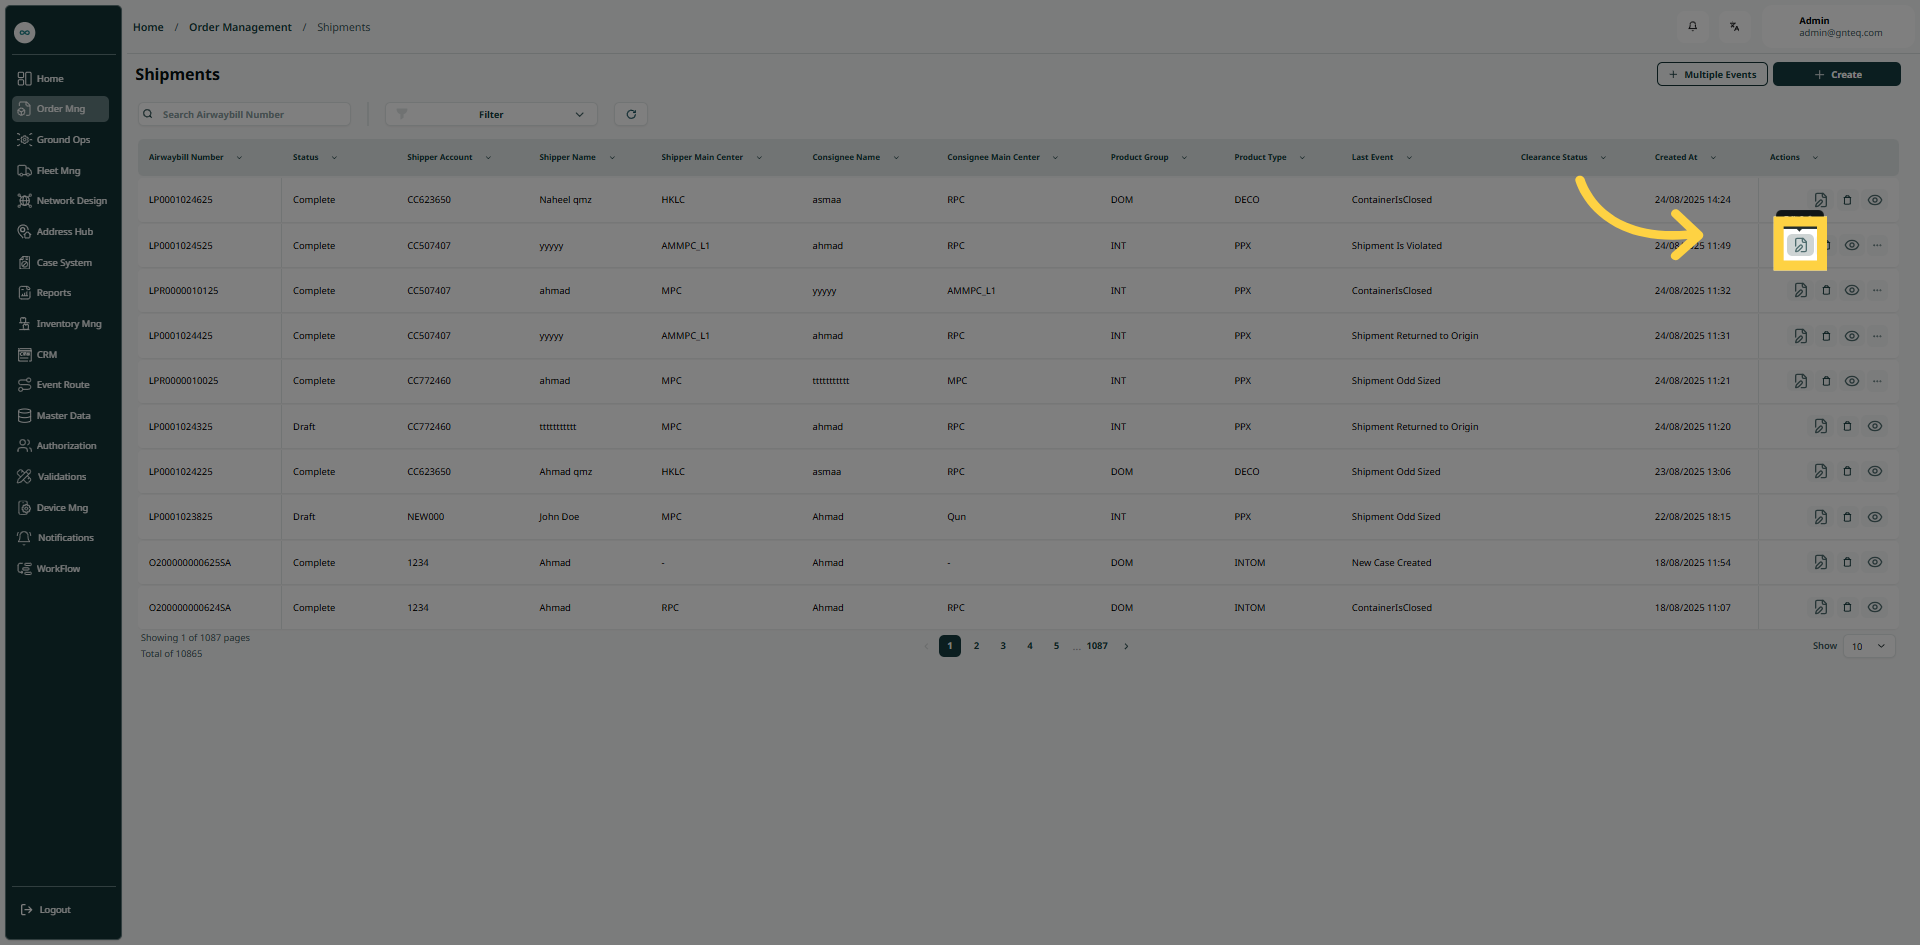
The user can edit the info of an existing shipment by clicking on Edit Info from Actions, by navigating to the ‘Shipments’ screen via the Shipment Management.
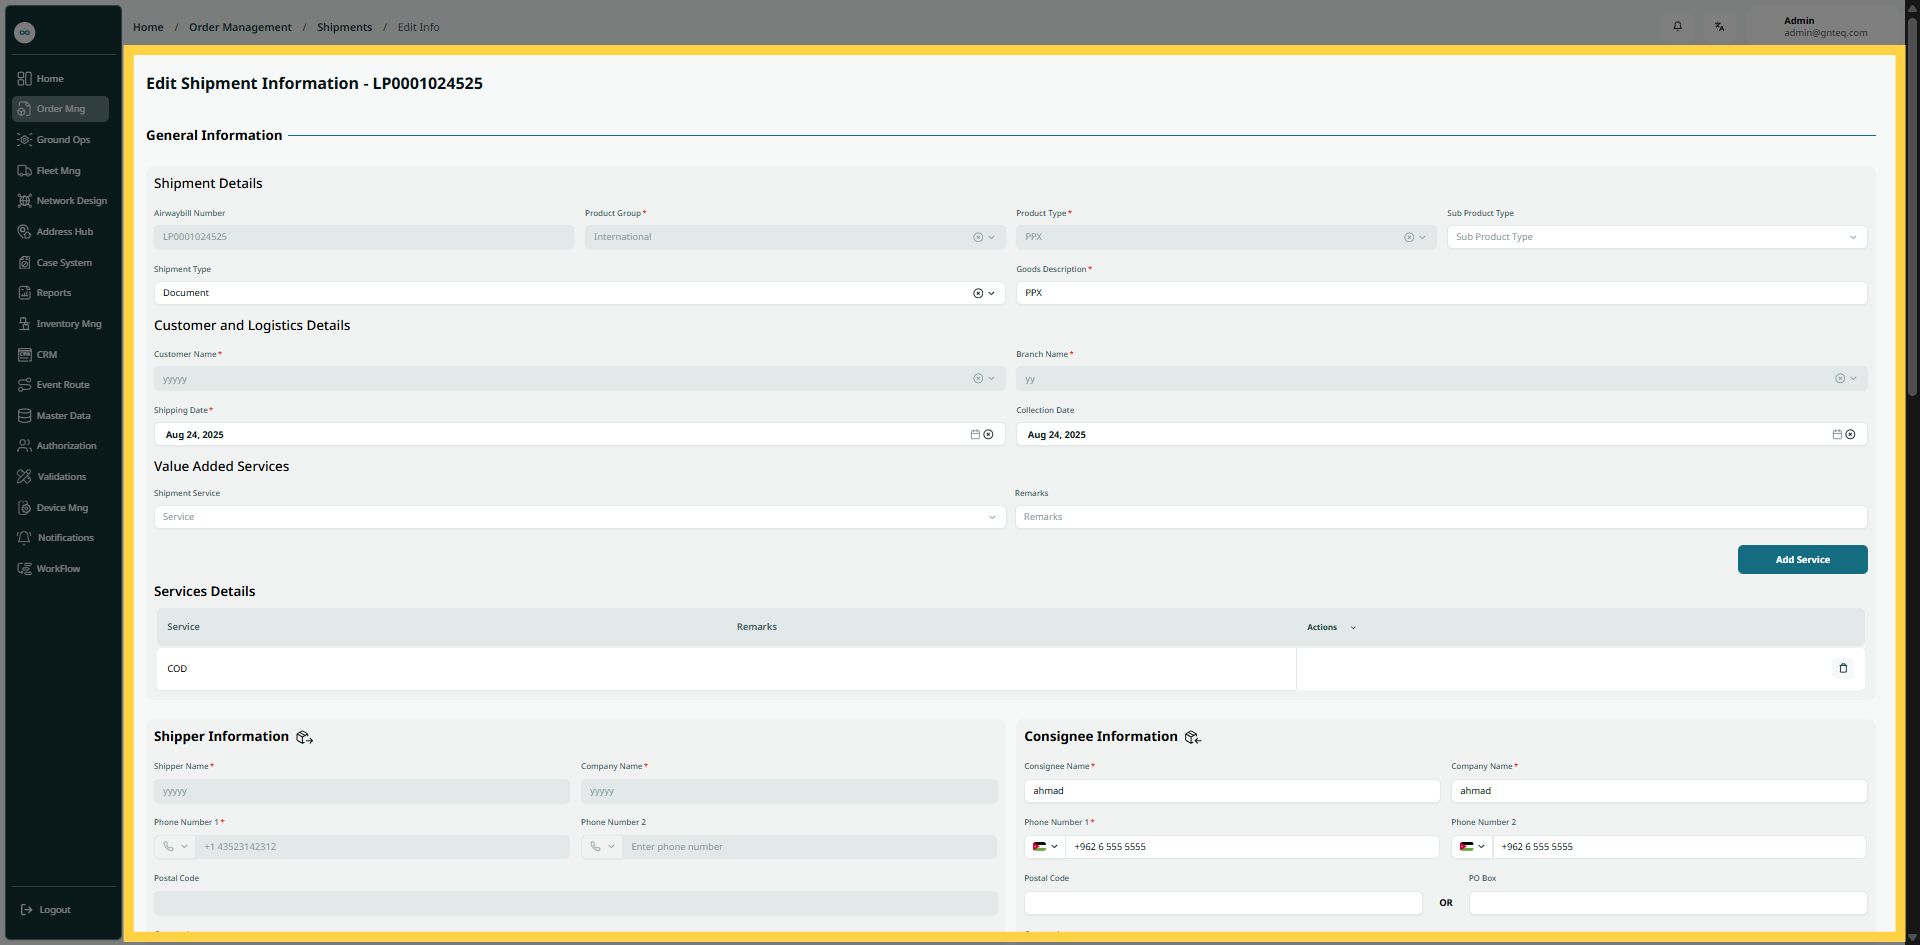
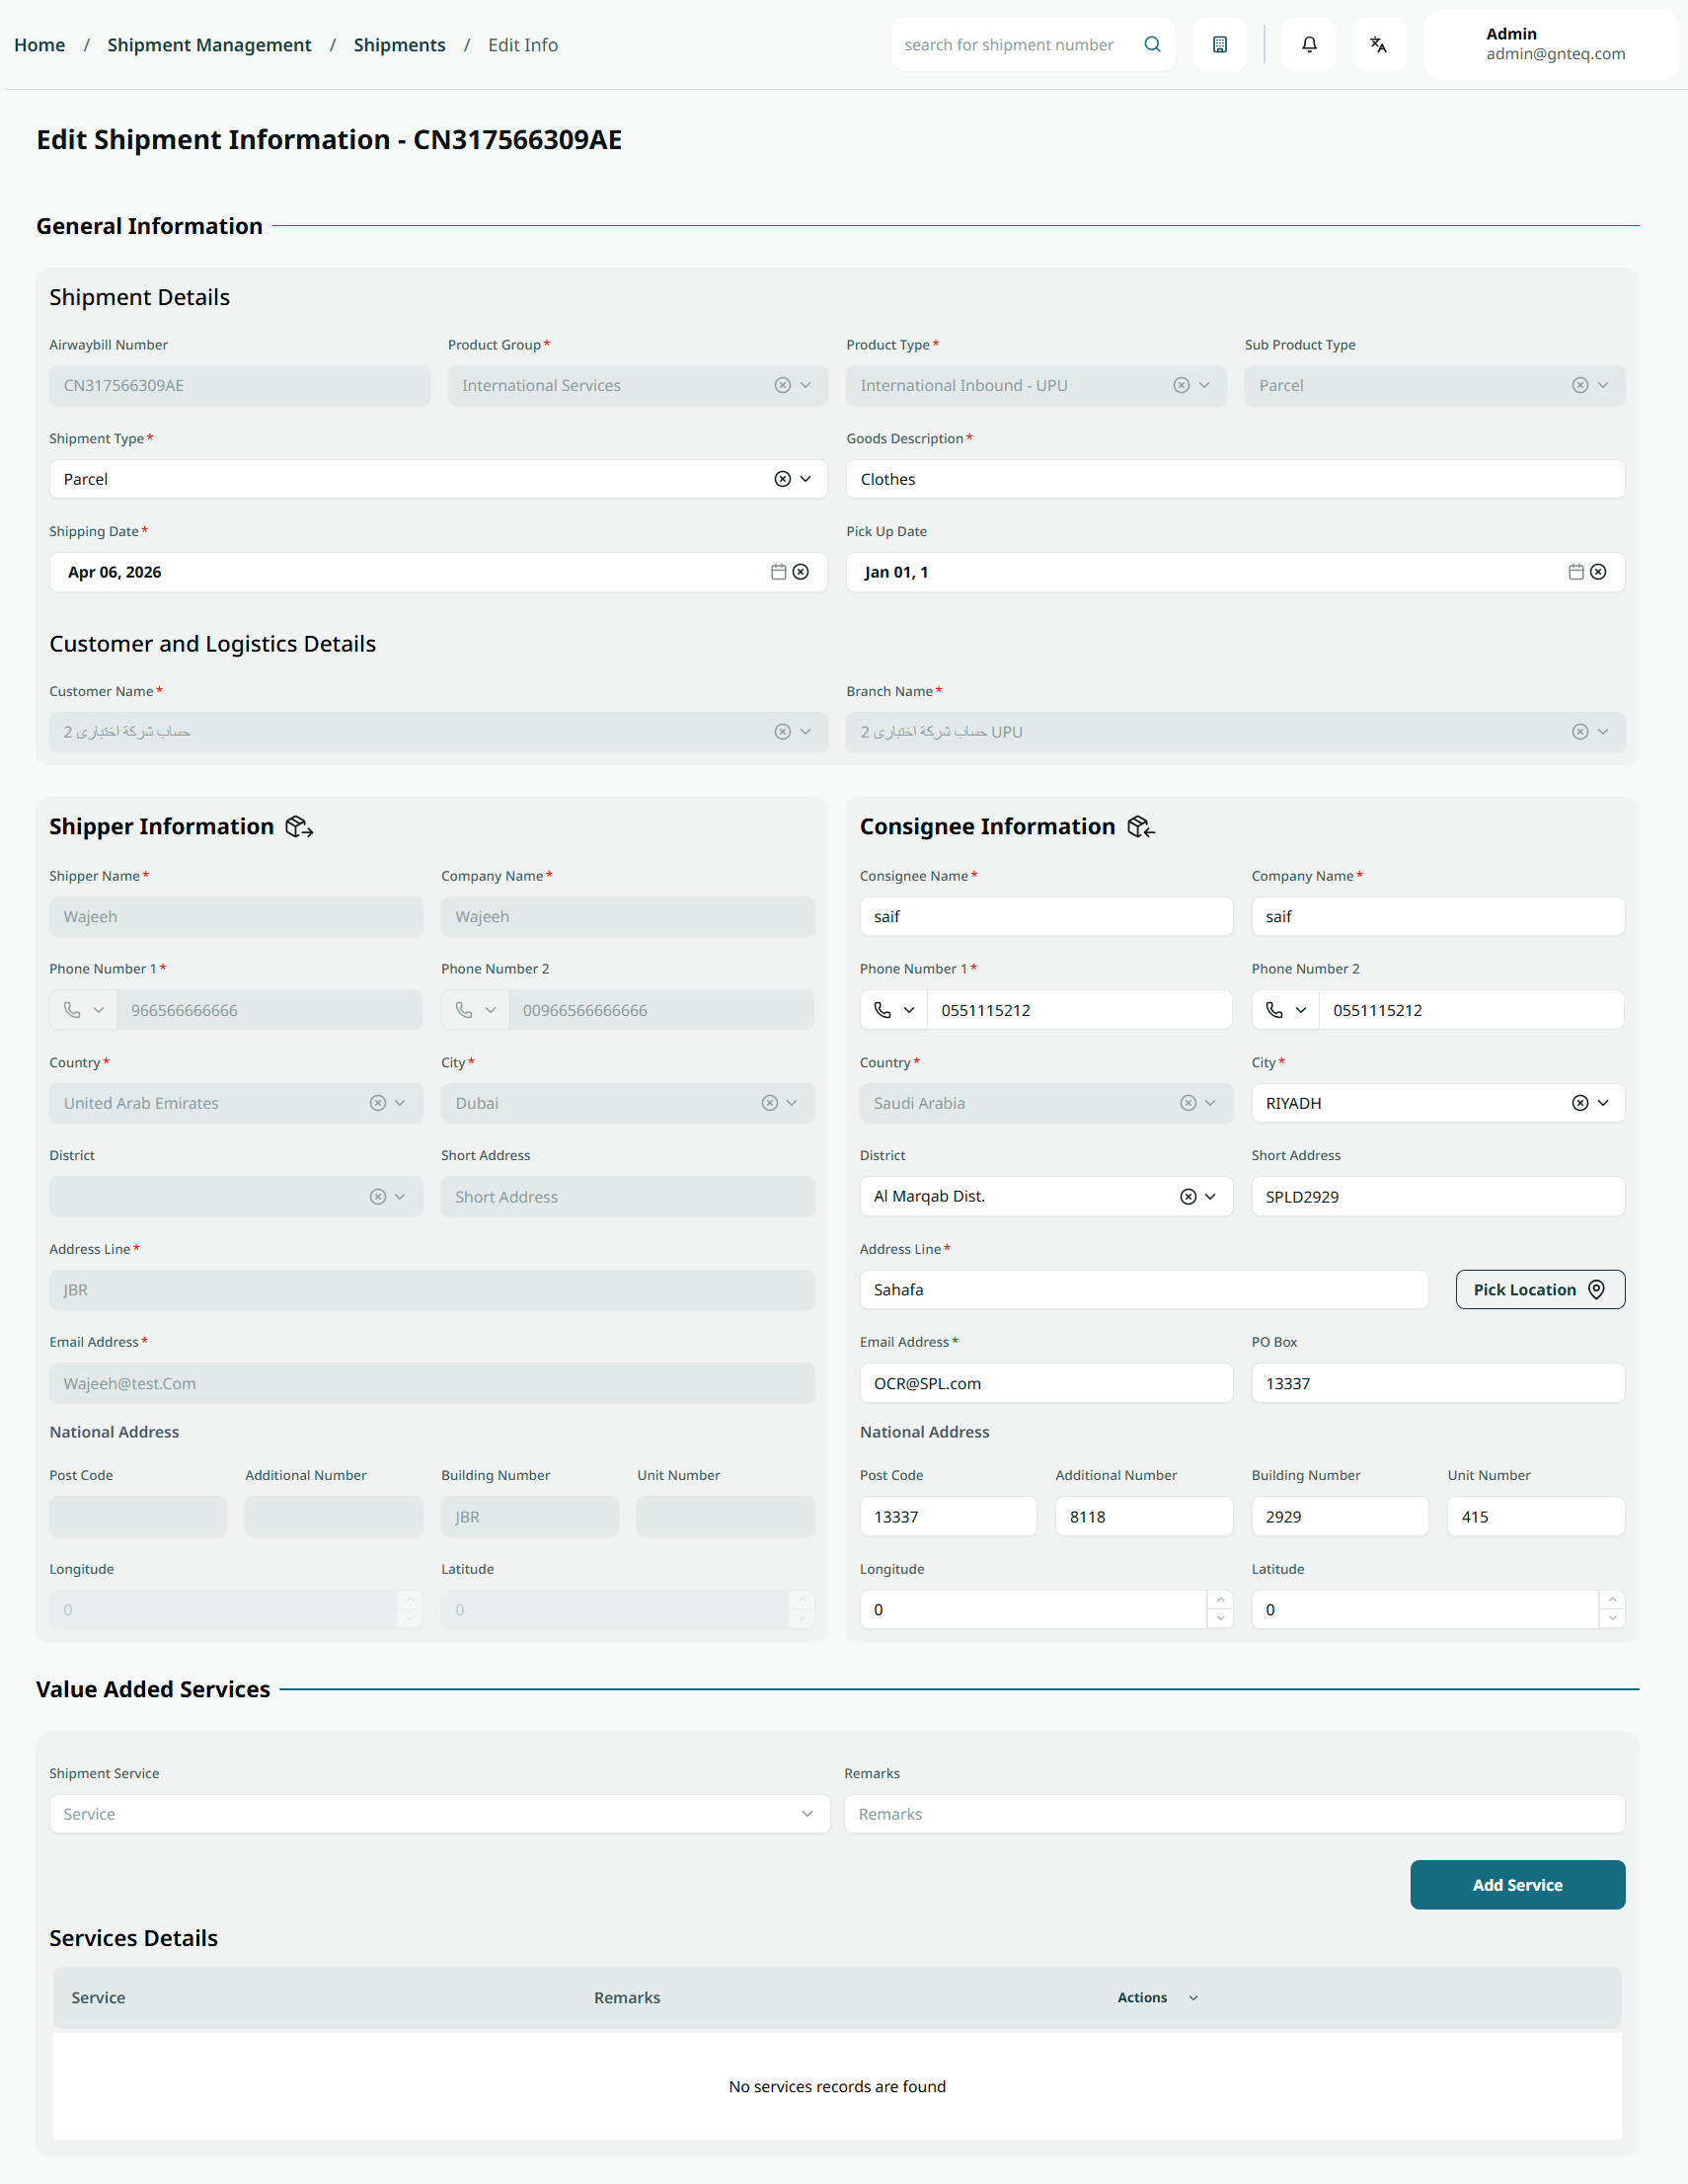
The user can add additional services in edit mode by clicking on Add Service.
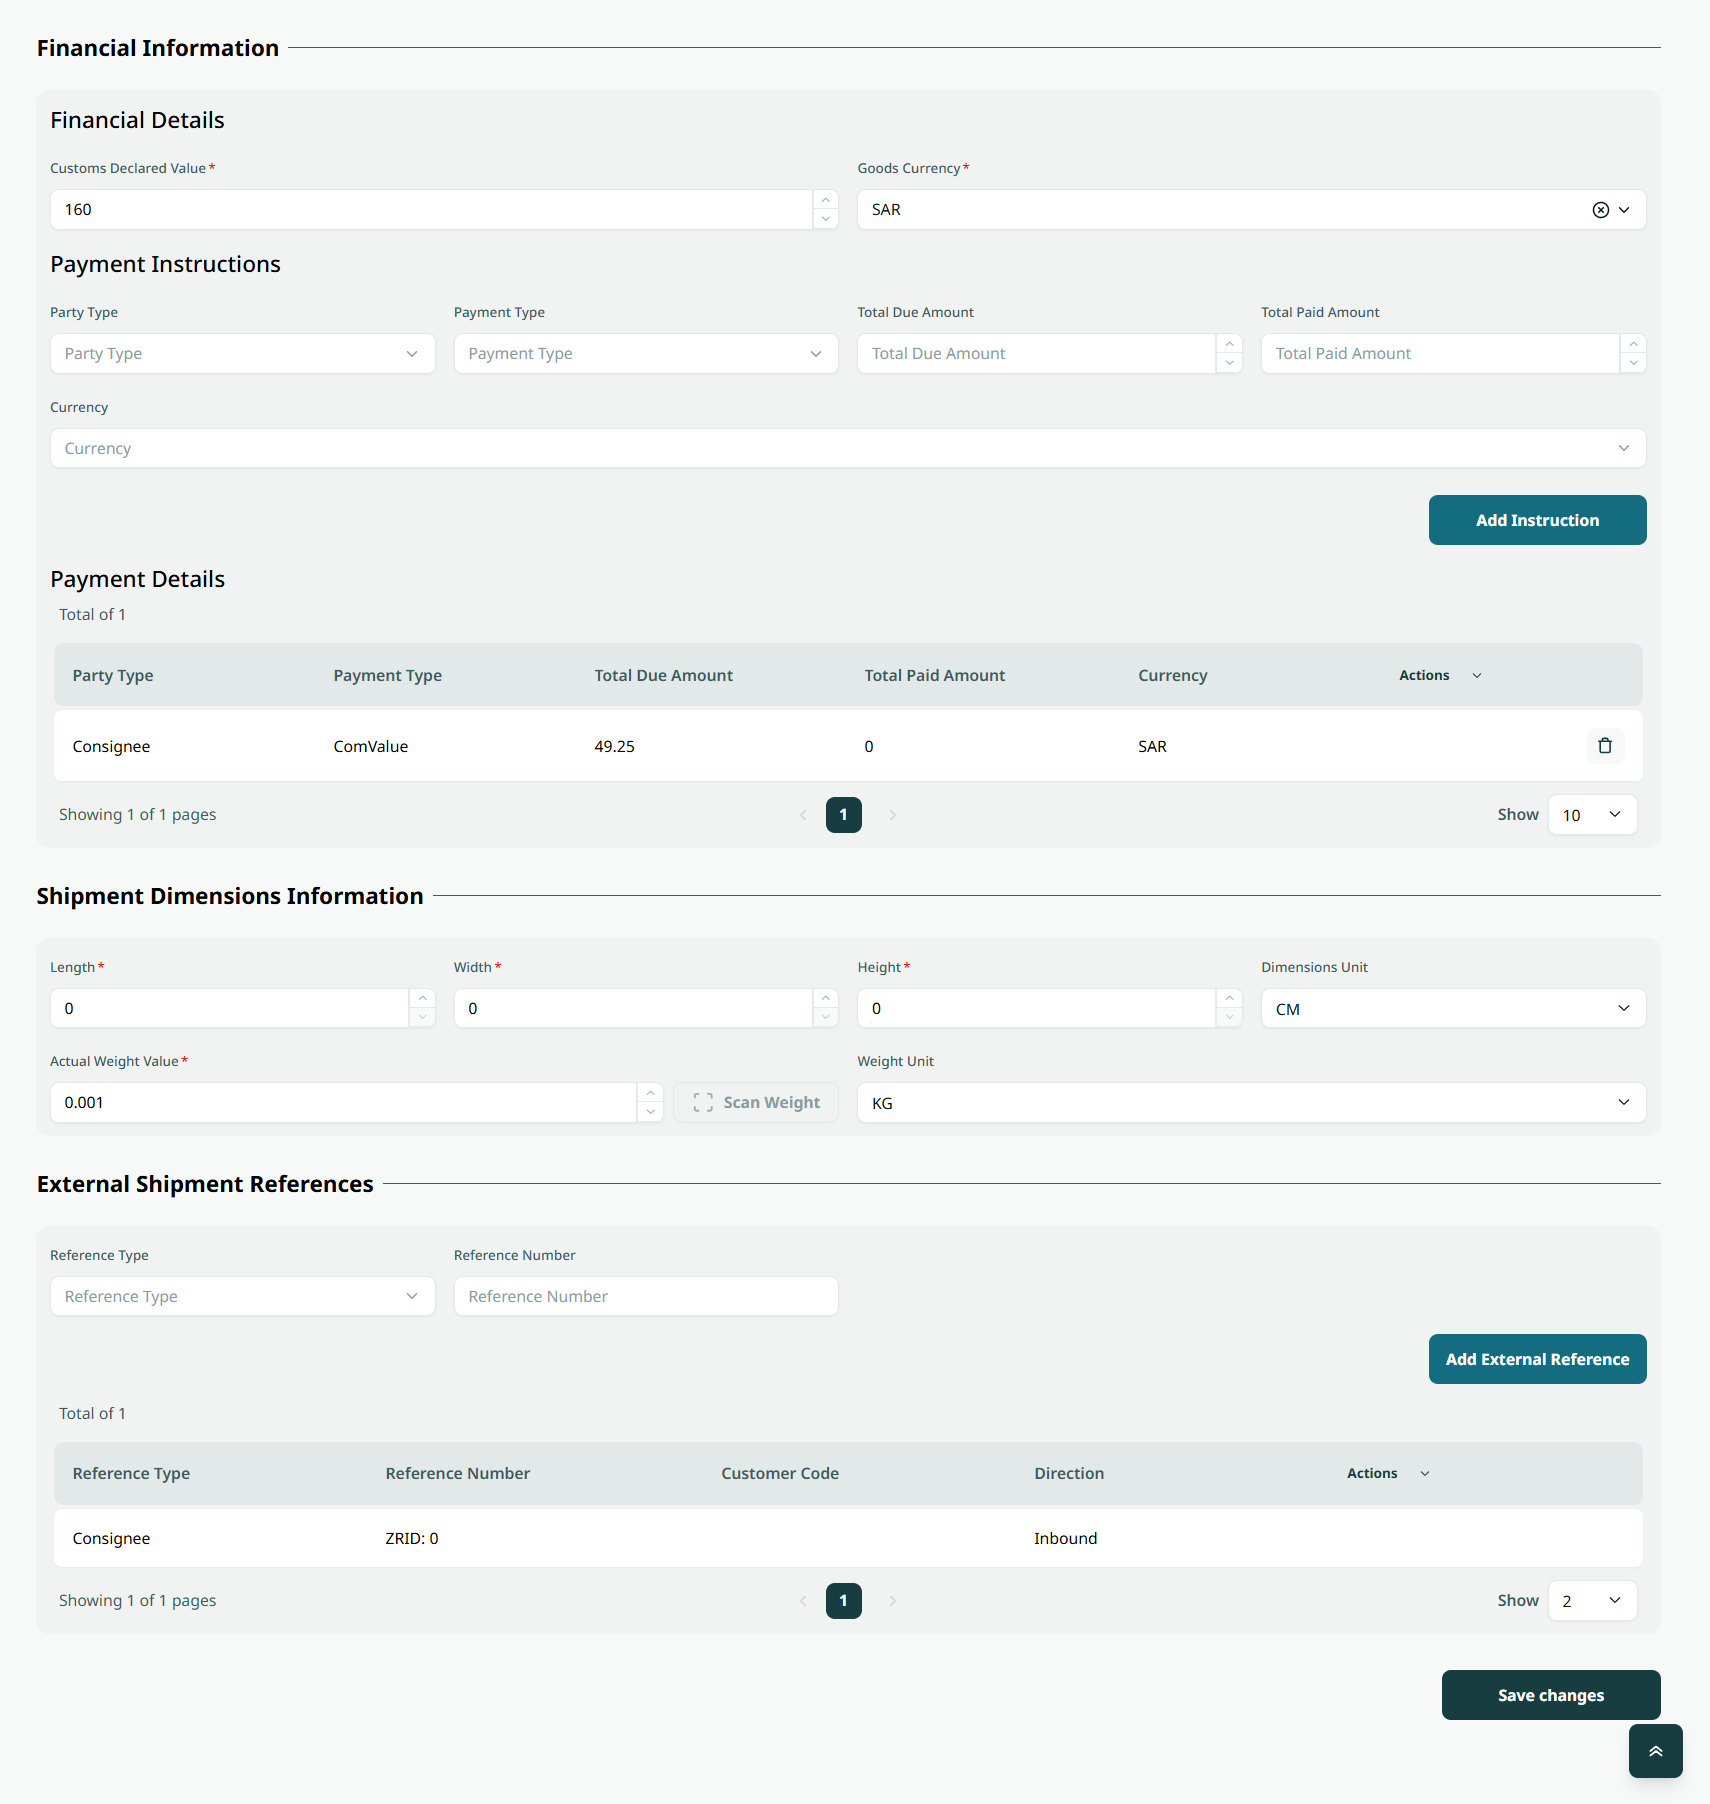
The user can add additional financial information by clicking on Add Instructions.
The user can add additional external references by clicking on Add External References.
By clicking on Save Changes, the information will be successfully updated in the system.
1.1.3 Delete Shipment
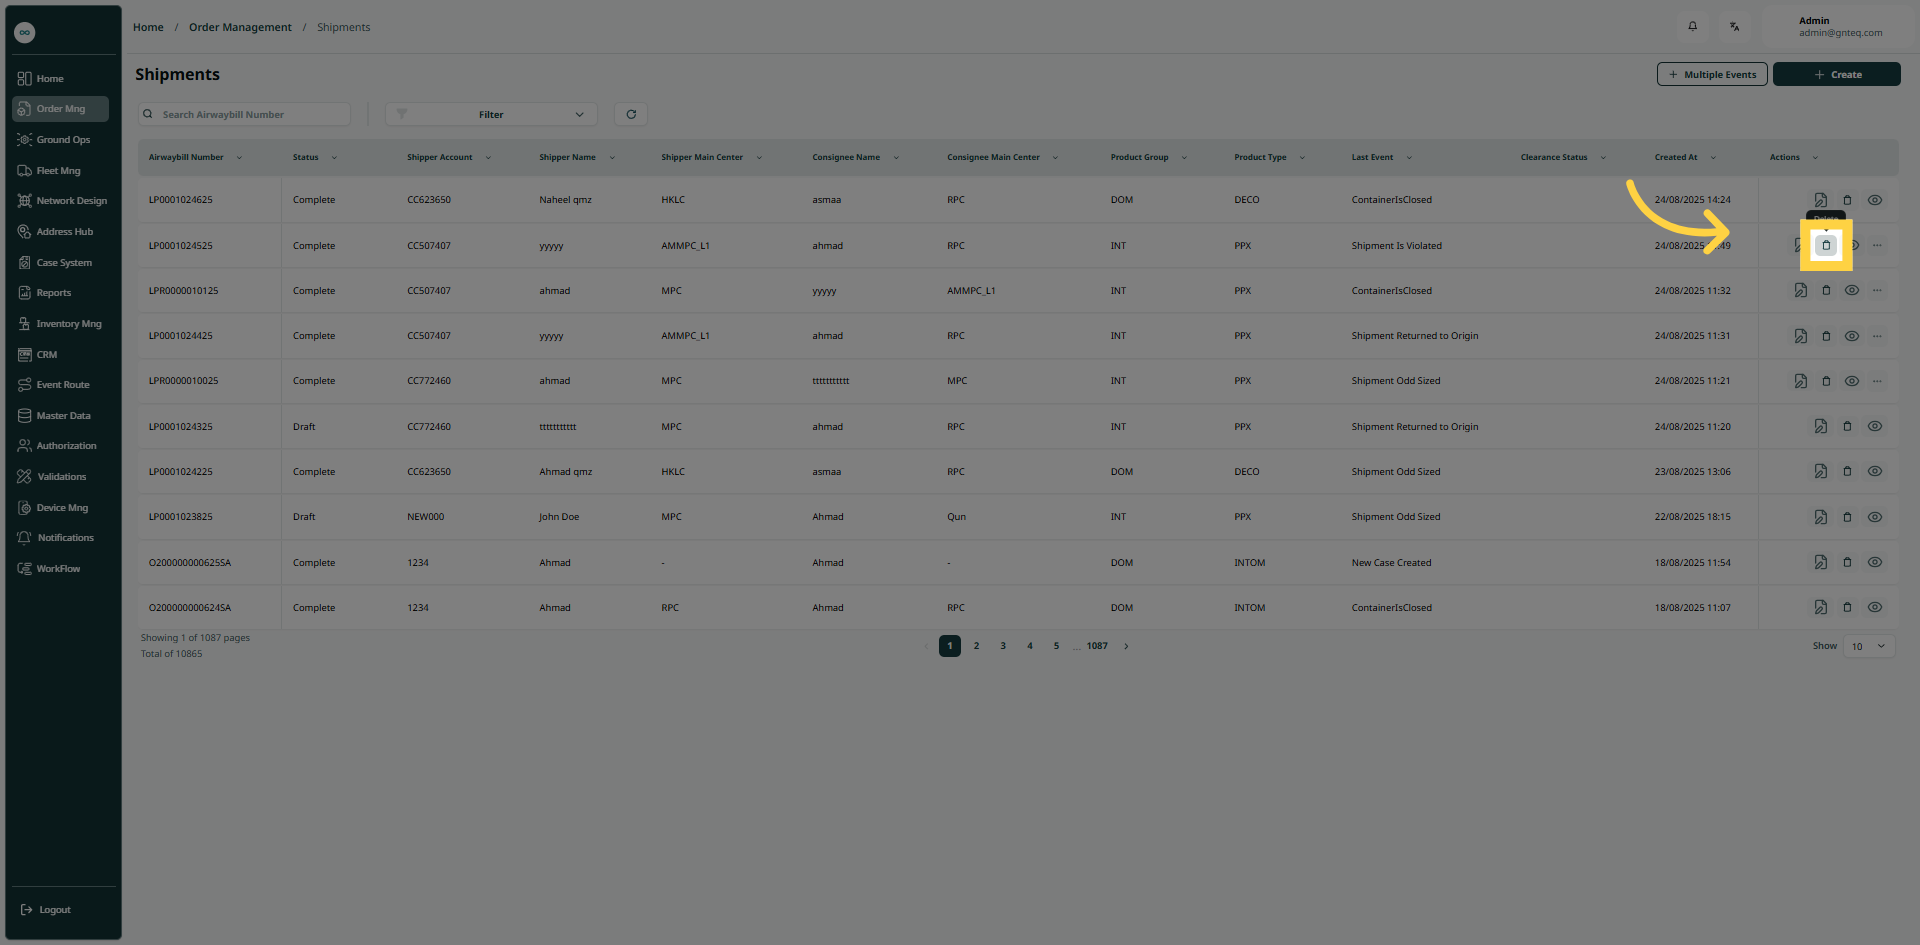
The user can delete the shipment by clicking on Delete Shipment from Actions, by navigating to the ‘Shipments’ screen via the Shipment Management.
2. Add Event
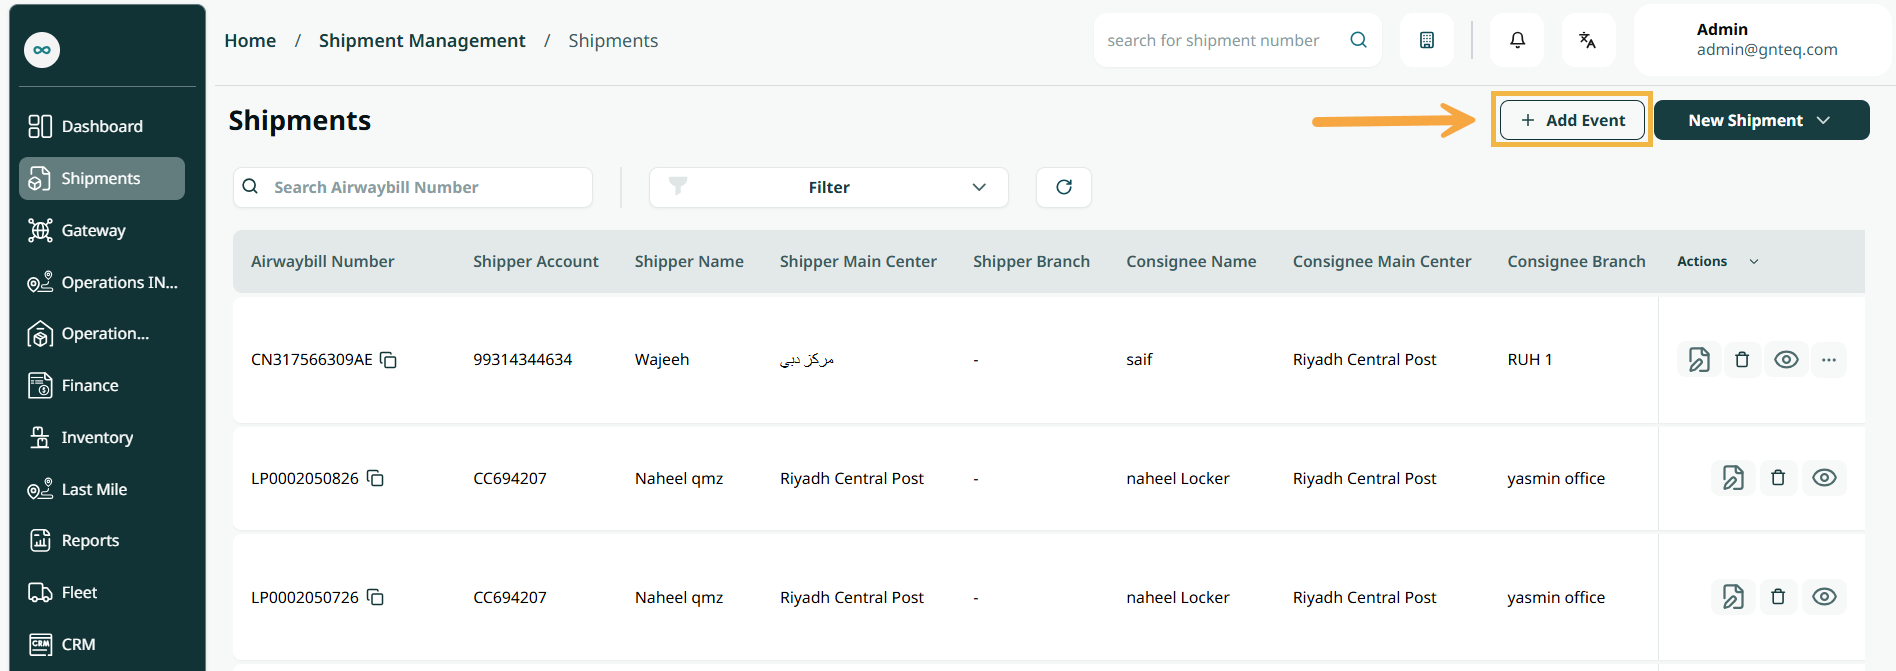
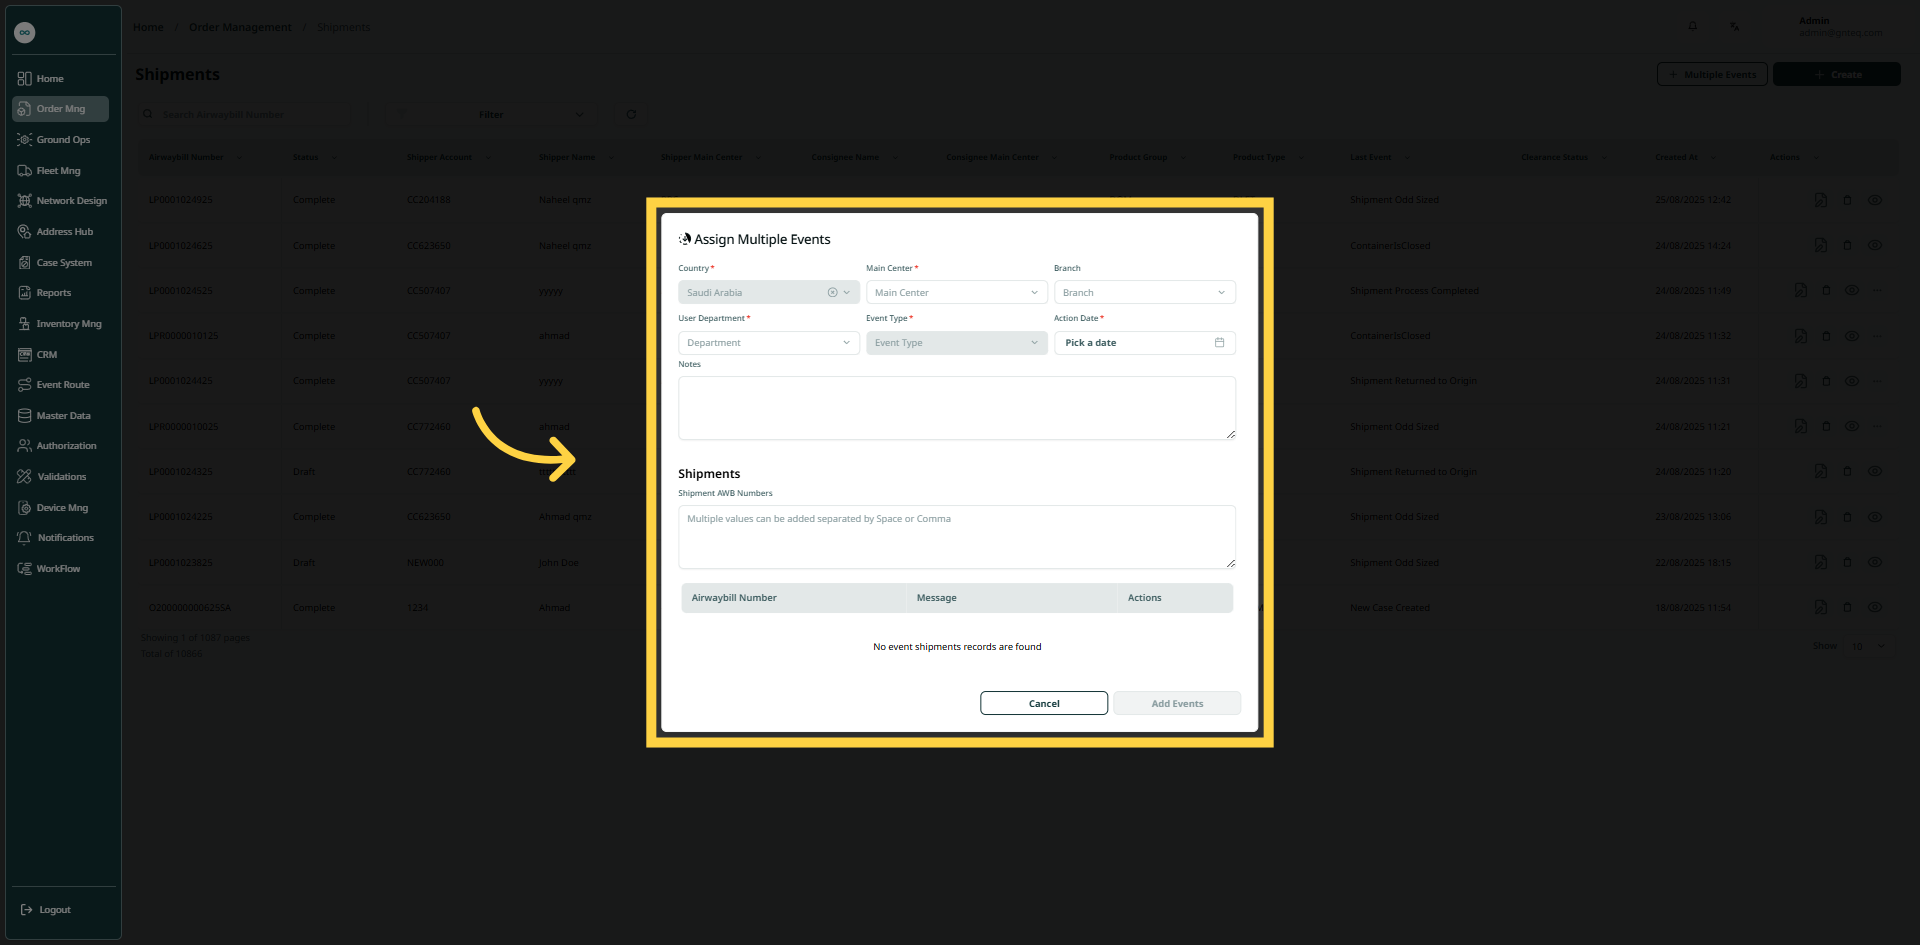
The user can create multiple events for the shipments by clicking on Add Event by navigating to the ‘Shipments Management’ screen via the Shipment Management.
-
Country: this field represents the place that the shipment will serve.
-
Main Center: this field represents the city where the shipment will arrive.
-
Branch: this field represents the station or route where the shipment will arrive.
-
User Department: this field represents the department of the user.
-
Event Type: this field represents the type of event that will be assigned to the shipments.
-
Action date: this field represents the date of the event.
-
Shipments: this field represents that the user can add shipments AWB.
By clicking Add Events, the event will be add to shipments successfully.
3. Add New Shipment (Normal)
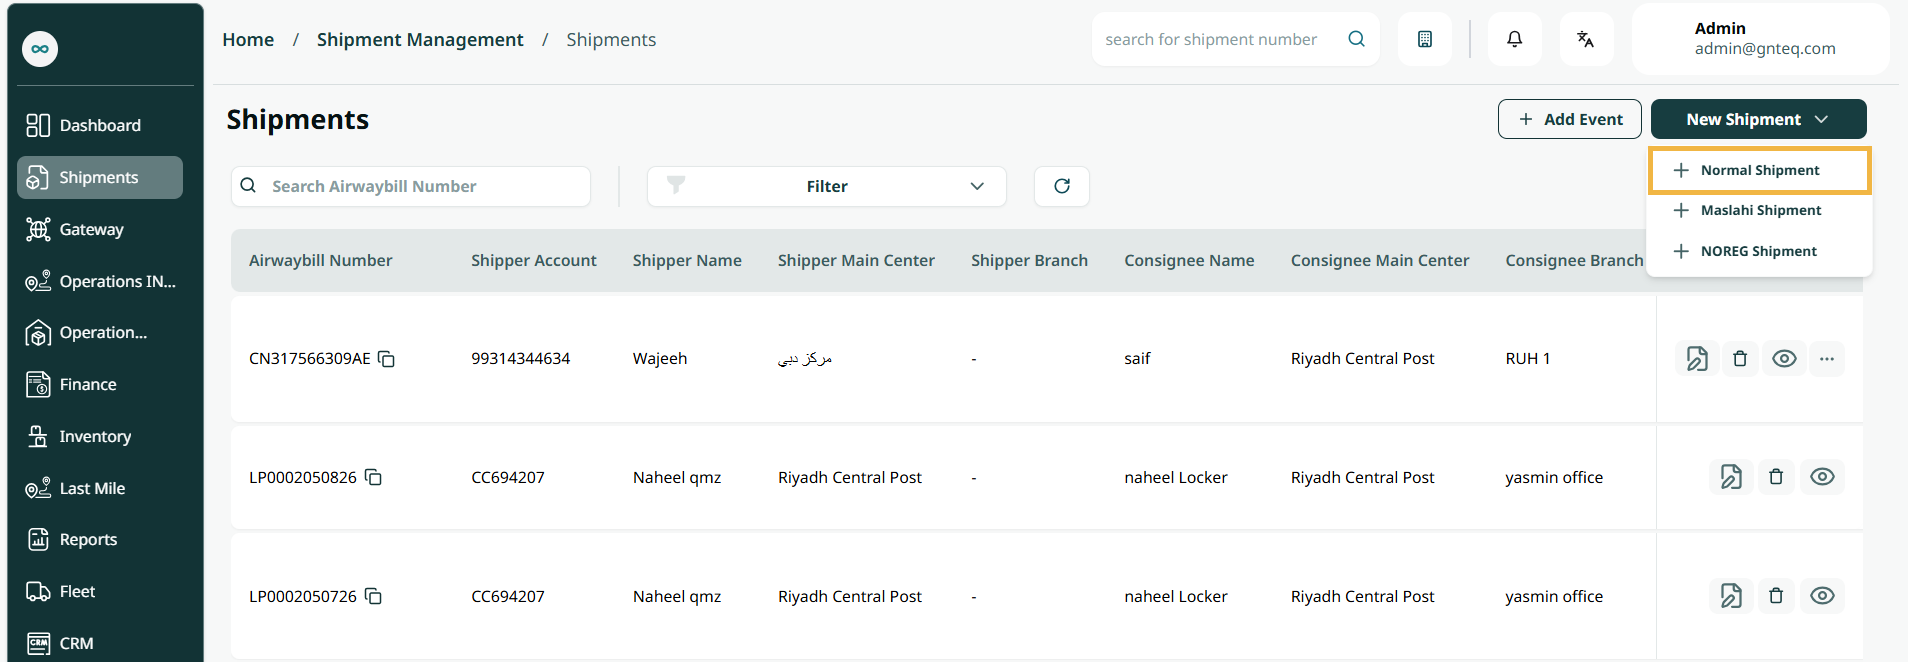
The user can create a new normal shipment by clicking on Create, by navigating to the ‘Shipments Management’ screen via the Shipment Management.
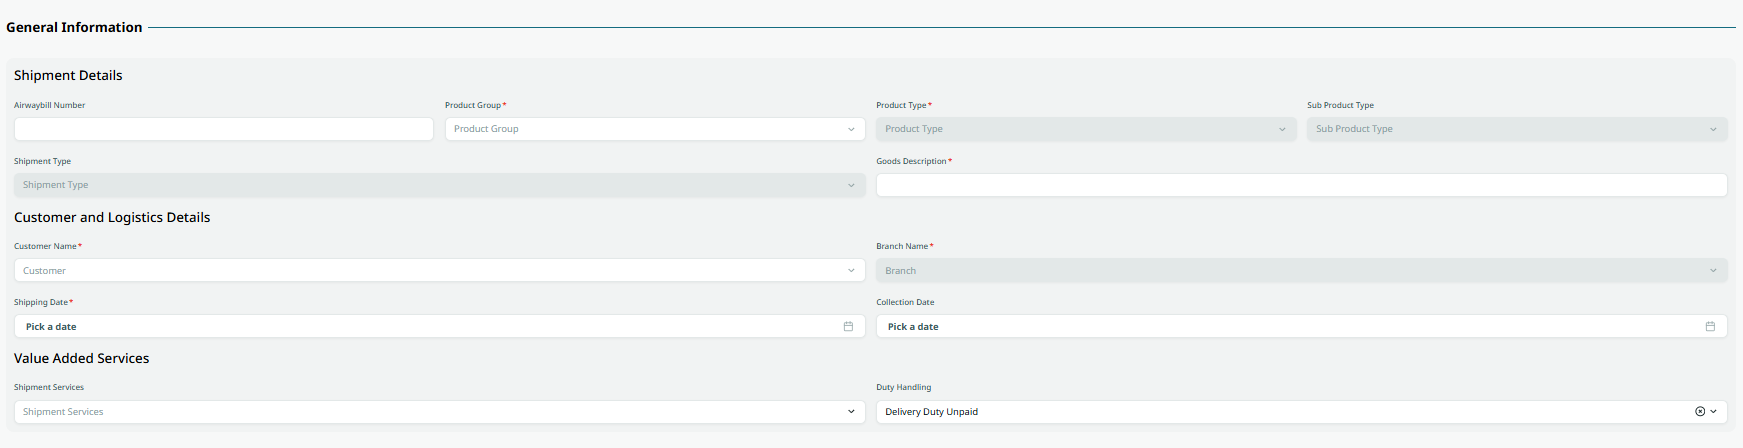
General Information
-
Airwaybill Number: this field represents the unique unique identifier number
of shipments.
-
Product Group: this field represents the delivery service.
-
Product Type: this field represents the type of delivery service (e.g., Express Domestic, Express International, etc.).
-
Sub Product Type: this field represents the delivery service subtype (e.g., Banks, Government Documents, etc.).
-
Shipment Type: this field represents the type of shipment (e.g., Banks, Government Documents, etc.).
-
Goods Description: this field represents a detailed description of the shipped goods.
-
Customer Name: this field represents the name of the customer associated with the shipment.
-
Branch Name: this field represents the branch name associated with the customer.
-
Shipping Date: this field represents the date of shipping.
-
Pick up Date: this field represents the date of the collection.
-
Shipment Service: this field represents the service responsible for delivering the shipment.
-
Duty Handling: this field represents the customs handling charge (Delivery Duty Paid / Unpaid).
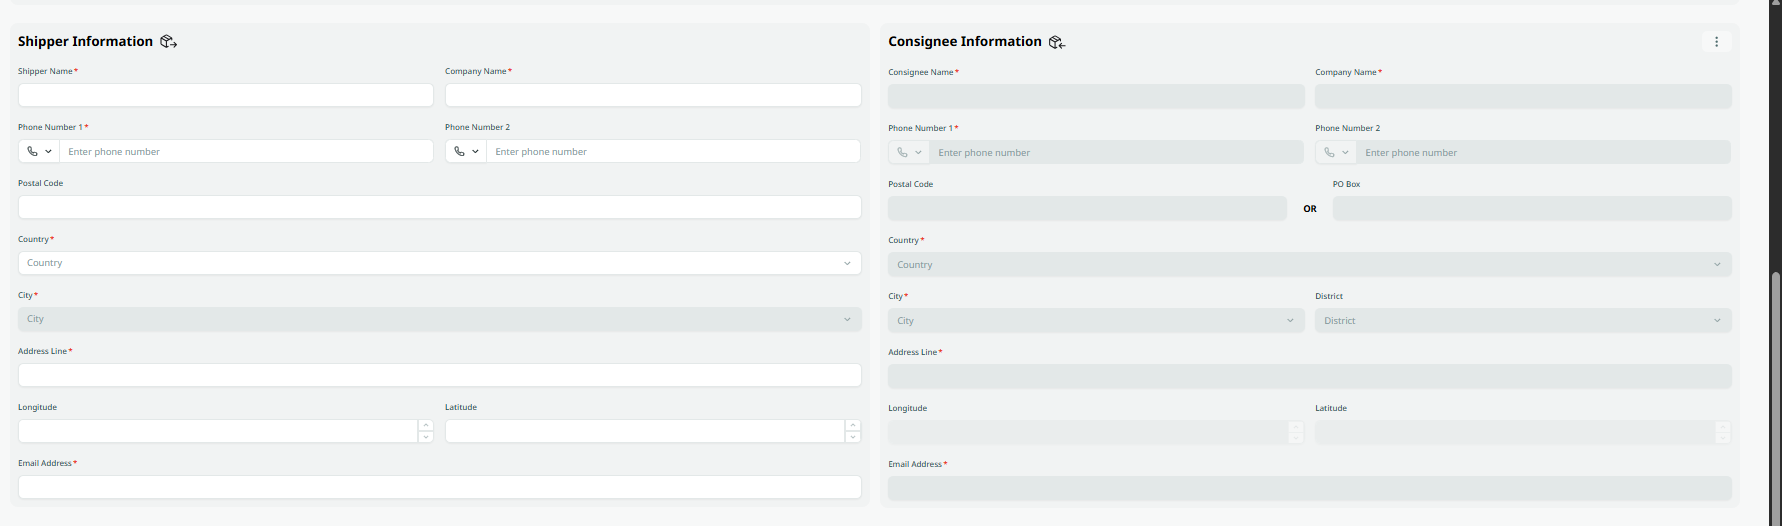
Shipper Information
-
Shipper Name: this field represents the shipper’s name.
-
Company Name: this field represents the company’s name.
-
Phone Number (1): this field represents the shipper’s primary phone number.
-
Phone Number (2): this field represents the shipper’s secondary phone number.
-
Country: this field represents the shipper’s country.
-
City: this field represents the shipper’s city.
-
District: this field represents a location, area, or region linked to the provided address.
-
Short Address: this field represents the shipper short address.
-
Address line: this field represents the shipper’s address.
-
Longitude: this field represents the longitude of the address to help locate the shipment.
-
Latitude: this field represents the latitude of the address to help locate the shipment.
-
Email Address: this field represents the shipper’s email address.
-
Post Code: this field represents a series of letters and numbers added to the postal address to sort and classify mail.
Consignee Information
-
Consignee Name: this field represents the consignee’s name.
-
Company Name: this field represents the consignee’s company name.
-
Phone Number (1): this field represents the consignee’s primary phone number.
-
Phone Number (2): this field represents the consignee’s secondary phone number
-
Short Address: this field represents the consignee’s short address.
-
Postal Code: this field represents a series of letters and numbers added to the postal address to sort and classify mail.
-
Country: this field represents the consignee’s country.
-
City: this field represents the consignee’s city.
-
District: this field represents a location, area, or region linked to the provided address.
-
Address Line: this field represents the consignee’s main address.
-
PO Box: this field represents the postal code for the consignee’s post office box.
-
Longitude: this field represents the longitude of the address to help locate the shipment.
-
Latitude: this field represents the latitude of the address to help locate the shipment.
-
Email Address: this field represents the consignee’s email address.
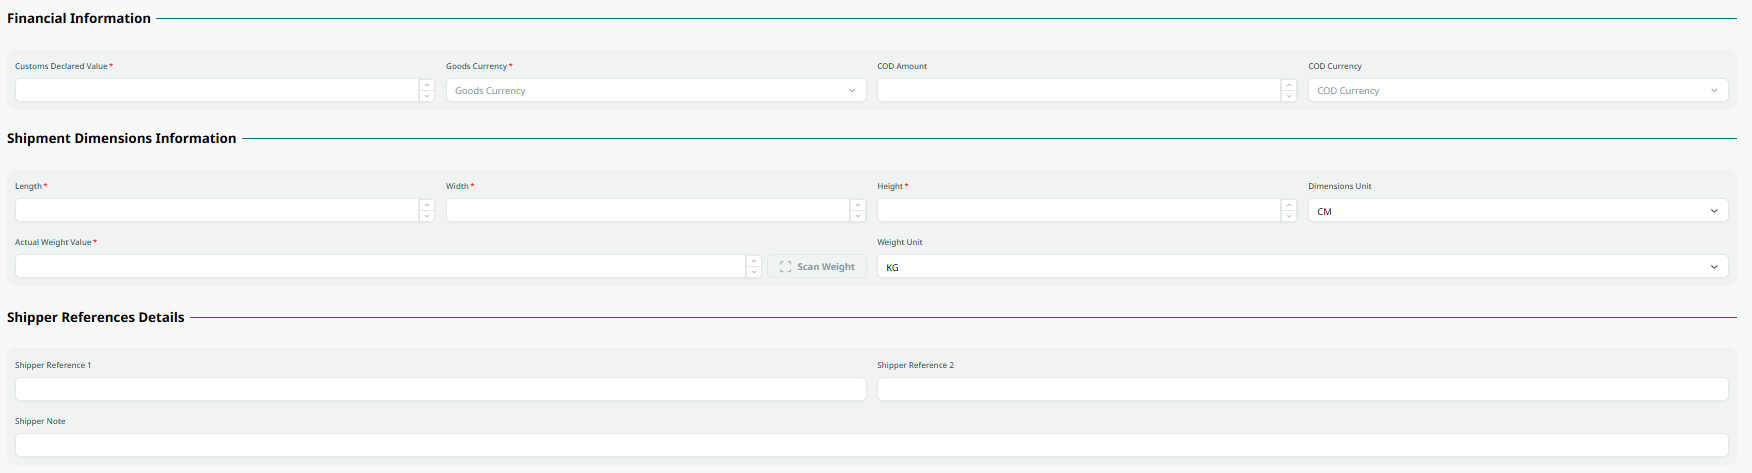
Financial Information
-
Customs Declared Value: this field represents the shipment value to be declared to customs authorities.
-
Goods Currency: this field represents the main currency in which charges will be made.
-
COD Amount: this field represents the amount to be collected on delivery from the consignee.
-
COD Currency: this field represents the currency of the COD amount value.
-
Length: this field represents the shipment’s length.
-
Width: this field represents the shipment’s width.
-
Height: this field represents the shipment’s height.
-
Dimension Unit: this field represents the unit of measurement for shipment dimensions (e.g., CM = centimeters, M = meters).
-
Actual Weight Value: this field represents the item’s actual weight value.
-
Weight Unit: this field represents the unit used to measure the weight of the shipment (e.g., KG = kilograms, LB = pounds).
-
Shipper Reference (1): this field represents any reference number or text added by the shipper.
-
Shipper Reference (2): this field represents any additional reference number or text added by the shipper.
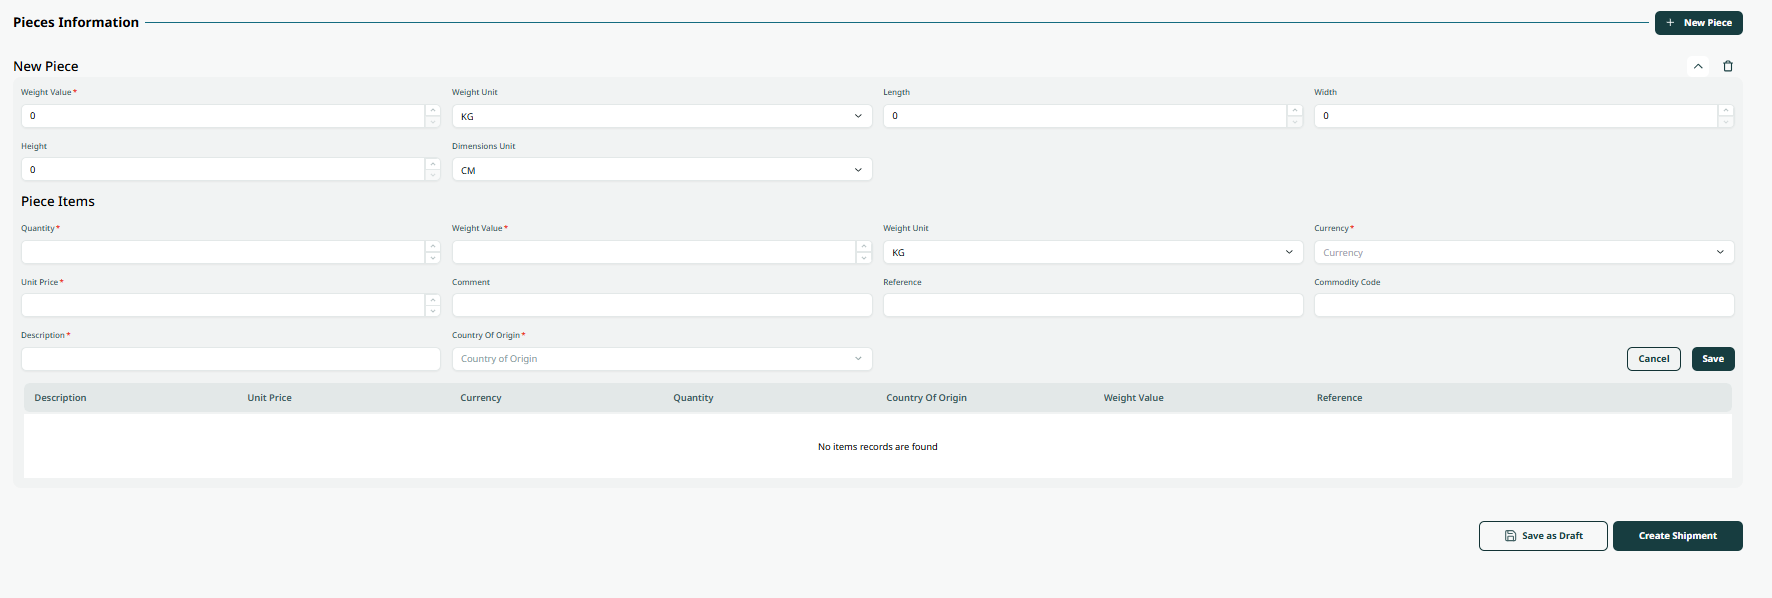
Pieces Information
-
Weight Value: this field represents the item’s actual weight value.
-
Length: this field represents the shipment’s length.
-
Width: this field represents the shipment’s width.
-
Height: this field represents the shipment’s height.
-
Dimension Unit: this field represents the unit of measurement for the shipment (e.g., CM = centimeters, M = meters).
-
Weight Unit: this field represents the unit used to measure the shipment’s weight (e.g., KG = kilograms, LB = pounds).
-
Quantity: this field represents the number of pieces.
-
Weight Value: this field represents the actual weight of the individual piece.
-
Weight Unit: this field represents the unit used to measure the weight of the piece.
-
Currency: this field represents the type of currency.
-
Unit Price: this field represents the price of the unit.
-
Comment: this field represents any comments related to the piece.
-
Commodity Code: this field represents a sequence of six, eight, or ten digits used to classify goods within European Union countries or outside member states.
-
Reference: this field represents the reference number.
-
Description: this field represents a detailed description of the piece.
-
Country of Origin: this field represents the piece origin country.
By clicking on “Save” the piece will be added successfully.
By Clicking on “Save Changes” the shipment will be updated successfully.
4. Add New Shipment (Maslahi)
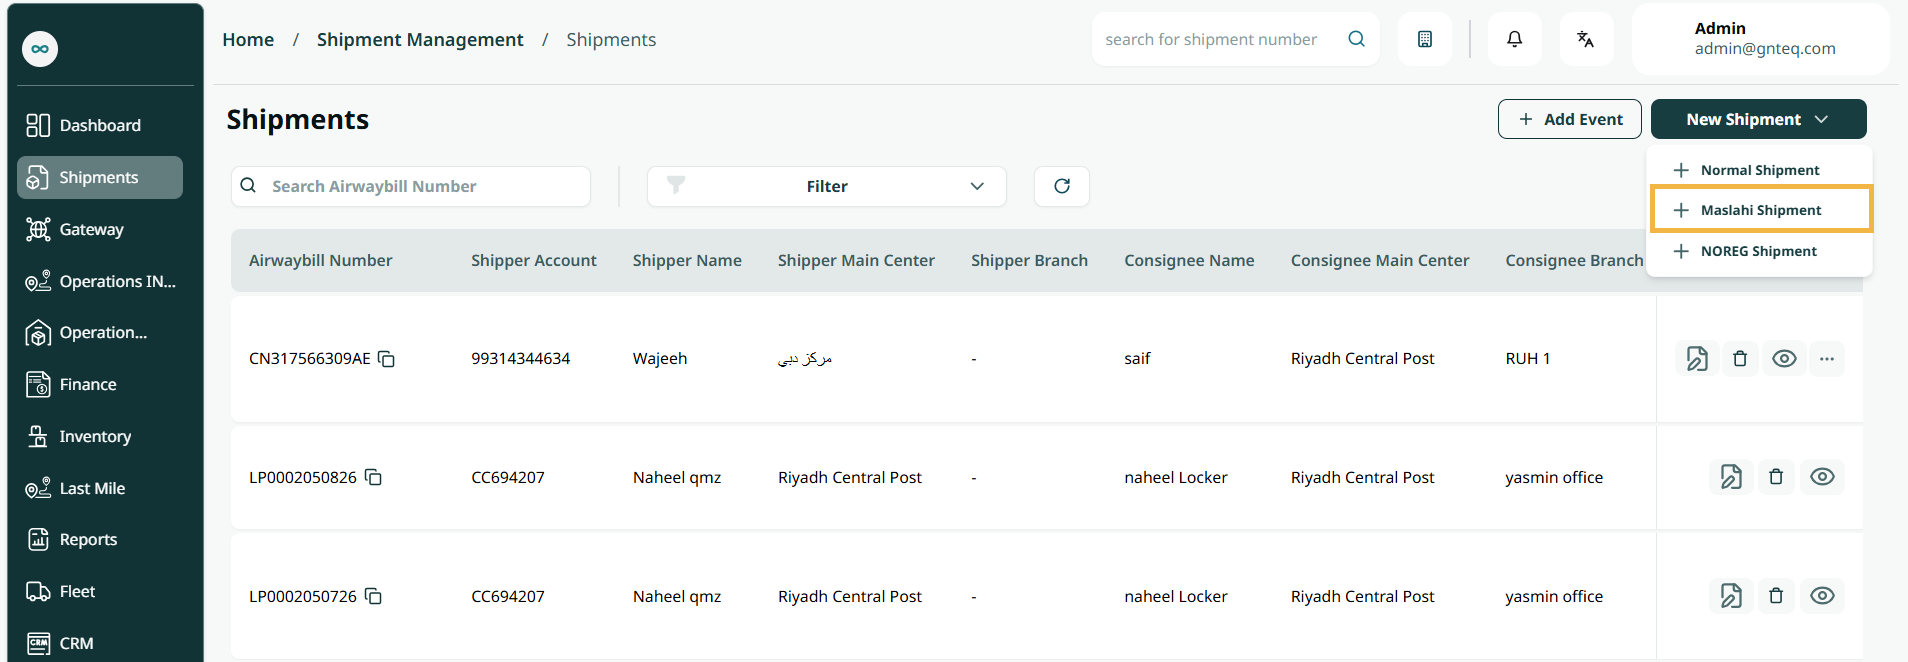
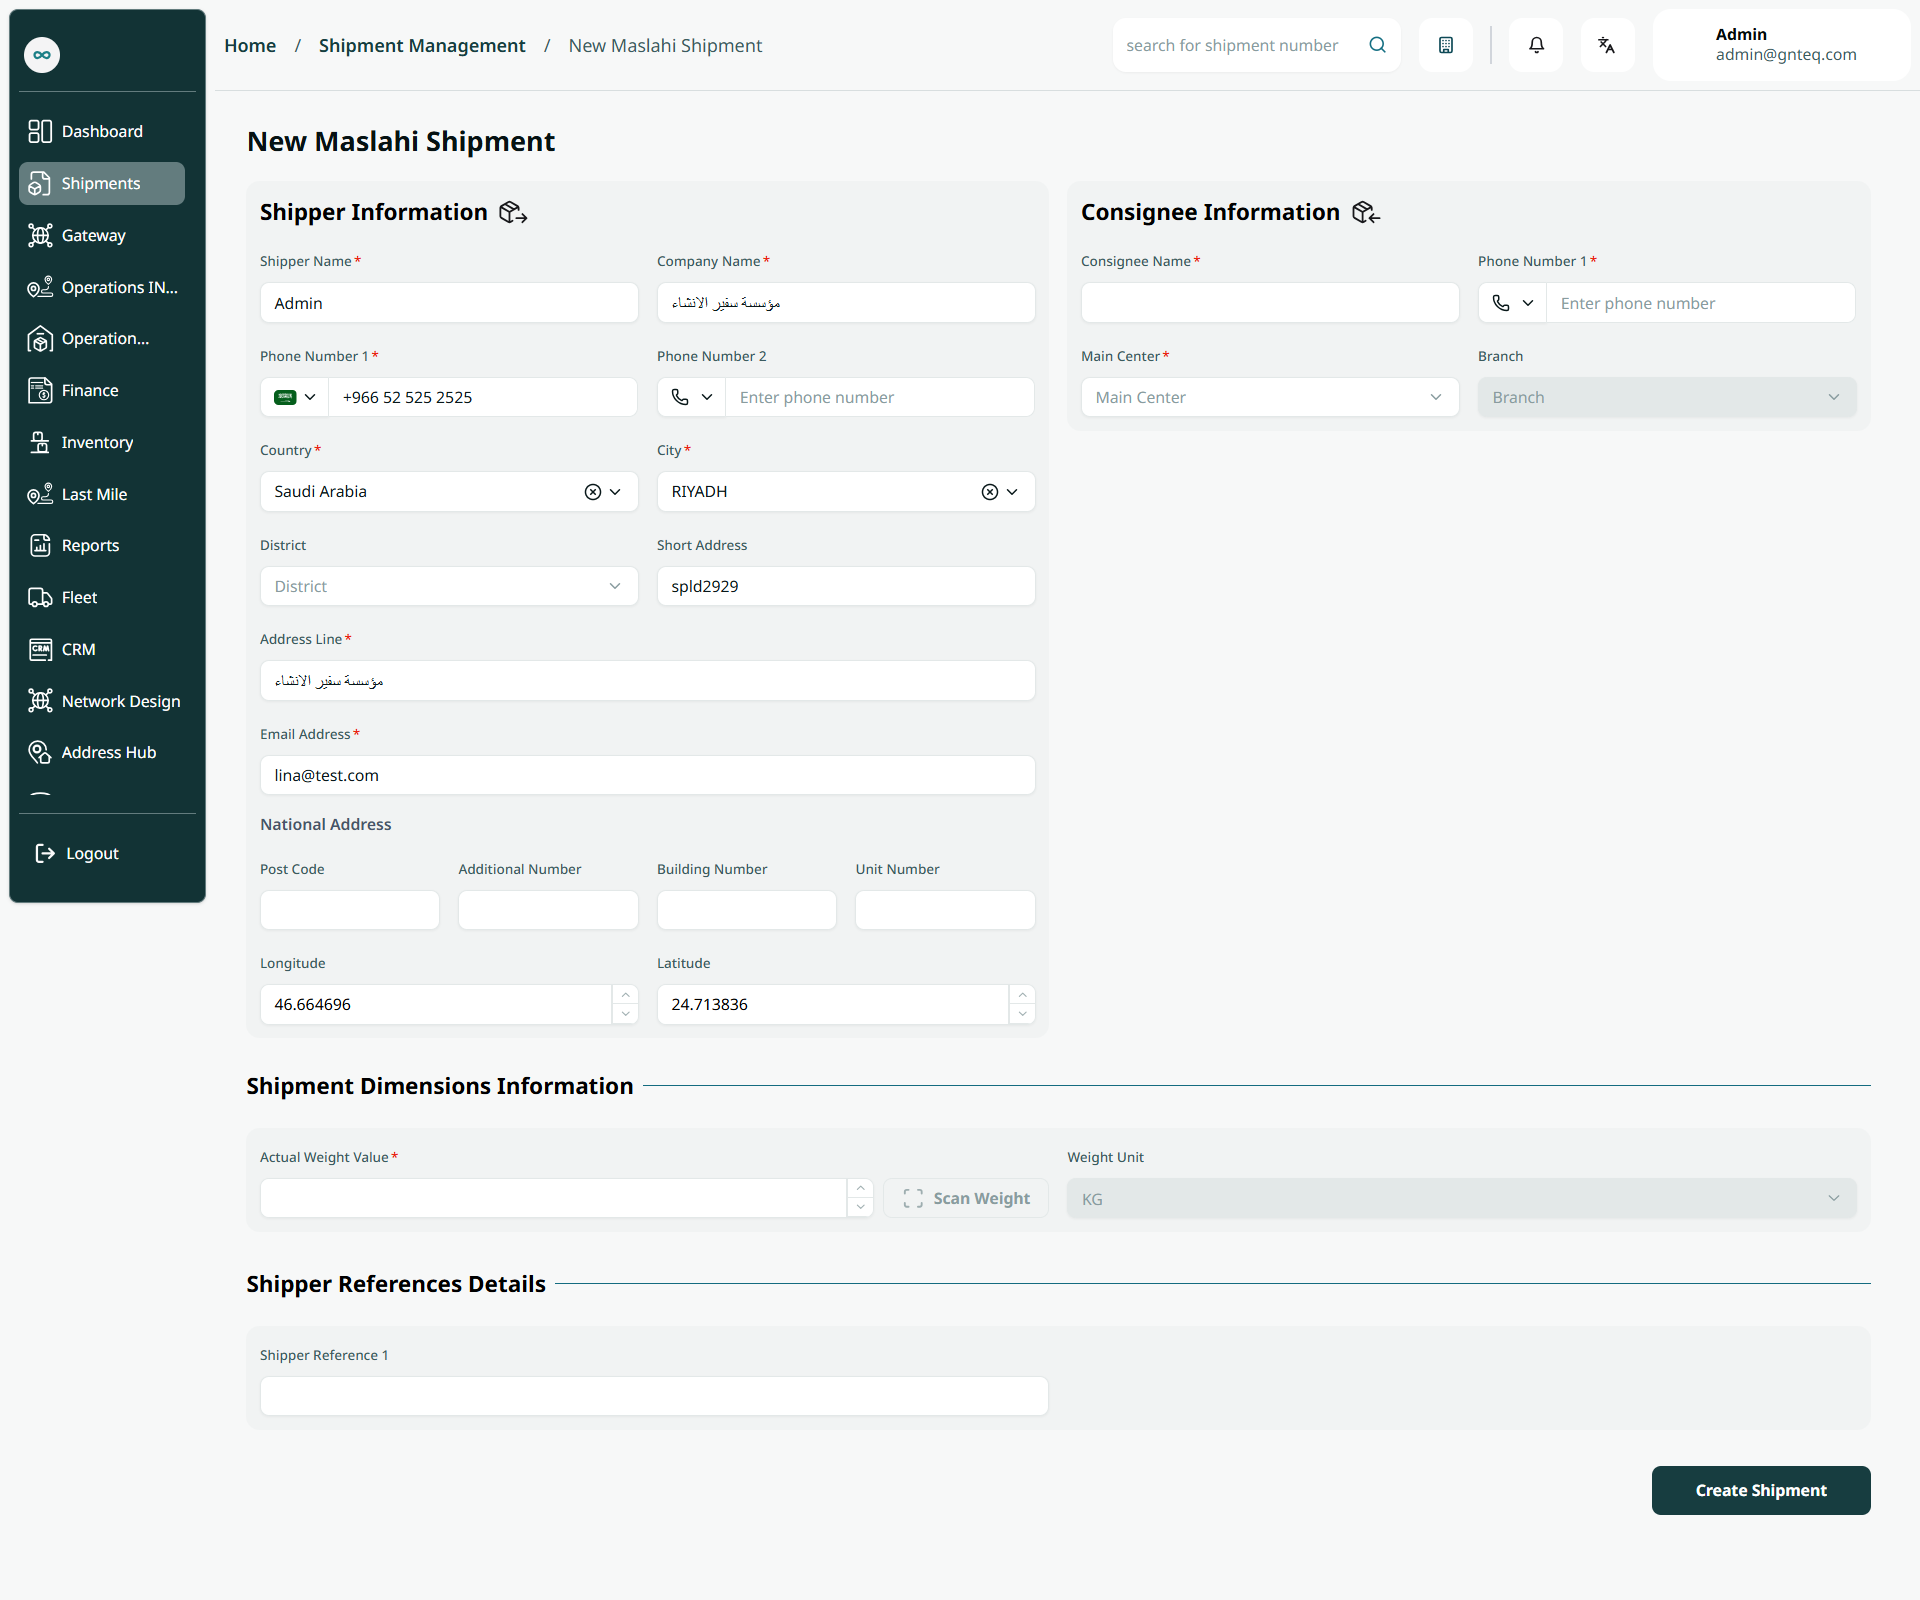
The user can create a new Masalhi shipment in the system by clicking the New Shipment button and selecting the Masalhi shipment type, by navigating to the Shipments screen via Shipment Management.
Shipper Information
-
Shipper Name: this field represents the shipper’s name.
-
Company Name: this field represents the company’s name.
-
Phone Number (1): this field represents the shipper’s primary phone number.
-
Phone Number (2): this field represents the shipper’s secondary phone number.
-
Country: this field represents the shipper’s country.
-
City: this field represents the shipper’s city.
-
District: this field represents a location, area, or region linked to the provided address.
-
Short Address: this field represents the shipper short address.
-
Address line: this field represents the shipper’s address.
-
Email Address: this field represents the shipper’s email address.
-
Post Code: this field represents a series of letters and numbers added to the postal address to sort and classify mail.
Consignee Information
-
Consignee Name: this field represents the consignee’s name.
-
Phone Number: this field represents the consignee’s primary phone number.
-
Main Center: this field represents the city where the shipment will arrive.
-
Branch: This field represents the branch to which the shipment will arrive.
Shipment Dimensions Information
-
Actual Weight Value: this field represents the item’s actual weight value.
-
Weight Unit: this field represents the unit used to measure the weight of the shipment (e.g., KG = kilograms, LB = pounds).
-
Shipper Reference (1): this field represents any reference number or text added by the shipper.
By clicking Create Shipment, the shipment will be added to system successfully.
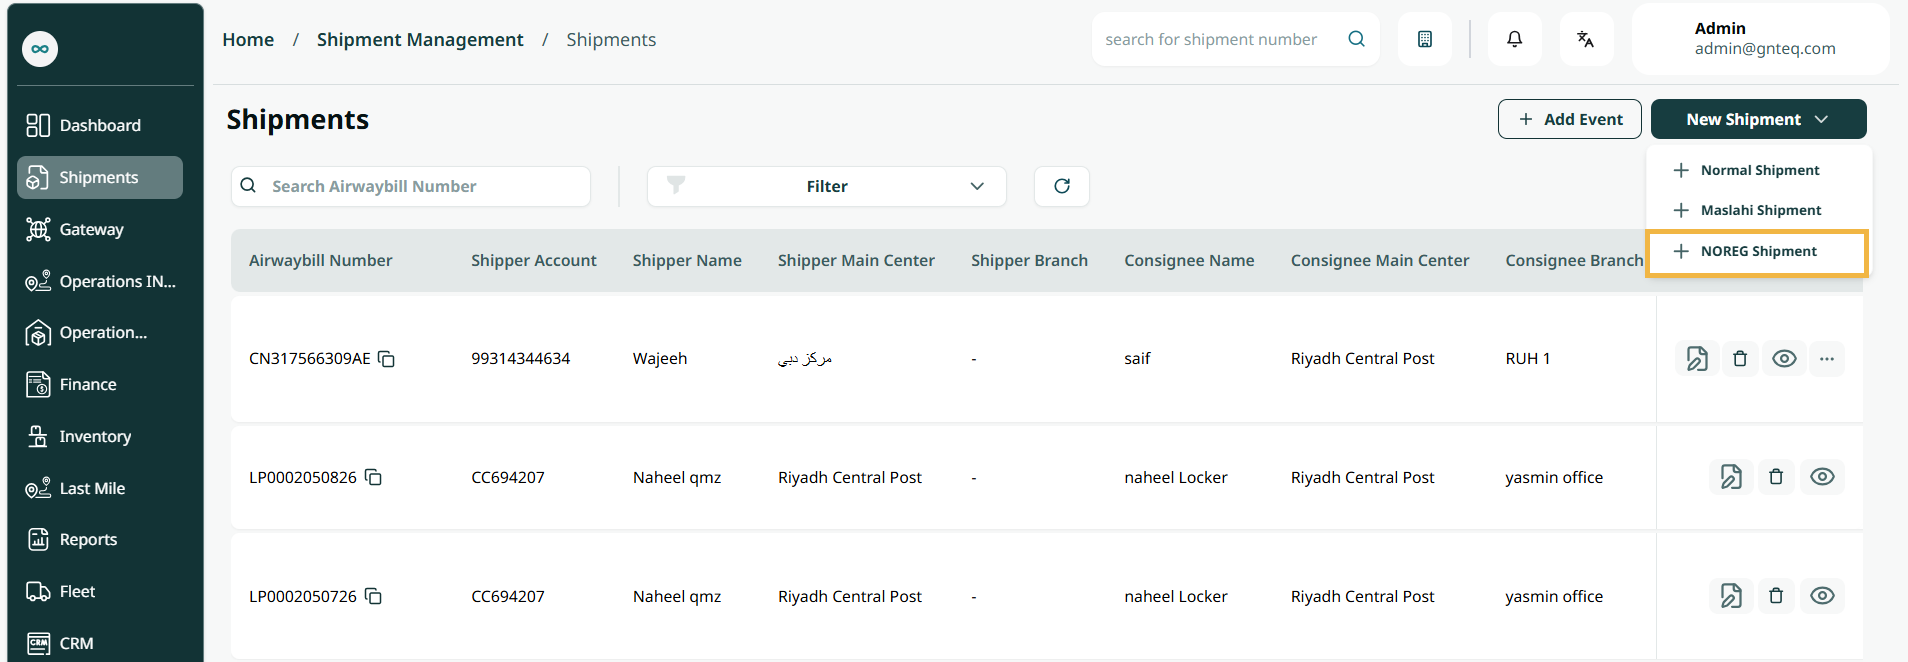
5. Add New Shipment (NOREG)
-
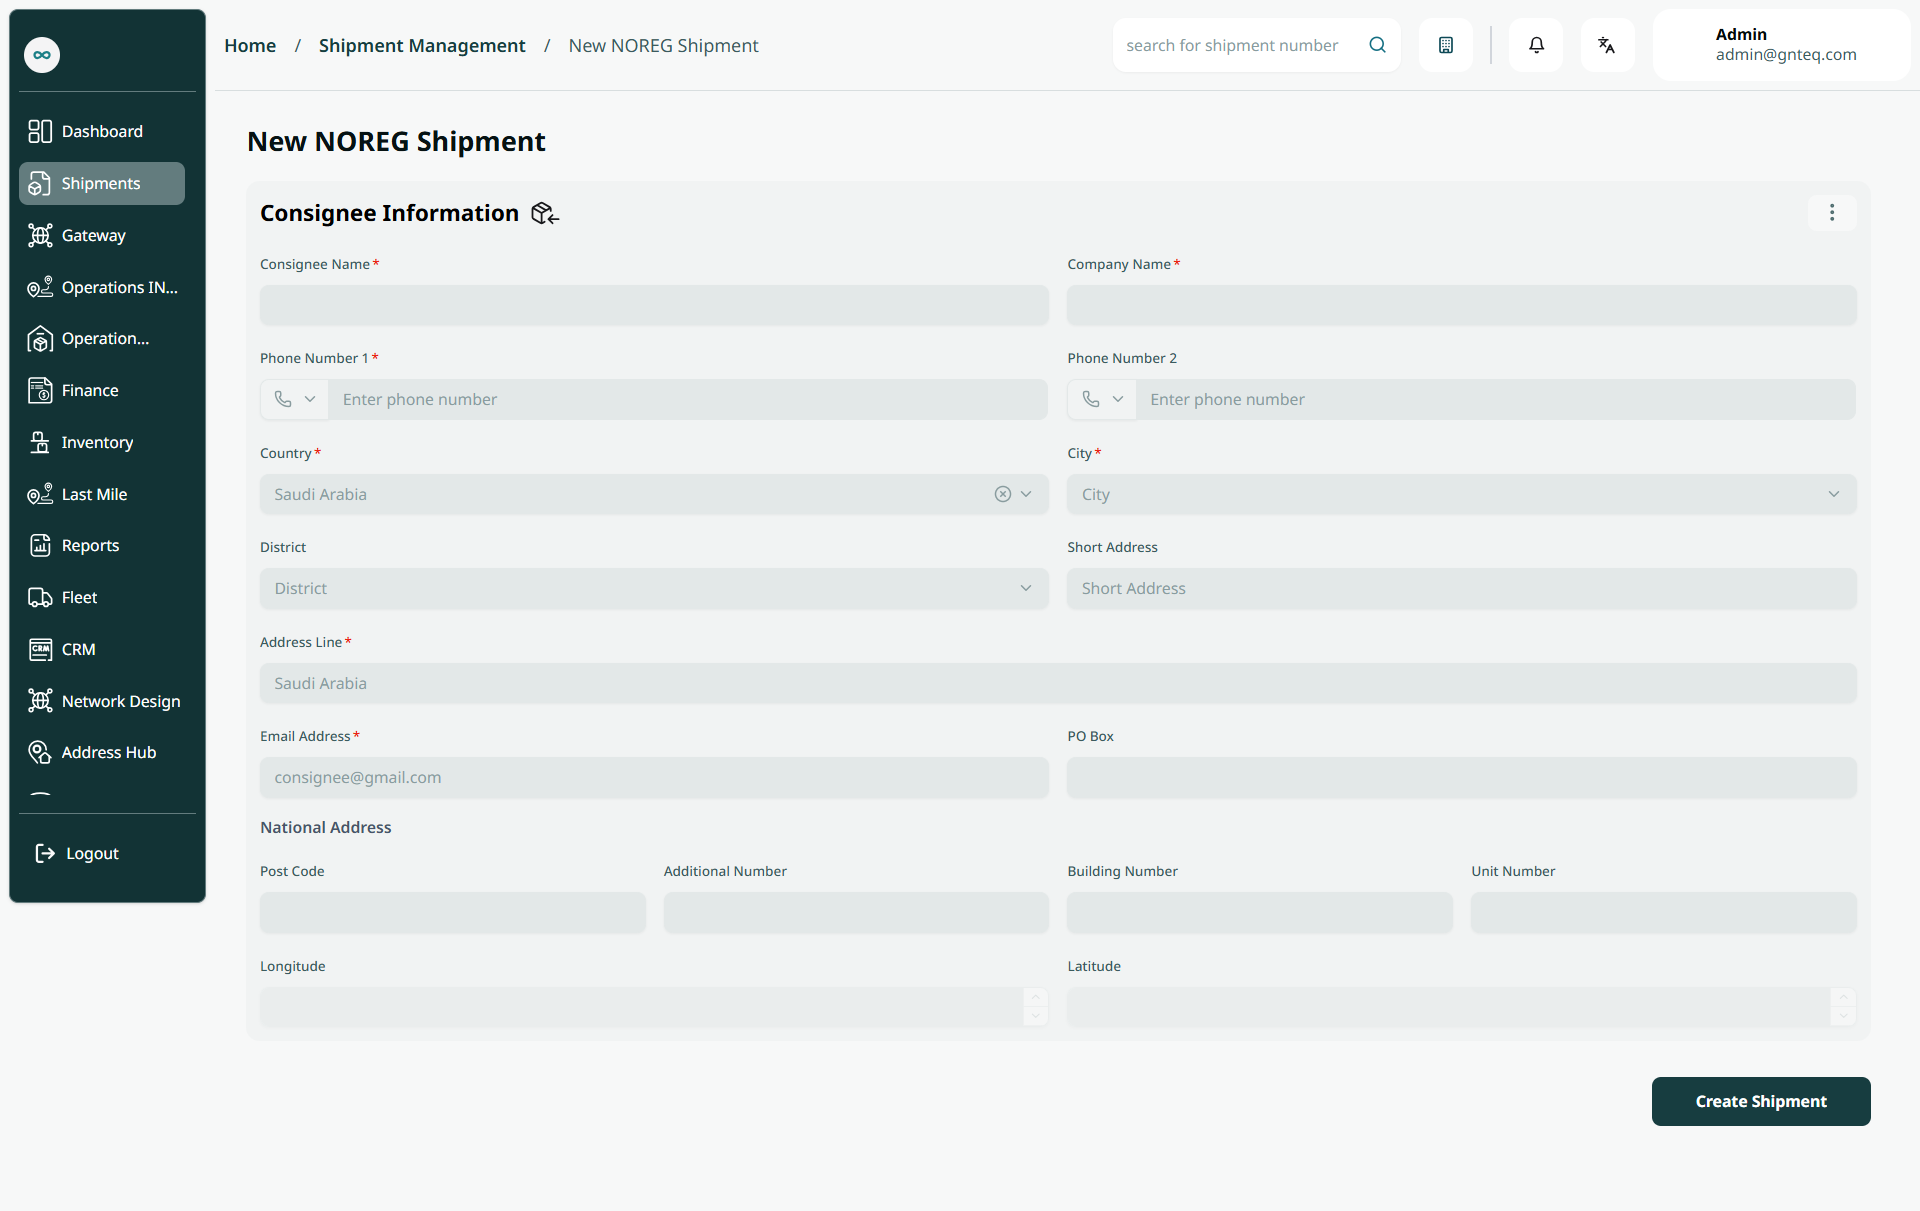
Consignee Name: this field represents the consignee’s name.
-
Company Name: this field represents the company’s name.
-
Phone Number (1): this field represents the consignee’s primary phone number.
-
Phone Number (2): this field represents the consignee’s secondary phone number.
-
Country: this field represents the consignee’s country.
-
City: this field represents the consignee’s city.
-
District: this field represents a location, area, or region linked to the provided address.
-
Short Address: this field represents the consignee’s short address.
-
Address line: this field represents the consignee’s address.
-
Email Address: this field represents the consignee’s email address.
-
PO Box: this field represents the postal code for the consignee’s post office box.
-
Post Code: this field represents a series of letters and numbers added to the postal address to sort and classify mail.
-
Longitude: this field represents the longitude of the address to help locate the shipment.
-
Latitude: this field represents the latitude of the address to help locate the shipment.
By clicking Create Shipment, the shipment will be added to system successfully.