
1. Official Mail
1.1 Dashboard
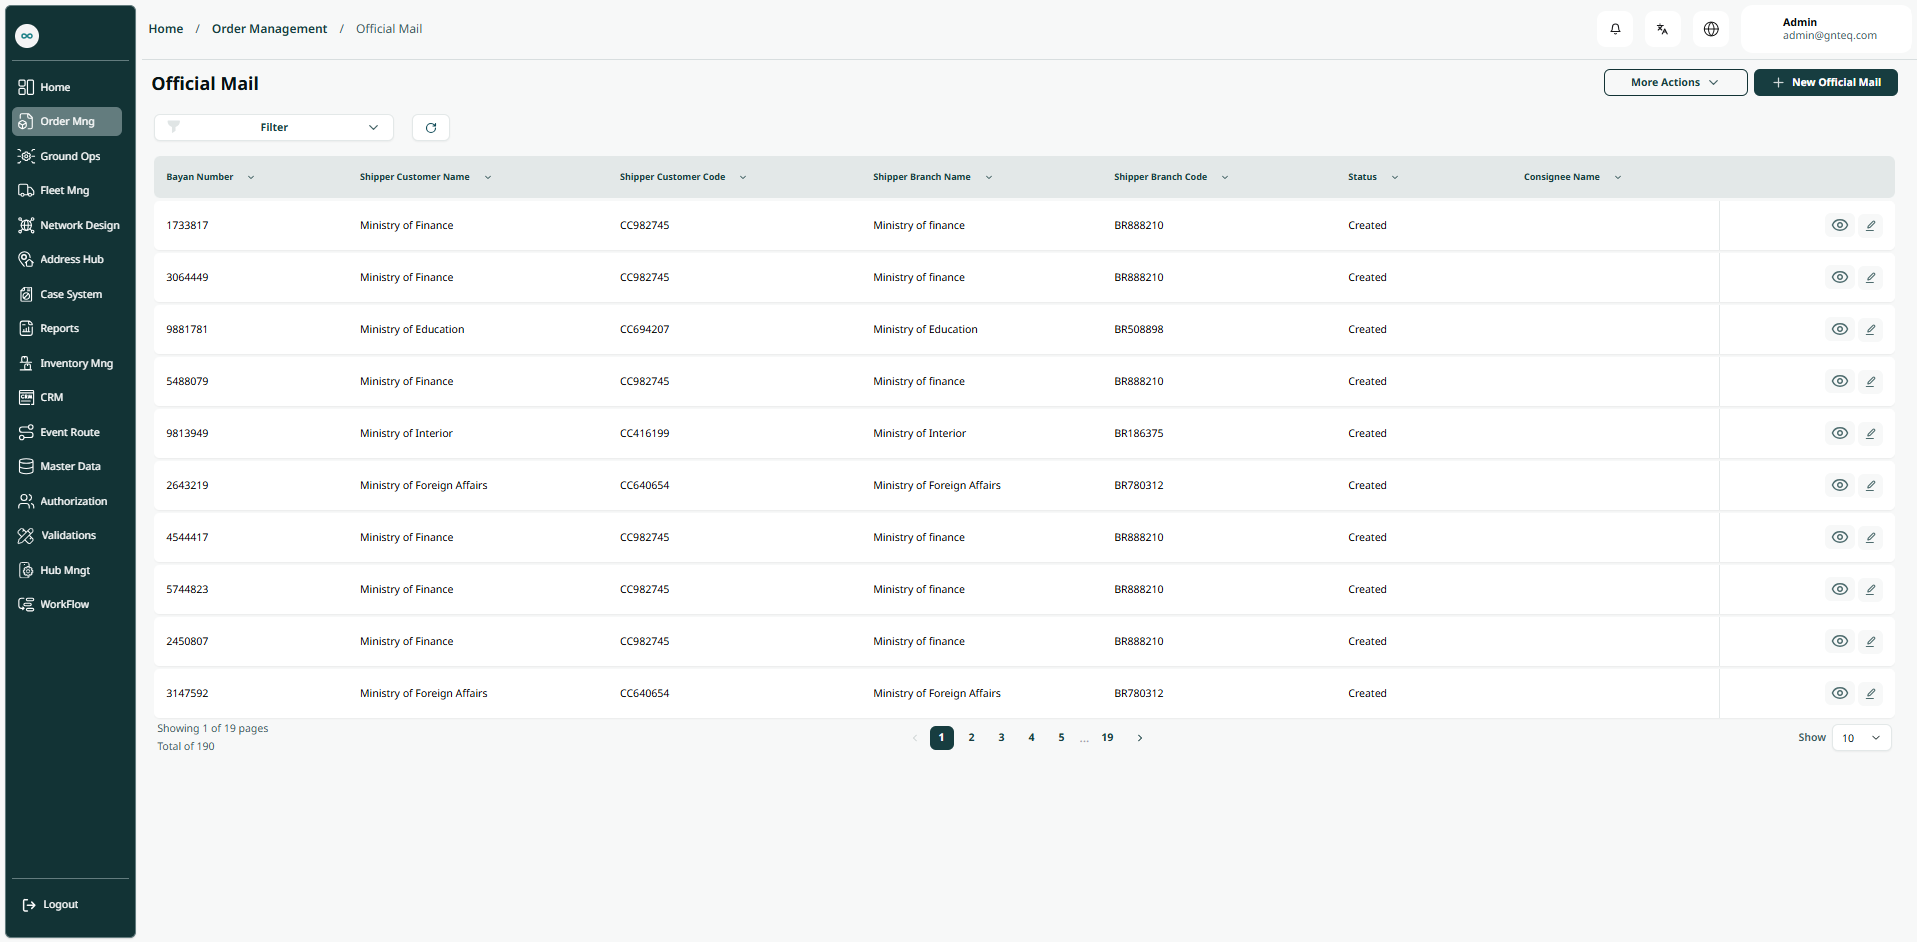
The user can delivering official mail shipments for government entities and individuals by navigating to the ‘Official Mail’ screen via the Order Management as follows:
-
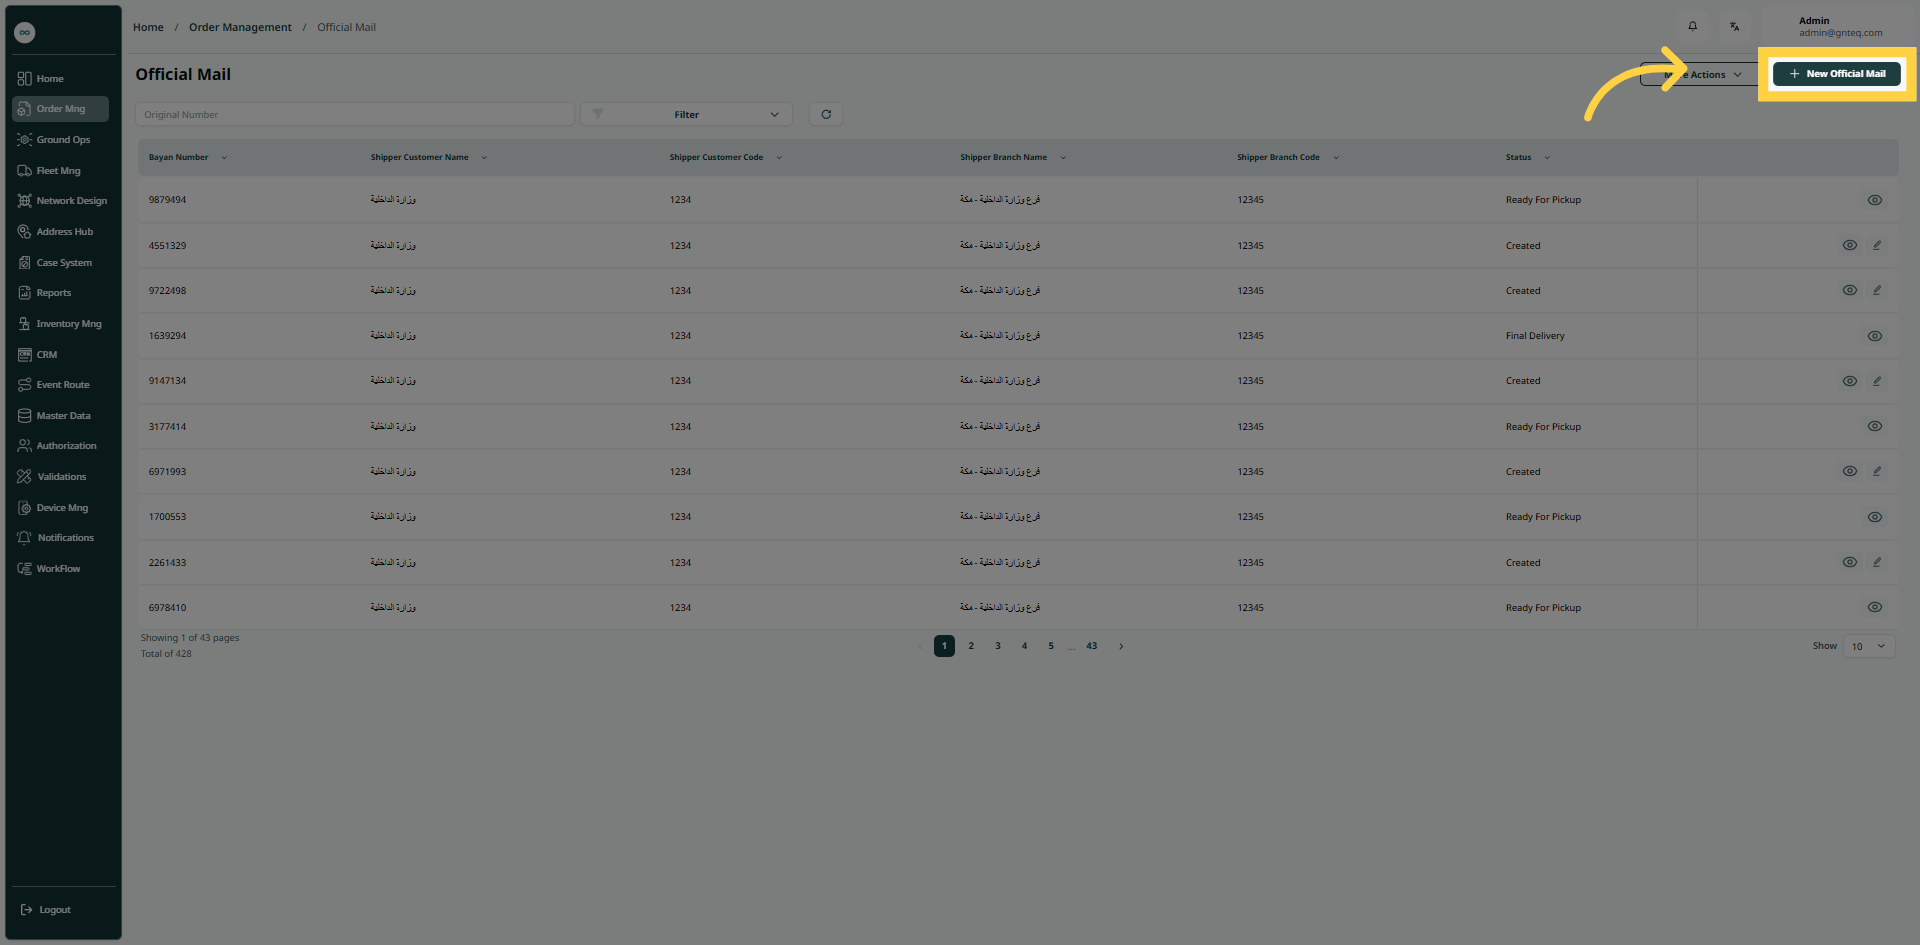
New Official Mail : the user can create new official mail by clicking on “New official Mail”.
-
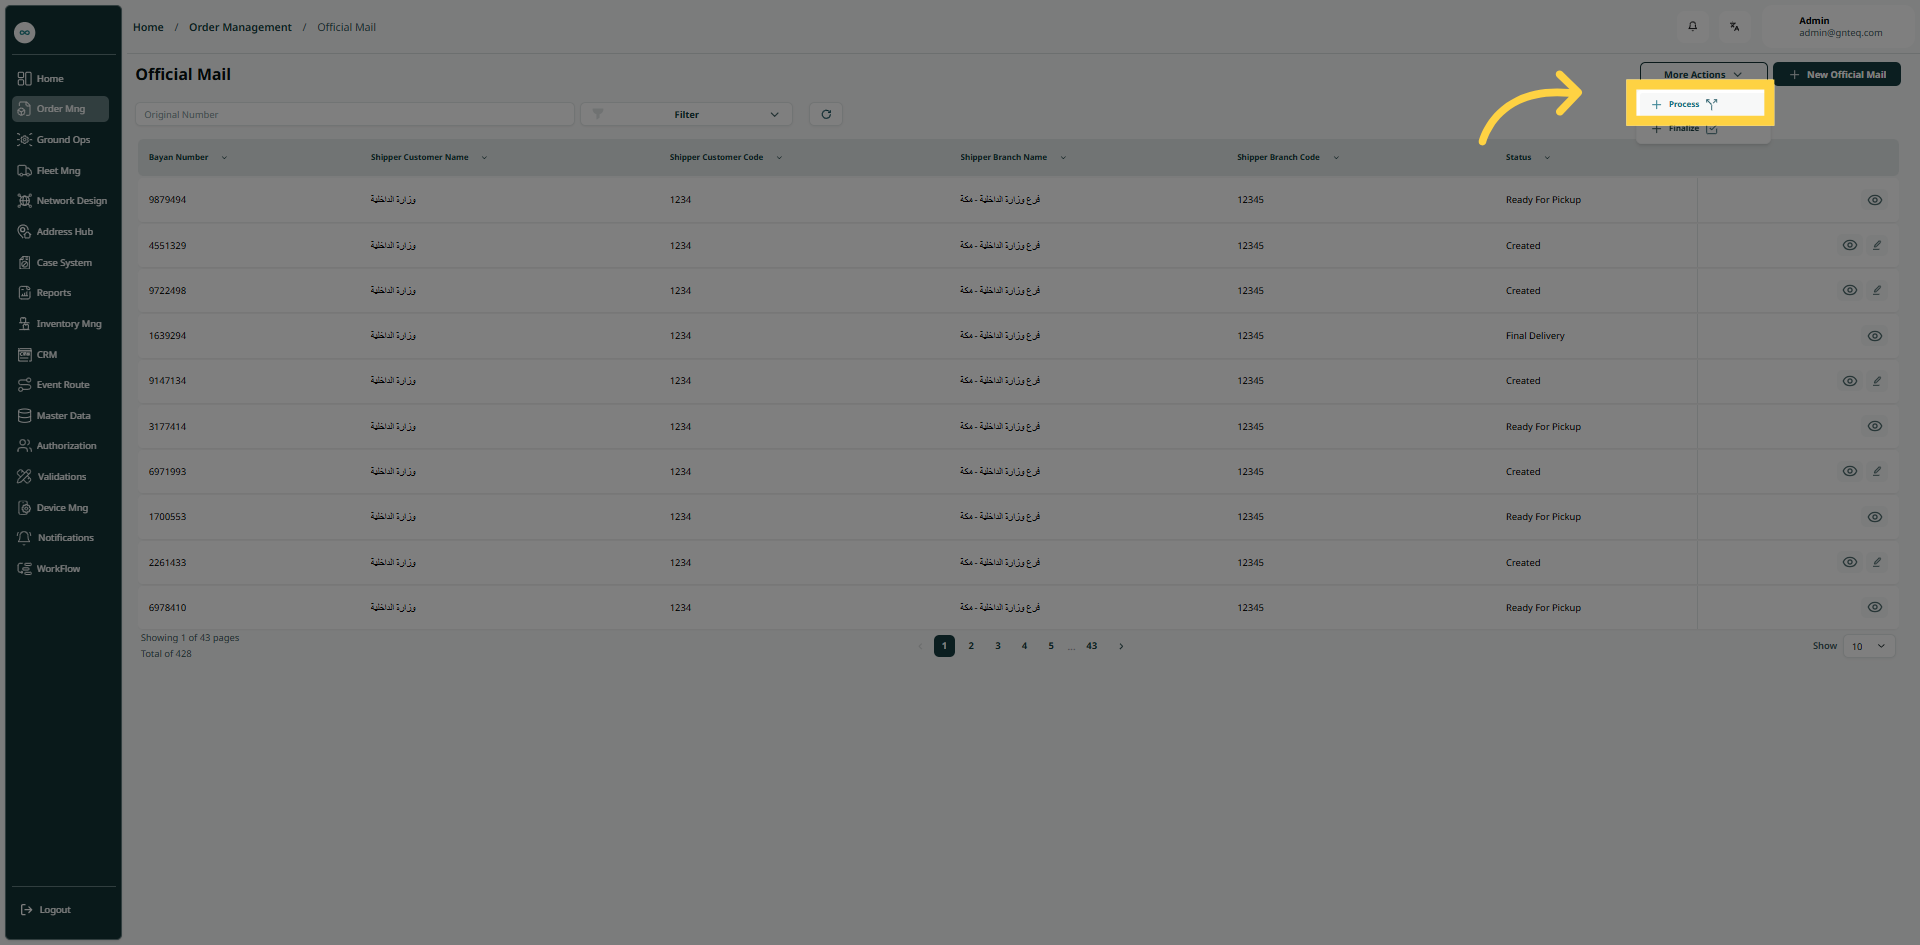
Process: the user can start processing shipments by clicking on “Process” by clicking on More Actions.
-
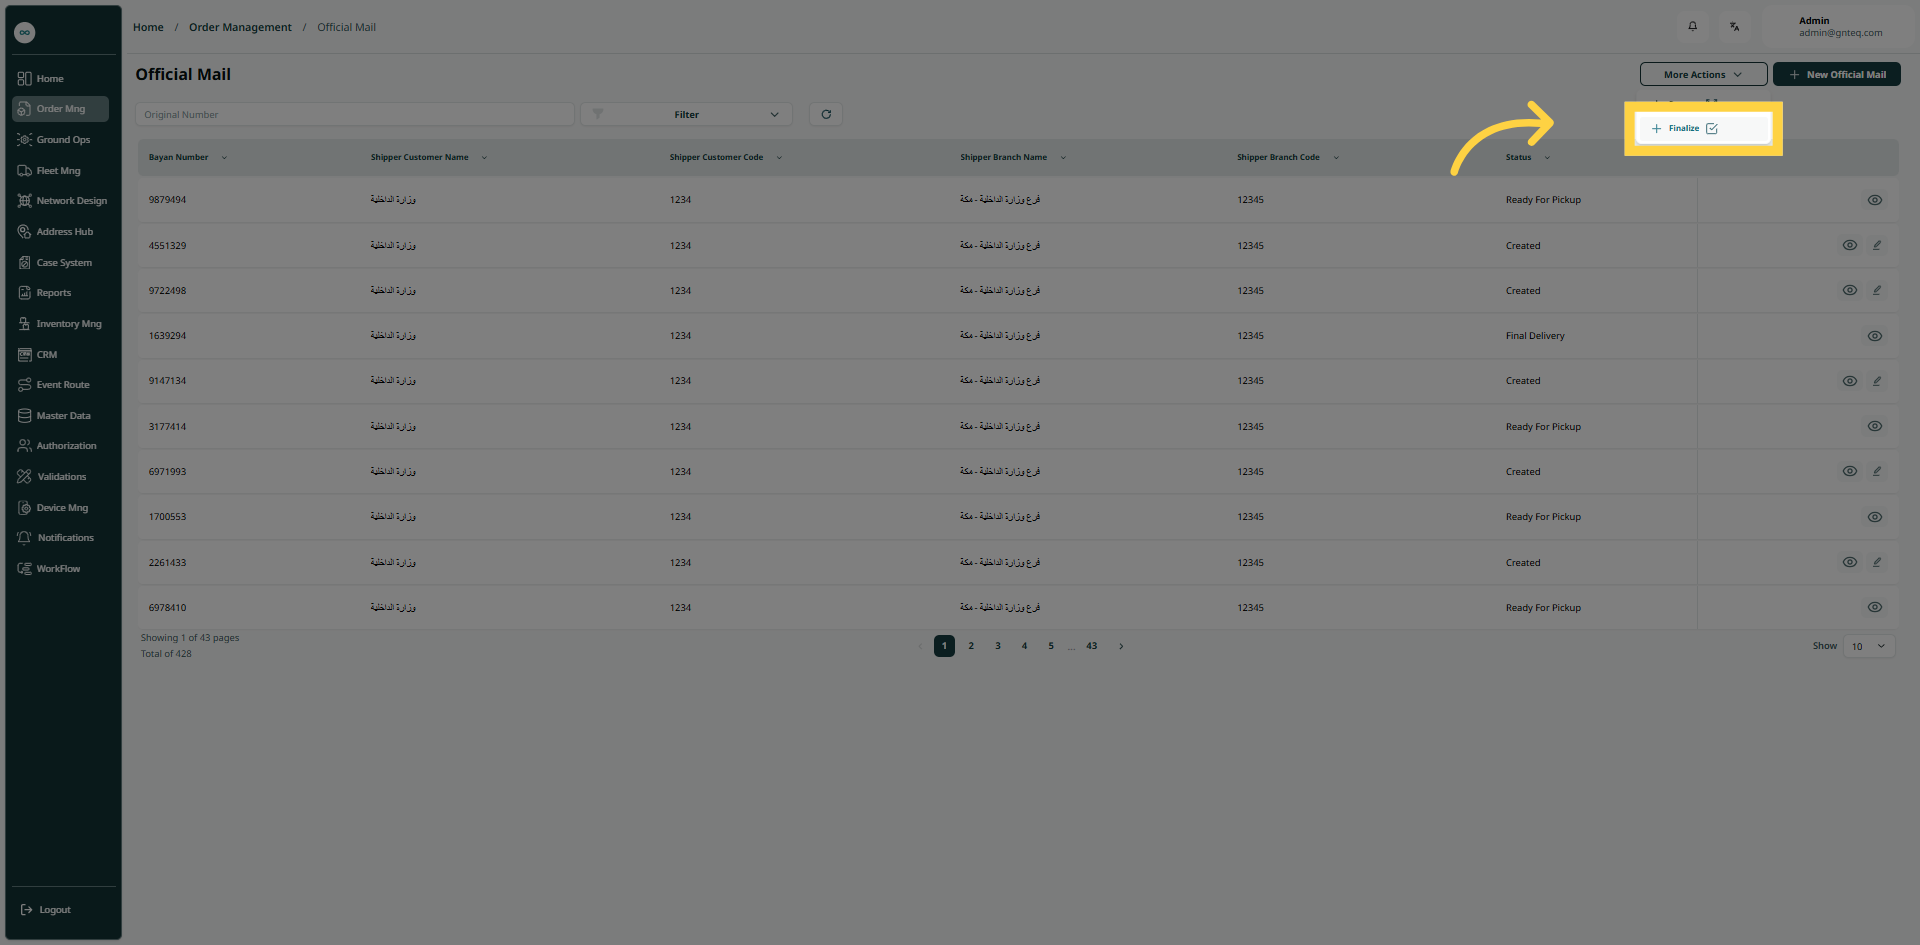
Finalize: the user can finalize shipments by clicking on “Finalize” by clicking on More Actions.
-
Filters: the user can search for the mail by the bayan number or shipper branch code… etc.
-
Rows Per Page: the user can select the number of items to show on each page.
-
Actions: By clicking on Actions, the user can edit the official mail by going to the Edit official mail section, or delete the official mail.
1.1.1 View Details
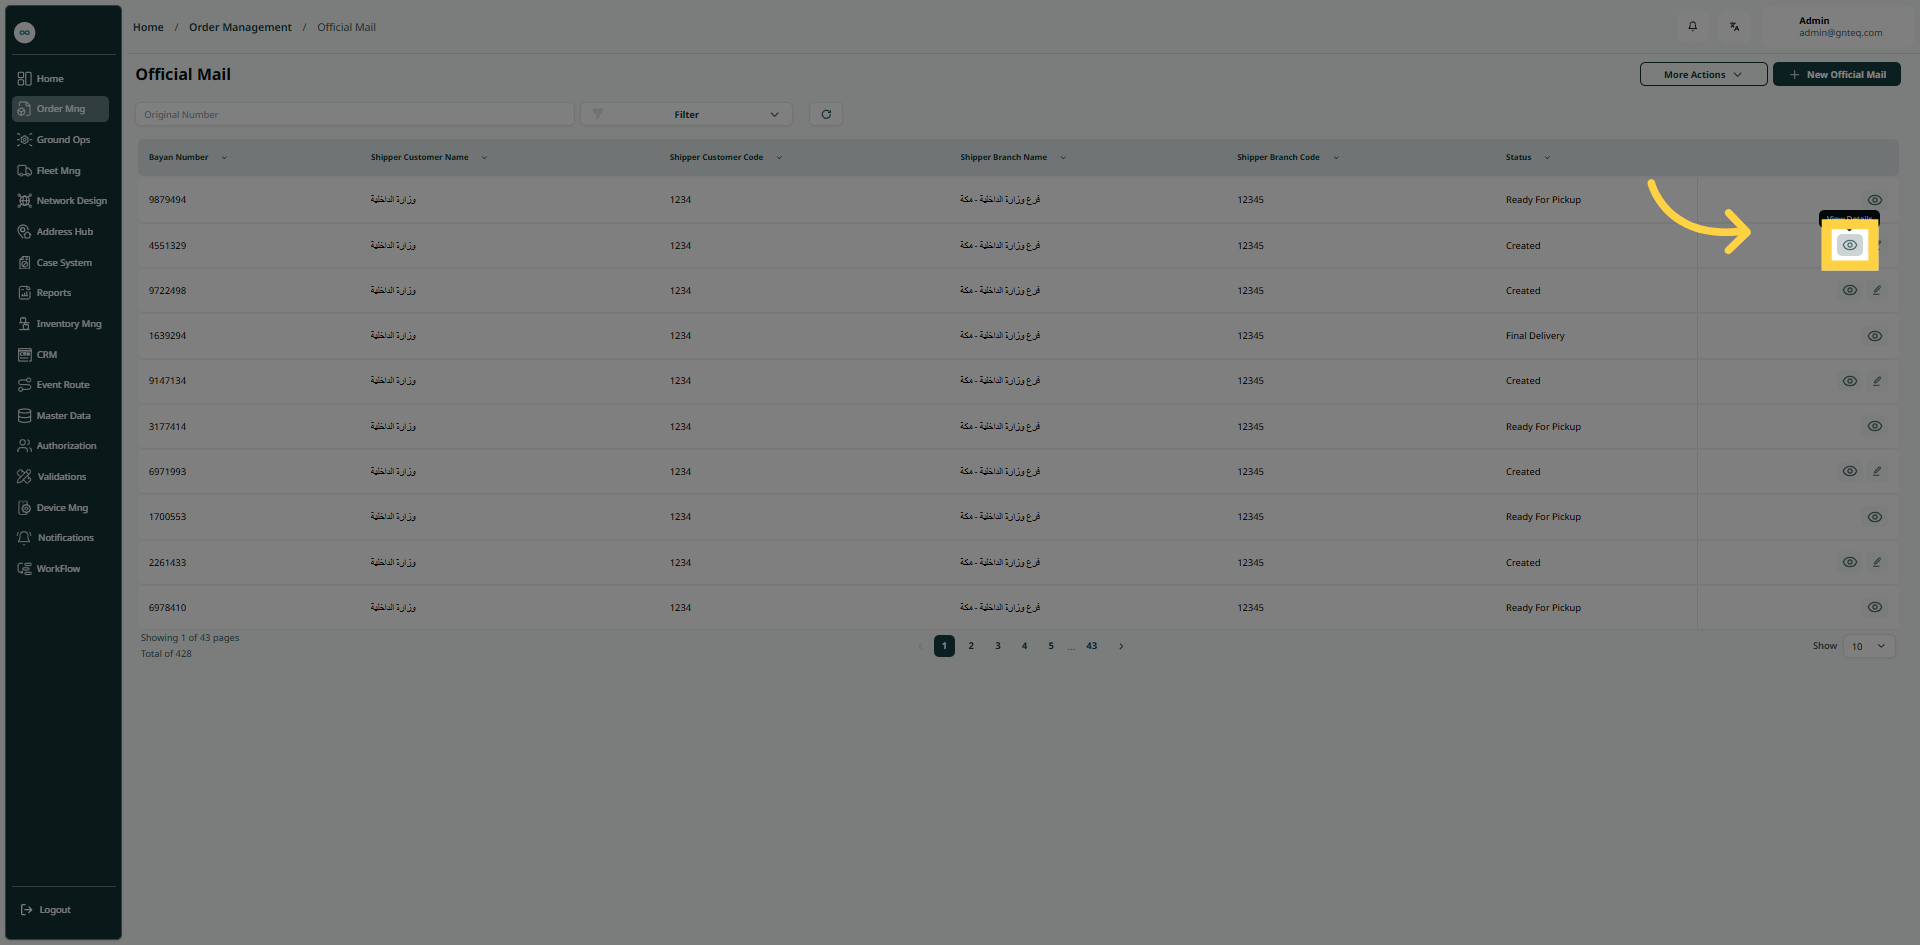
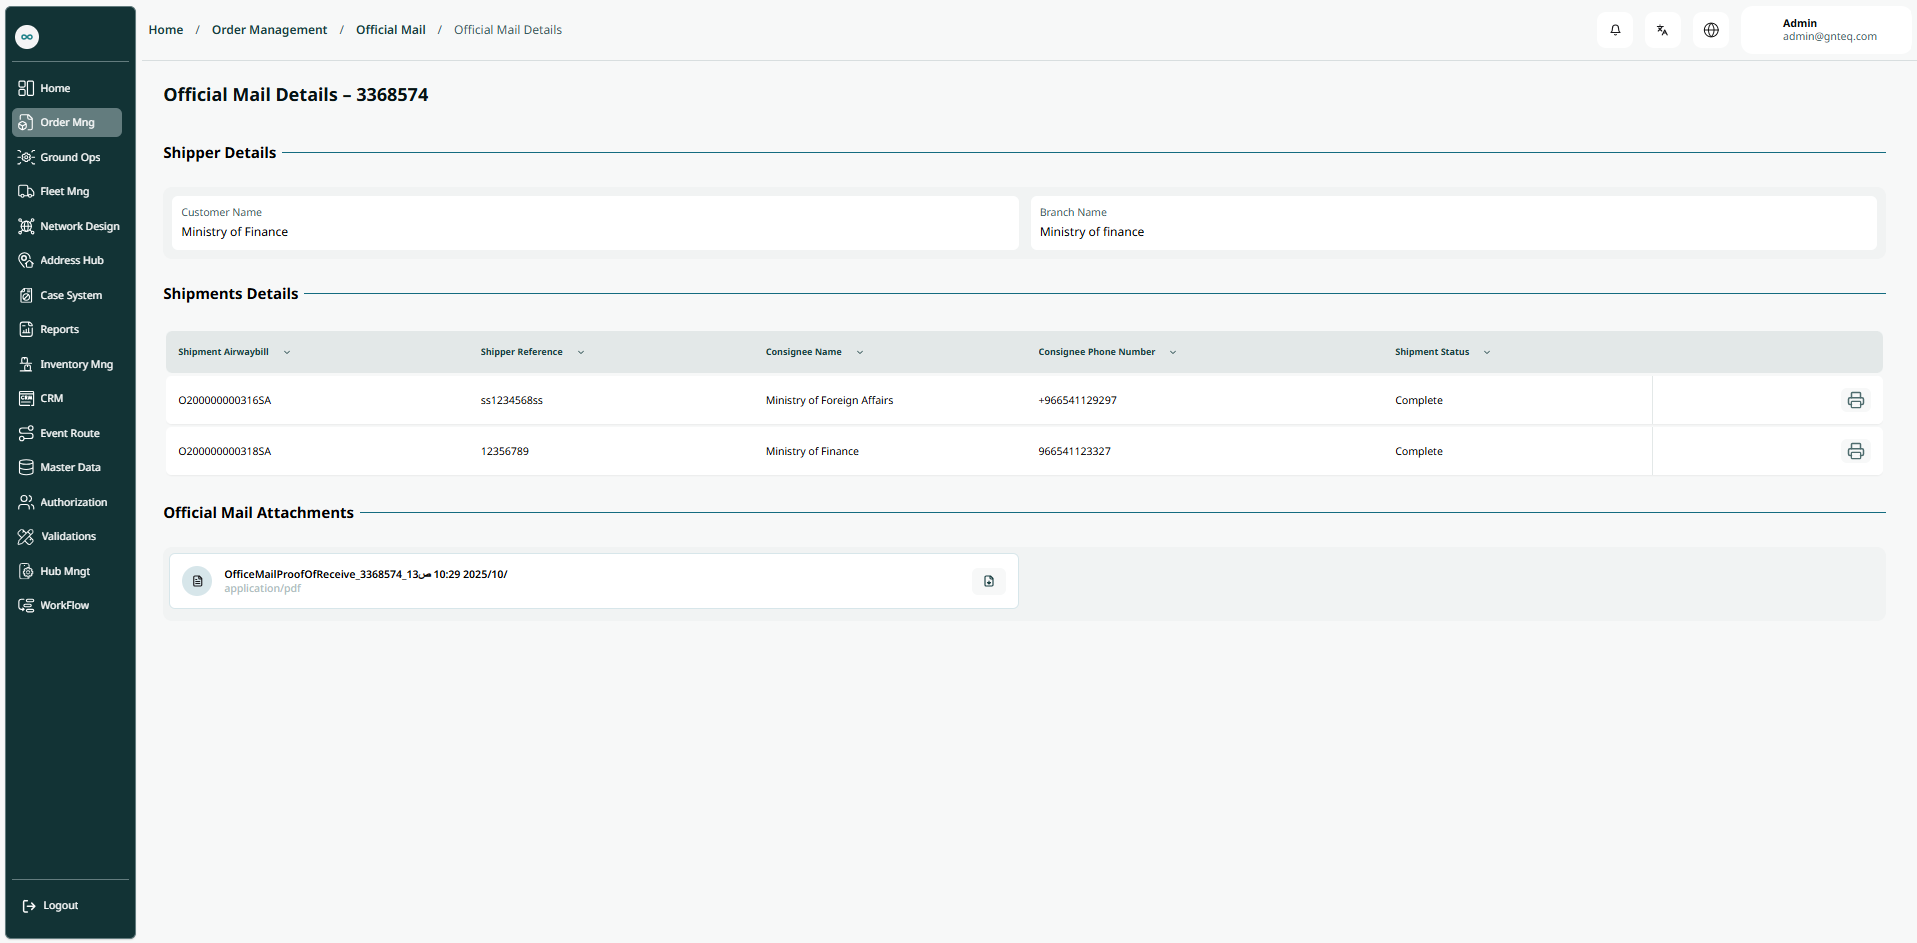
The user can view the shipment details by navigating to the ‘Official Mail’ screen via the Order Management and clicking on View Details from Actions as follows:
1.1.2 Edit Information
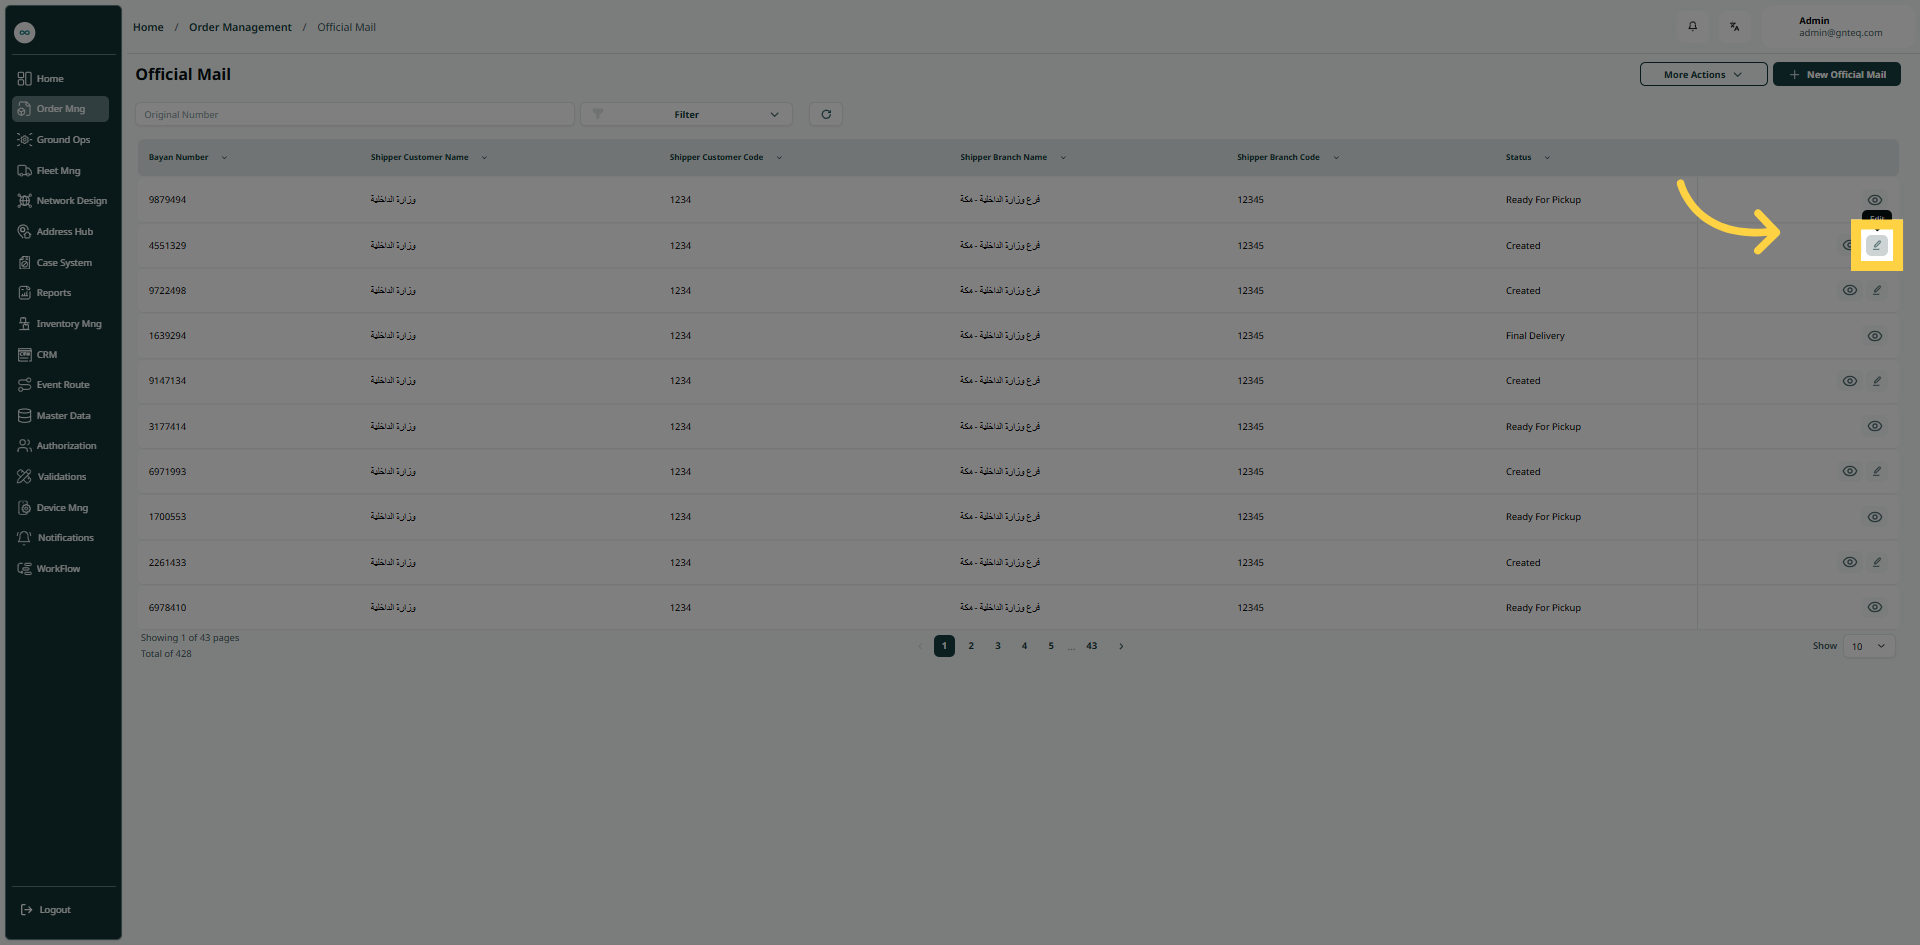
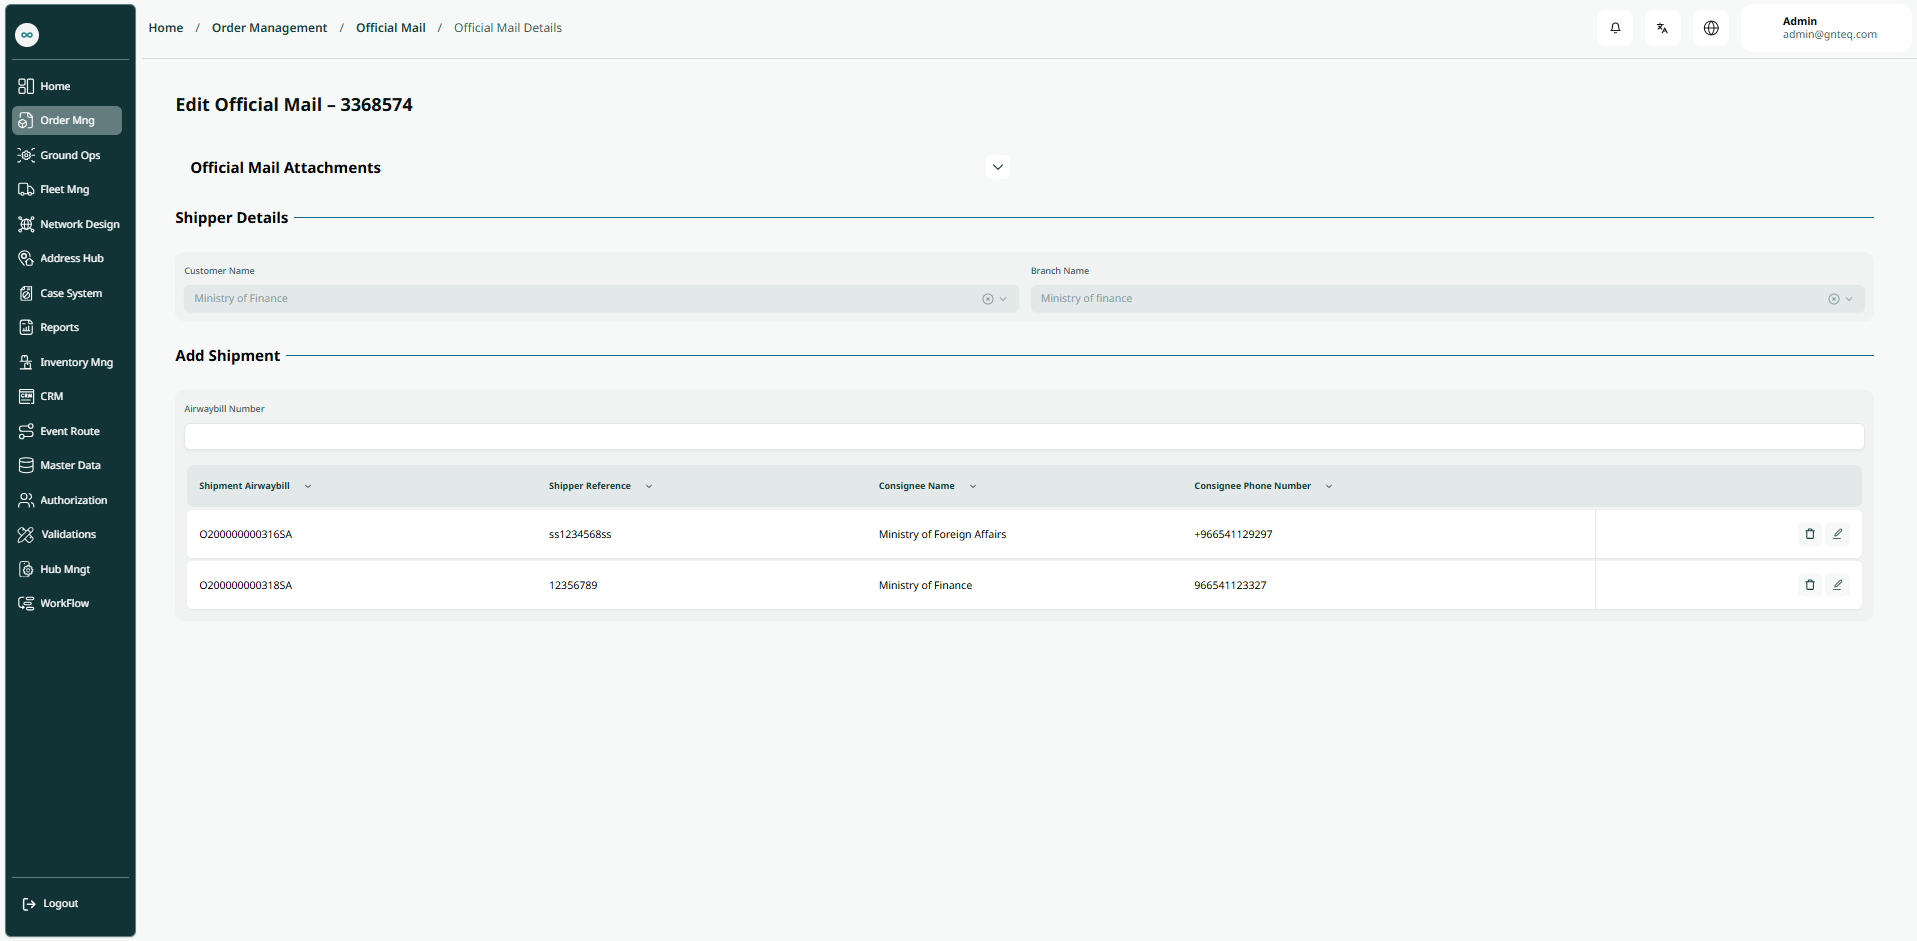
The user can edit the shipment details by navigating to the ‘Official Mail’ screen via the Order Management and clicking on Edit Information from Actions as follows:
1.2 Add New Official Mail
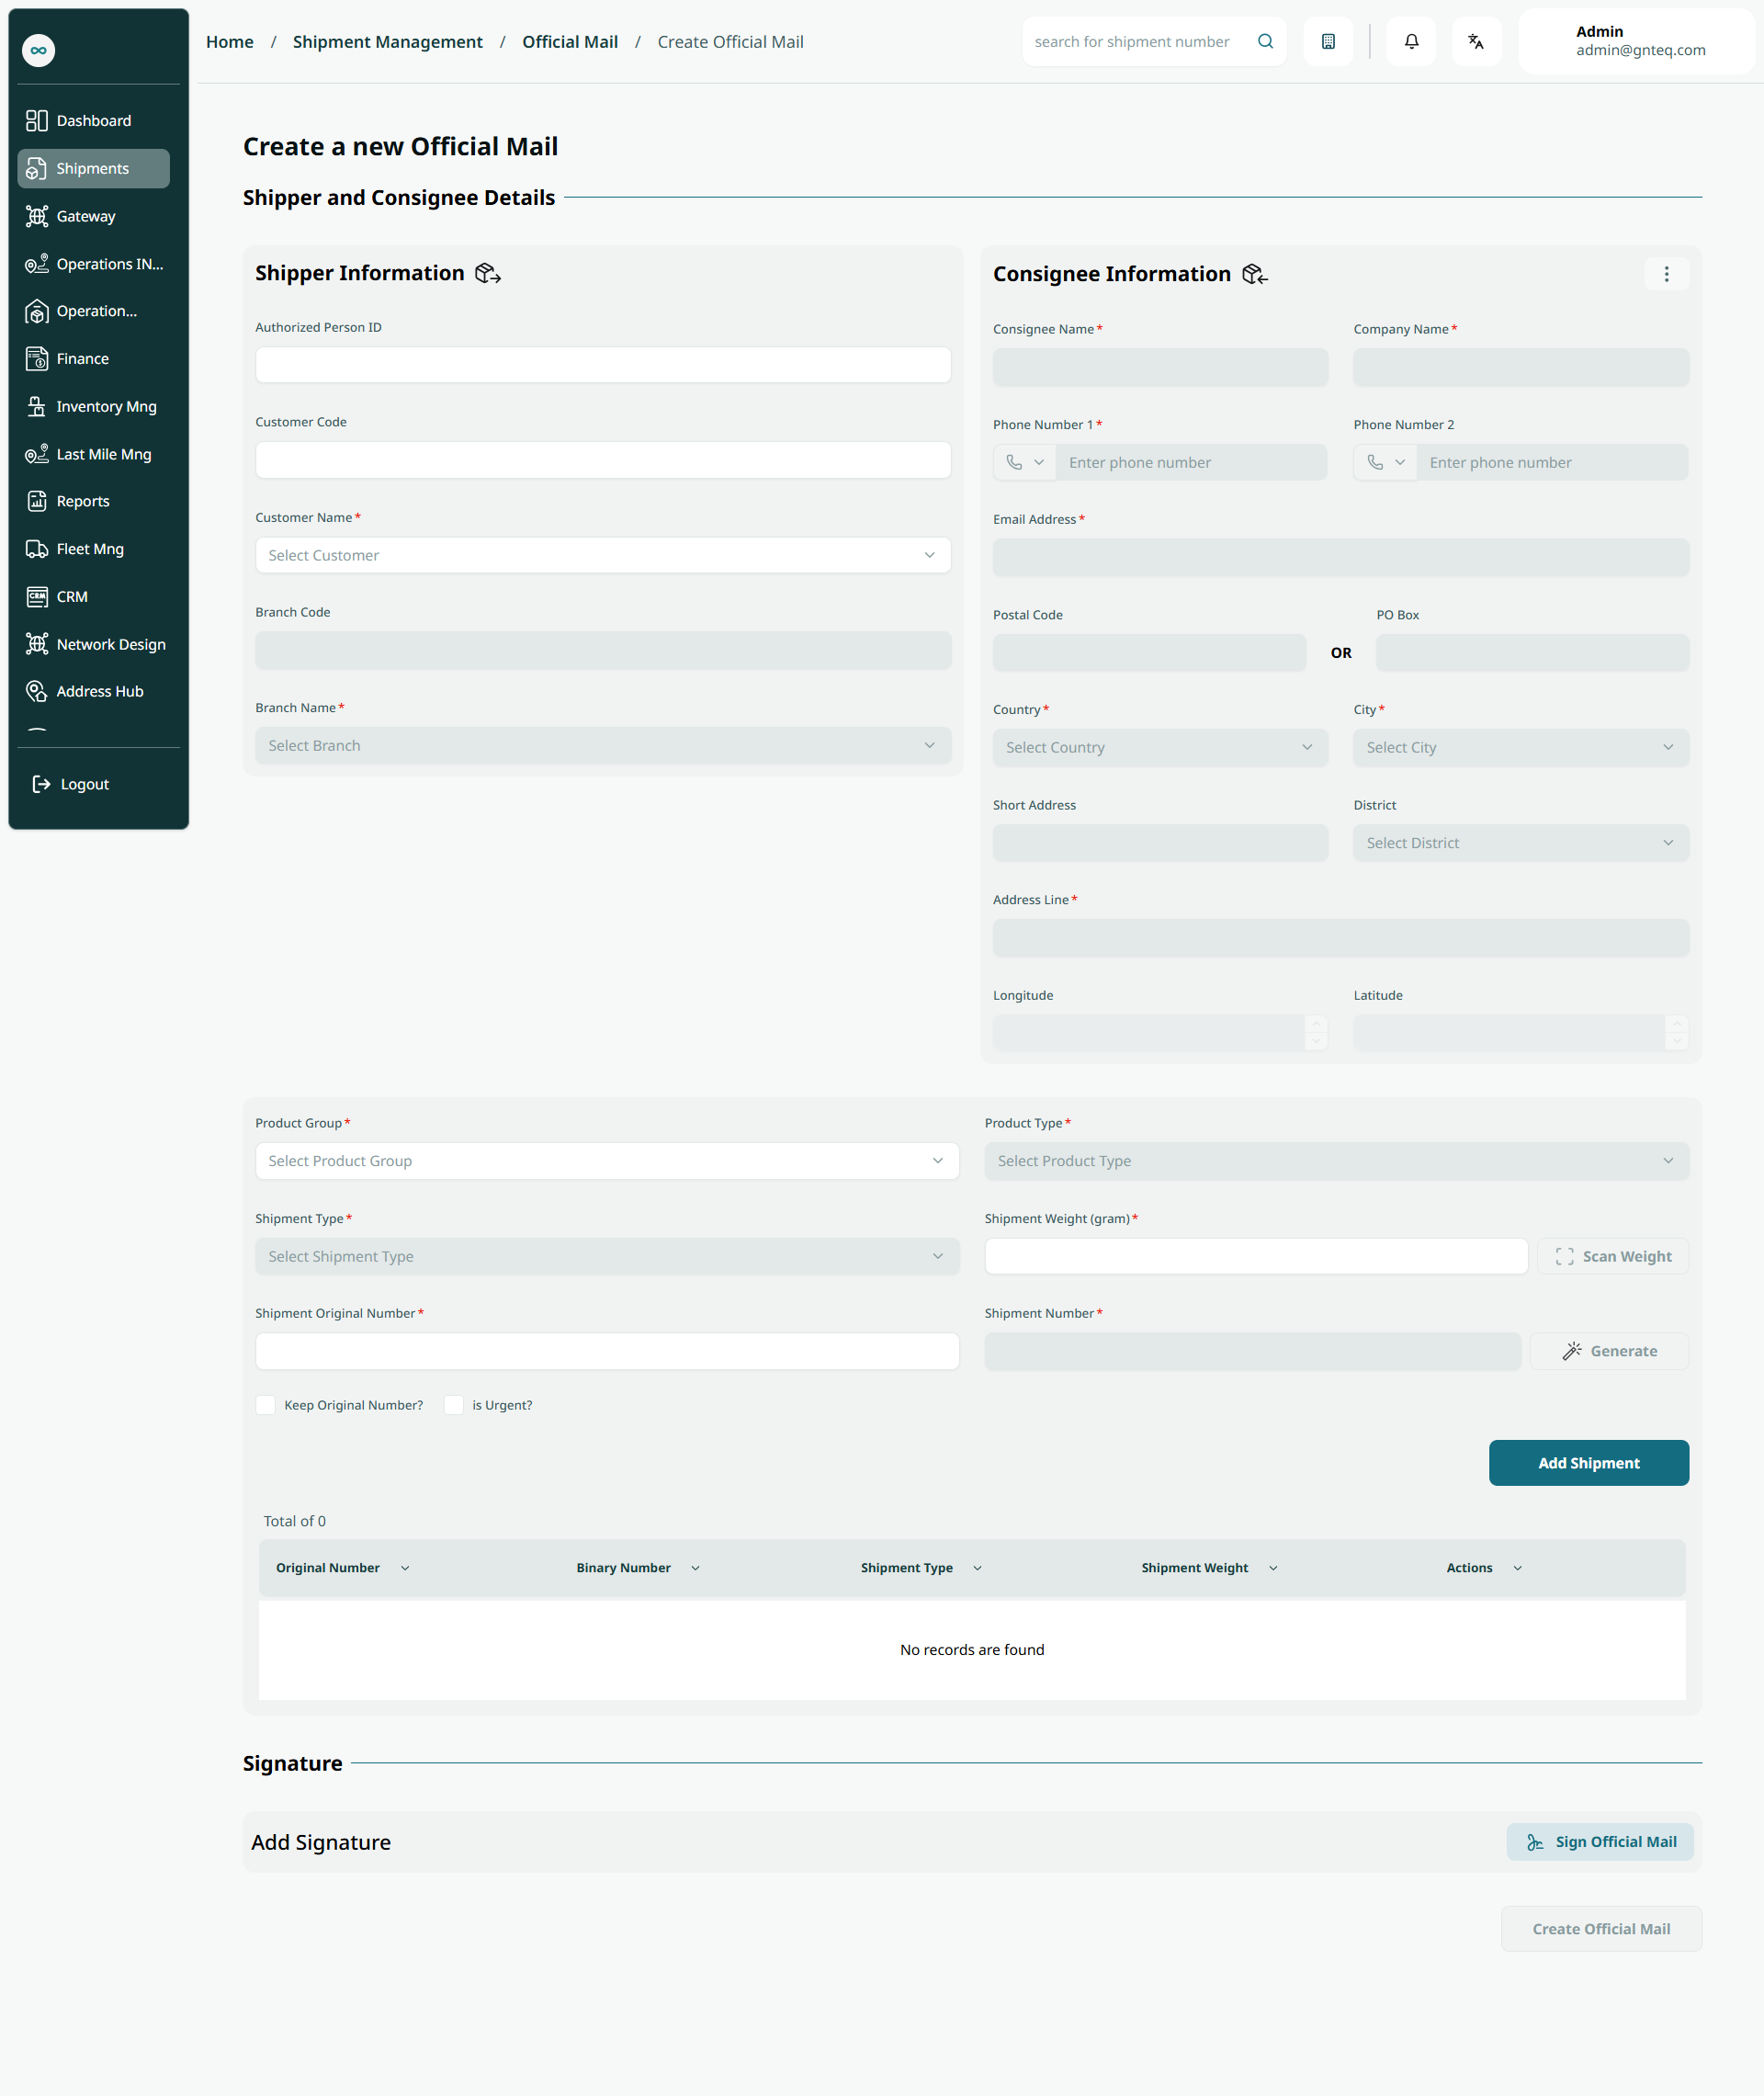
The user can create a new official mail by navigating to the ‘Official mail’ screen via the Order Management and clicking on Create as follows:
Shipper Information
-
Authorization Person ID: this field represents the ID number of the authorized person
-
Customer Name: this field represents the customer’s full name.
-
Customer Code: this field will be auto-generated after selecting the customer name.
-
Branch Name: this field represents the branch name related to the shipment.
-
Branch Code: this field will be auto-generated after selecting the branch name.
Consignee Information
-
Consignee Name: this field represents the customer’s name.
-
Company Name: this field represents the company name
-
Phone Number (1): this field represents the consignee's primary phone number.
-
Phone Number (2): this field represents a secondary phone number for the consignee.
-
Email Address: this field represents the consignee's email address.
-
Postal Code: this field represents a string of letters and numbers attached to the mailing address for sorting and classifying mail.
-
PO Box: this field represents the recipient's P.O. Box number.
-
Country: this field represents the consignee's country.
-
City: this field represents the consignee's city.
-
Short Address: this field represents the consignee's short address.
-
District: this field represents the consignee's district field.
-
Address Line: this field represents the consignee's main address.
-
Longitude: this field represents the longitude of the address to determine the location.
-
Latitude: this field represents the latitude of the address to determine the location
-
Product Group: this field represents the delivery service.
-
Product Type: this field represents the type of delivery service (e.g., Express Domestic, Express International, etc.).
-
Shipment Type: this field represents the type of shipment.
-
Shipment Weight: his field represents the item’s actual weight value.
-
Shipment Original Number: this field represents the shipment AWB number.
-
Shipment Number: this field represents the number of the shipment in binary.
-
Keep Original Number (checkbox): If checked, the shipment’s original number will be retained to allow adding another official mail with the same number.
By clicking on “Add Shipment, the shipment will be added successfully to the official mail.
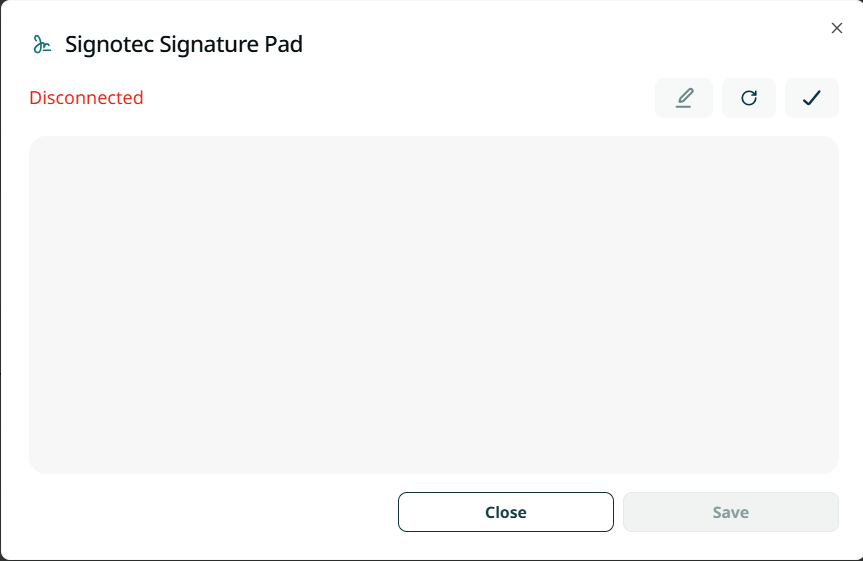
By clicking on Sign Official Mail, the user can add the signature to the official mail.
By clicking on Create Official Mail, the mail will be created successfully.
1.3 Process
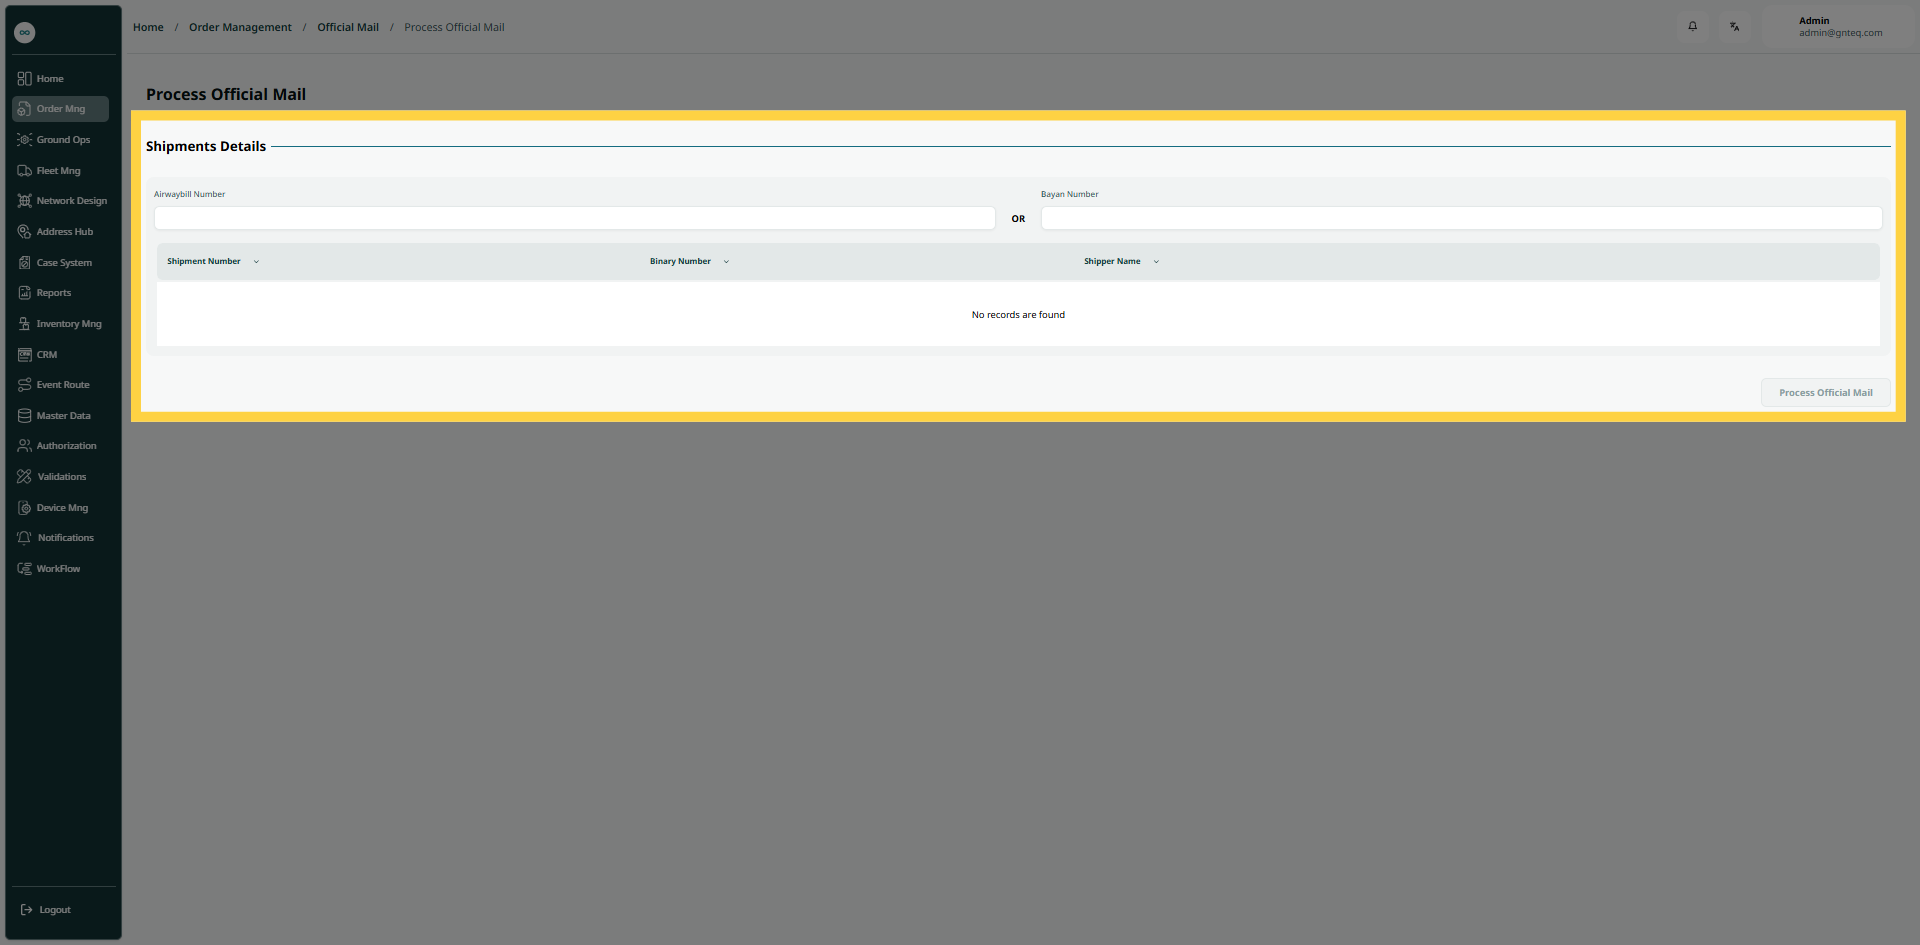
The user can process official mail after it has been created by navigating to the ‘Official Mail’ screen via Order Management and clicking on Process from More Actions as follows:
-
Airwaybill Number: this field represents the shipment number.
-
Bayan Number: this field represents a combined number that includes multiple airwaybills.
Note: the user can enter either the airway bill number or the bayan number.
By clicking on Process Official Mail, the shipment will be processed successfully.
1.4 Finalize
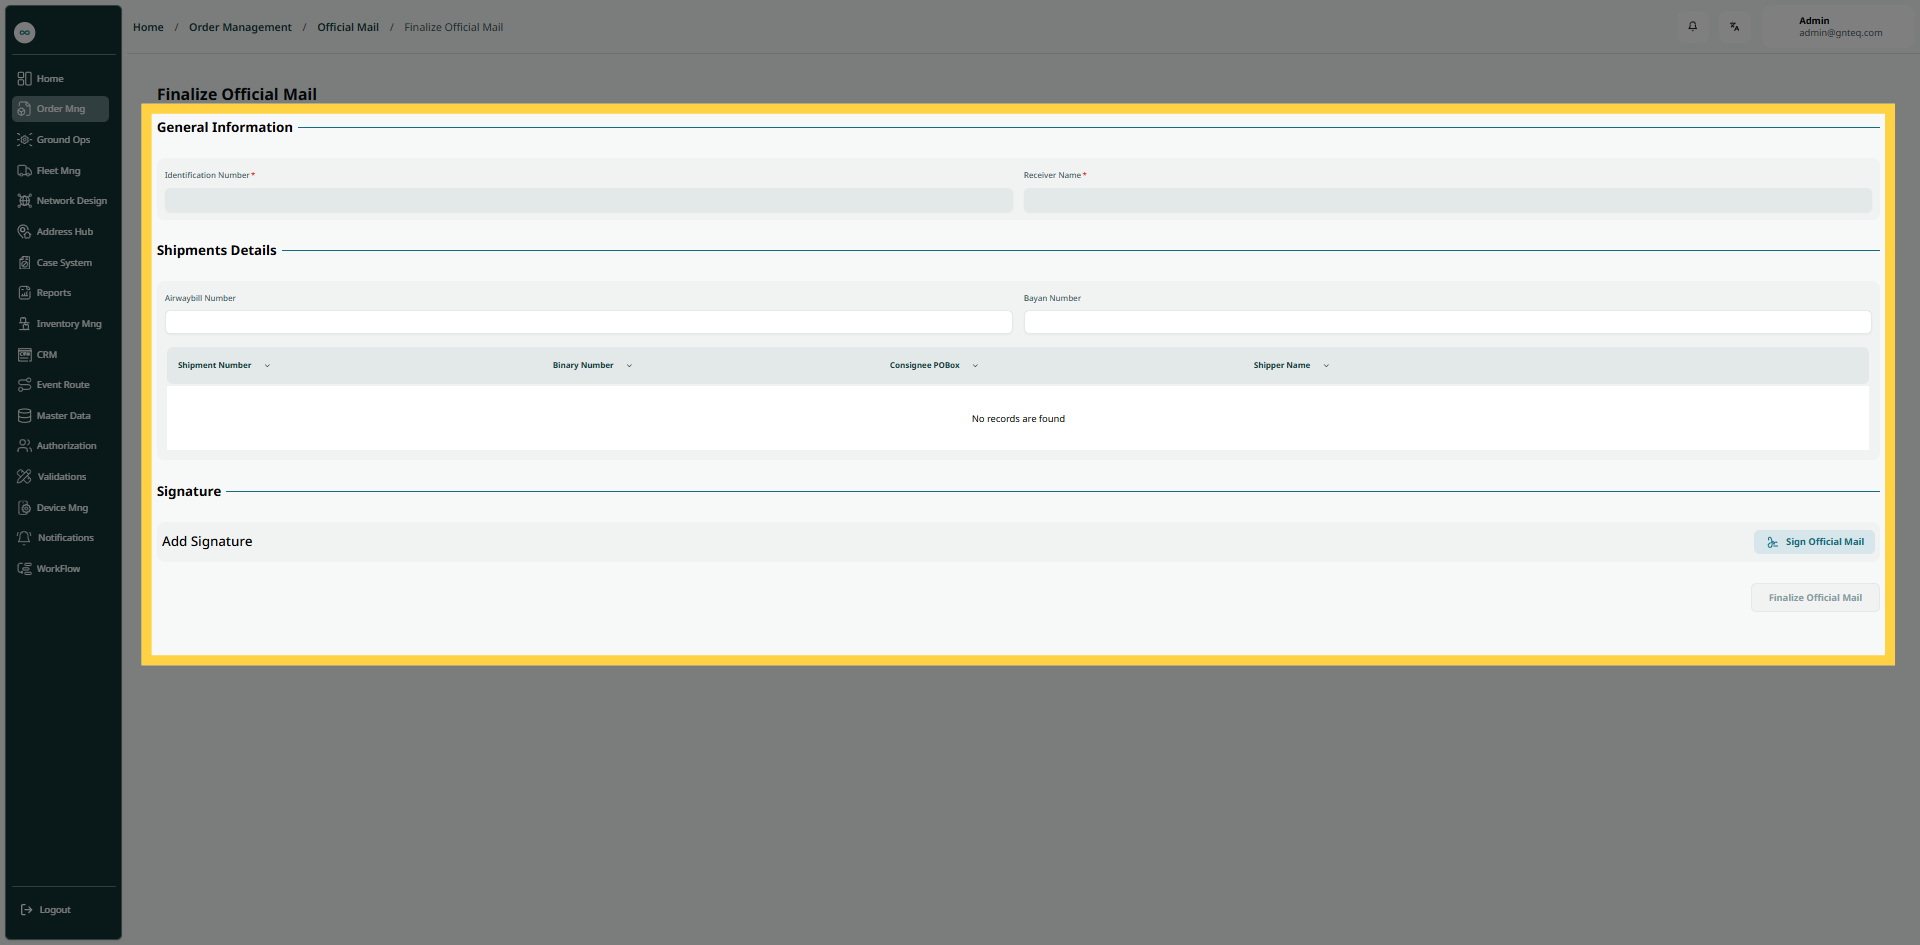
The user can finalize official mail after it has been processed by navigating to the ‘Official mail’ screen via the Order Management and clicking on Finalize from More Actions as follows:
-
Receiver Name: this field represents the receiver’s full name.
-
Identification Number: this field represents the receiver’s identification number.
-
Airwaybill Number: this fields represents the shipment number.
-
Bayan Number: this field represents a combined number that includes multiple airwaybills
By clicking on “Sign Official Mail”, the user can add the signature to the official mail.
By clicking on “Finalize Official Mail”, the shipment will be finalized successfully.