
1. Role
1.1 Dashboard
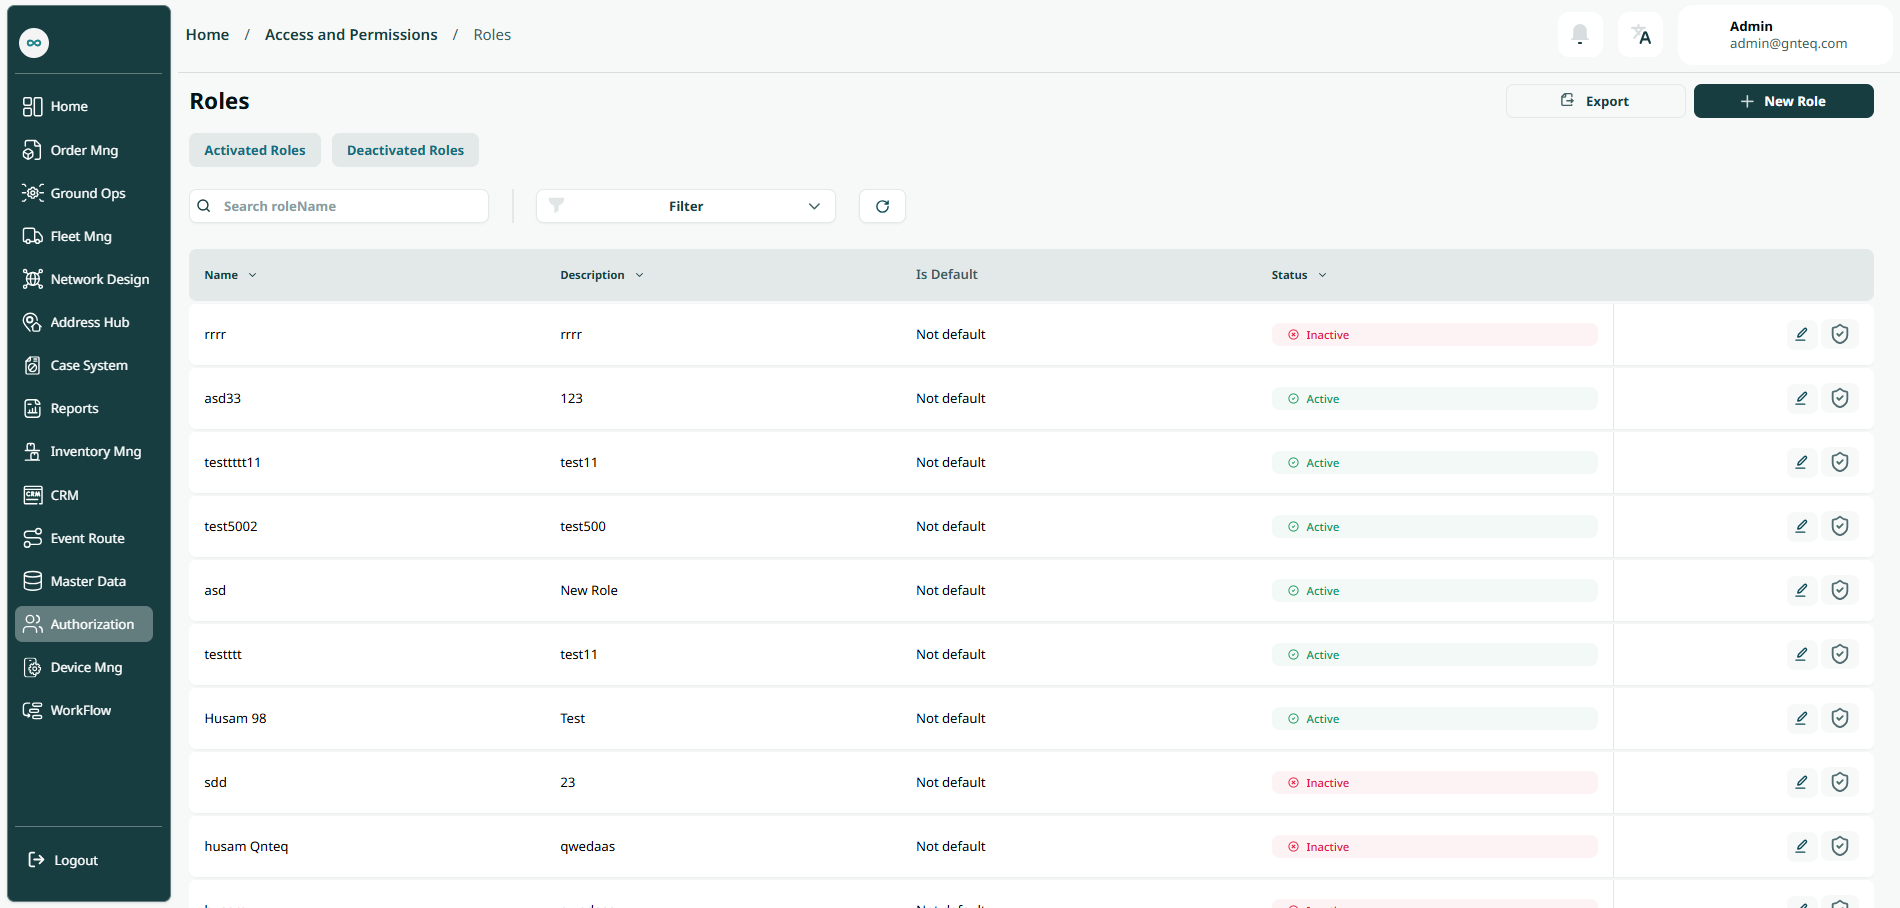
The admin can view the defined roles in the system by navigating to the ‘Roles’ screen in the Authorization Module from the left navigation panel as follows:
-
New Role: the admin can add a new role by clicking on "New Role" .
-
Export: the admin can export the list as an Excel file by clicking the "Export" button.
-
Activated Roles: the admin can access the activated roles screen by clicking "Activated Roles."
-
Deactivated Roles: the administrator can access the disabled roles screen by clicking "Deactivated Roles."
-
Search: the admin can search for roles by typing the role name.
-
Filters: the admin can search for a role by its default.
-
Number of Rows per Page: the admin can specify the number of items to display per page.
-
Actions: by clicking Actions, the admin can edit information, delete the role, and control permissions.
1.1.1 Edit Information
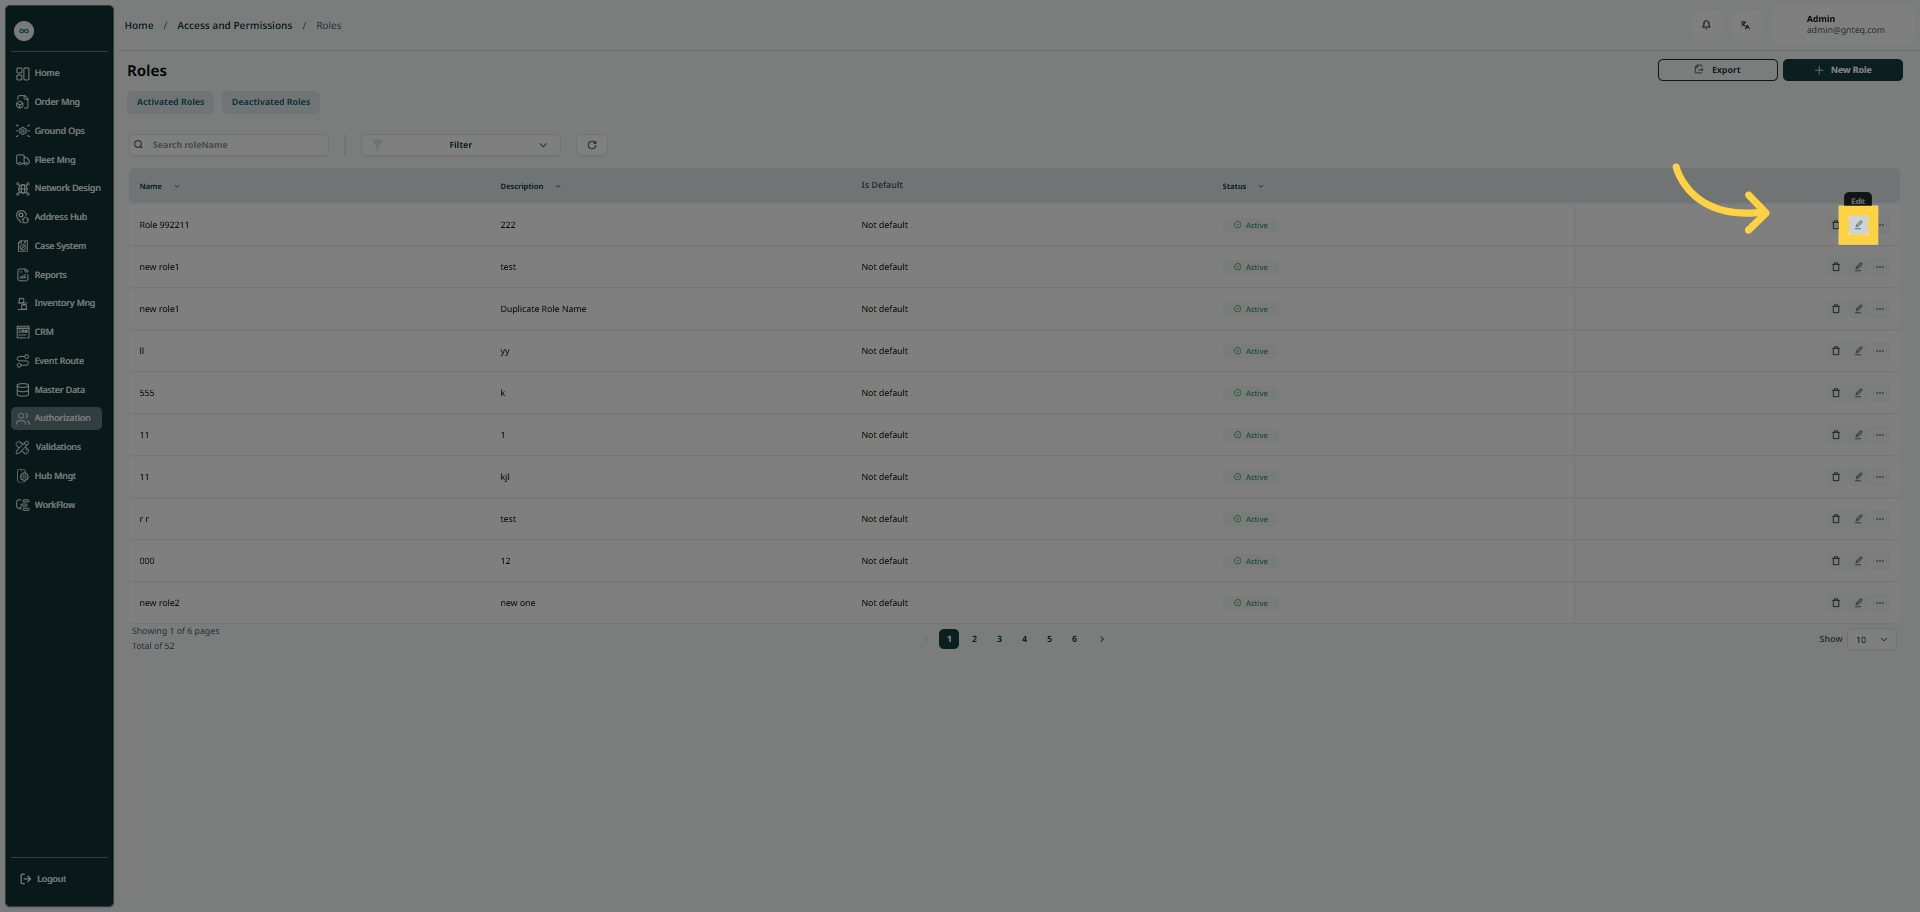
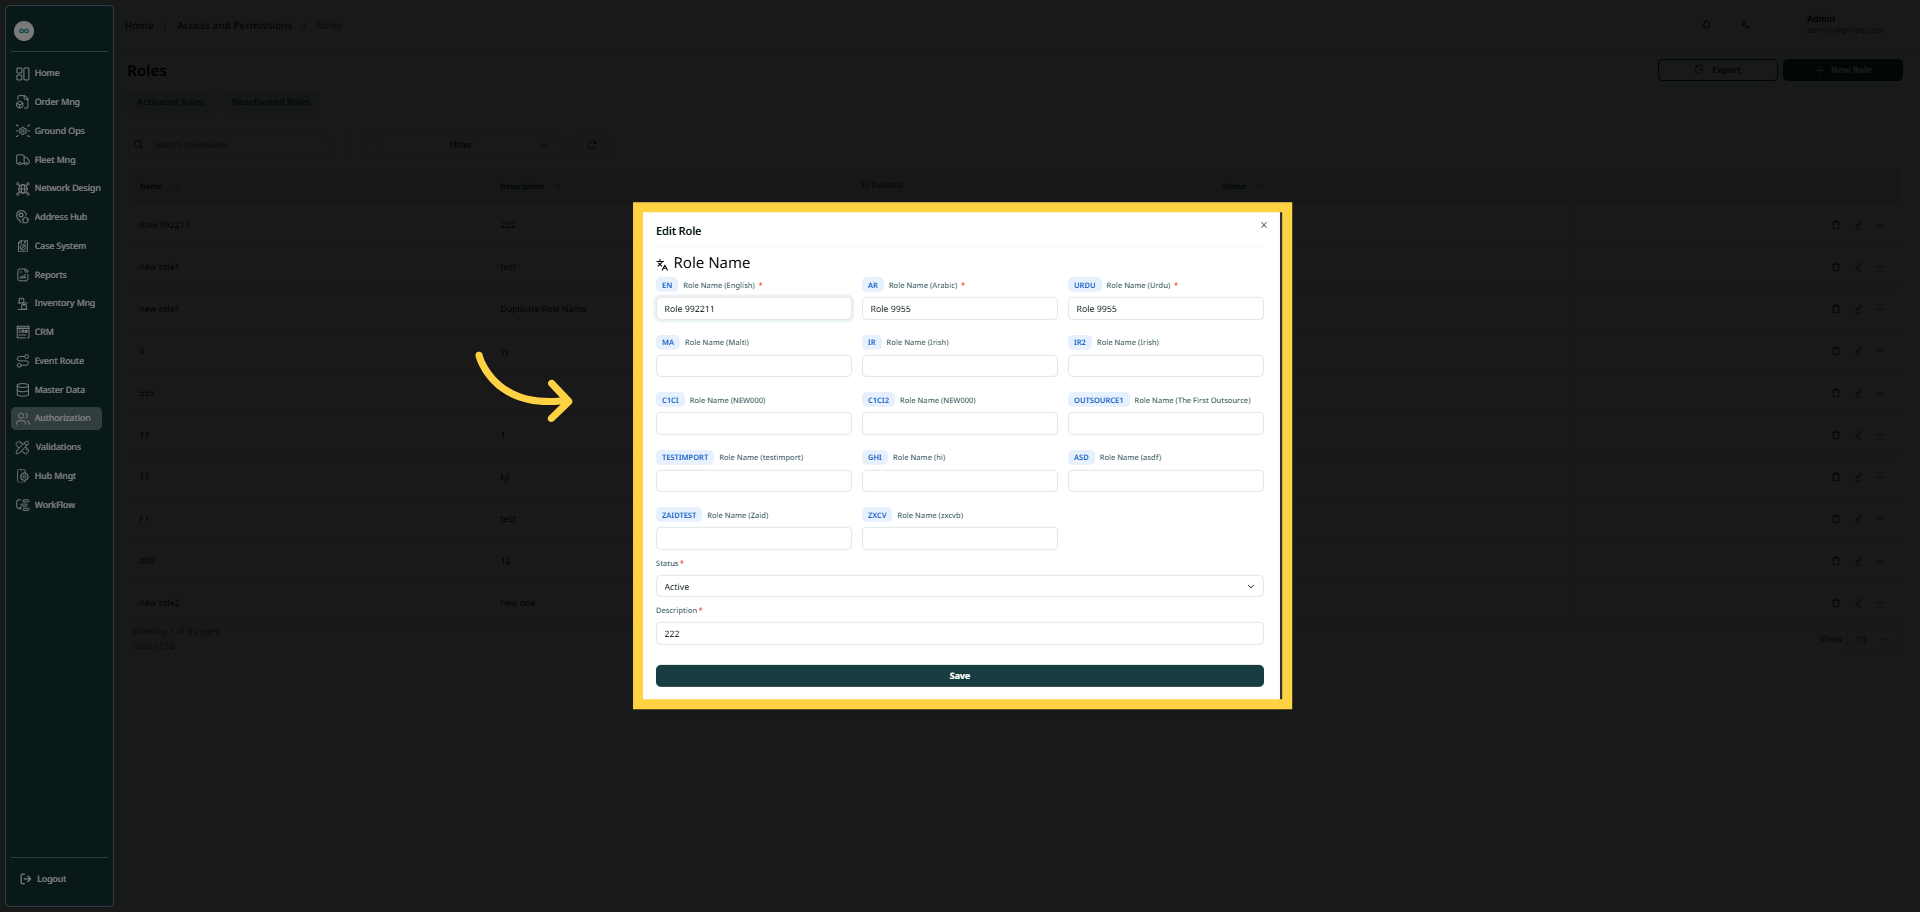
The admin can edit an existing role by clicking on Edit from Actions by navigating to the ‘Roles’ screen via the Authorization Module.
1.1.2 Permissions
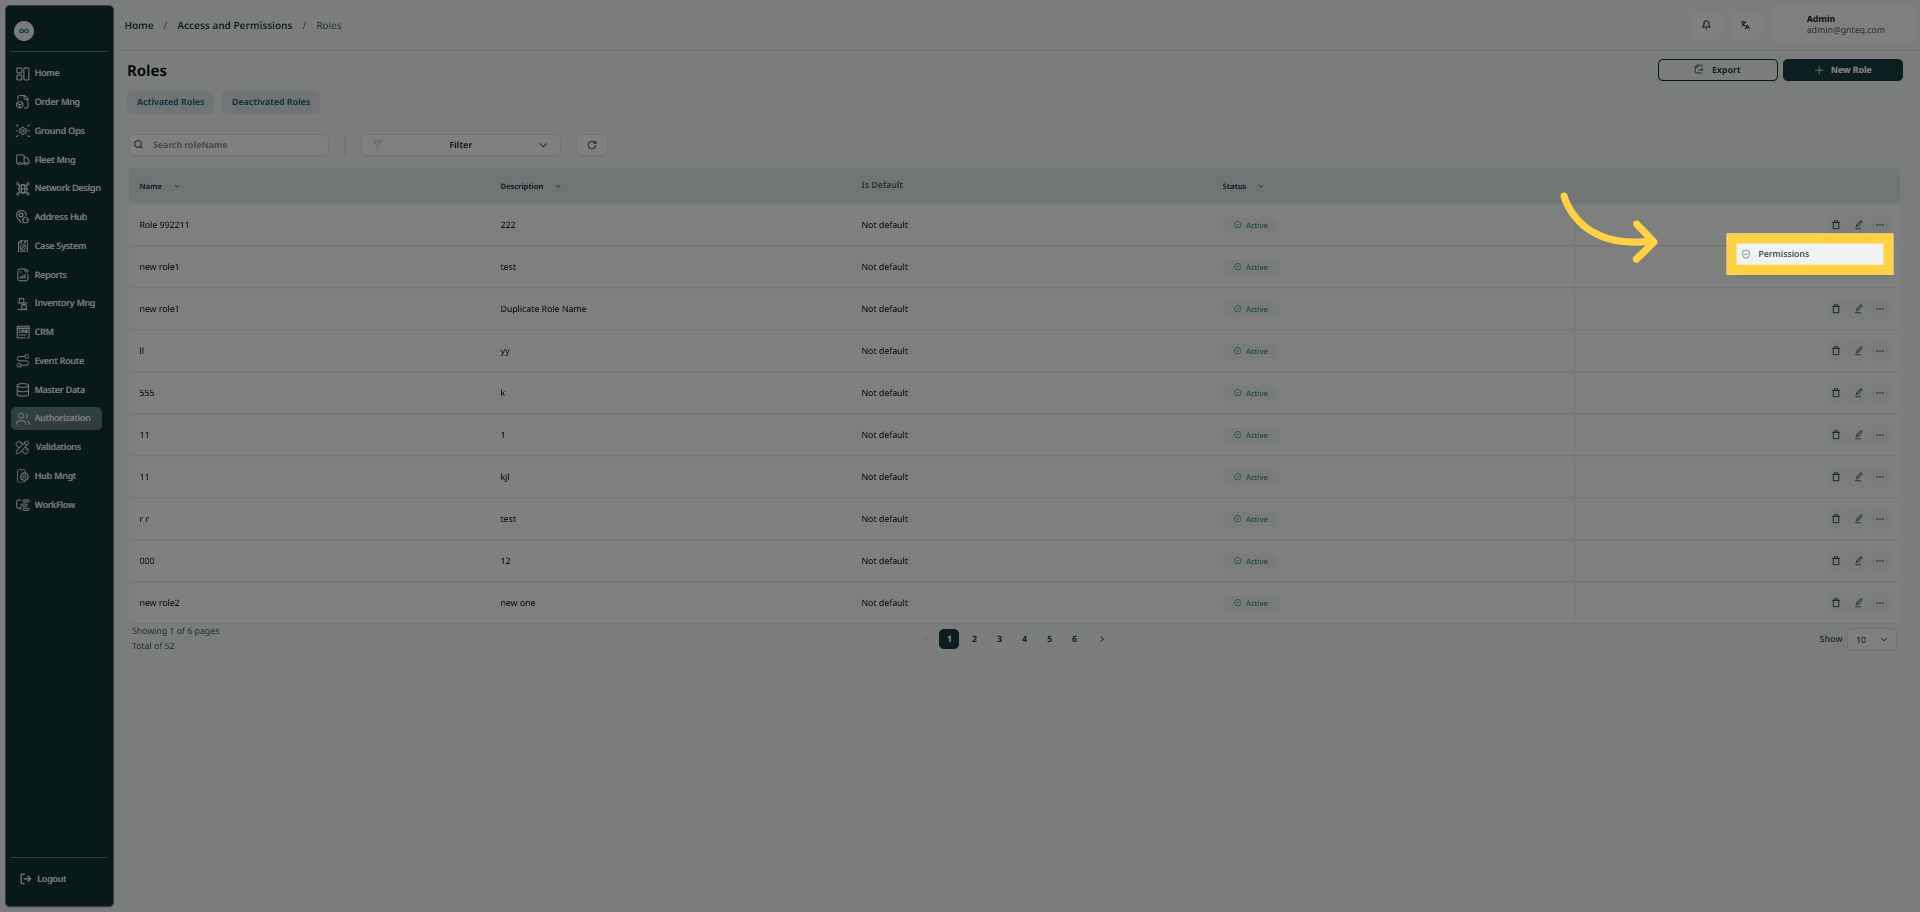
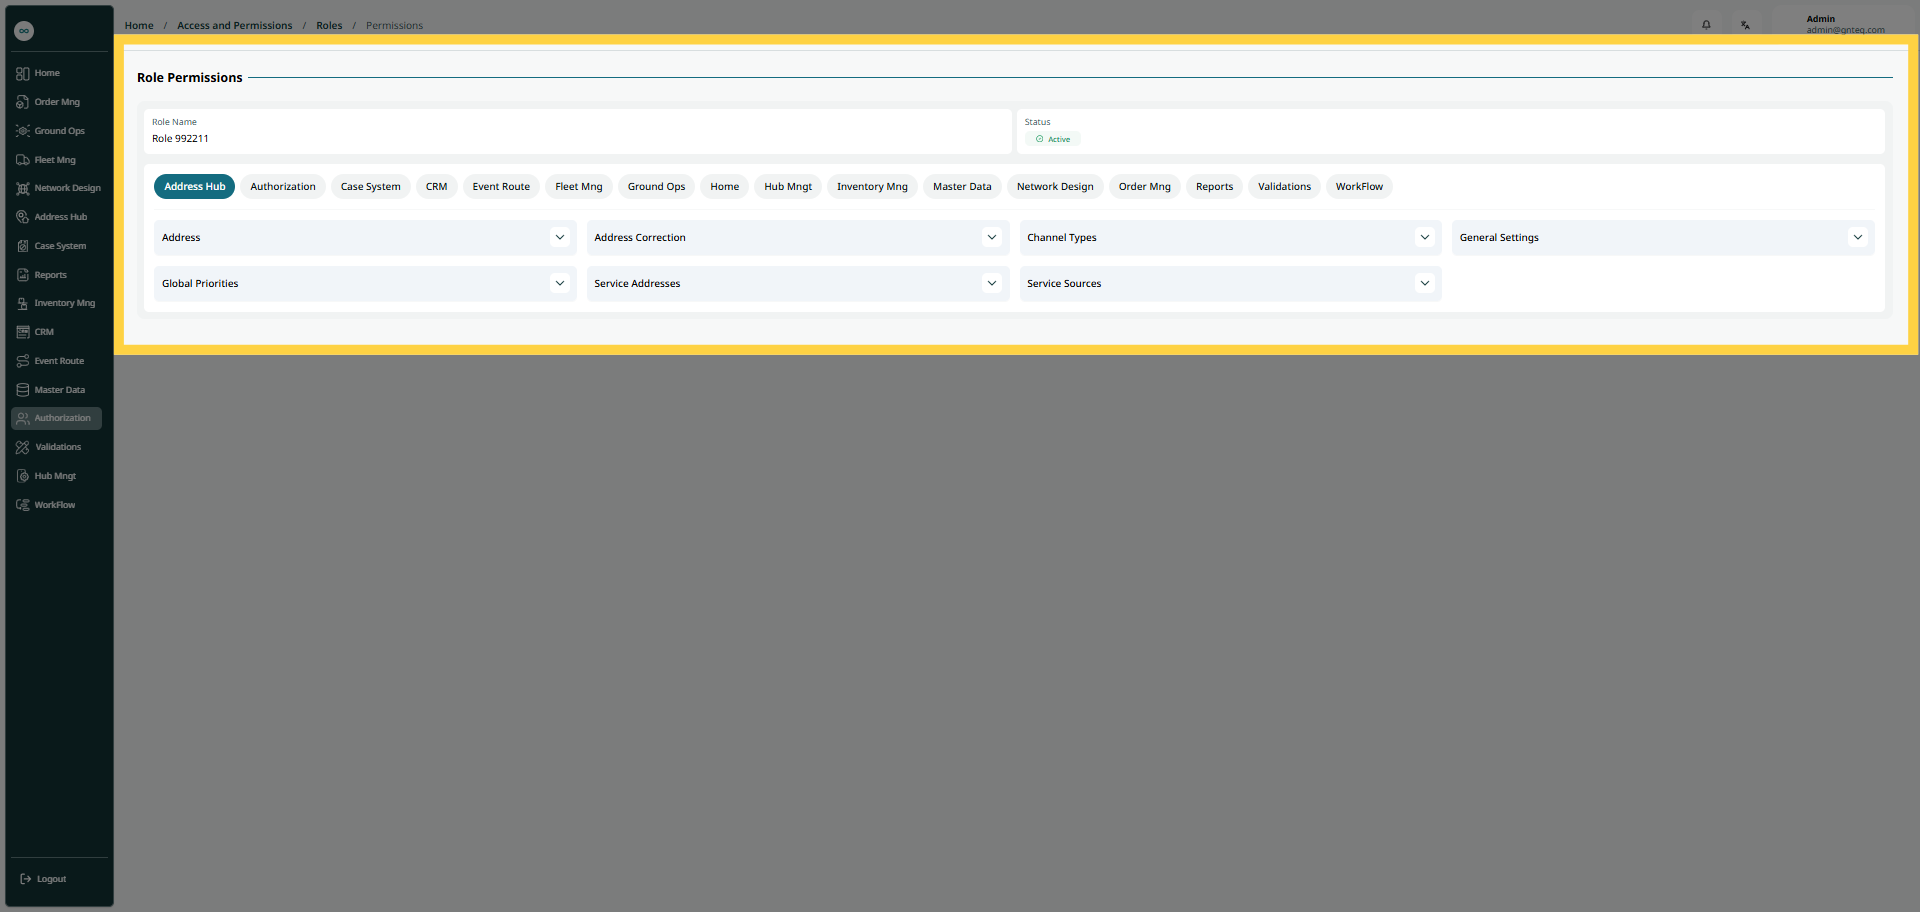
The admin can control permissions by clicking on Permission from Actions by navigating to the ‘Roles’ screen via the Authorization Module.
1.2 Add New Role
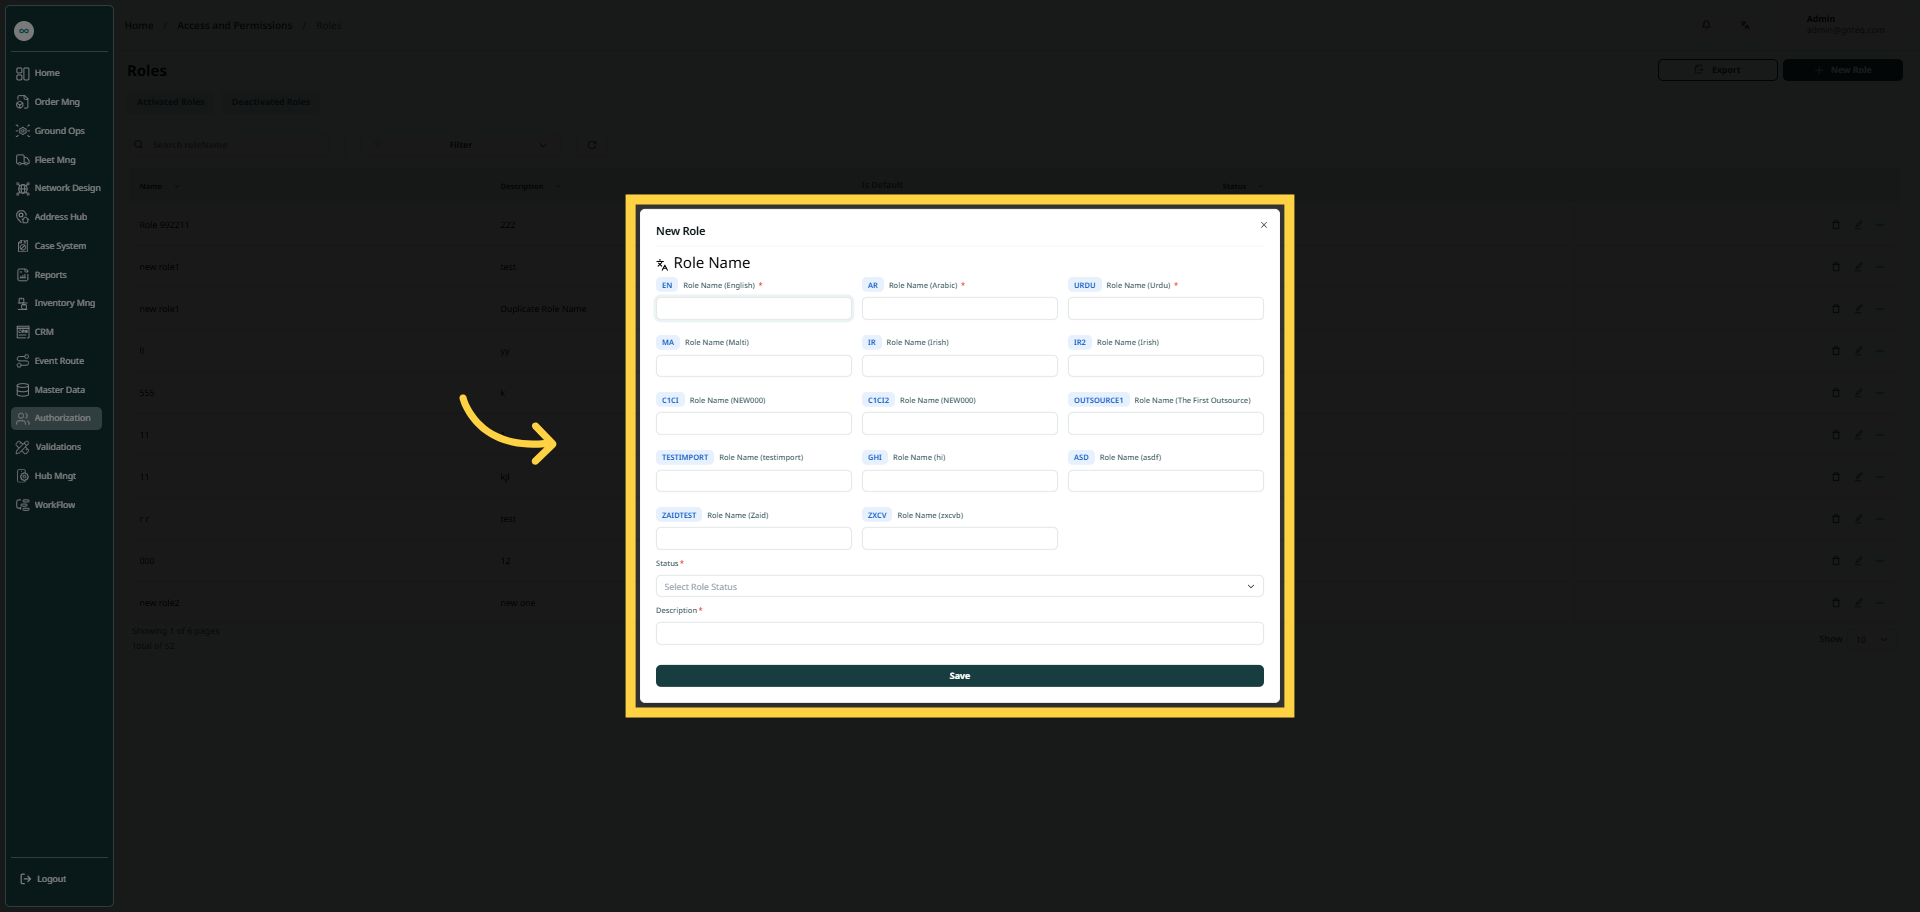
The admin can create a new role by navigating to the ‘Roles’ screen via the Authorization Module and clicking on New Role button:
-
Role Name (English) : this filed represents the user role name in english.
-
Role Name (Arabic): this field represent the user role name in arabic.
-
Status: this field represents the status, where 'active' means that the user is currently functioning within the system, and 'inactive' means that the user is no longer part of the system.
-
Description: this field represents details about the new role.
By clicking on Save, the user will be save successfully.