
1. Customer Creation Overview
2. Dashboard
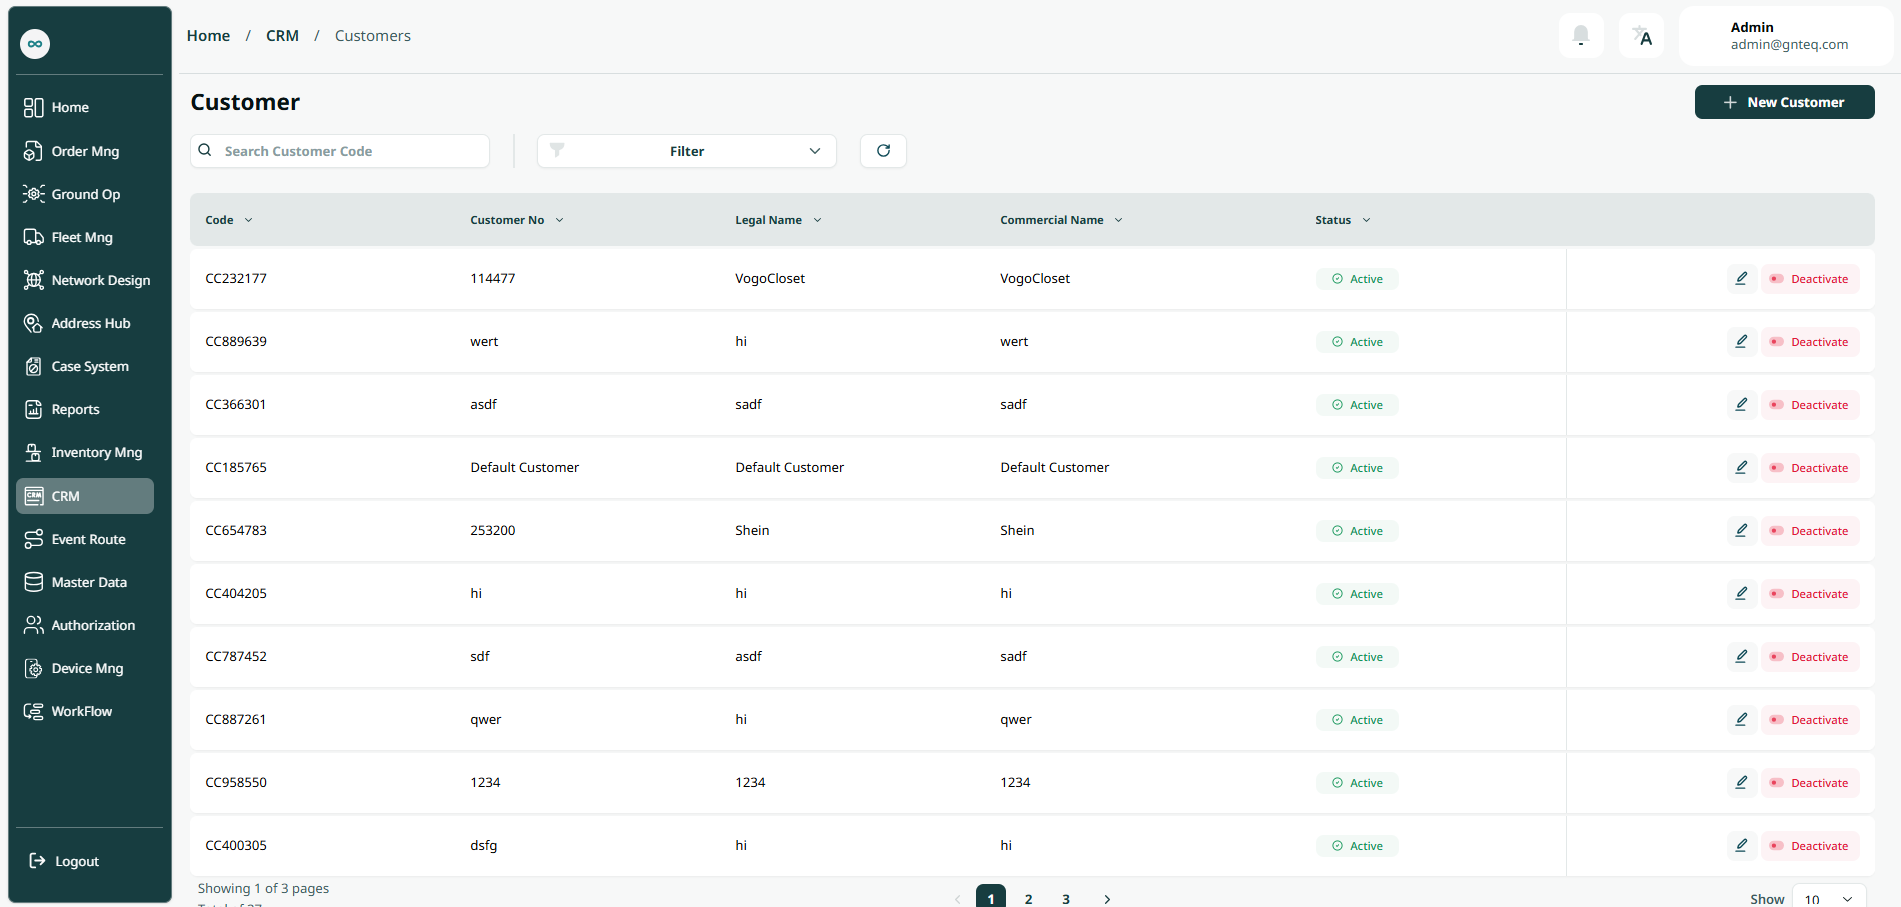
The user can view their defined customers in the system by navigating to the ‘Customers’ screen in the CRM Module from the left navigation panel as follows:
-
New Customer: The user can add a new customer by clicking on 'New Customer', referring to the 'Add New Customer' section.
-
Filters: The user can search for customers by customer type or company legal name.
-
Search: the user can search for a customer by entering the customer code.
-
Rows Per Page: the user can select the number of items to show on each page
-
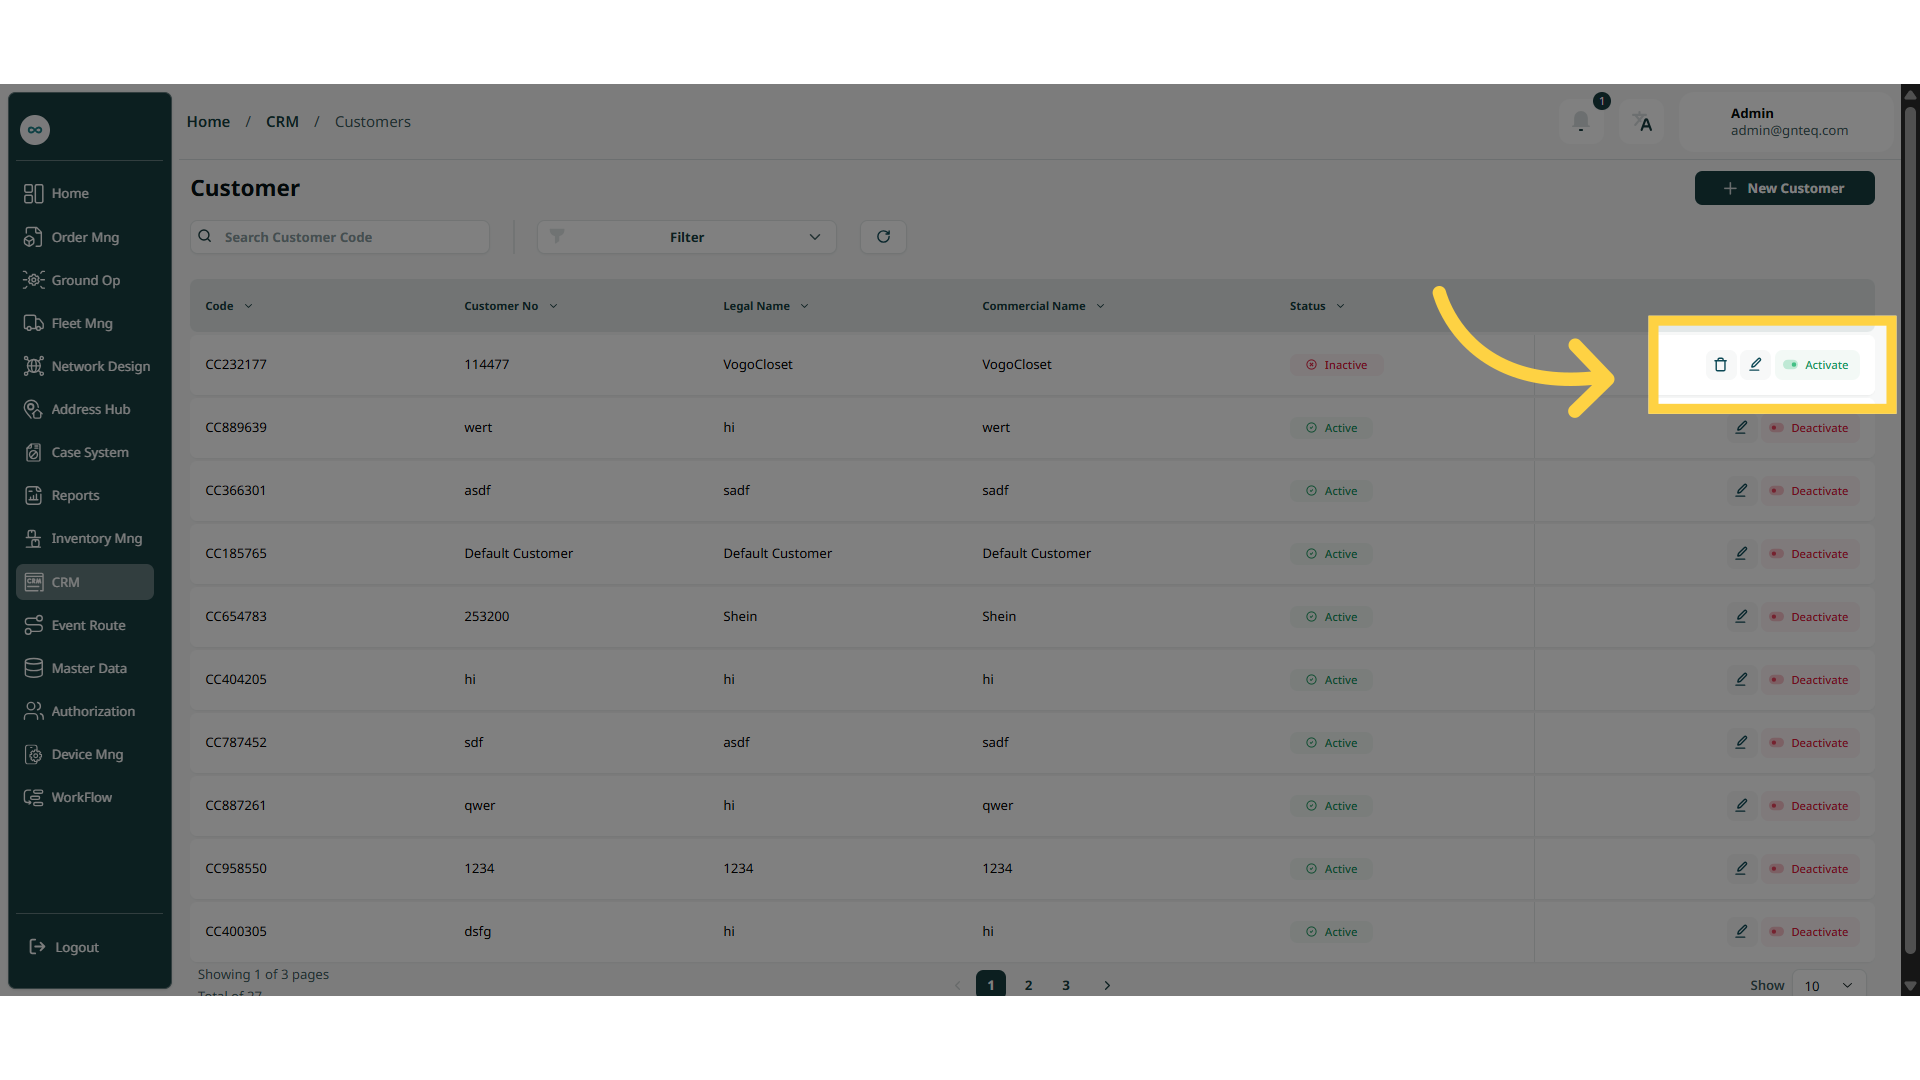
Actions: by clicking on Actions, the user can view customer details, edit customer information, view customer profile, and delete the customer.
2.1 Edit Customer Information
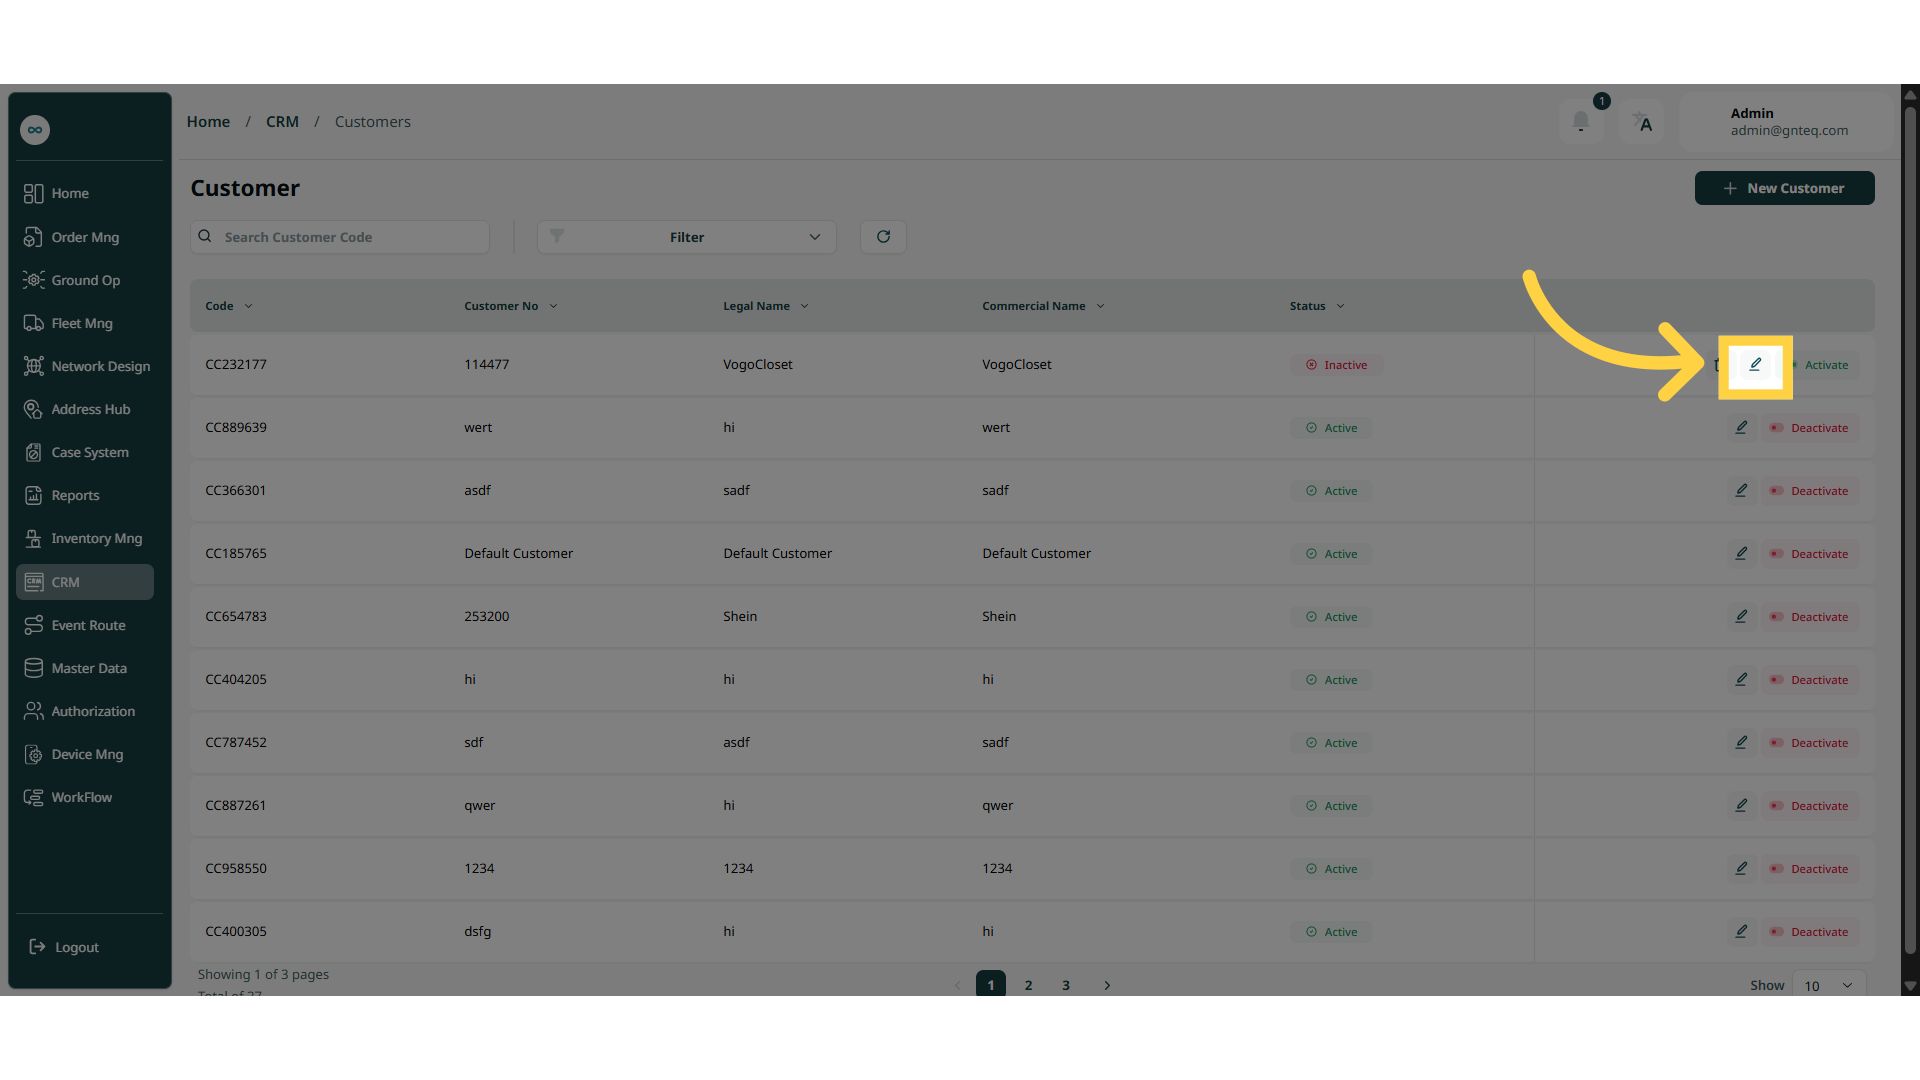
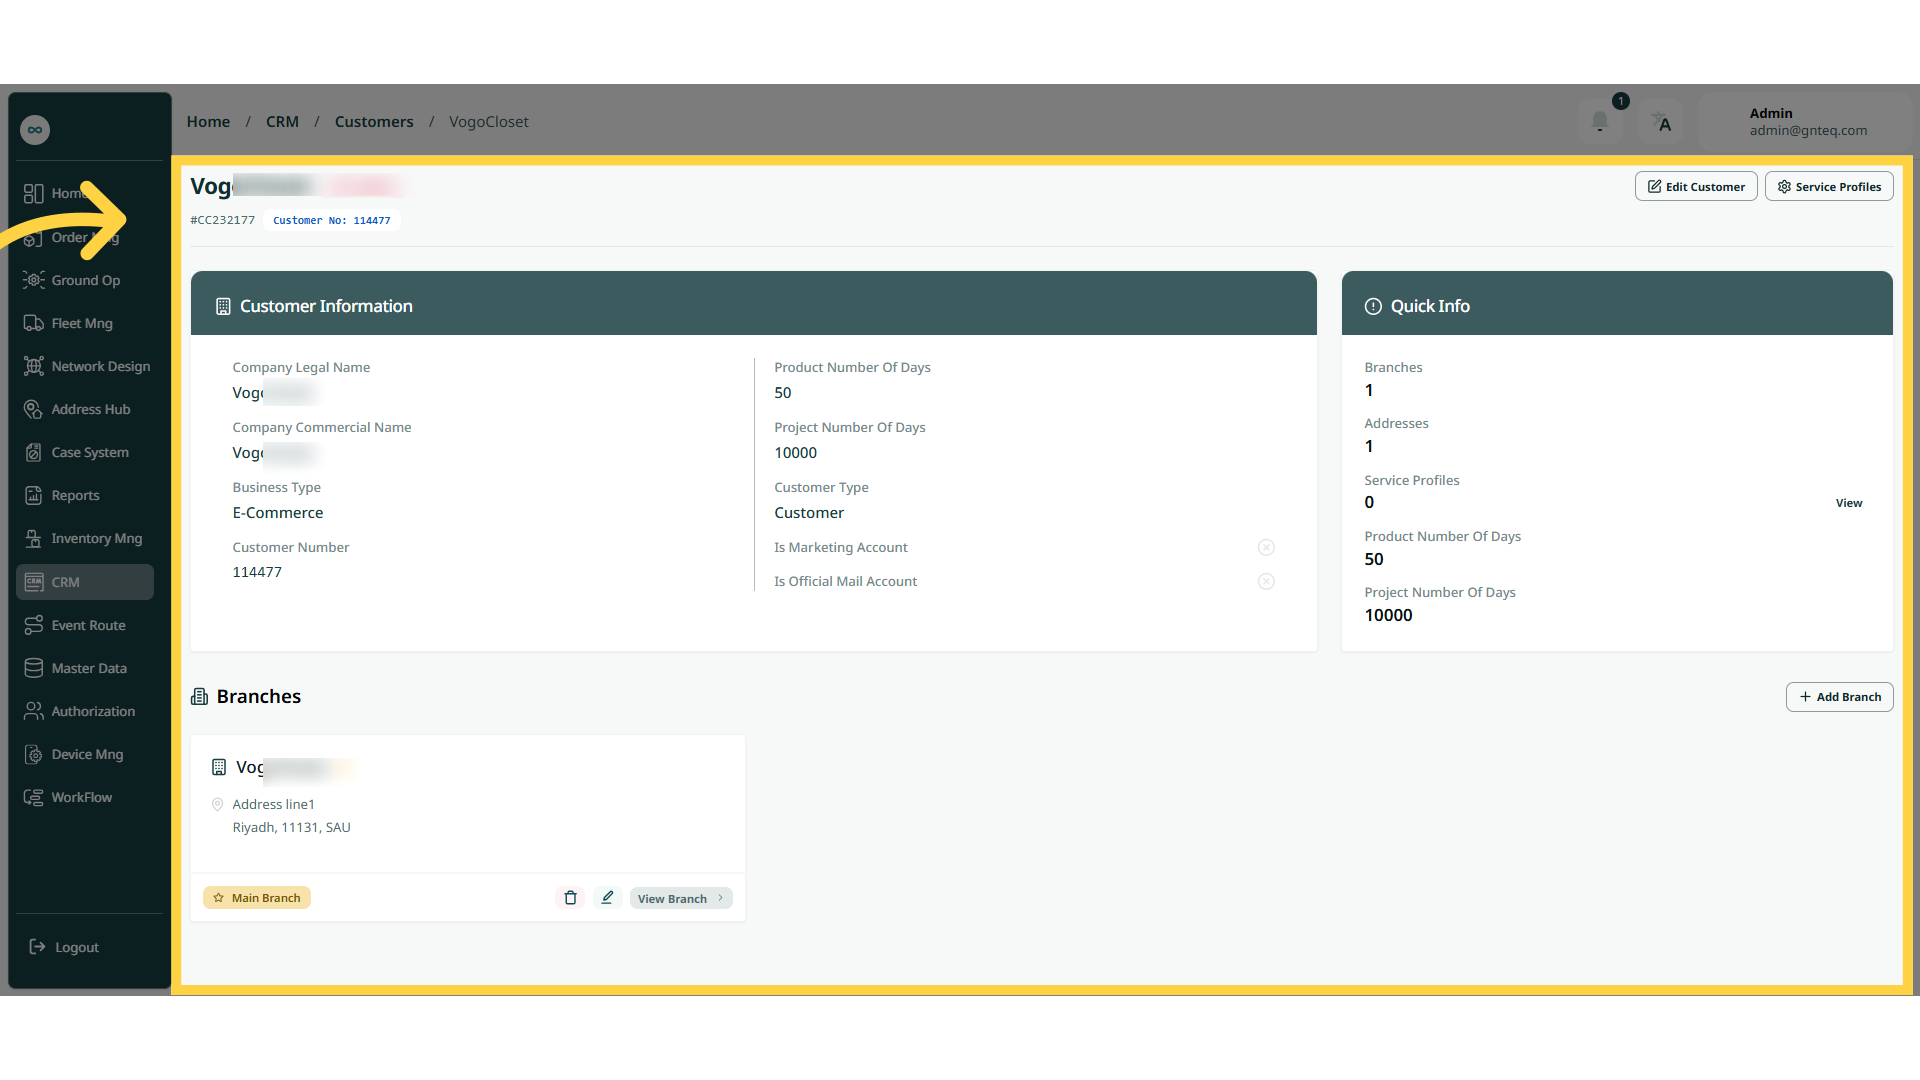
The user can edit information of an existing customer and the main branch by navigating to the ‘Customer’ Screen via CRM Module and clicking on Edit Information from Actions as follows:
2.1.1 Edit Customer
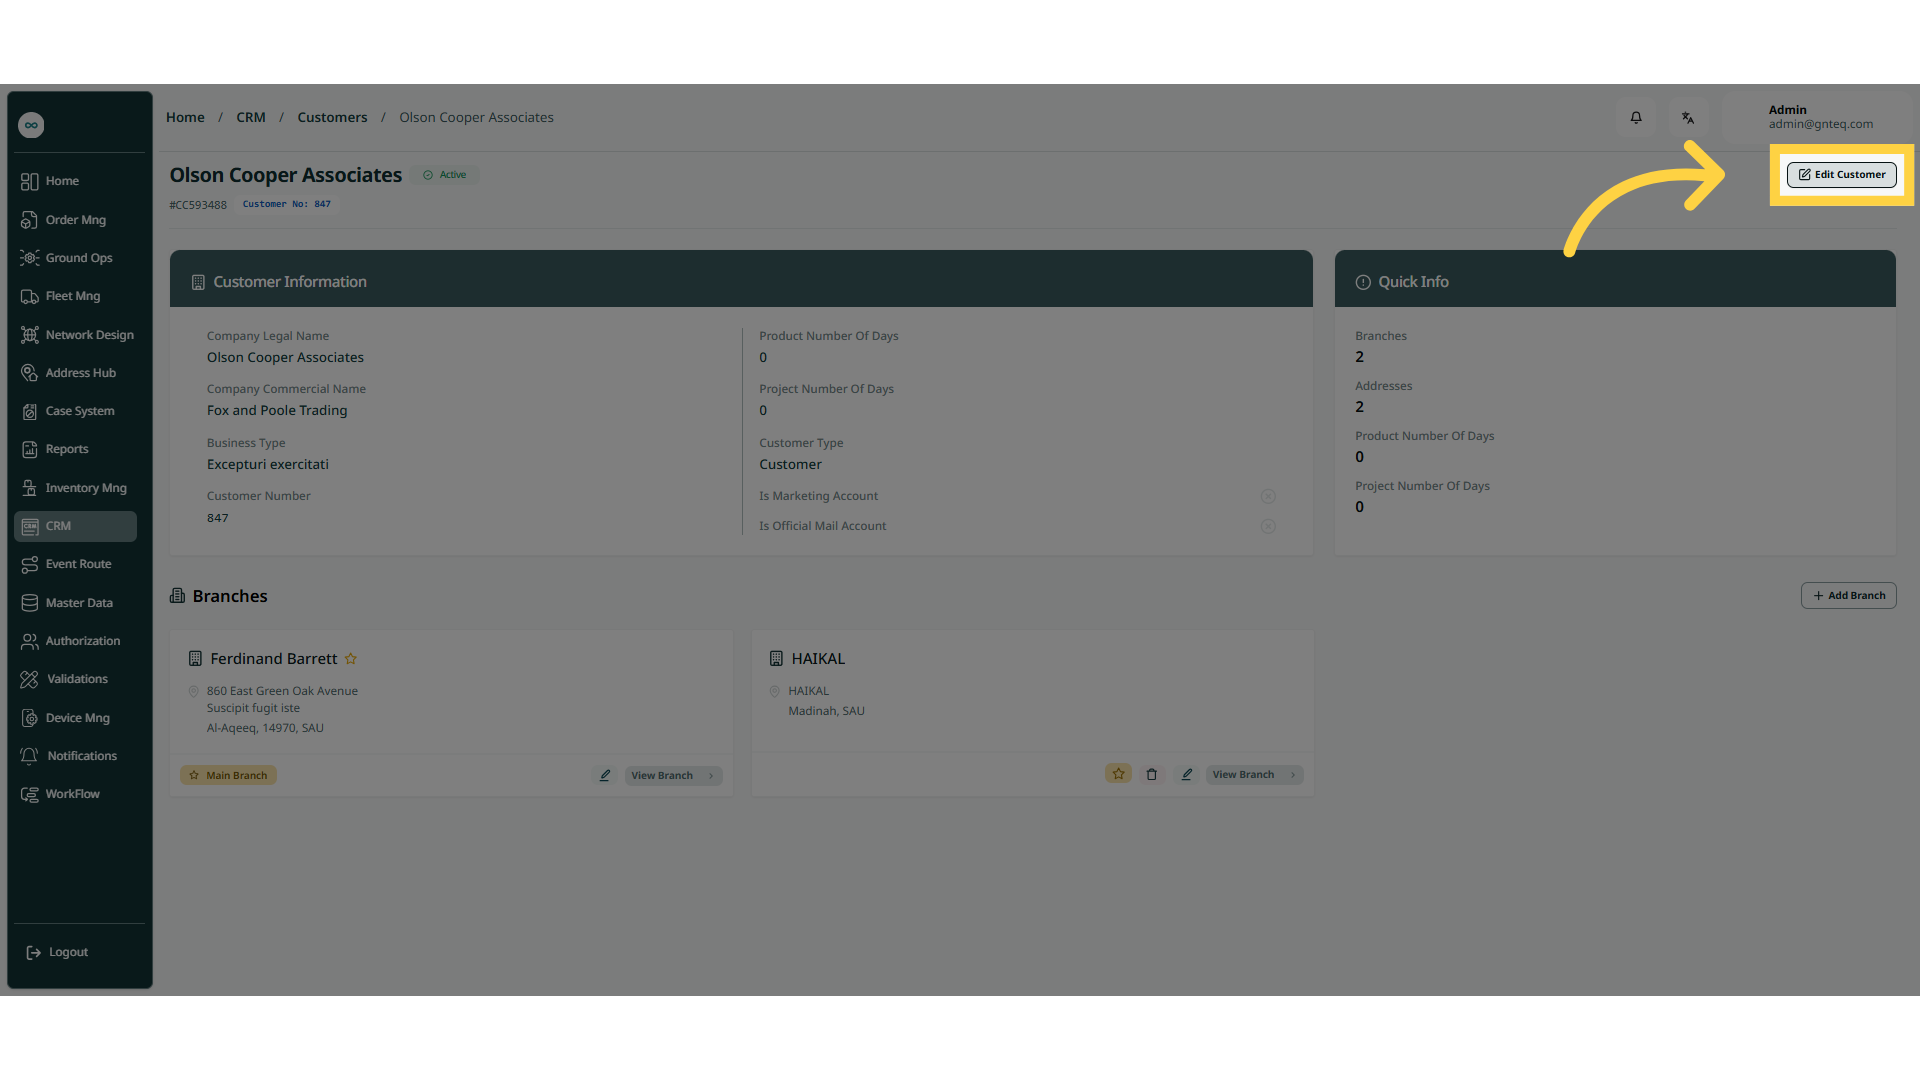
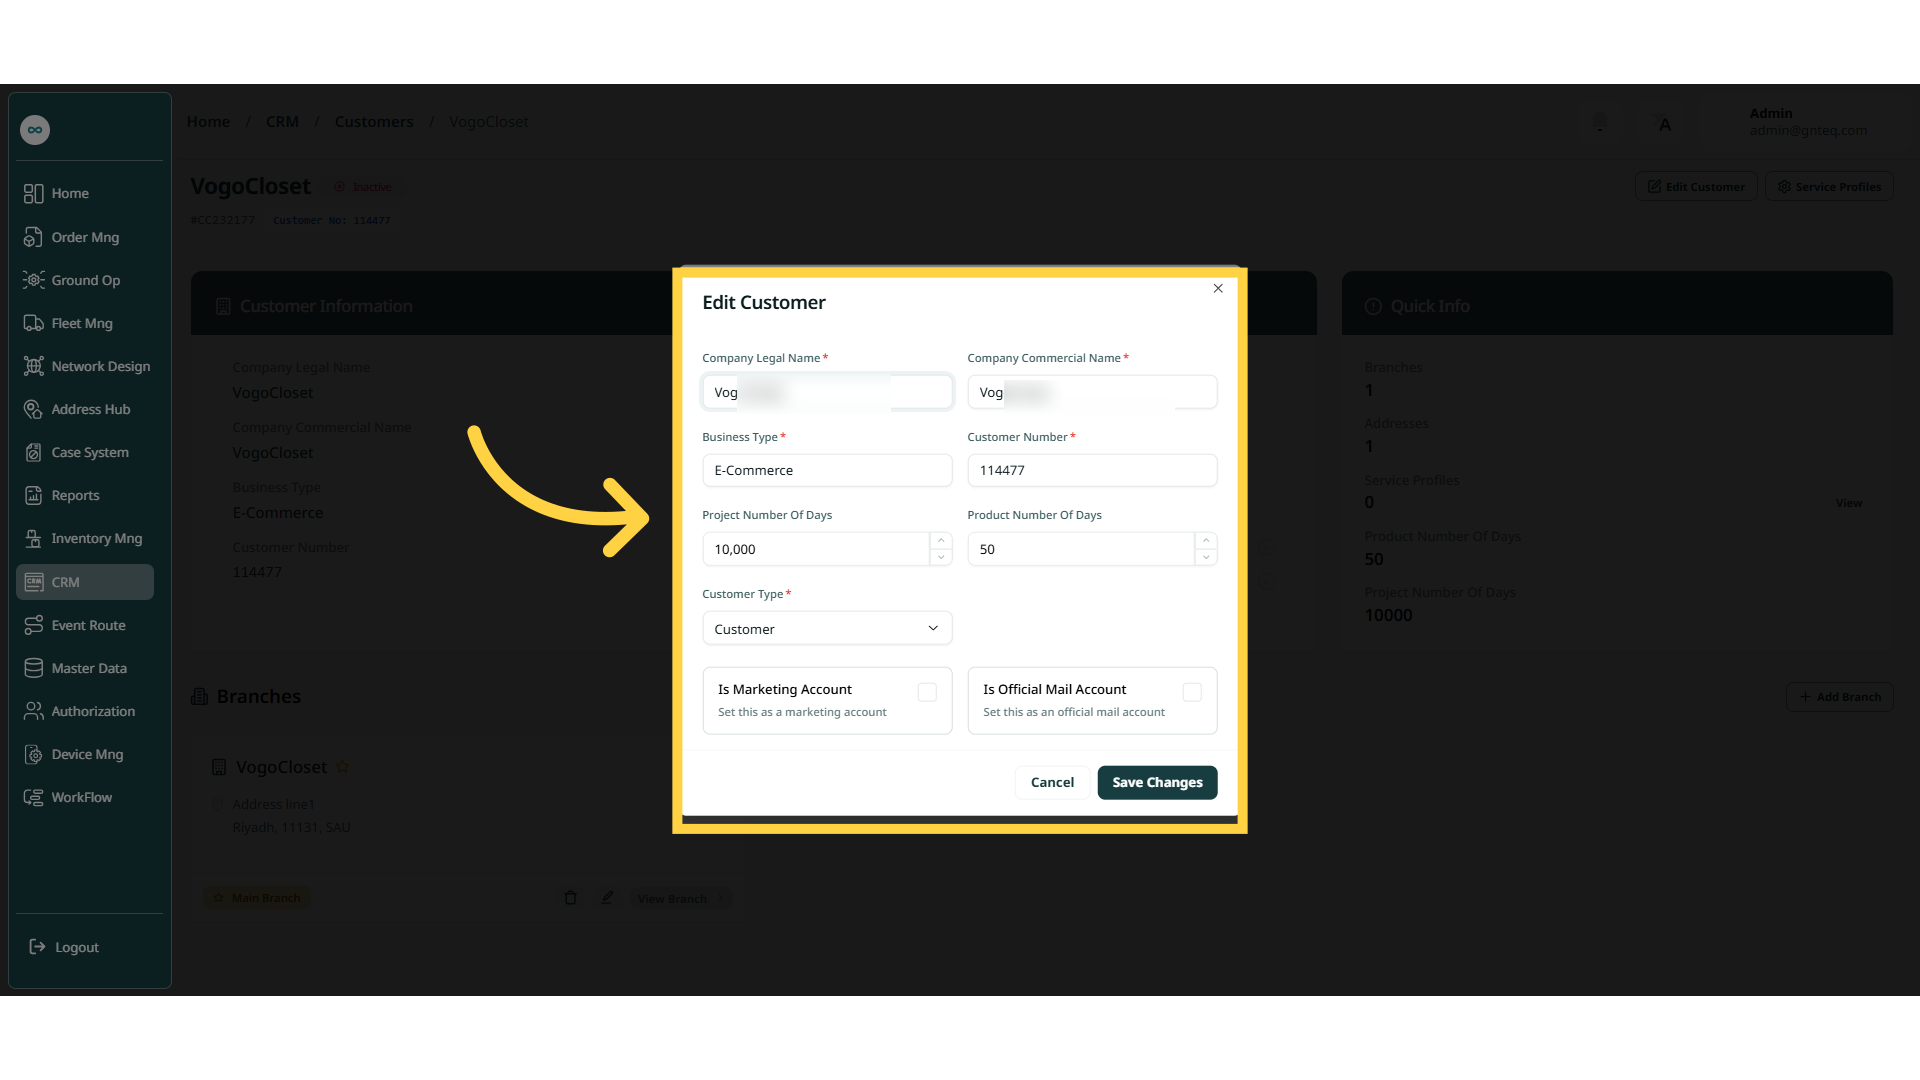
The user can edit the customer details by clicking on the Edit Customer button.
2.2 Delete Customer
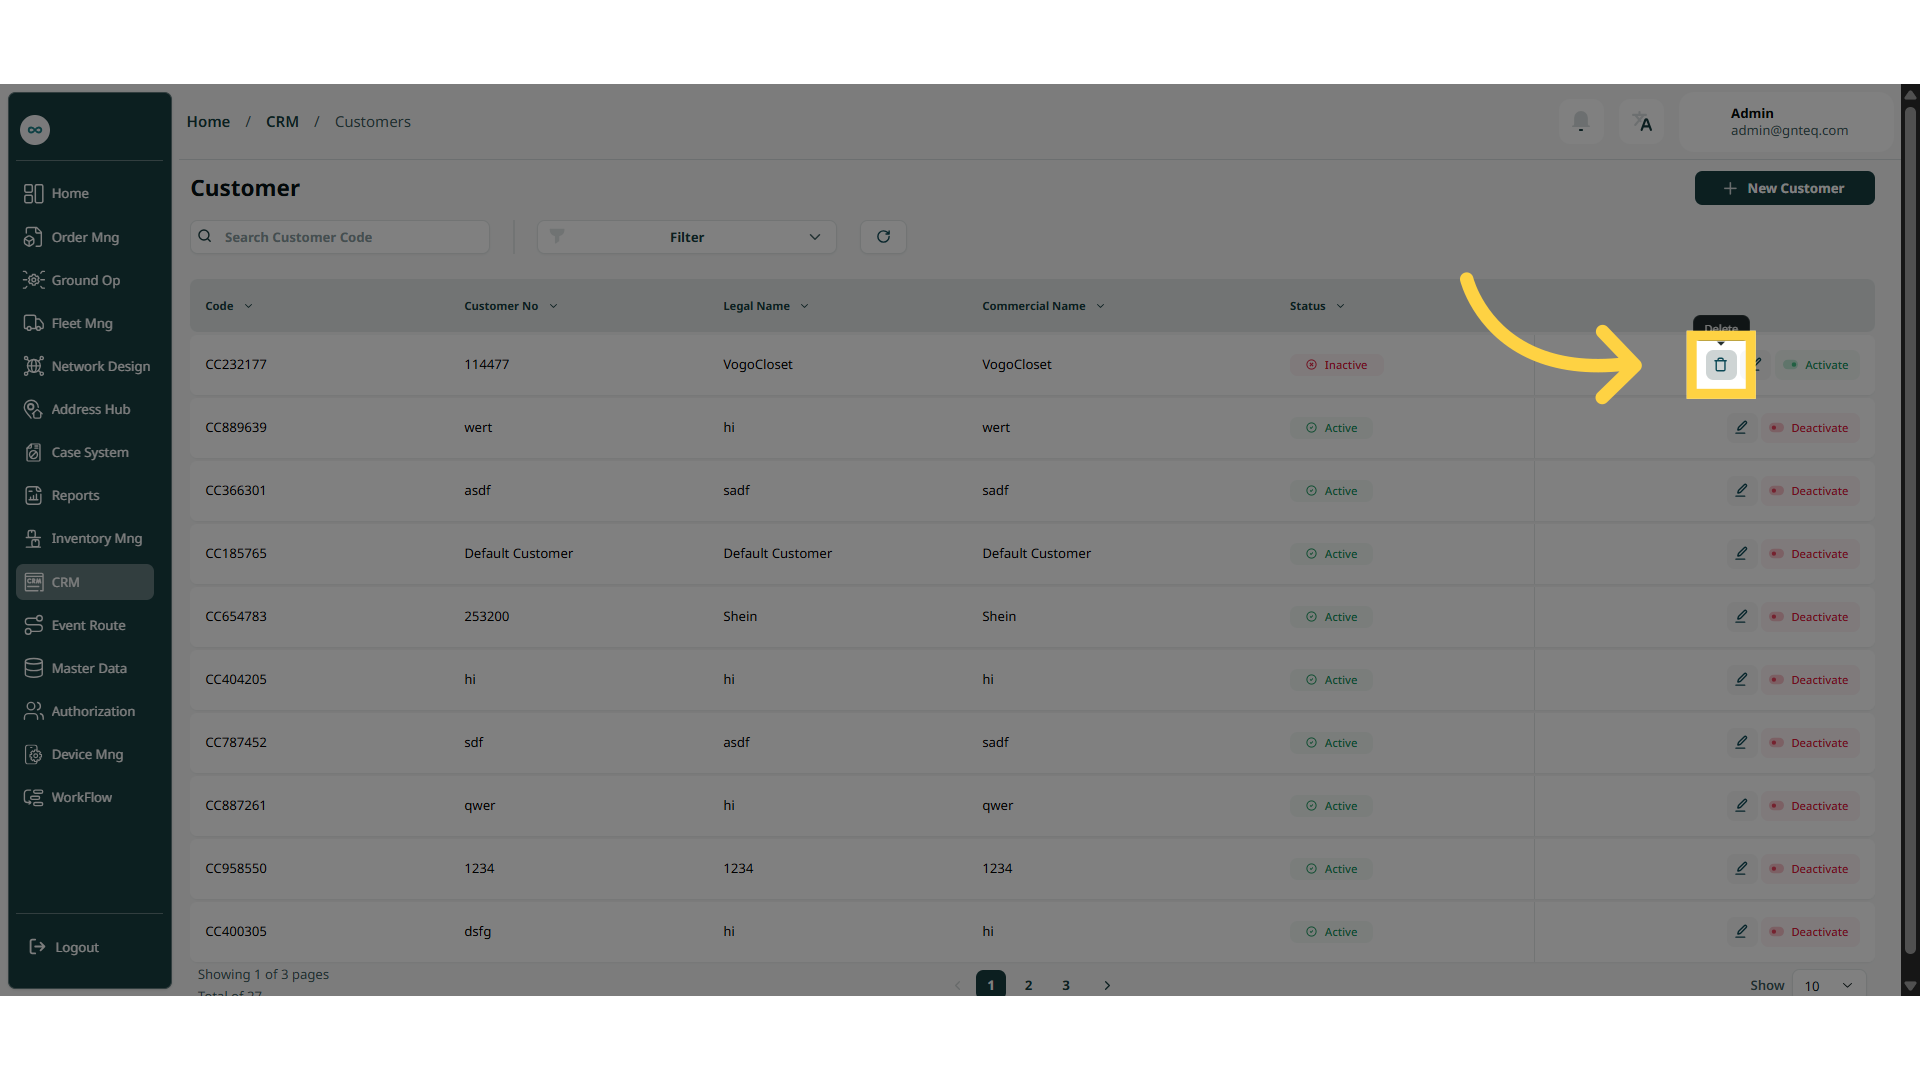
The user can delete a customer profile by navigating to the ‘Customer’ Screen via CRM Module and clicking on Delete Customer from Actions as follows:
2.3 Active& Deactivate
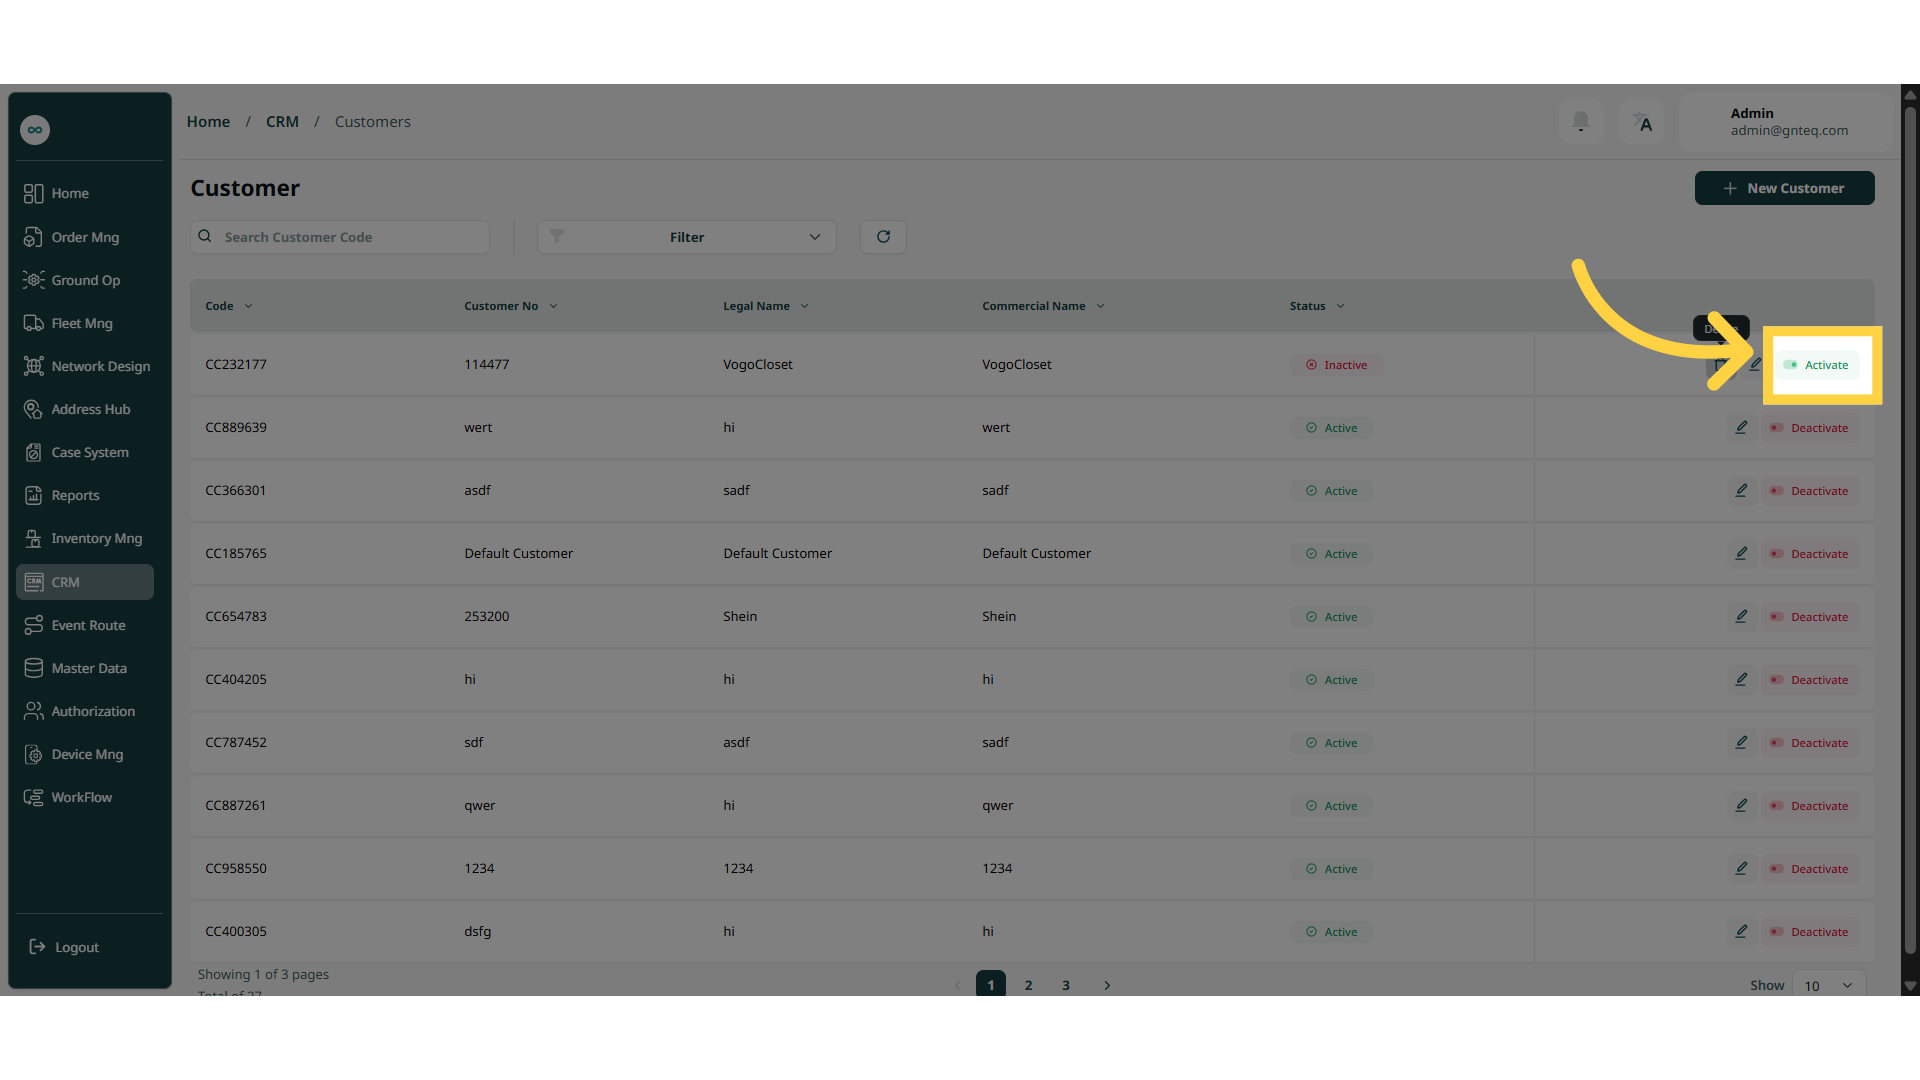
The user can activate and deactivate a customer by navigating to the ‘Customer’ screen via the CRM Module and clicking on the Deactivate Vehicle button:
3. Branch
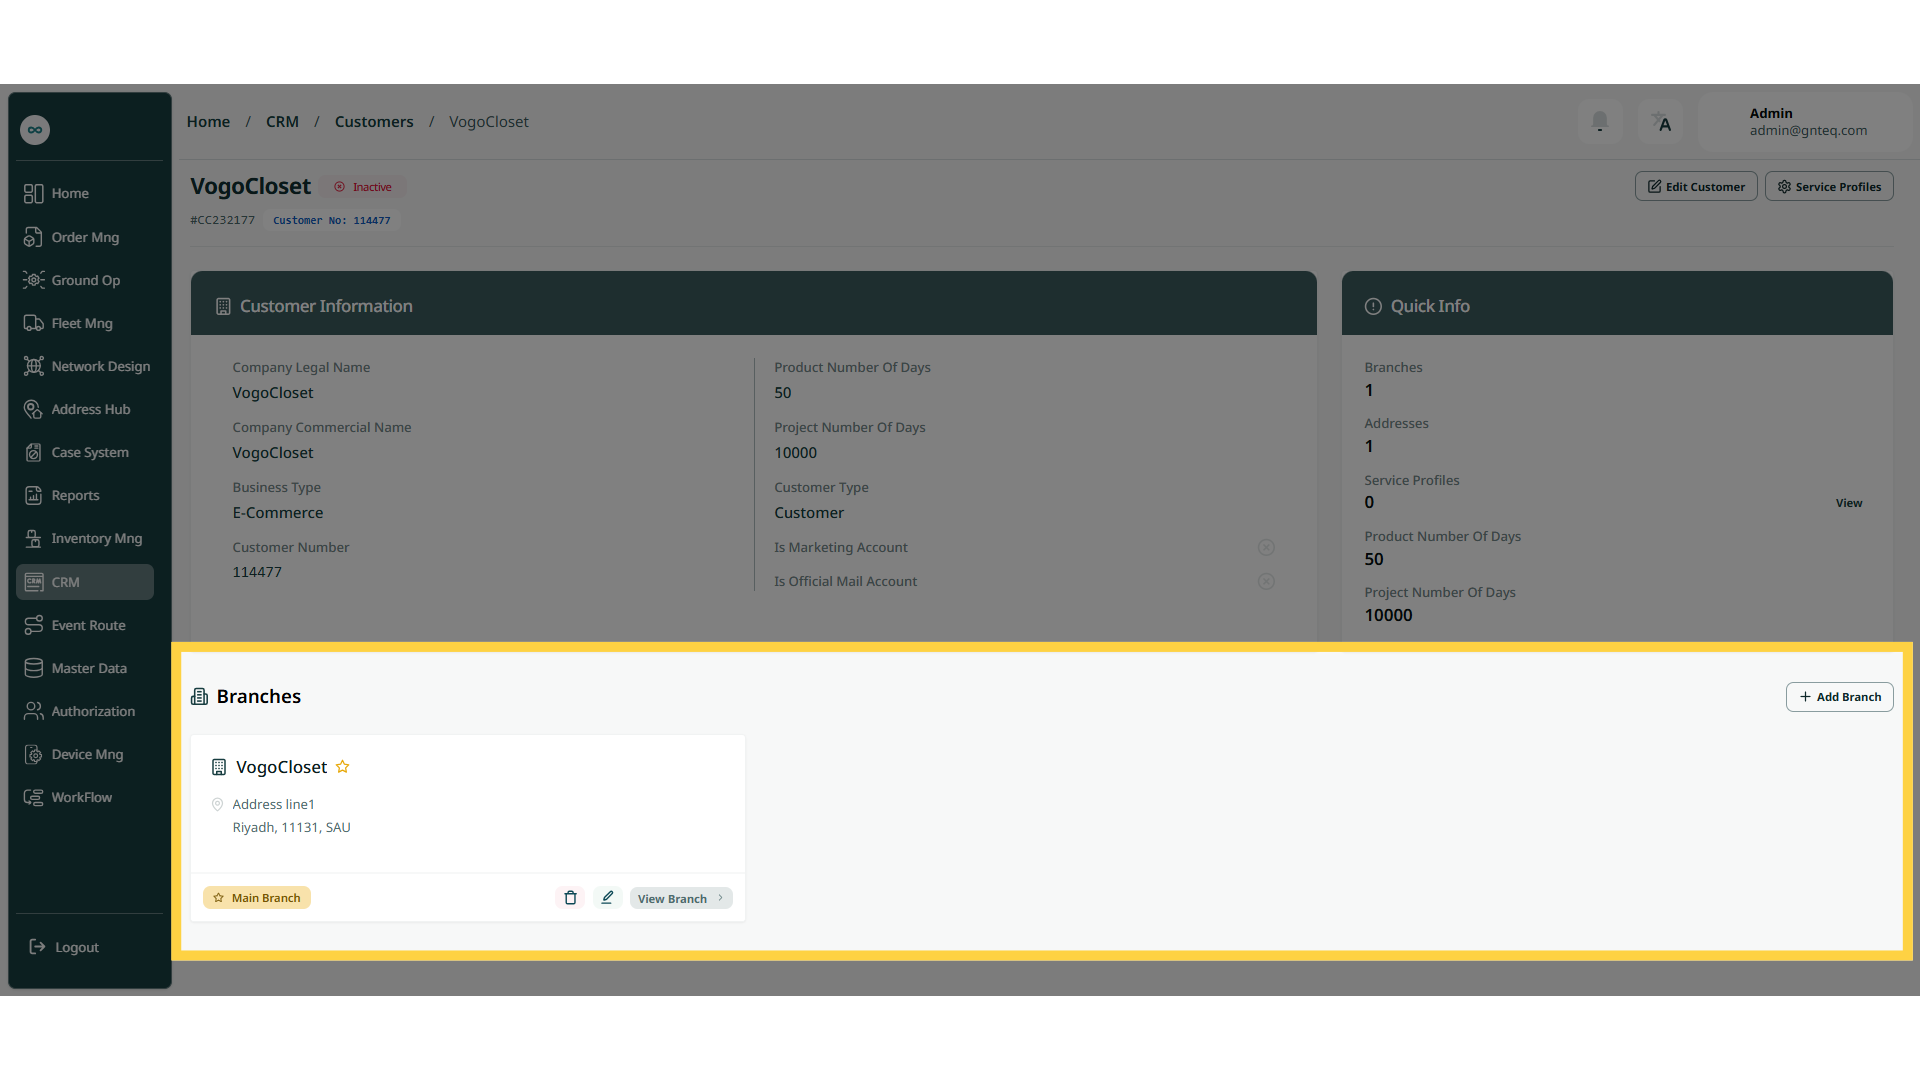
-
Add Branch: the user can add a new branch related customer by clicking on the Add Branch button.
-
Actions: by clicking on Actions, the user can view the branch, edit the branch, or delete the branch.
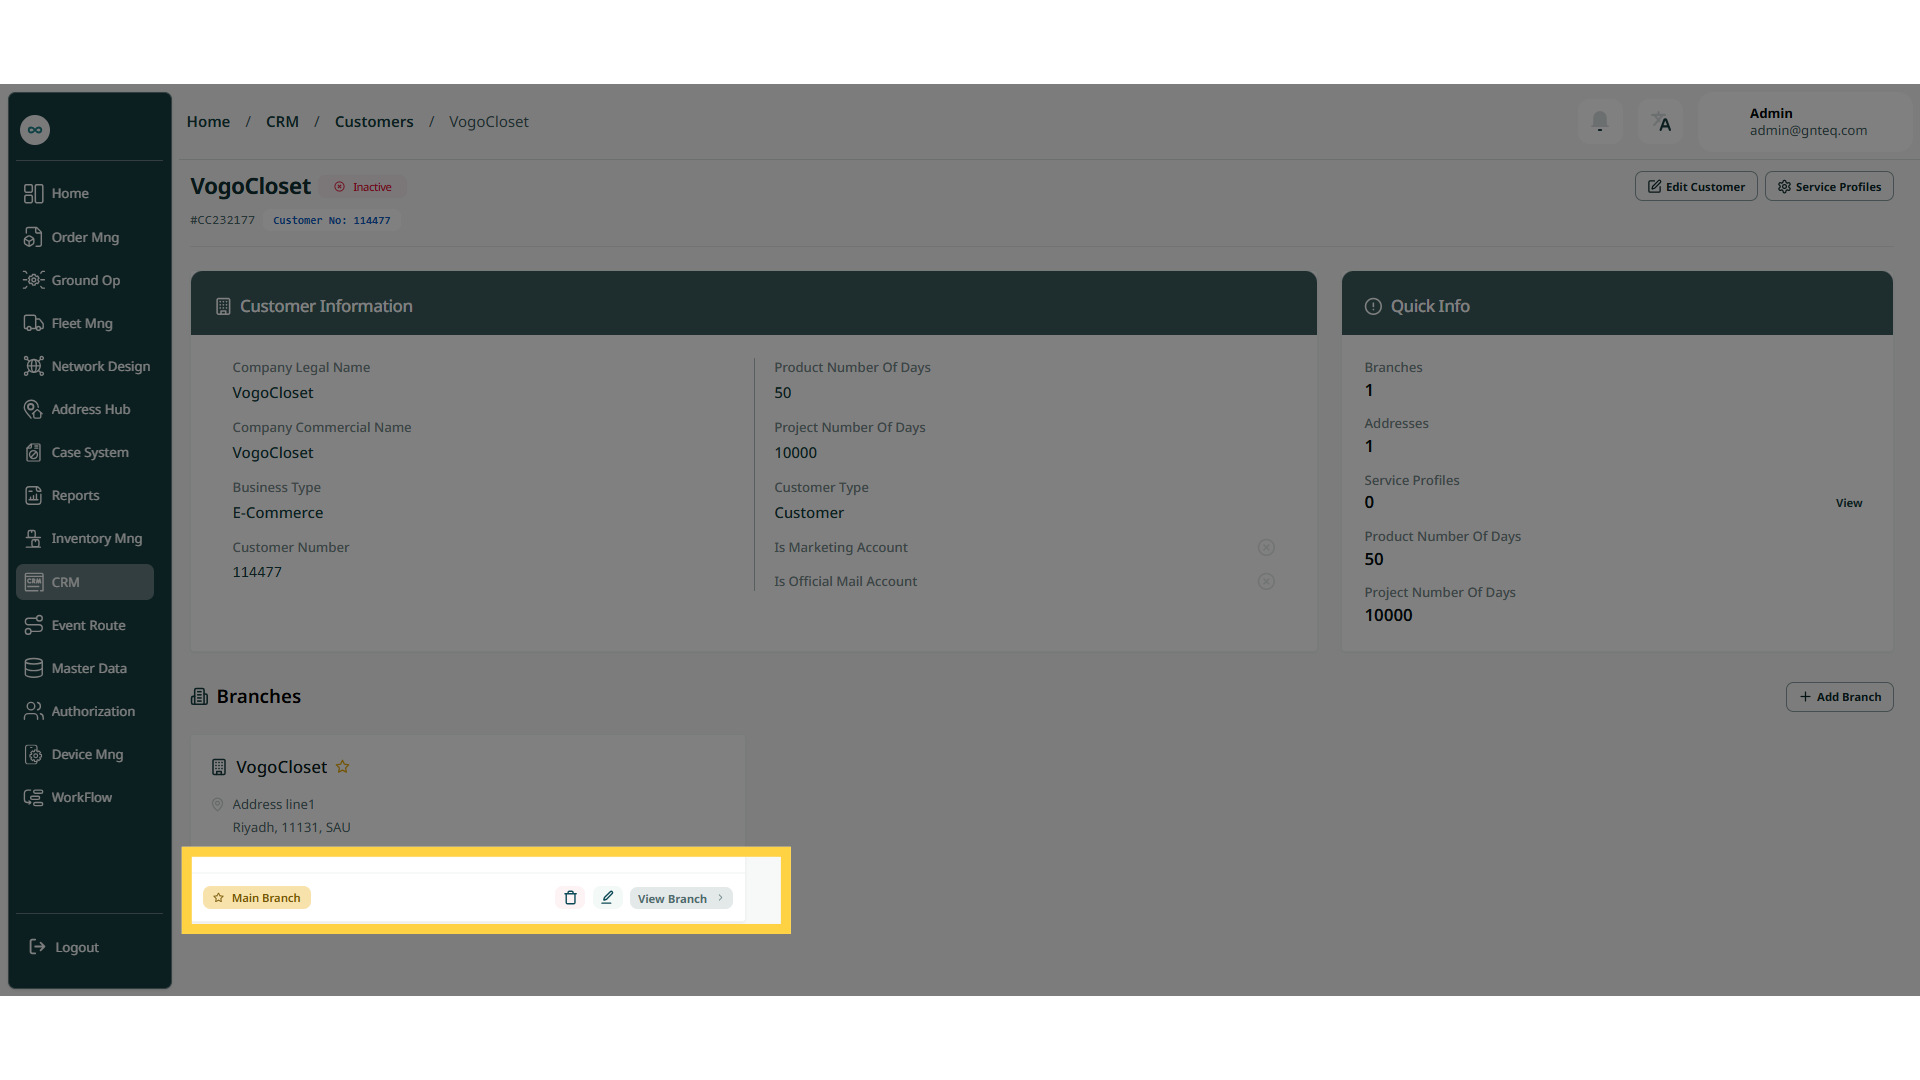
-
Rows Per Page: the user can select the number of items to show on each page.
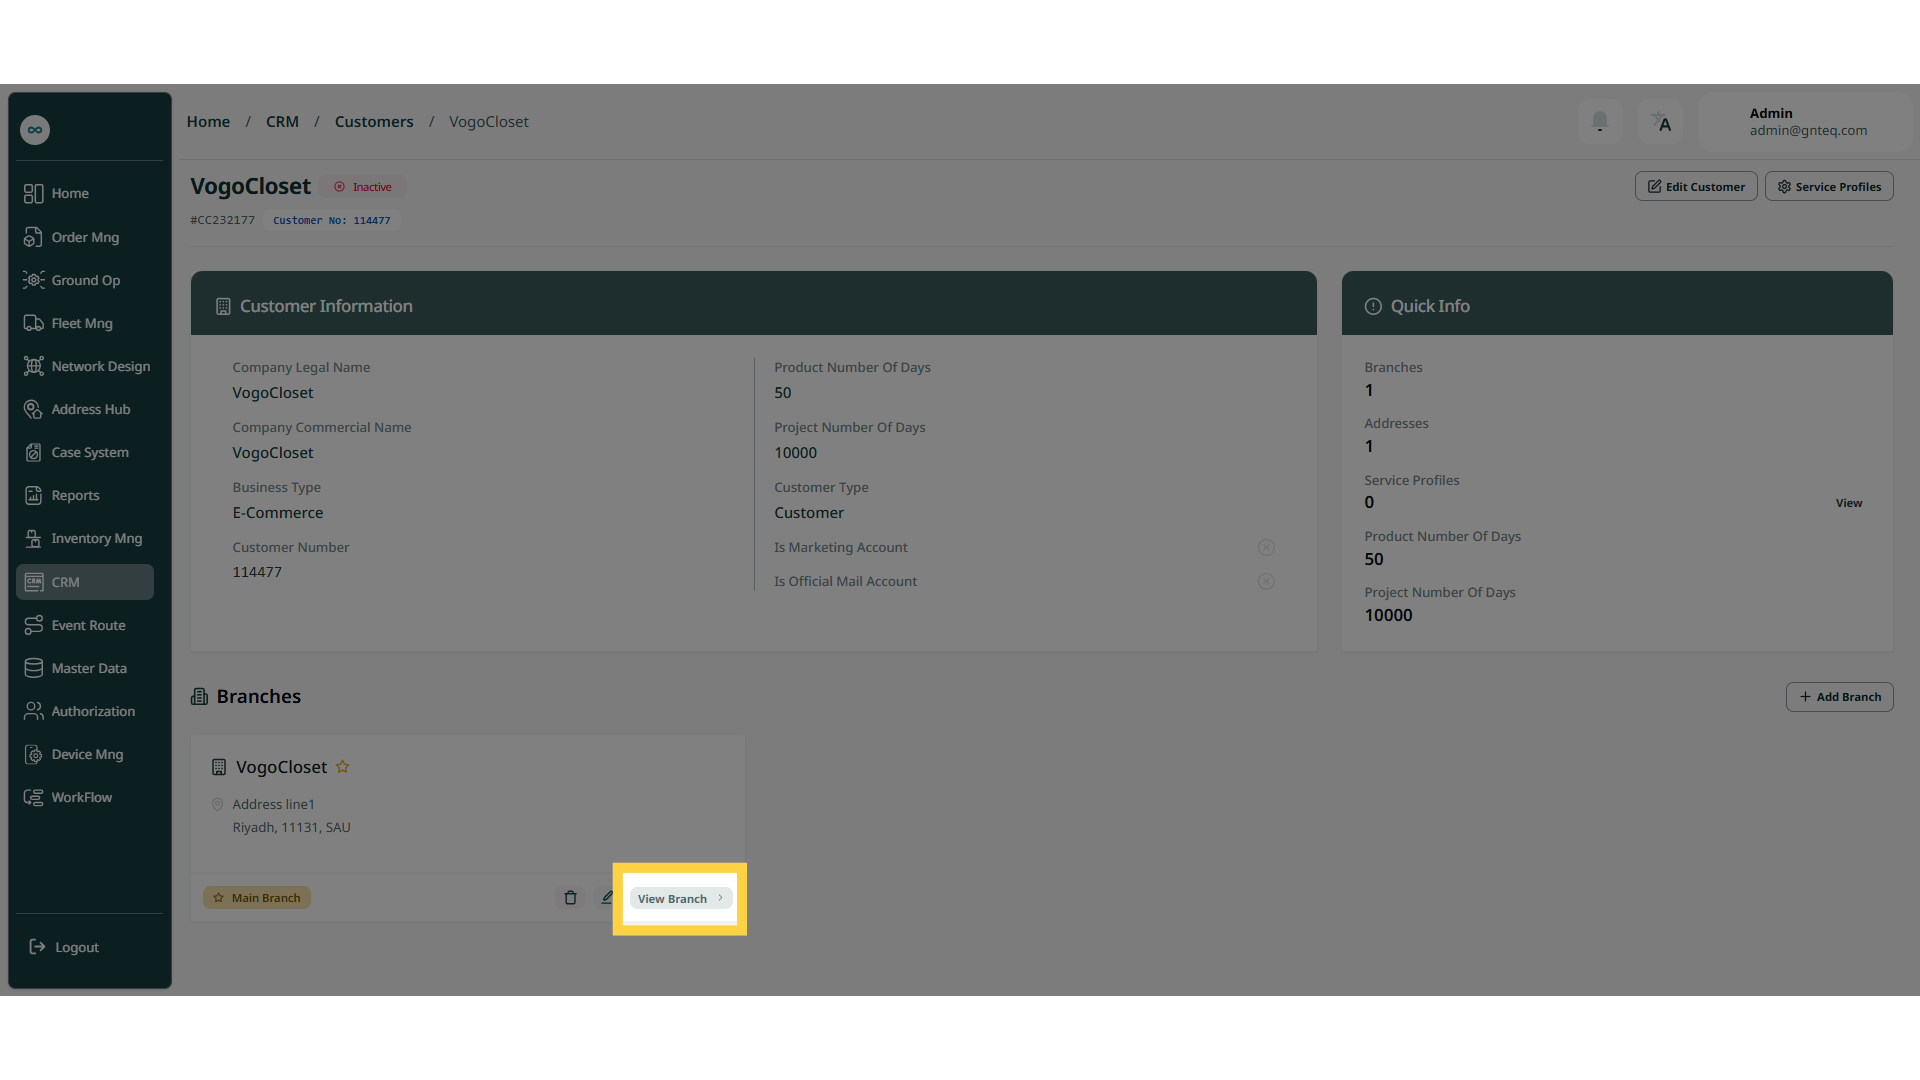
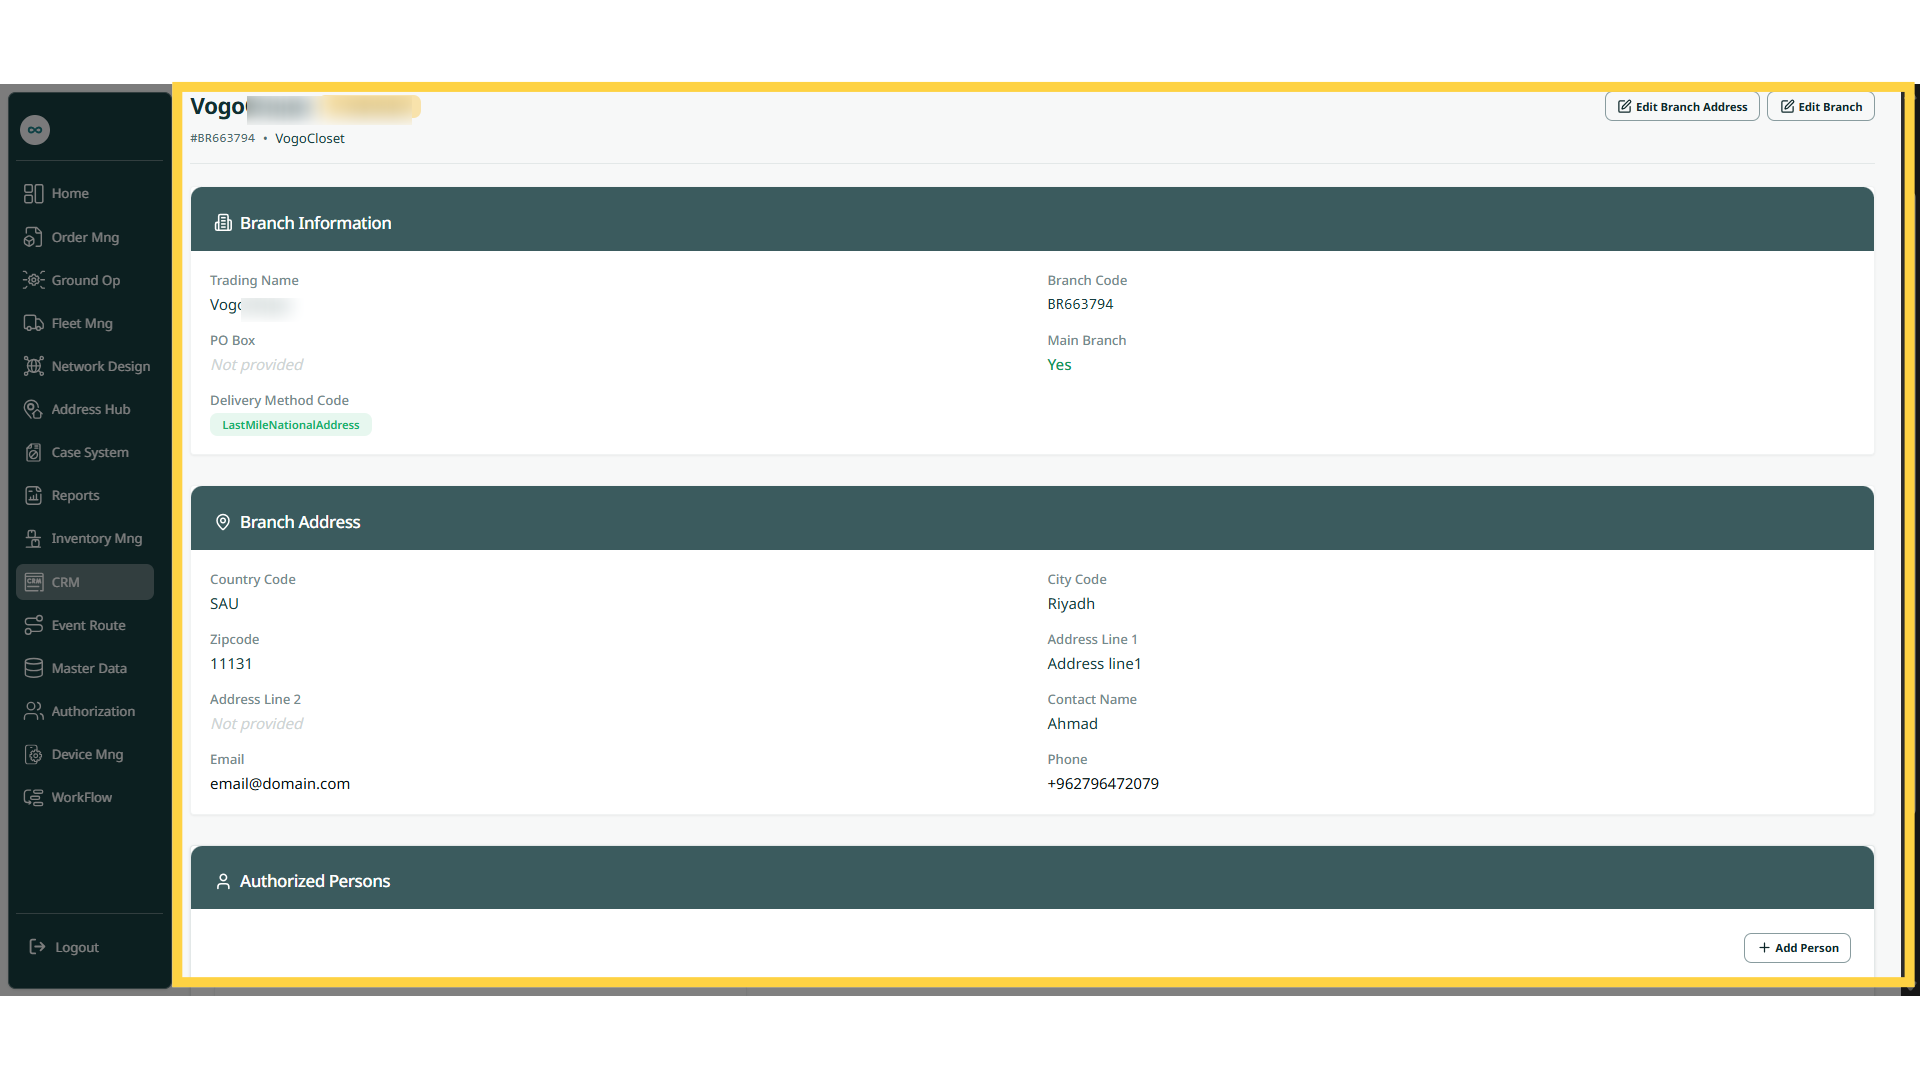
3.1 View Branch
The user can view details of an existing branch by navigating to the ‘Customer Details’ Screen via the CRM Module and clicking on View Branch from Actions as follows:
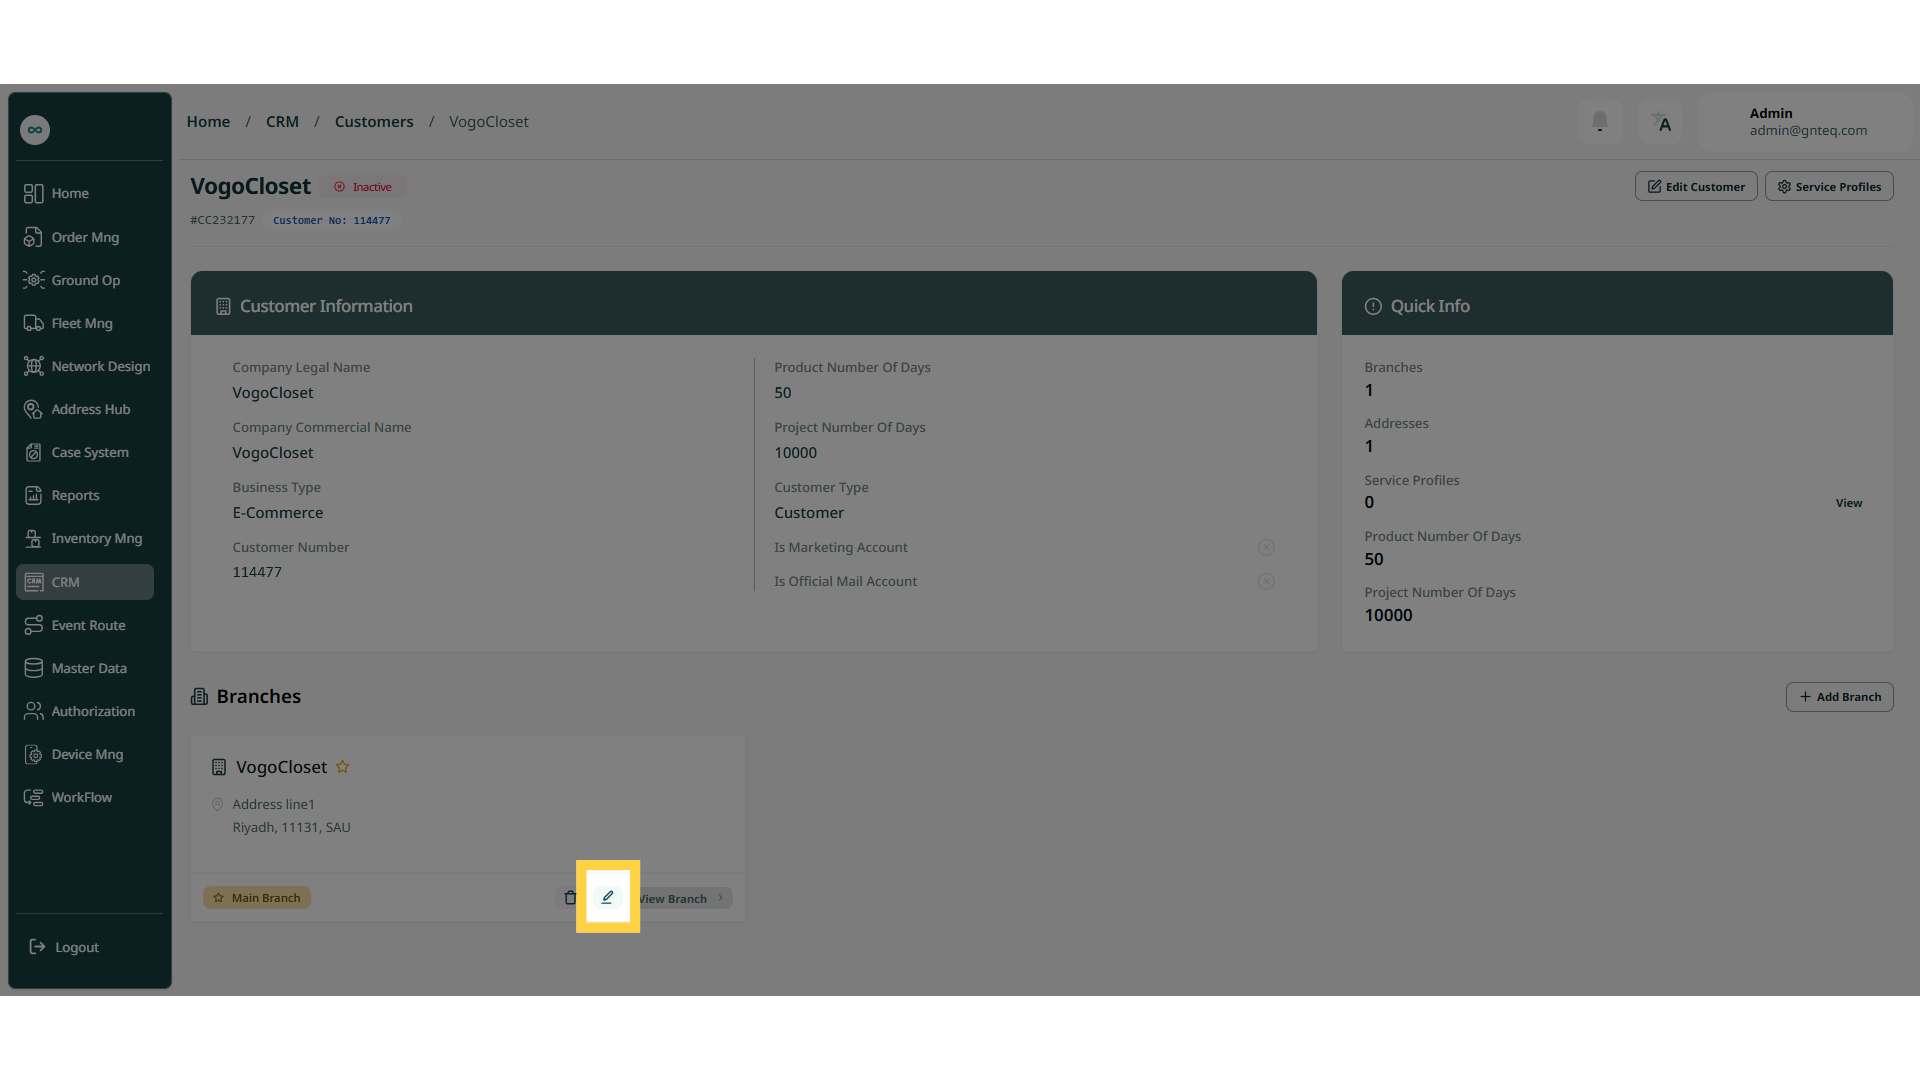
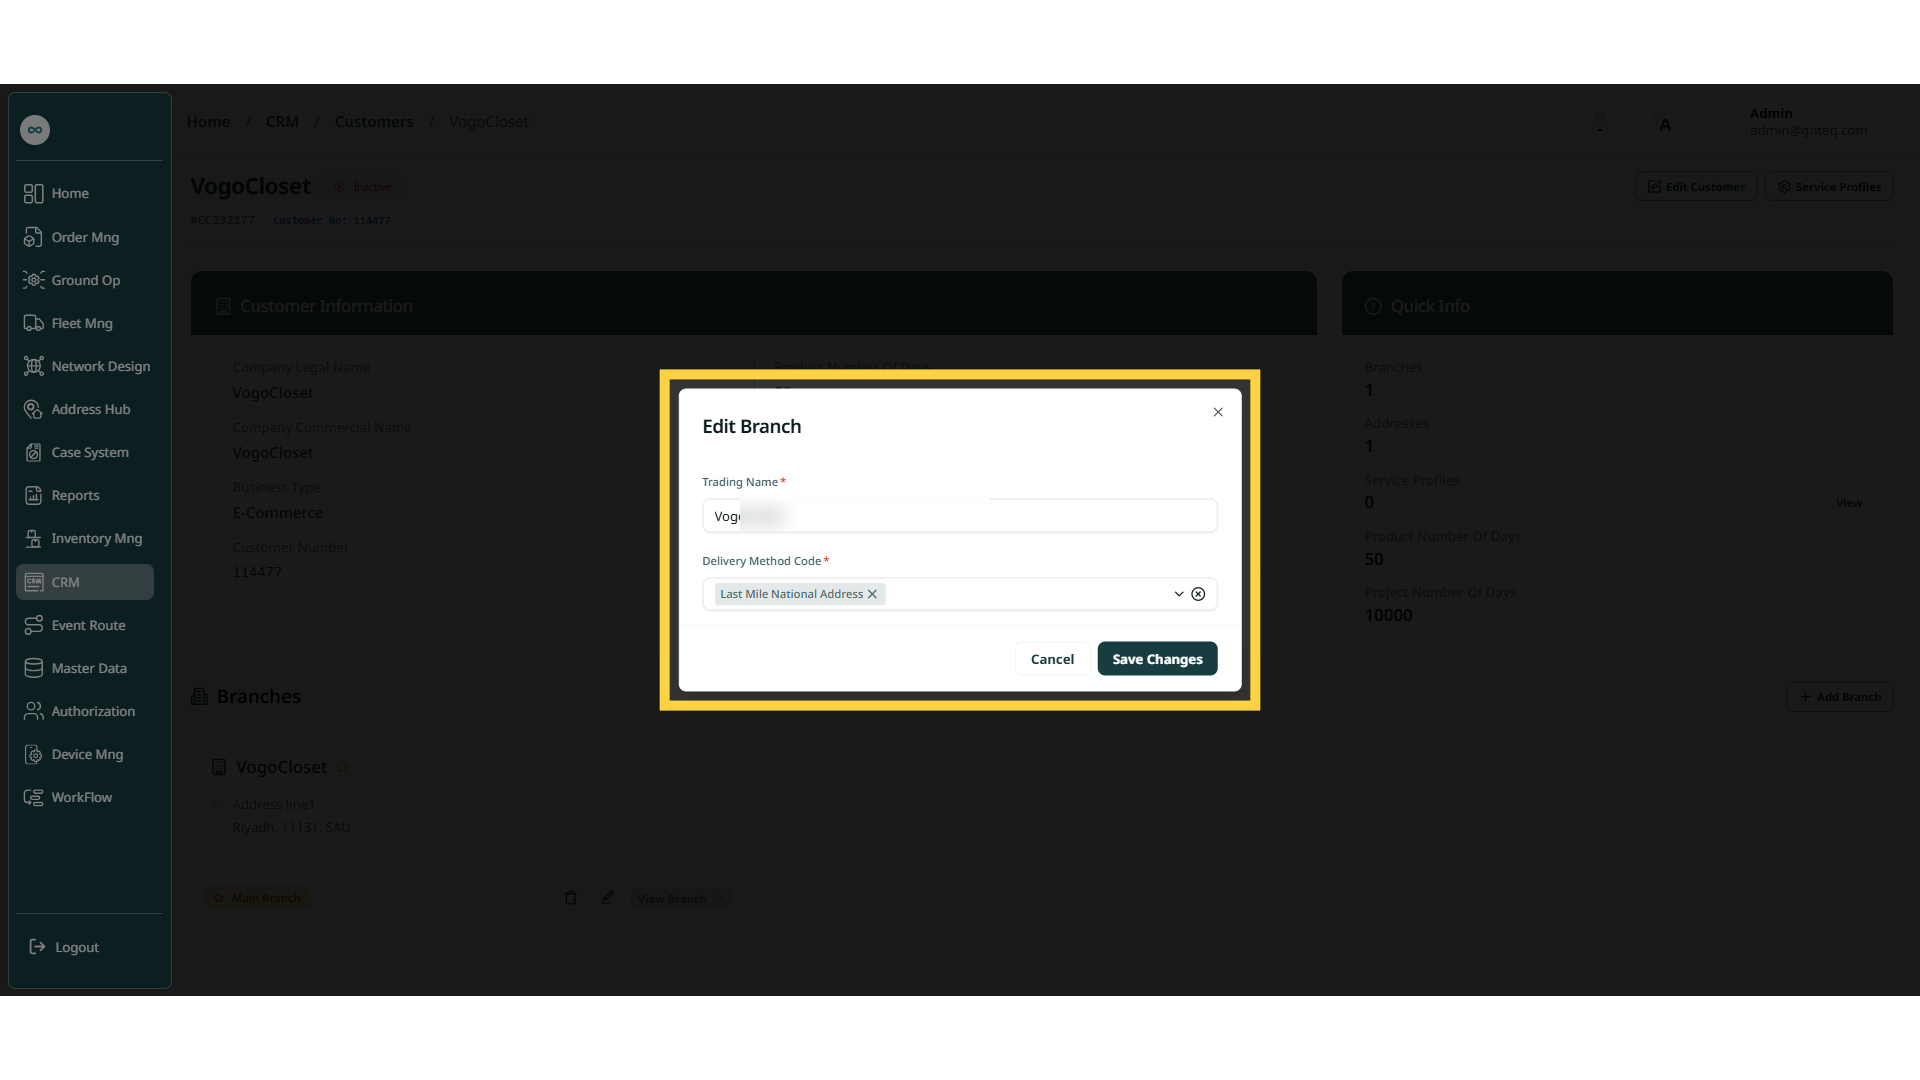
3.2 Edit Branch
The user can edit a branch of an existing branch and navigate to the ‘Customer Details’ Screen via the CRM Module and click on Edit Branch from Actions as follows:
3.3 Delete Branch
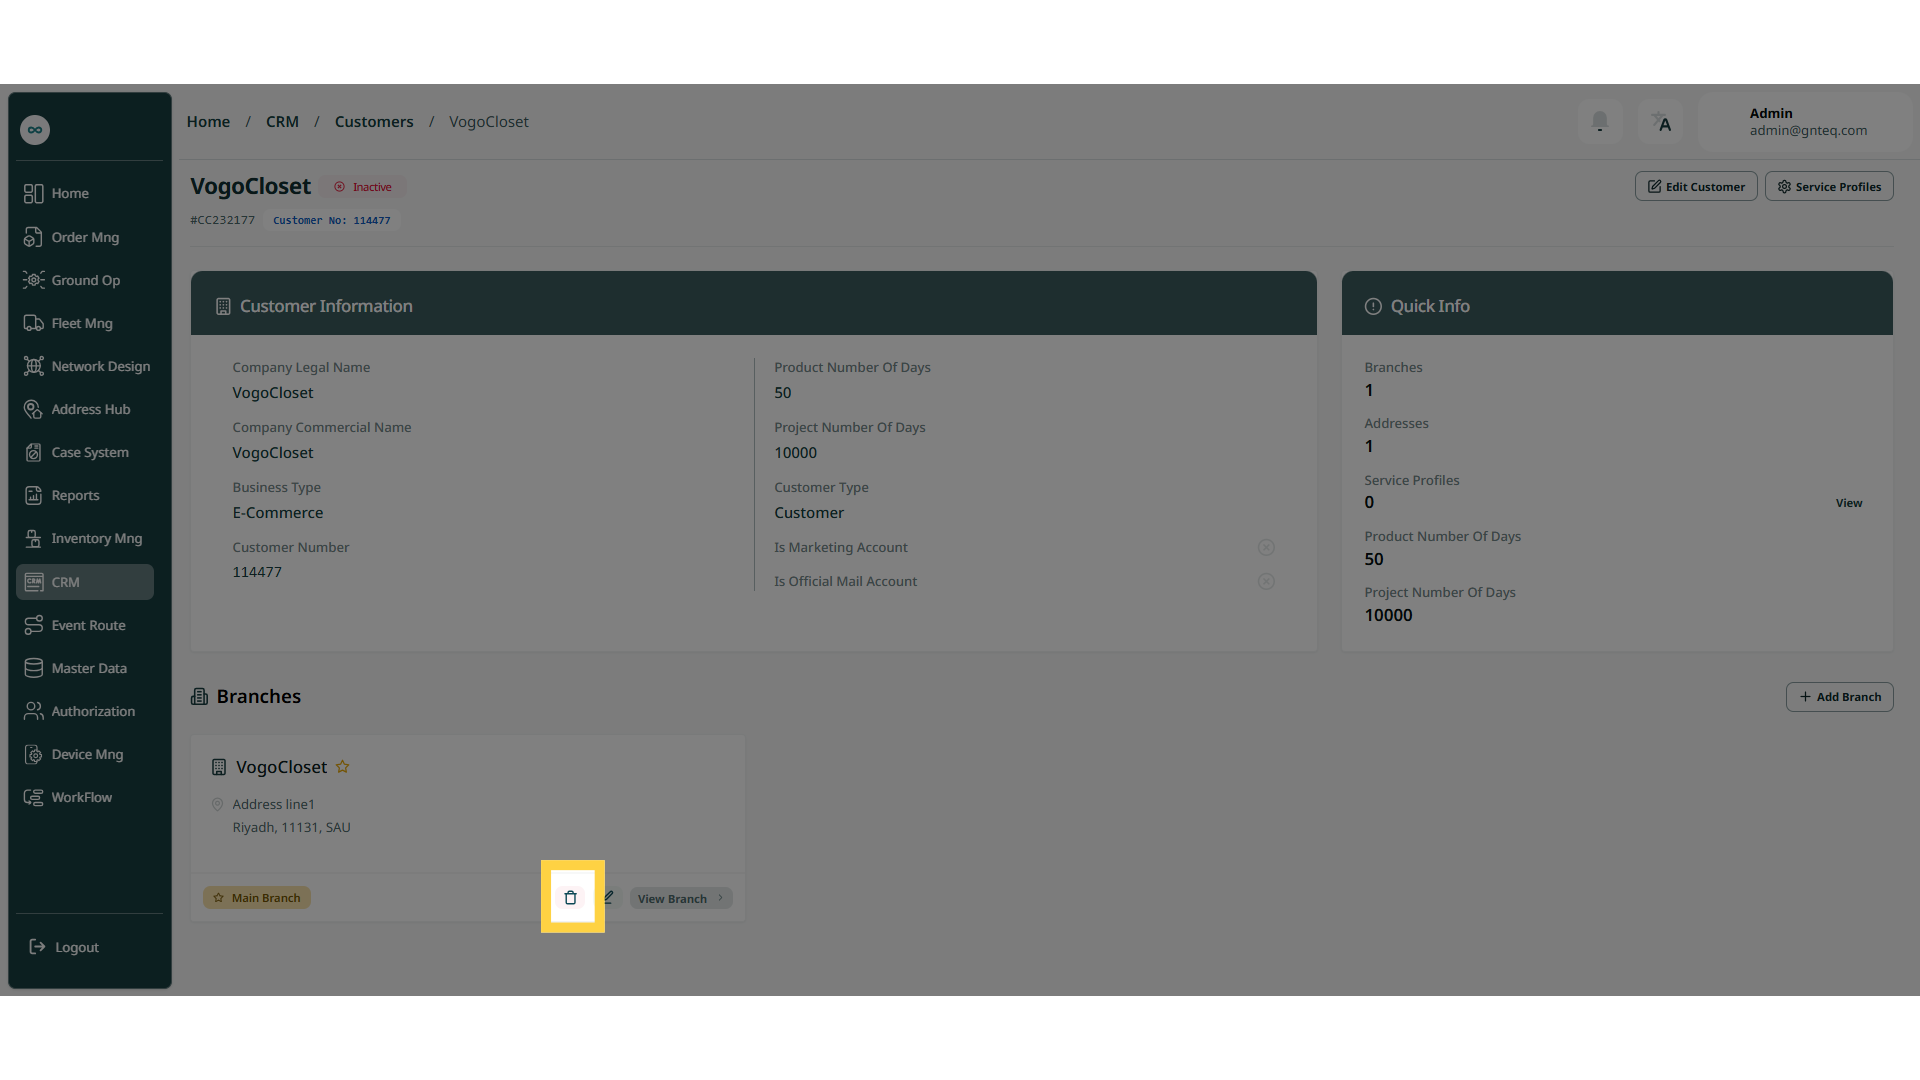
The user can delete a branch by navigating to the ‘Customer Details’ Screen via the CRM Module and clicking Delete Branch from Actions. The user can’t delete the branch if it’s the main branch.
4. Add New Customer
The user can add a new customer by navigating to the ‘Customer’ screen via the CRM Module and clicking on the New Customer button:
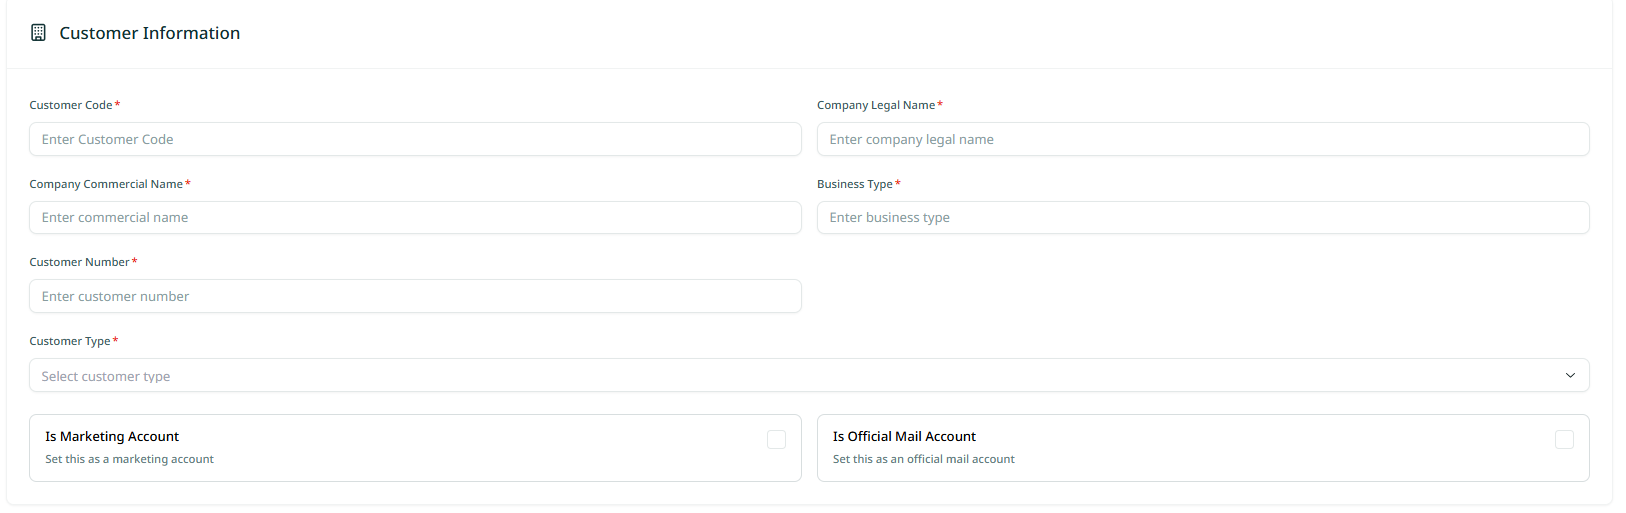
4.1 Customer Information
-
Customer Code: this field represents the code of the customer.
-
Company Commercial Name: this field represents the company’s trading name.
-
Company Legal Name: this field represents the name that appears on all official documents or legal papers.
-
Business Type: this field represents the company’s business industry, e.g., Retail, Banking, e-commerce, etc.
-
Customer Number: this field represents the customer’s personal number.
-
Customer Type: this field represent the type of customer (customer, cash account, VIP).
-
Is Marketing Account (checkbox): by enabling this checkbox will give a user the ability to create, edit, and delete campaign records, plus other campaign management permissions.
-
Is Official Mail Account (checkbox): by enabling this checkbox, will marks the selected email account as the official or primary contact address and by enabling it, a fields will appear in the same window containing an information for the authorized person.

4.2 Service Profile Link
-
Service Profile: this field represents the name of the service profile for the customer.
-
Contract ID: this field represents the ID number of the contract.
-
Commercial Product Type: this field represents the commercial name of the product type.
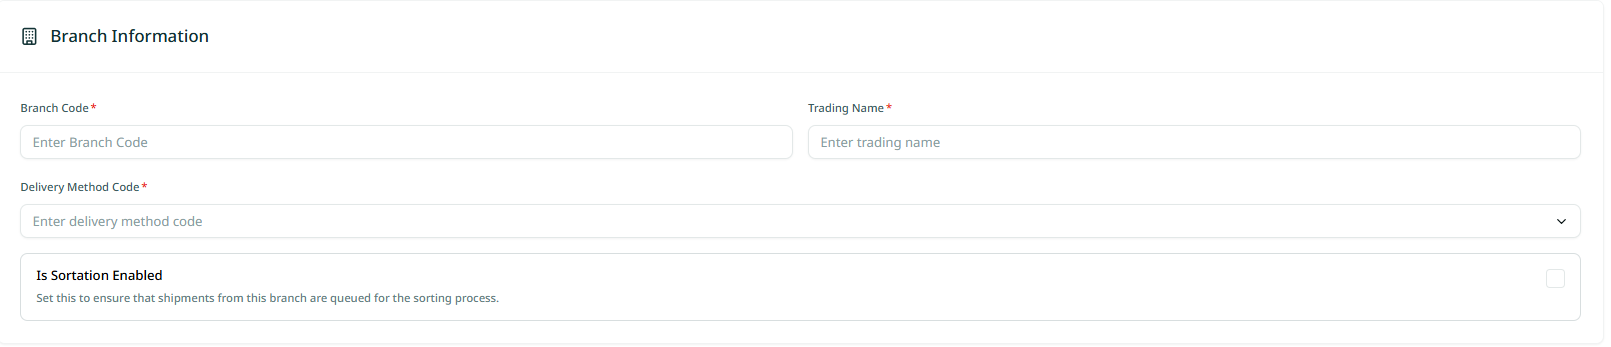
4.3 Branch Information
-
Branch code: this field represents the code of the branch that related to the customer.
-
Delivery Method Code: this field represents the method used to receive deliveries.
-
Trading Name: this field represents the branch’s name.
-
Is Sortation Enabled: if selected, this ensure that shipments from this branch are arranged for the sorting process.
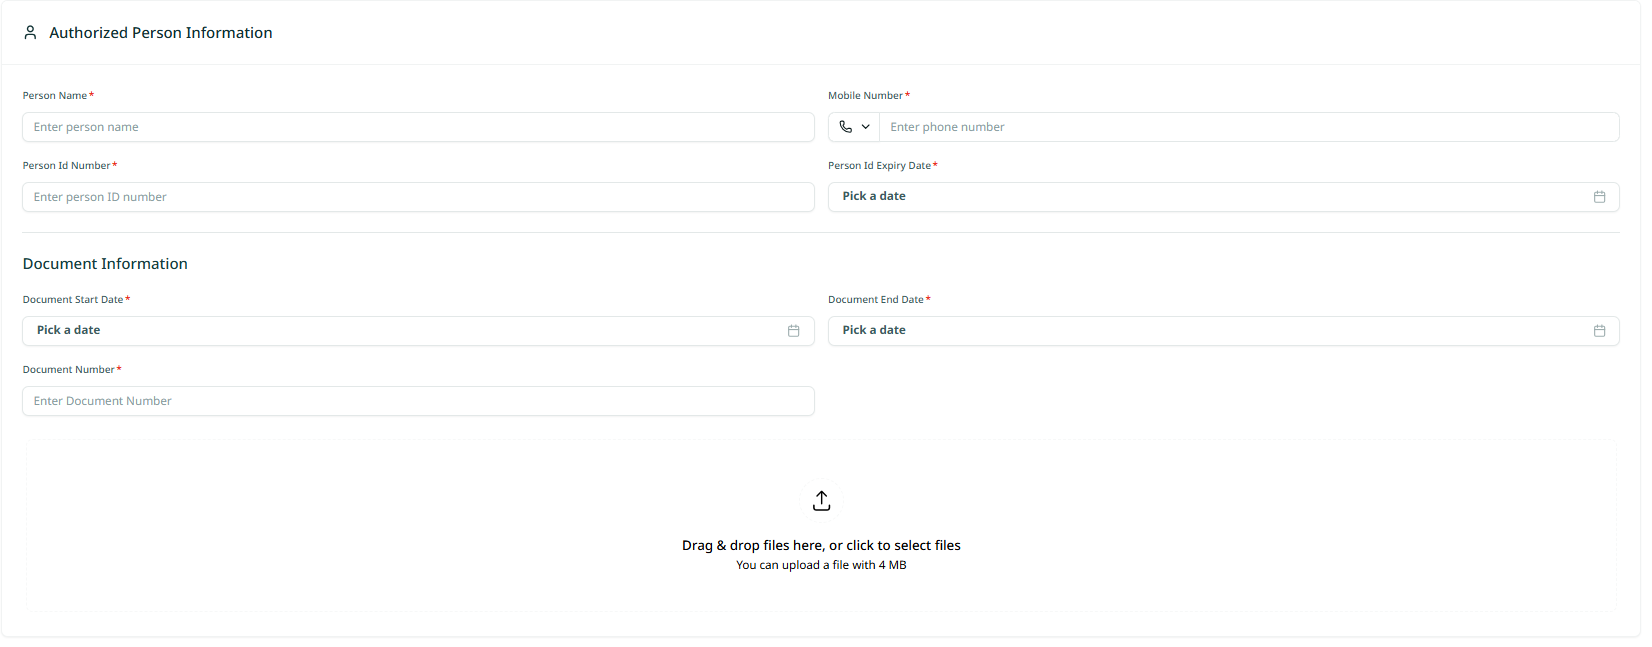
4.4 Authorized Person Information
-
Person's Name: this field represents the name of the person authorized by the government.
-
Phone Number: this field represents the phone number of the authorized person.
-
Persons ID Number: this field represents the ID number of the authorized person.
-
Persons ID Expiration Date: this field represents the expiration date of the authorized person's ID.
-
Document Start Date: this field represents the start date of the document.
-
Document End Date: this field represents the end date of the document.
-
Document Number: this field represents the number of the document.
-
Upload: by clicking on upload, the user can upload documents that are related to the authorized person.
Note: the authorized person information fields will automatically appears once 'Customer' is selected as the Customer Type and the 'Is Official Mail' checkbox is enabled.
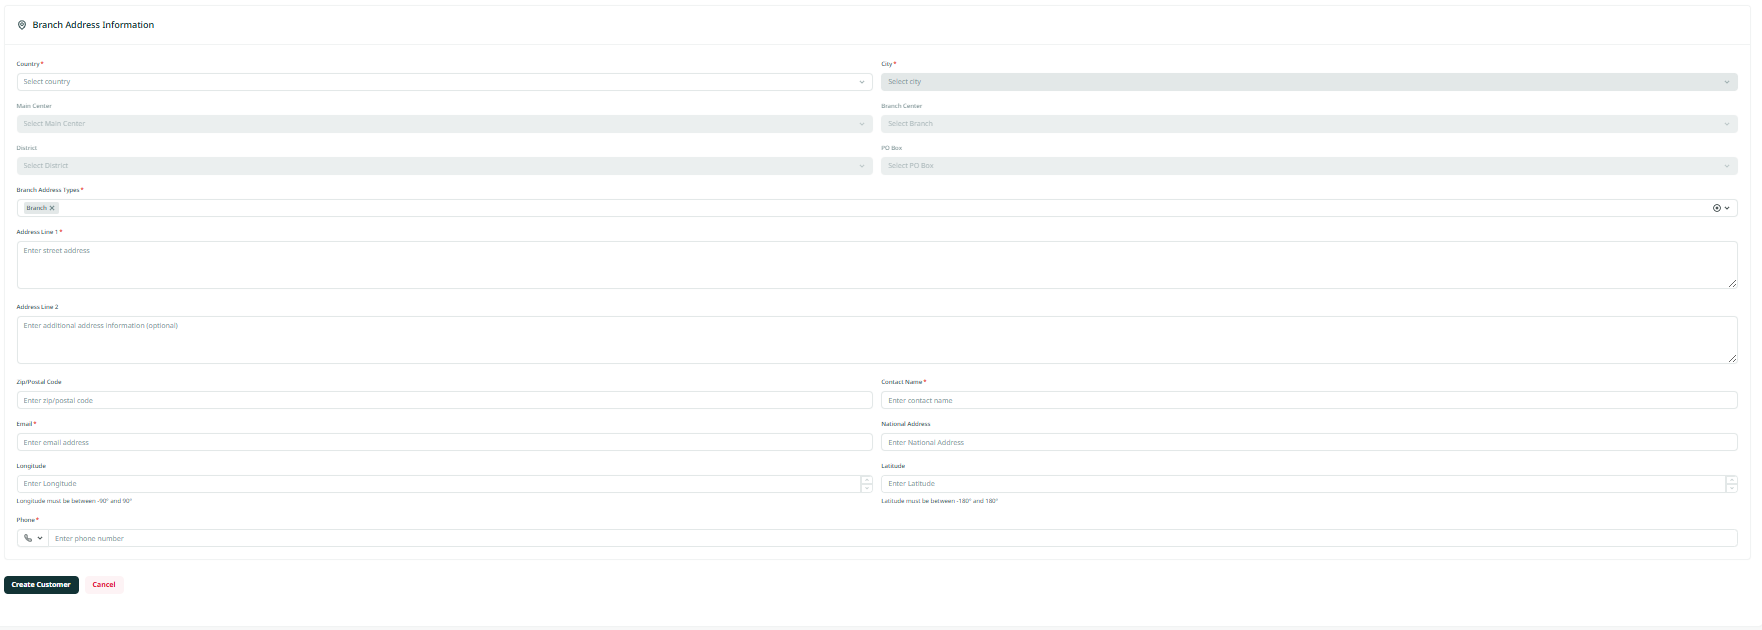
4.5 Branch Address Information
-
Country: this field represents the country of the company's main branch.
-
City: this field represents the city of the company's main branch.
-
Main Center: this field represents the customer's main branch.
-
Branch Center: this field represents the customer's station or route.
-
District: this field represents the location, region, or province associated with the provided address.
-
PO Box: this field represents the customer's postal code.
-
Address Line 1: this field represents the company's primary contact address.
-
Address Line 2: this field represents the company's secondary contact address.
-
Zip Code: this field represents the company's postal code.
-
Contact Name: this field represents the person responsible for communicating on behalf of the company.
-
Email: this field represents the contact's email address.
-
Phone: this field represents the contact's mobile number.
-
National Address: this field represents a spatial identity card for each home or facility, accurately linking people and places geographically and including all location-related details.
-
Longitude: this field represents the geographic coordinates of the longitude.
-
Latitude: this field represents the geographic coordinates of the latitude.
By clicking Create Customer, the customer will be successfully added to the system..