
Document History
|
Version |
Author |
Reviewer/Approver |
Date of Issue |
Page / Section |
Brief Description |
|---|---|---|---|---|---|
|
1.0 |
Jameel.S |
Deema.Z \ Asma.L |
20/1/2025 |
Route Management |
First Version |
1. Route Creation Overview
2. Dashboard
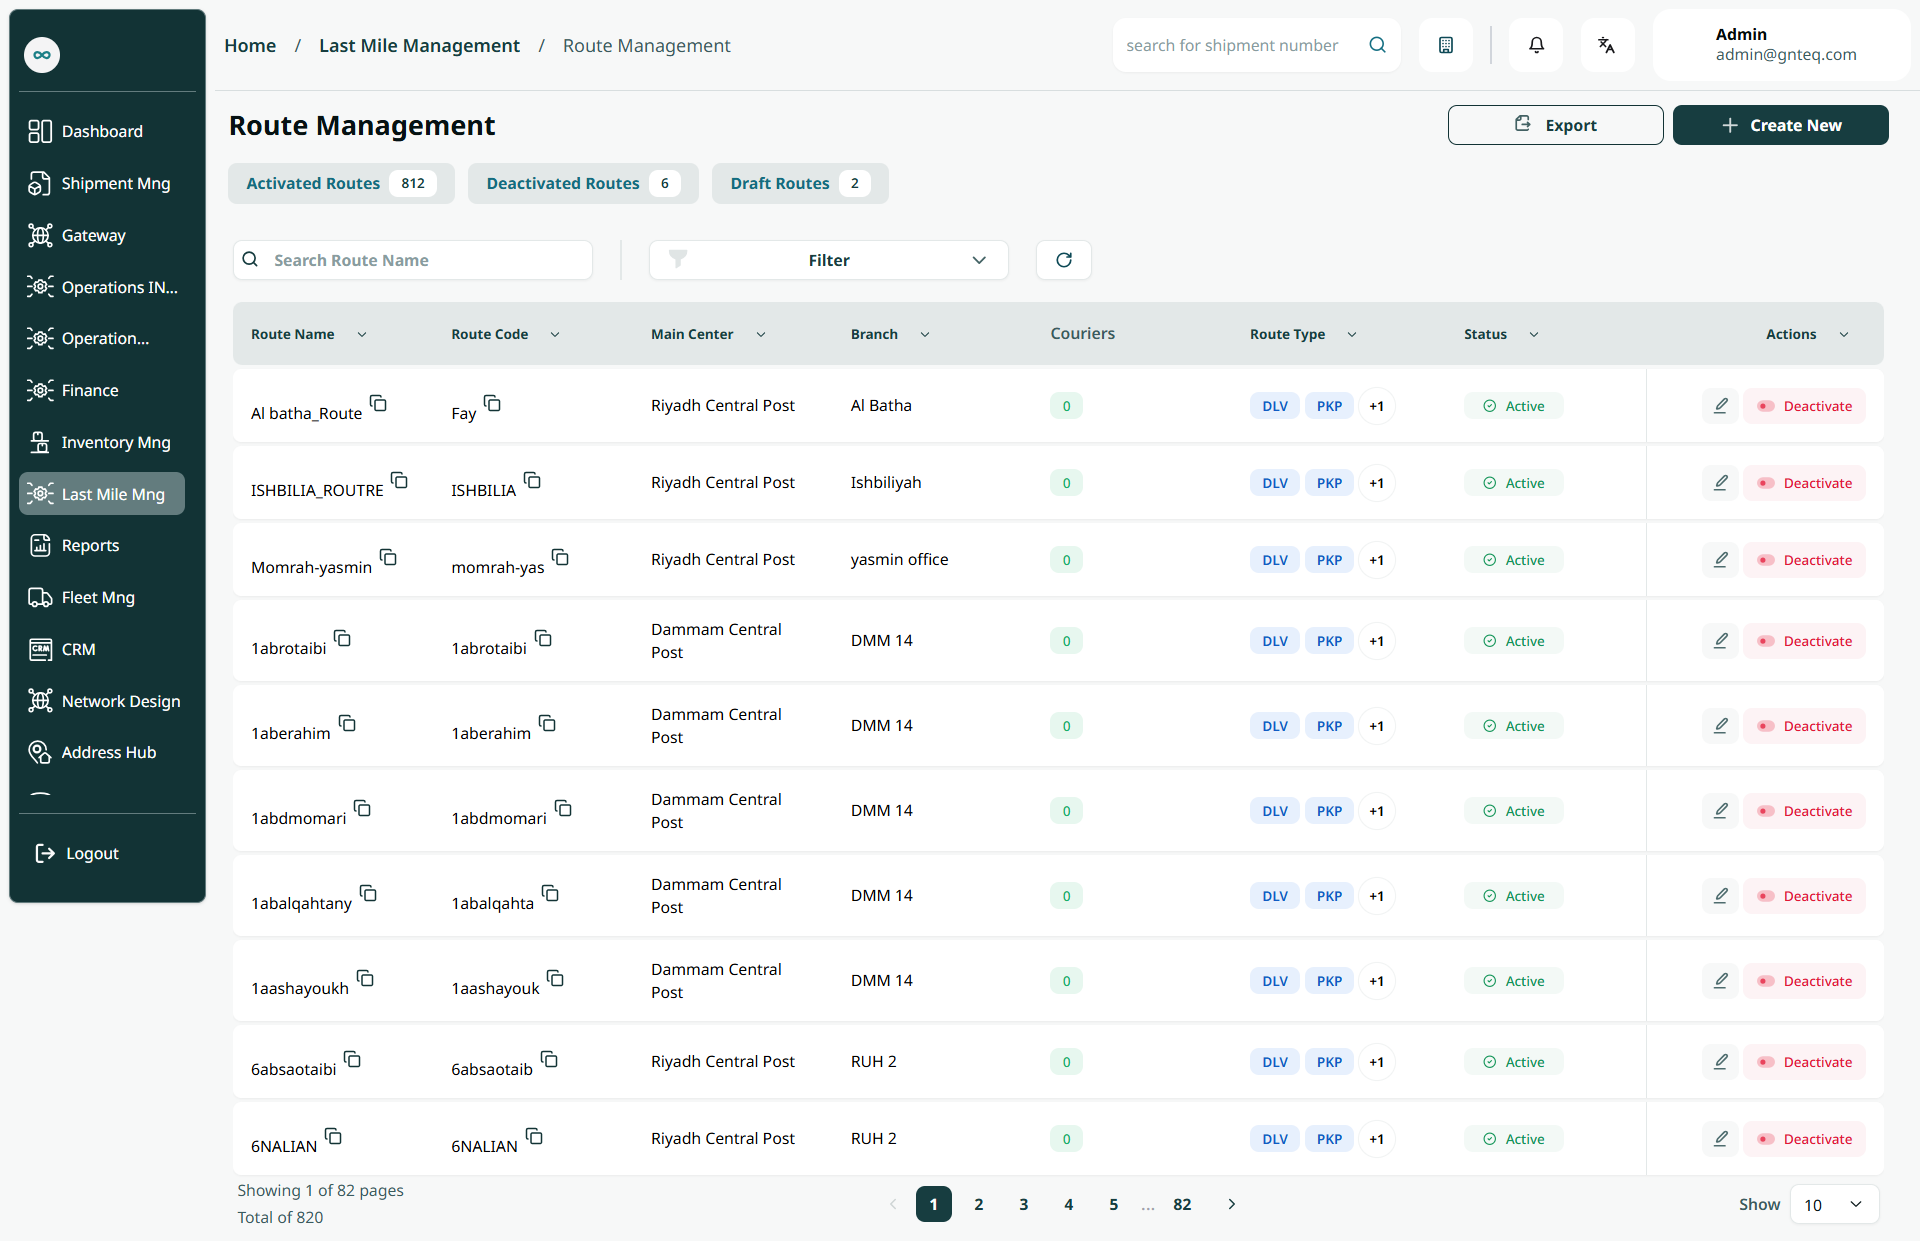
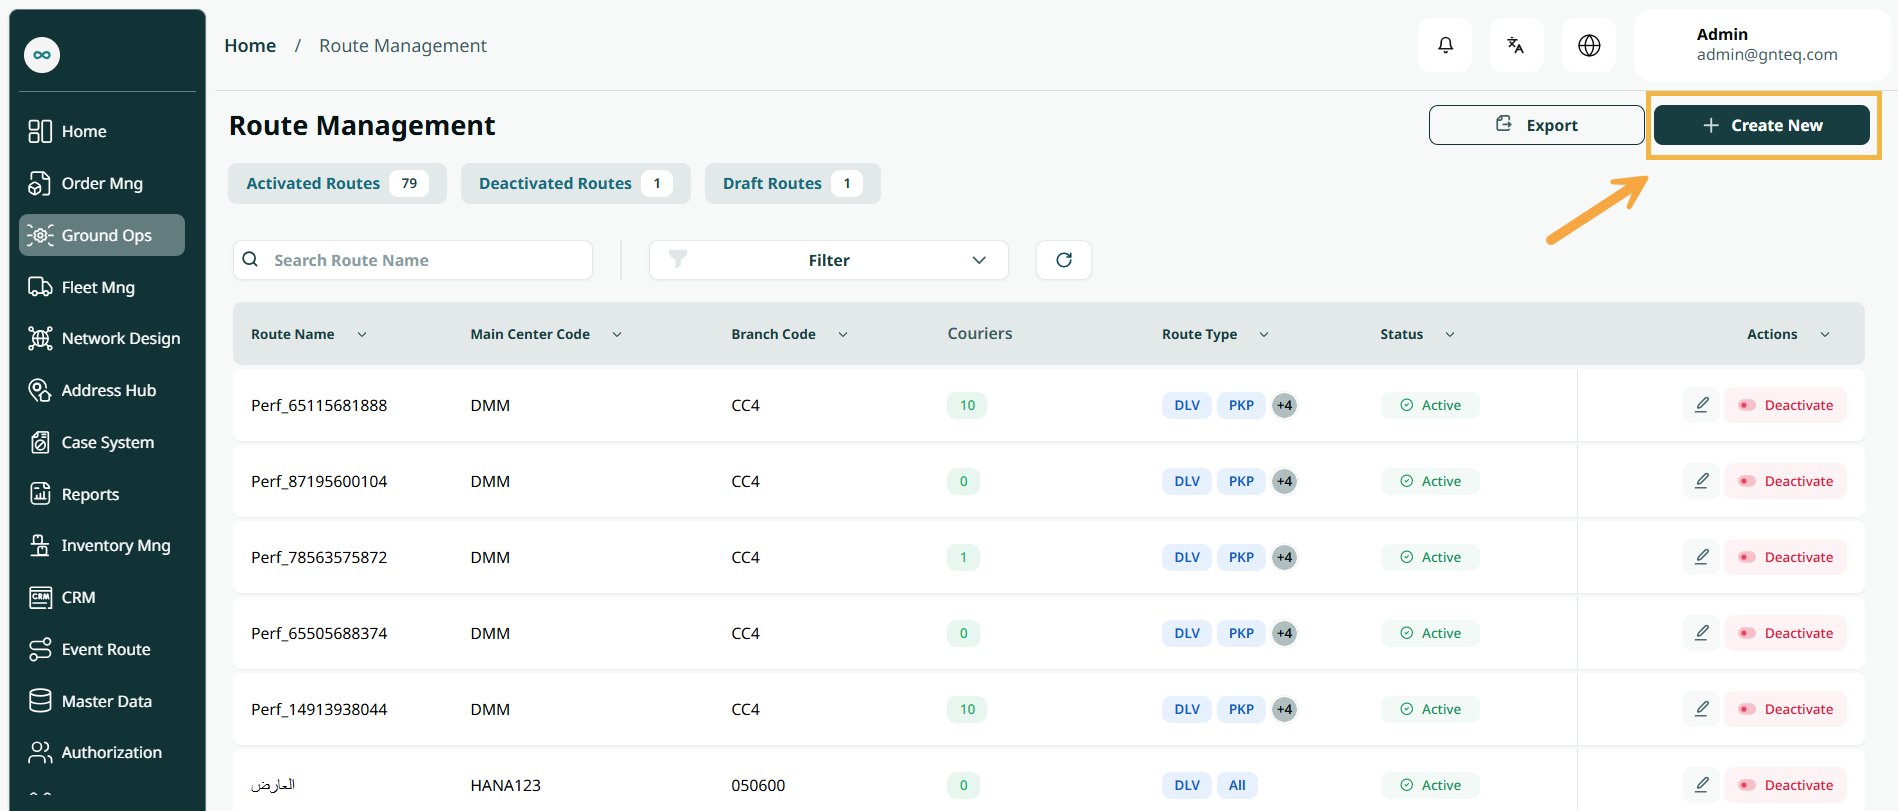
The user can view their defined routes in the system by navigating to the ‘Route Management’ screen in the Last Mile Management from the left navigation panel as follows:
-
Create New: the user can add a new route by clicking on ‘Create New’.
-
Activated Routes: the user can access the active routes screen by clicking "Activated Routes."
-
Deactivated Routes: the user can access the deactivated routes screen by clicking "Deactivated Routes."
-
Draft Routes: the user can access the routes under construction screen by clicking "Draft Routes."
-
Export: the user can export the list as an Excel file by selecting the export button.
-
Filters: the user can search for the route by main center code, branch code, or collection capacity.
-
Search: The user can search for a route by entering the route name.
-
Rows Per Page: the user can select the number of items to show on each page.
-
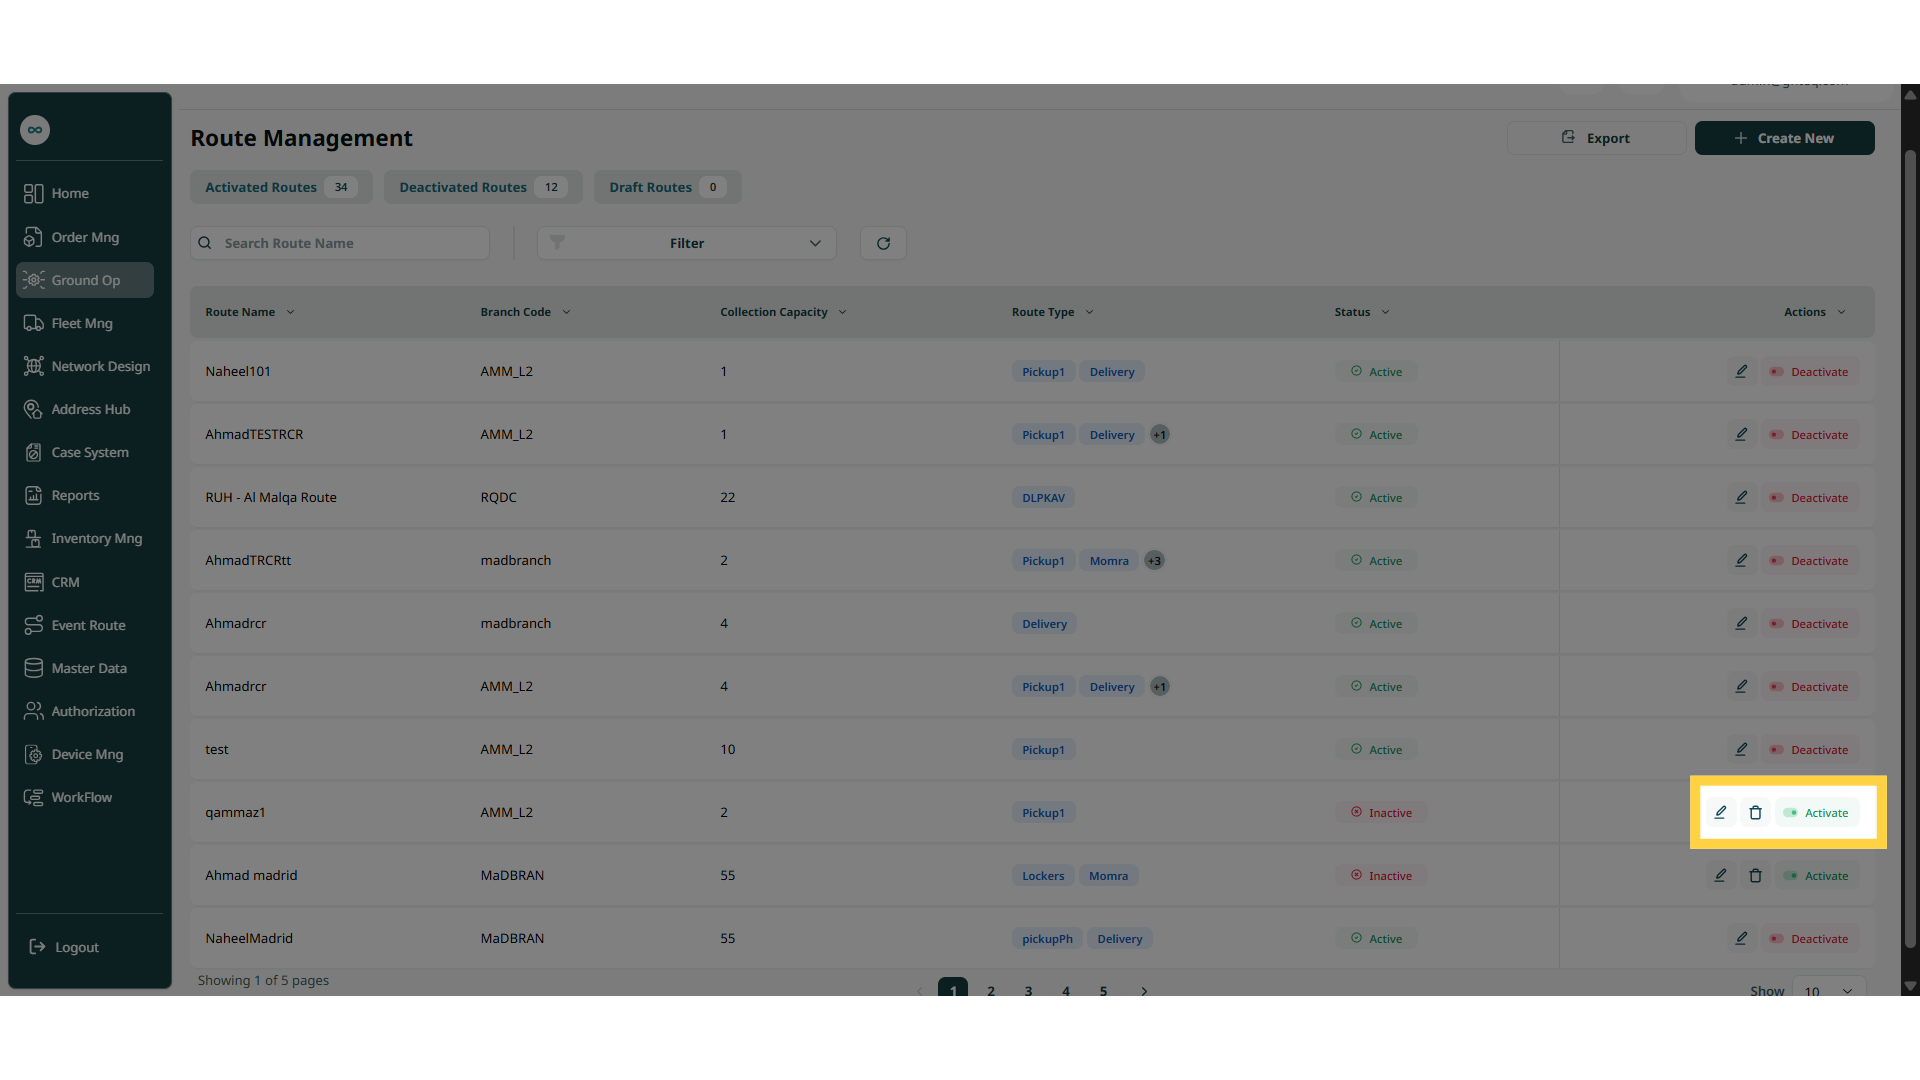
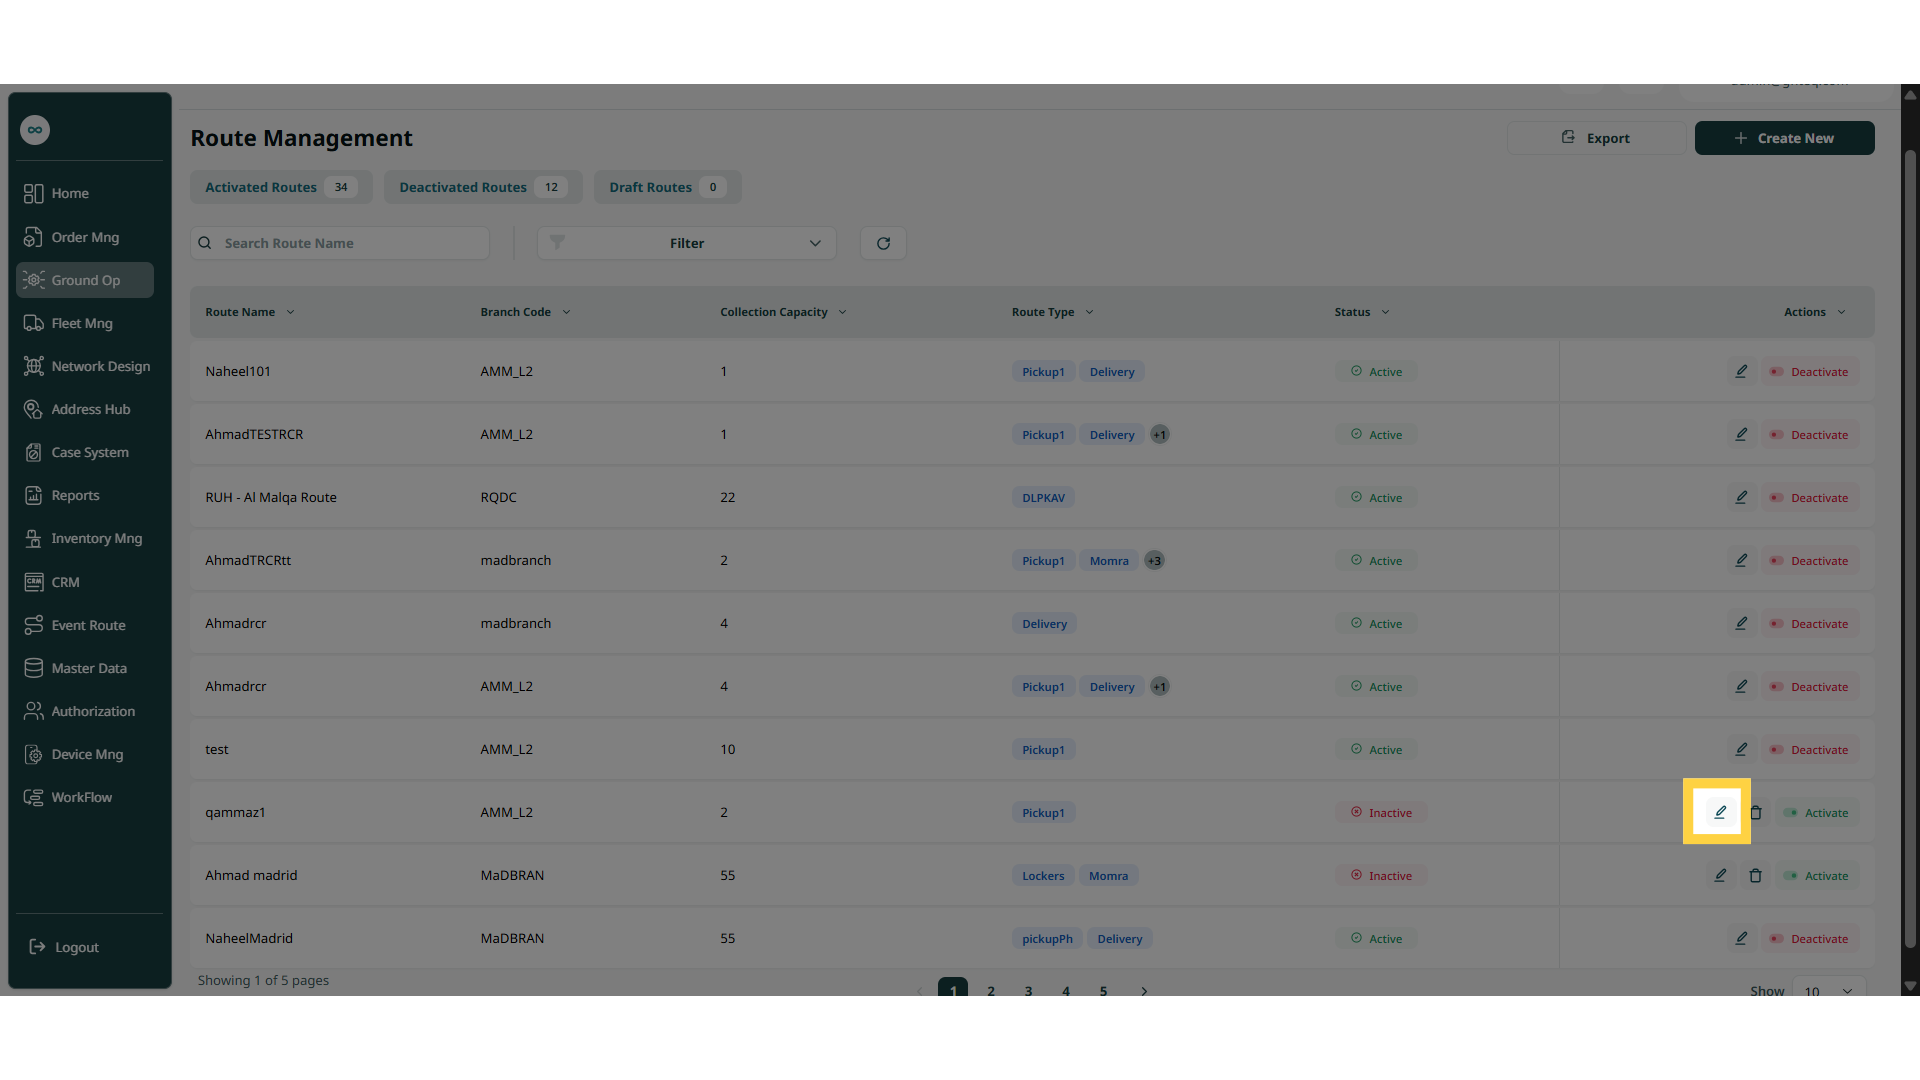
Actions: by clicking on Actions, the user can edit the route by going to the edit route section, or delete the route , or active and deactivate the route.
2.1 Edit Route
The user can edit an existing route by clicking on Edit from Actions by navigating to the ‘Route Management’ screen via the Last Mile Management.
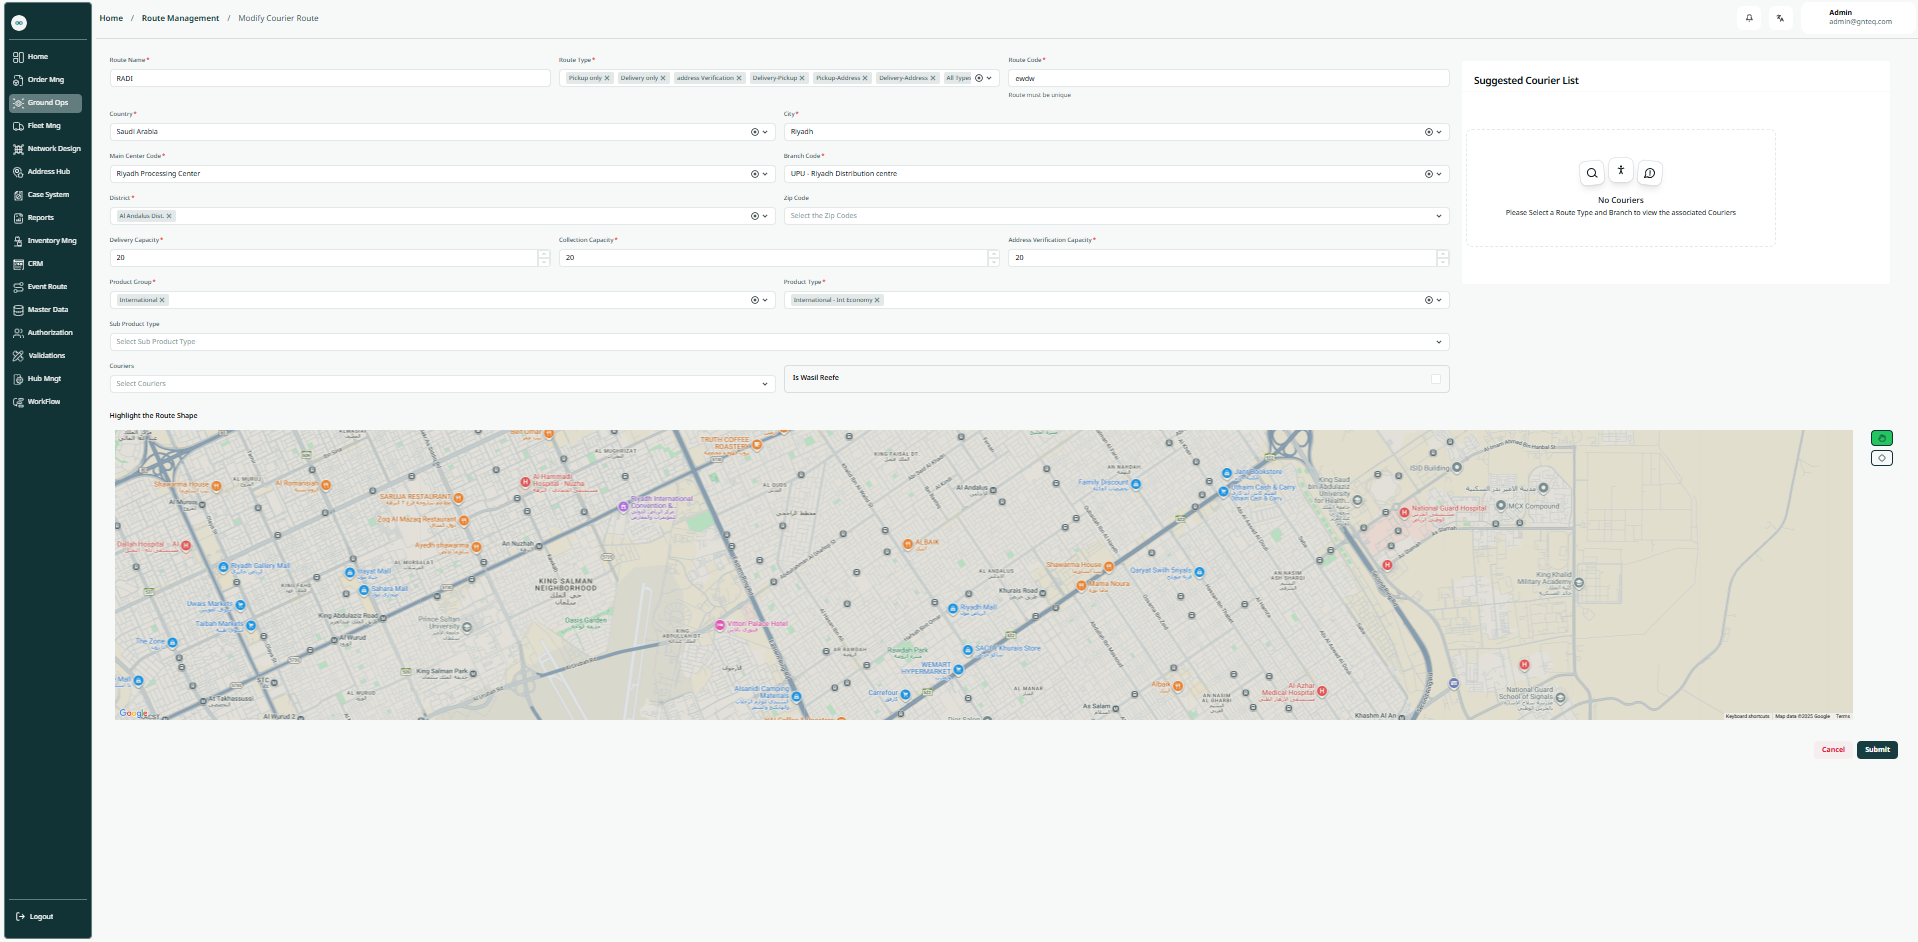
By clicking on ‘Save’ the vehicle will be save successfully.
2.2 Active & Deactivate Route
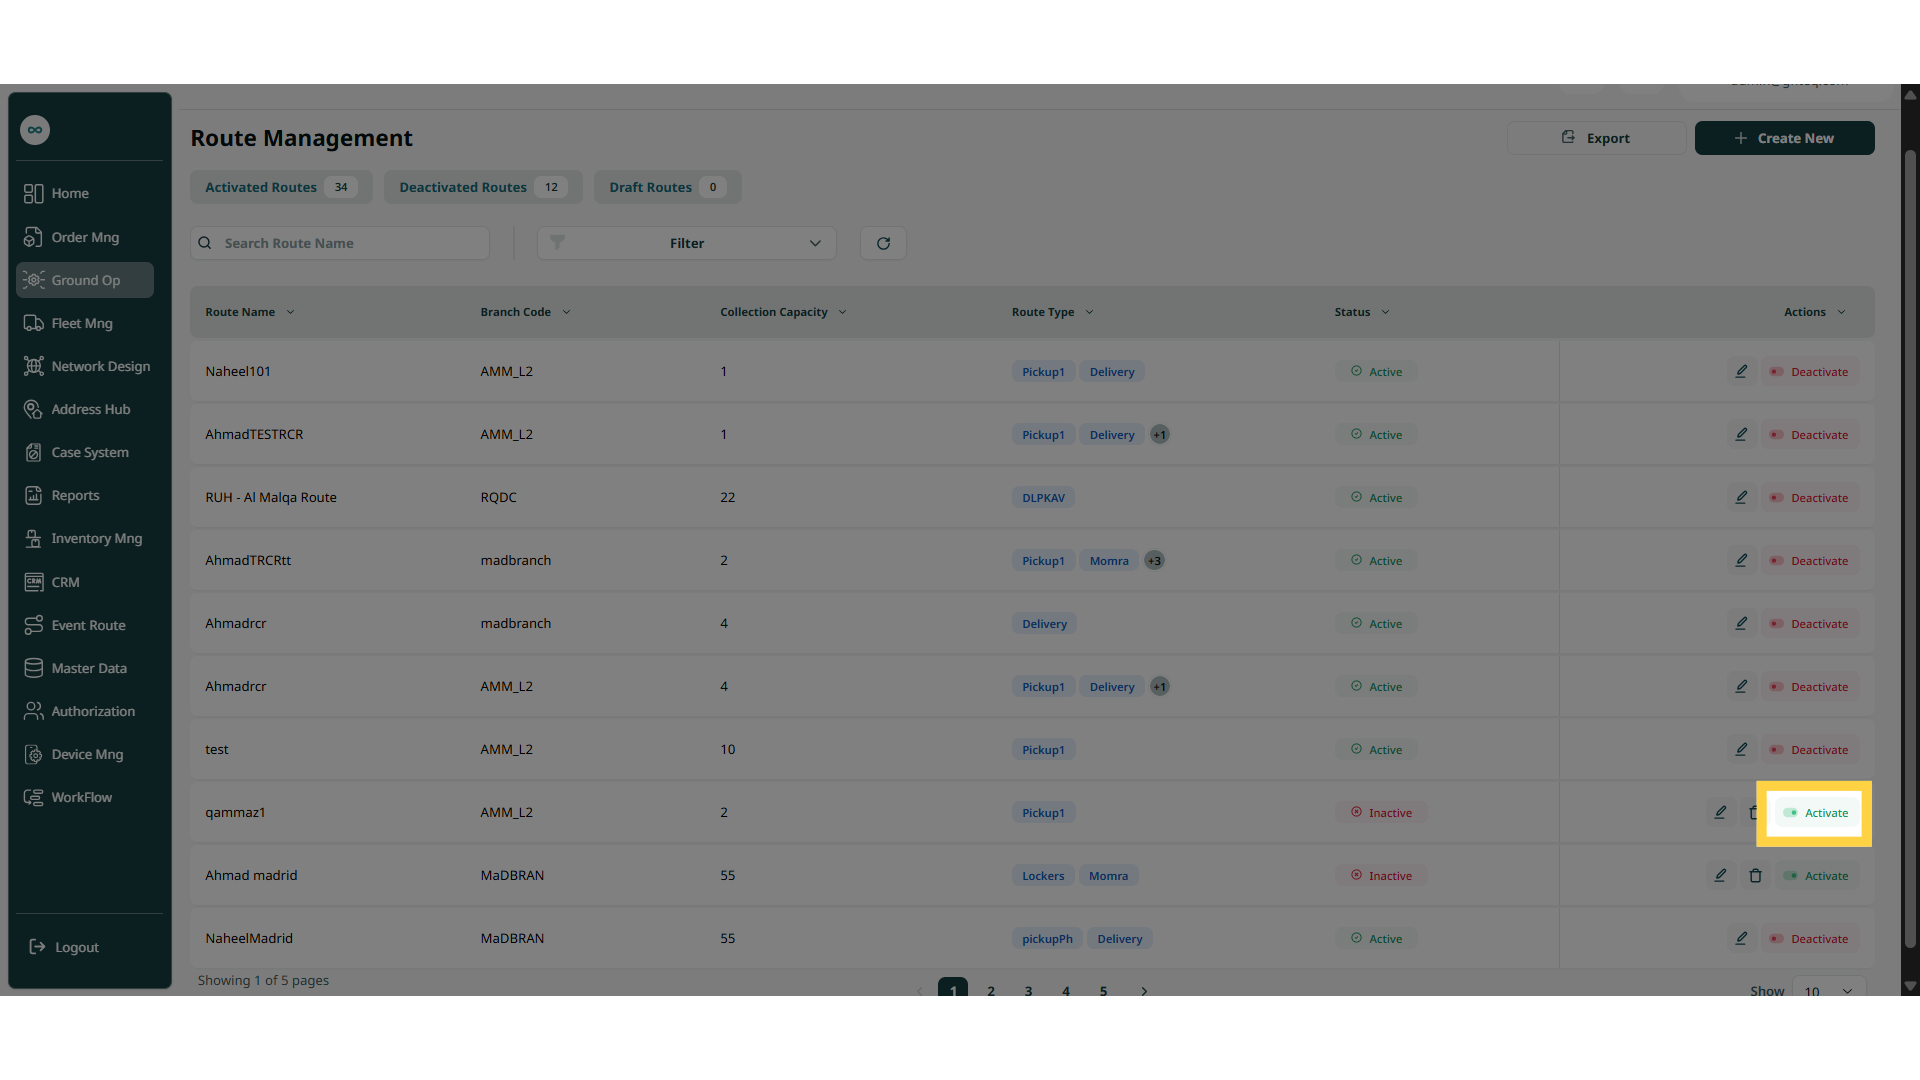
The user can active and deactivate an existing route by clicking on Deactivate from Actions by navigating to the ‘Route Management’ screen via the Last Mile Management.
1.2 Add New Route
The user can create a new route by navigating to the ‘Route Management’ screen via the Last Mile Management and clicking on the Create New button:
-
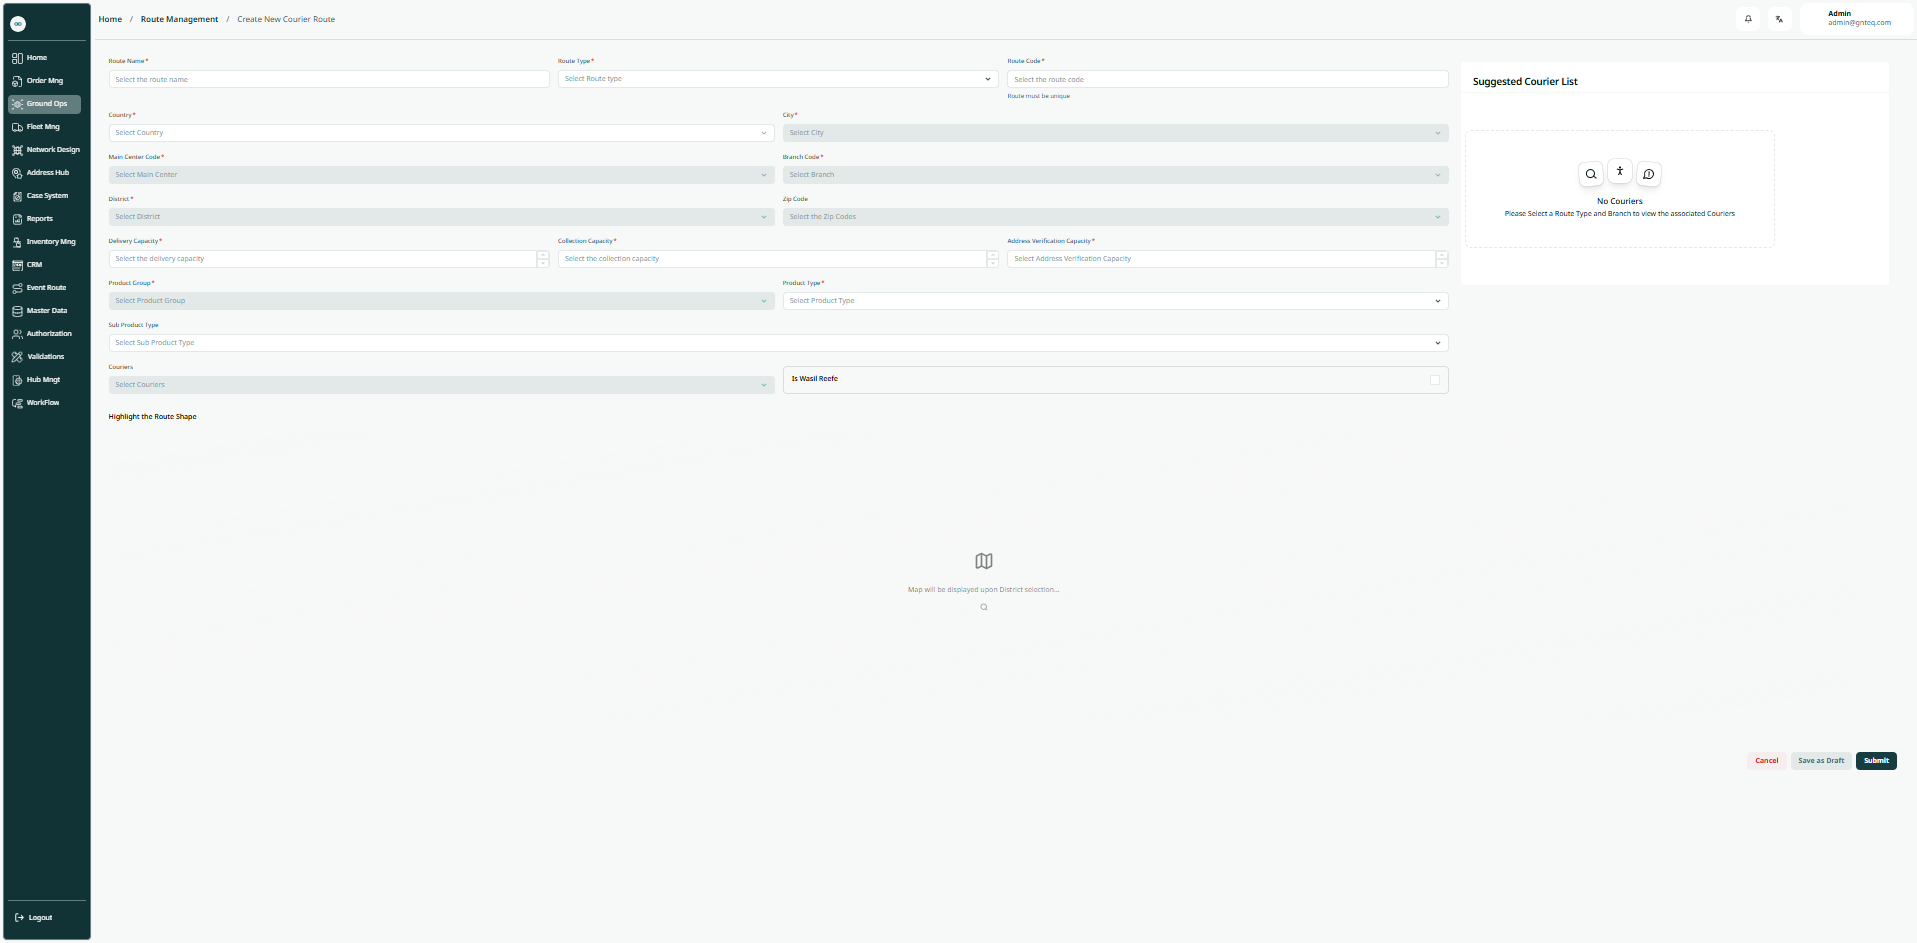
Route Type: this field represents the route type e.g. (Pick up route, Delivery route, Pharma Route).
-
Delivery Capacity: this field represents the limit of the shipments that the user can assign to a run sheet related to this route.
-
Collection Capacity: this field represents the limit on the number of collections a user can assign to a run sheet related to this route.
-
Address Verification Capacity: this field represents the capacity of the address verification.
-
Route name: this field represents the name of the route that the courier will use.
-
Route code: this field represents a specific code that describes each route.
-
Country: this field represents the place that the courier will serve.
-
Main Centre code: this field represents the city where the vehicle is registered or primarily operates.
-
Branch Code: this field represents the station that the courier will serve.
-
City: this field represents the city that the courier will serve.
-
District: this field represents a specific area that the courier will serve.
-
Zip code: this field represents a specific number that corresponds to a certain location.
-
Product Group: this field represents the product service surcharges: International, Domestic, Return ... etc.
-
Product Type: this field represents the delivery service type e.g., Home Delivery, Office Delivery, Drop Off, etc.
-
Sub Product Type: this field represents the delivery service sub type(banks, government documents, …….etc.).
-
Wasil Reefe (checkbox): when this field is selected, the route will be considered as wasil reefe route.
Note: when the user enters the country, branch code, City, district the system will automatically generate a route map directions.