
1.Trips Dashboard
The courier can view the current trip in the route by navigating to the trip screen, where the can also view the trip type (delivery, pick-up, momrah, or locker).
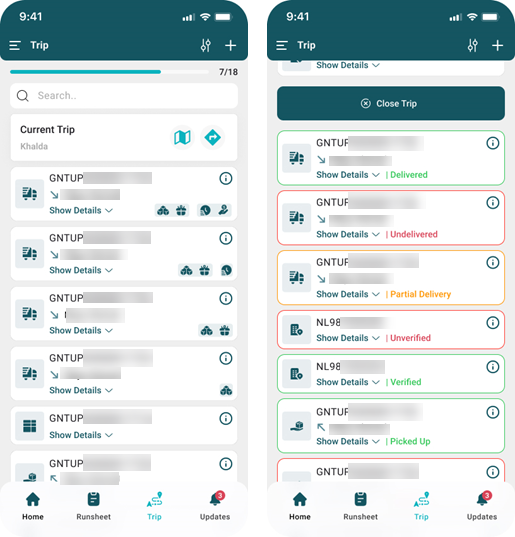
Note: The trips displayed on the page will be organized according to the route. Completed
shipments will appear below and will be marked with a specific status to indicating their completion.
2. Trip Types
2.1 Delivery

-
The courier can identify the delivery shipments by seeing this icon on the trip tab
2.2 Pick-up

-
The courier can identify the pick-up shipments by seeing this icon on the trip tab.
2.3 Momrah

-
The courier can identify the momrah shipments by seeing this icon on the trip tab.
2.4 Lockers

-
The courier can identify the lockers shipments by seeing this icon on the trip tab.
3. Pick-Up
3.1 Picked-Up
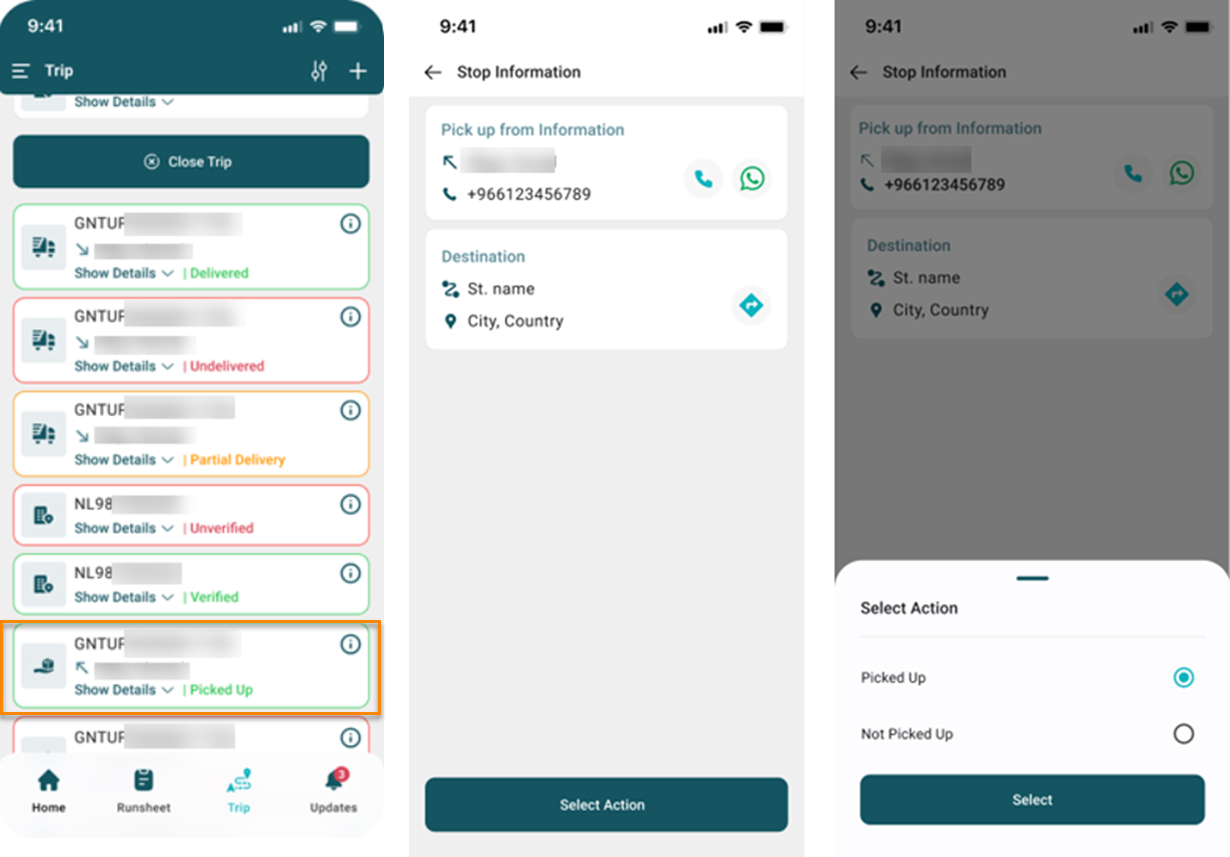
The courier can pick up shipments from the consignee. Once the courier arrives at the consignee's location, the courier must select the 'Picked Up' option in the system.
3.1.1 Scan Shipments
The courier must scan the shipments after picking up from the consignee to verify the pickup action.
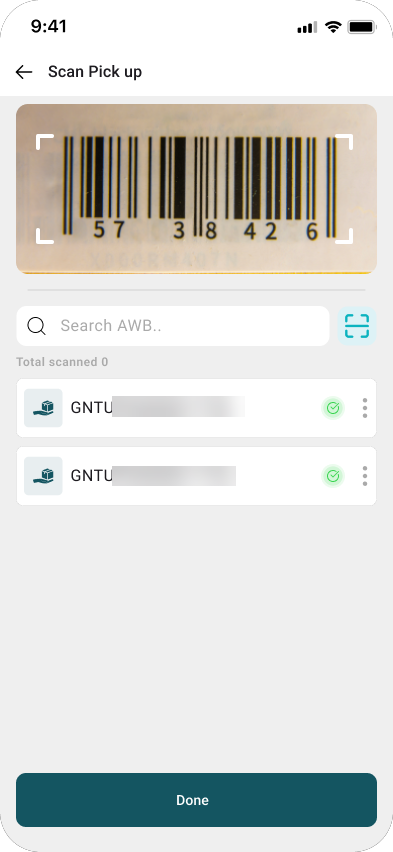
By clicking on Done, the shipment will be picked up successfully and the trip will be highlighted in green as Picked Up on the trip tab.
3.2 Not Unpicked Up
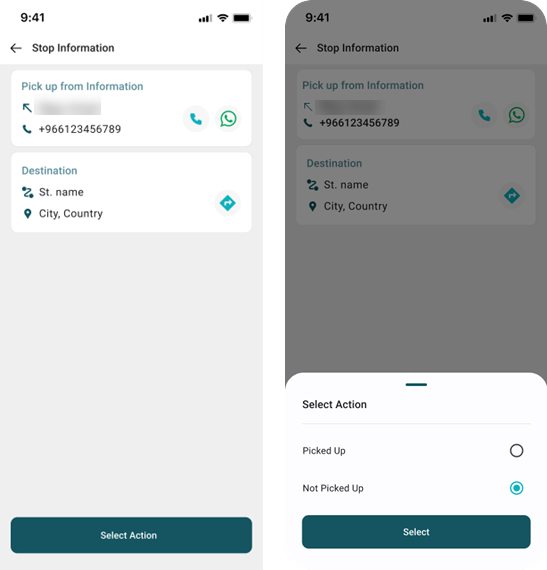
The courier can cancel a shipment pickup from the consignee, by selecting the 'Not Picked Up' option upon arrival."
3.2.1 Pick Up Exception
The courier must select a reason for the pickup exception in order to continue the process.
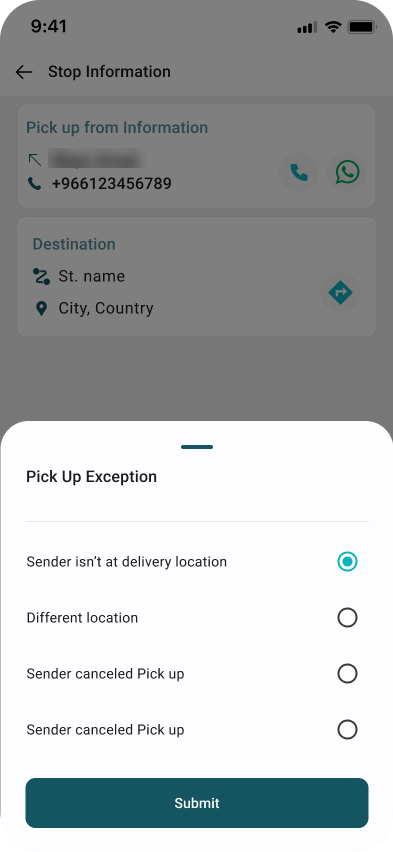
By clicking on Submit, the delivery exception will be successfully added and the trip will be highlighted in red as Unpicked on the trip tab.
4. Virtual Shipments
4.1 Verified
The courier can verify a specific location. Upon arrival and confirming it is correct, the courier must select the 'Verify' option in the system.
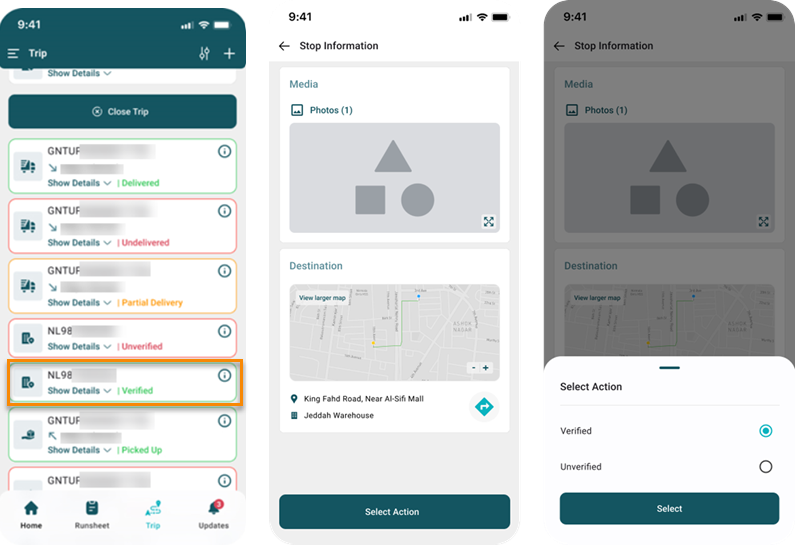
4.1.1 Attach File
The courier can attach pictures to the location to confirm it.
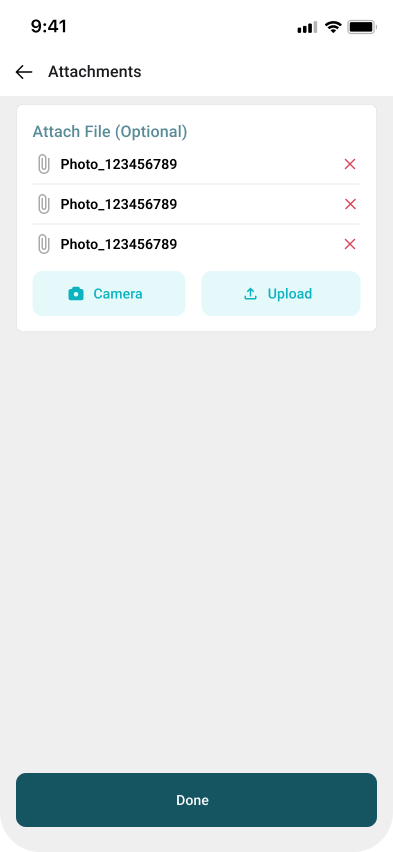
By clicking on Done, the location will be confirmed and the trip will be highlighted in green as Verified on the trip tab.
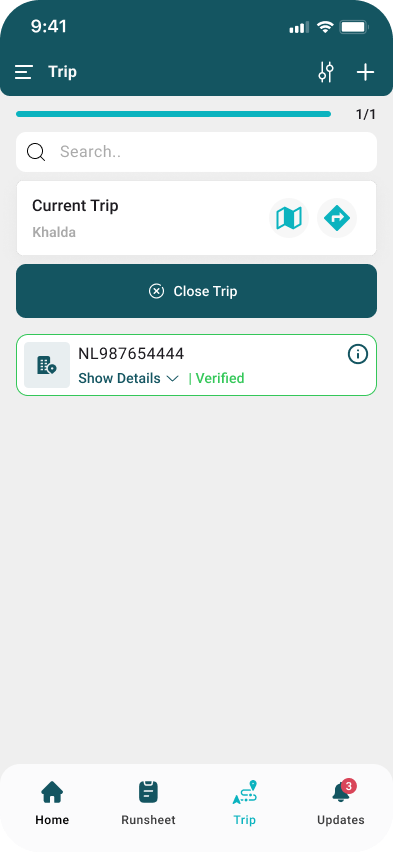
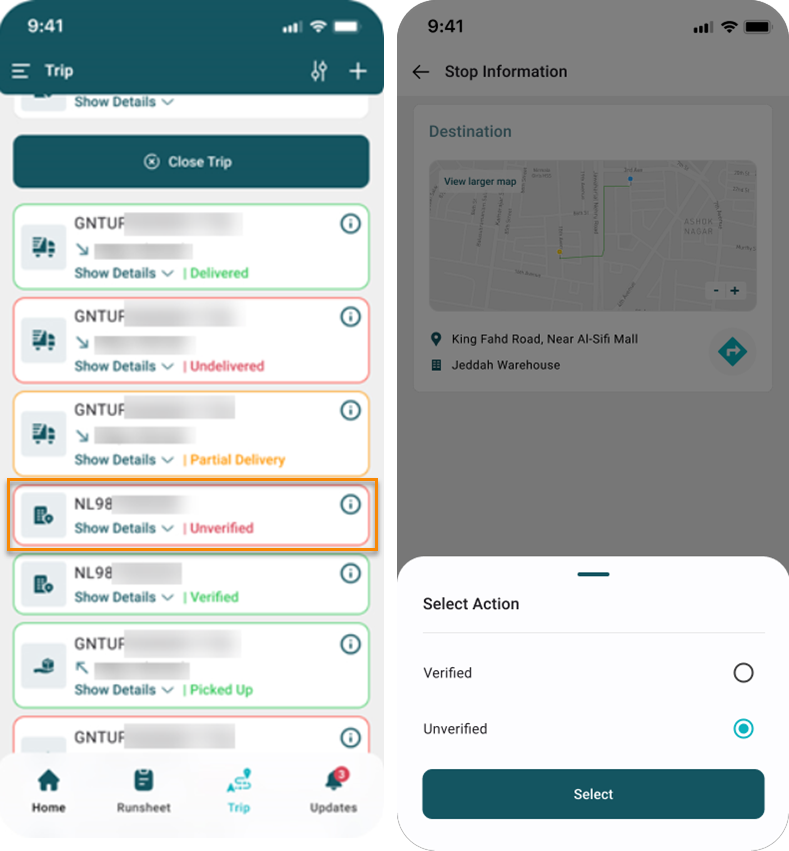
4.2 Unverified
The courier can mark location as unverified. Upon arrival and confirmation that it is not the correct location, the courier must select the "Unverified " option in the system.
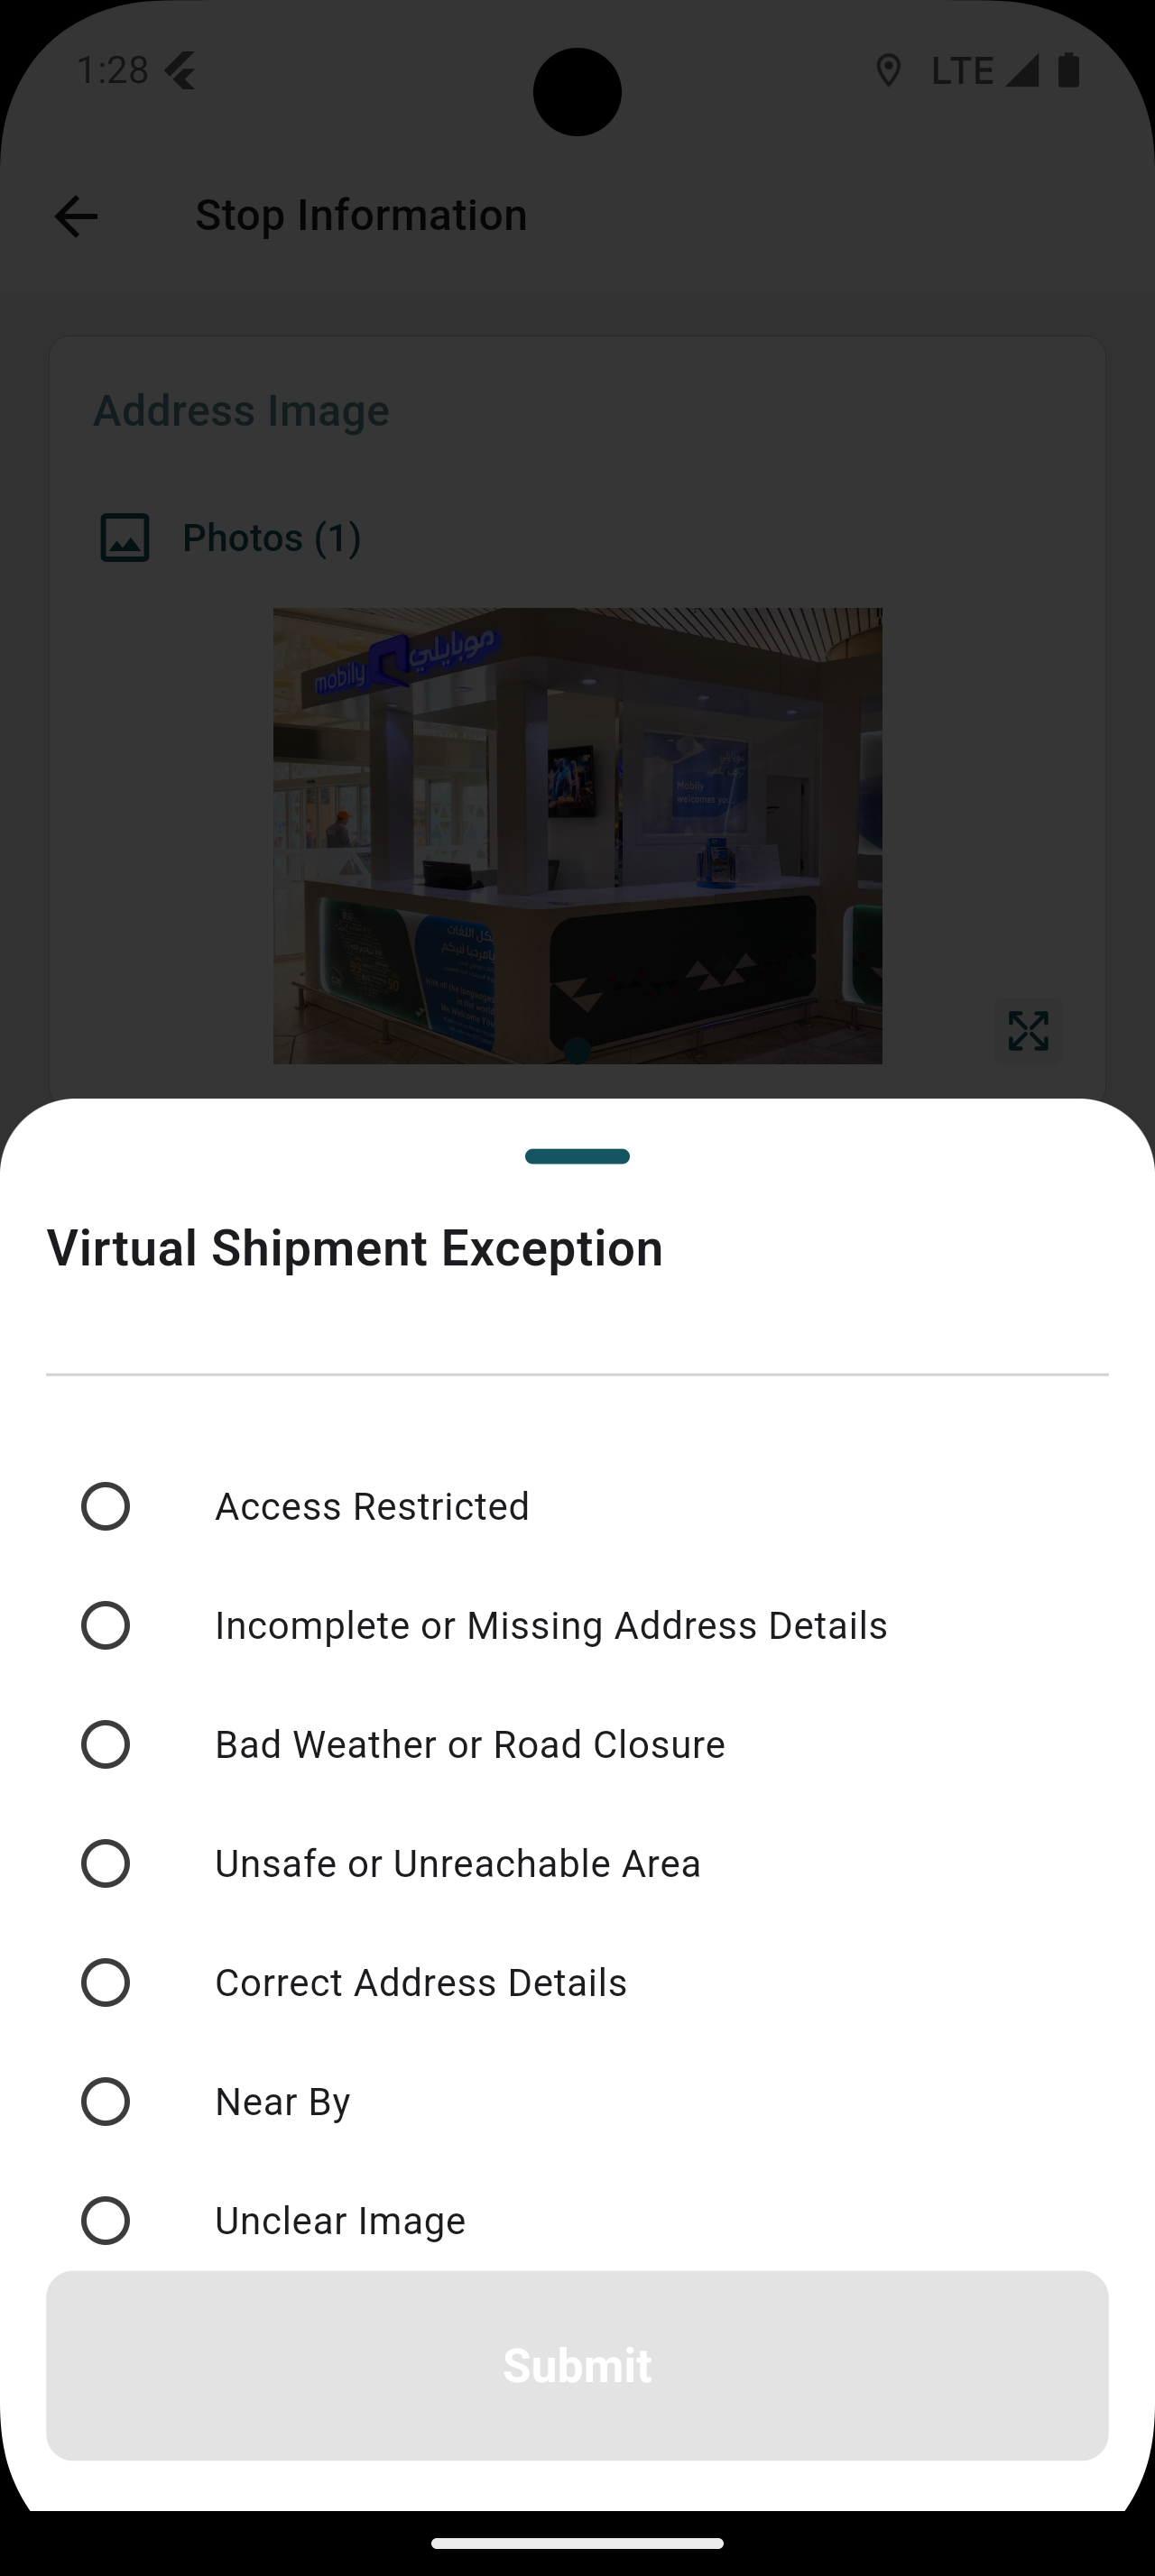
4.2.1 Virtual Shipment Exception
The courier must select the right reason for the exception to continuo the operation.
4.2.2 Attach File
The courier can attach pictures of the location to make sure that it is not verified.
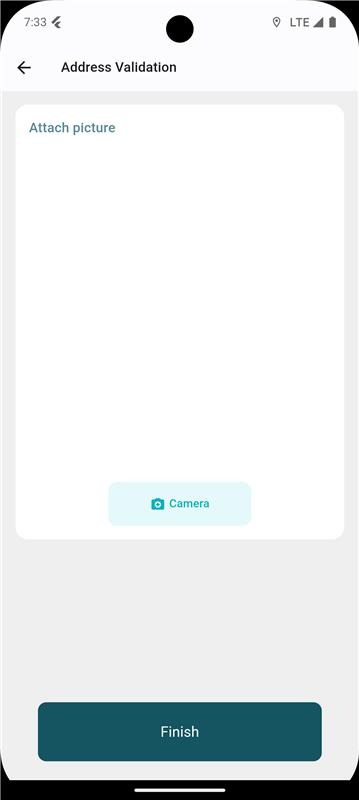
By clicking on Done, the location will be completely incorrect, and the trip will be highlighted in red as Unverified on the trip tab.
4.3 Nearby
The courier can select the "Nearby" reason if the courier is certain that the location is at least 1000 meters away from the exact location.
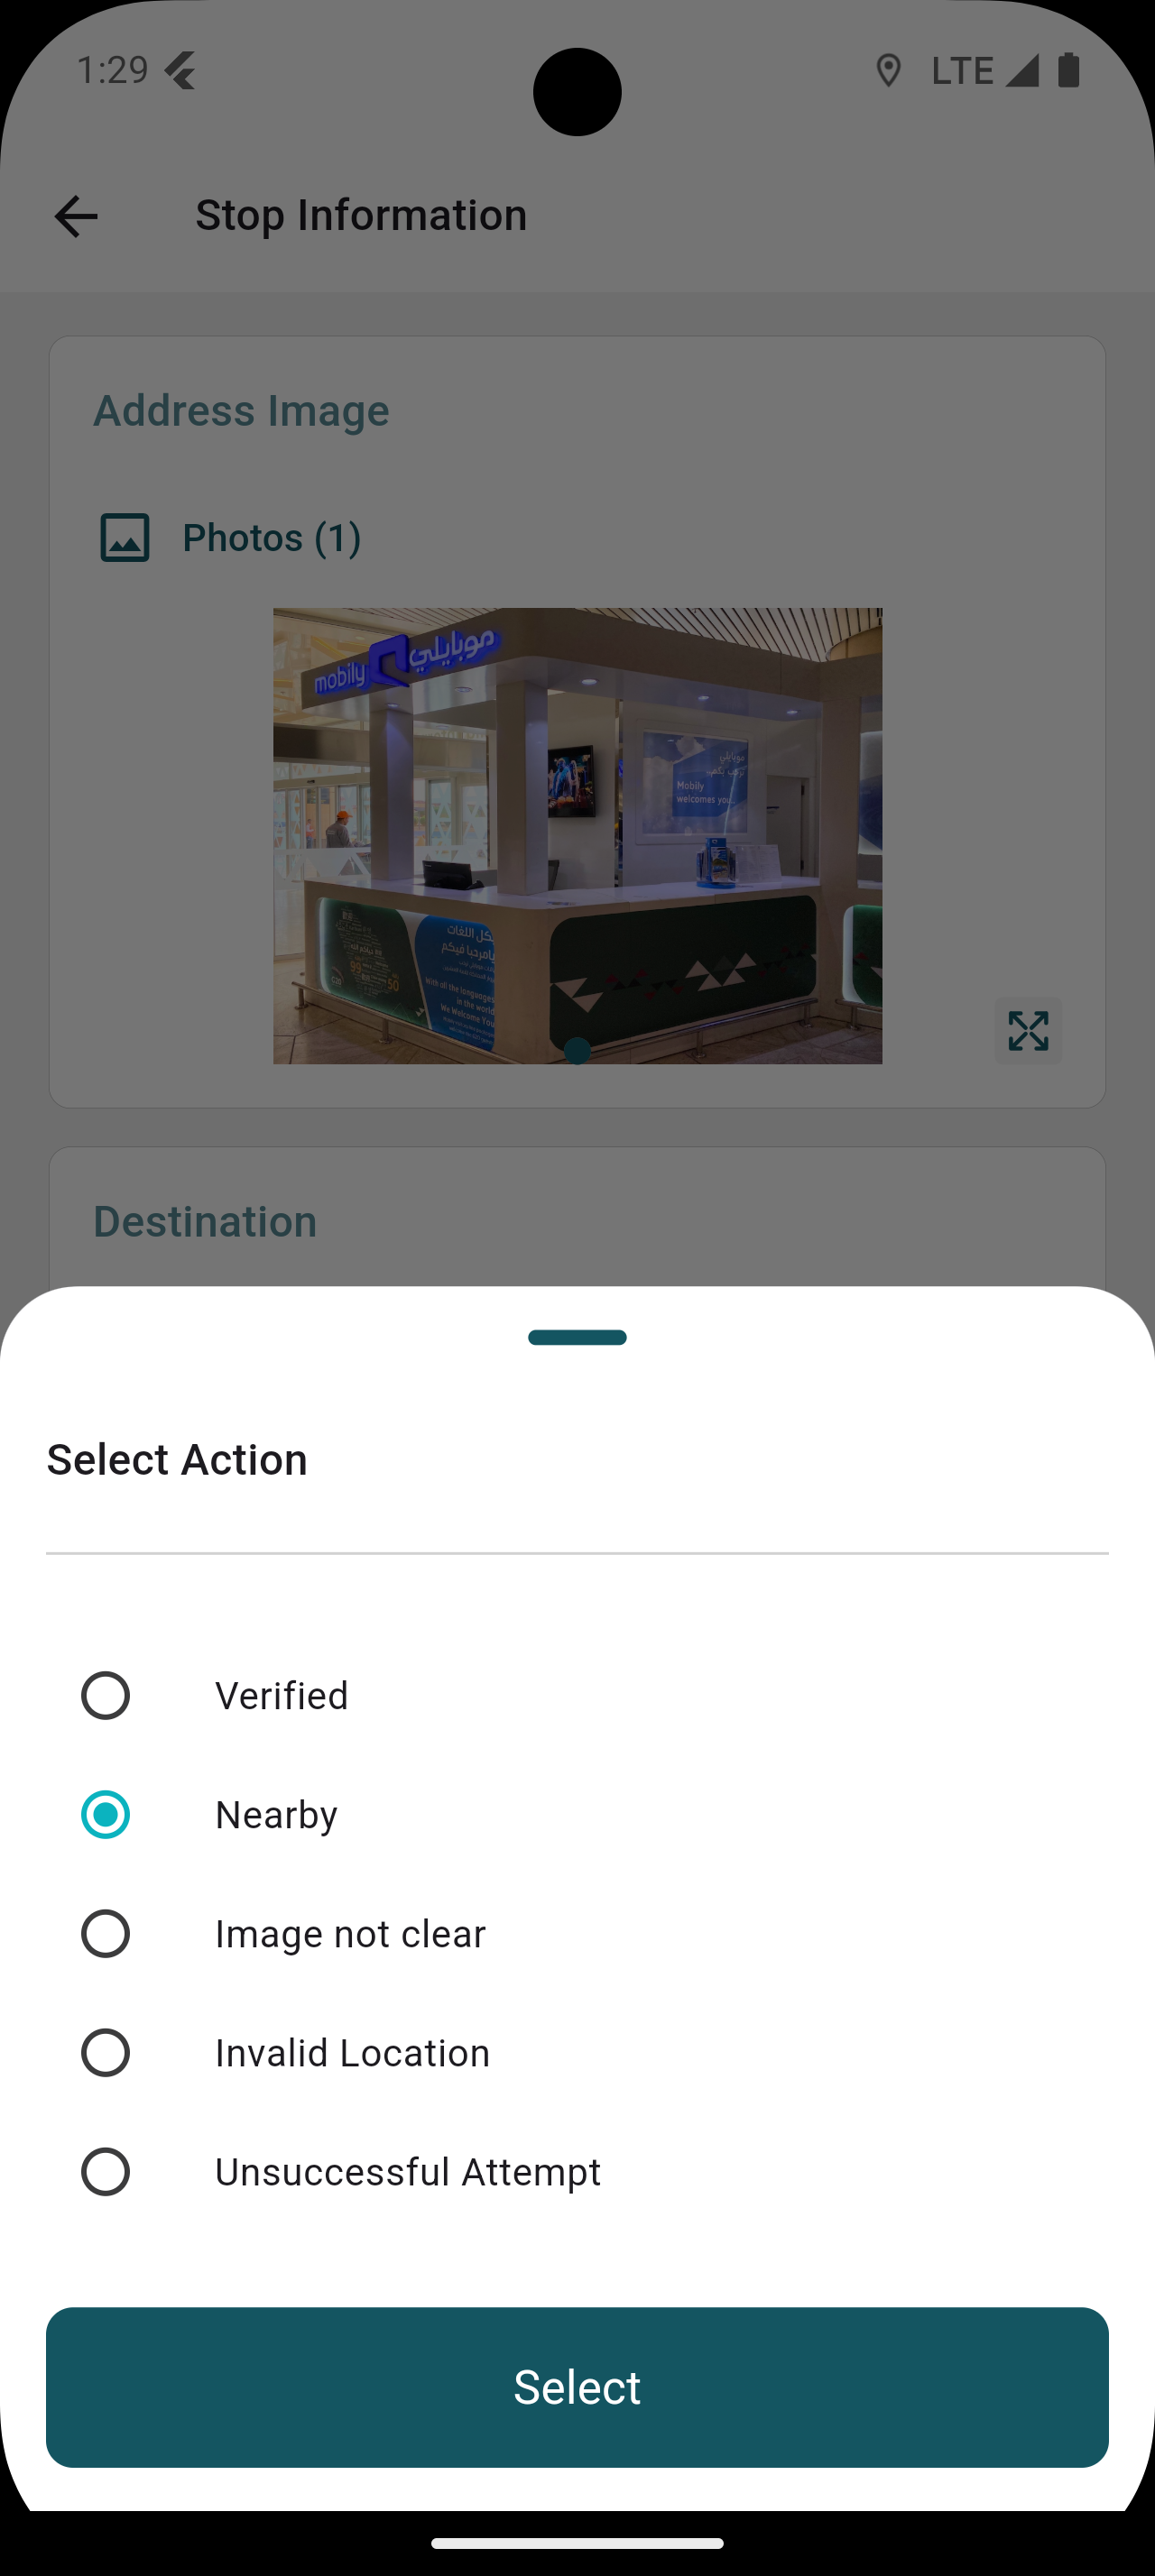
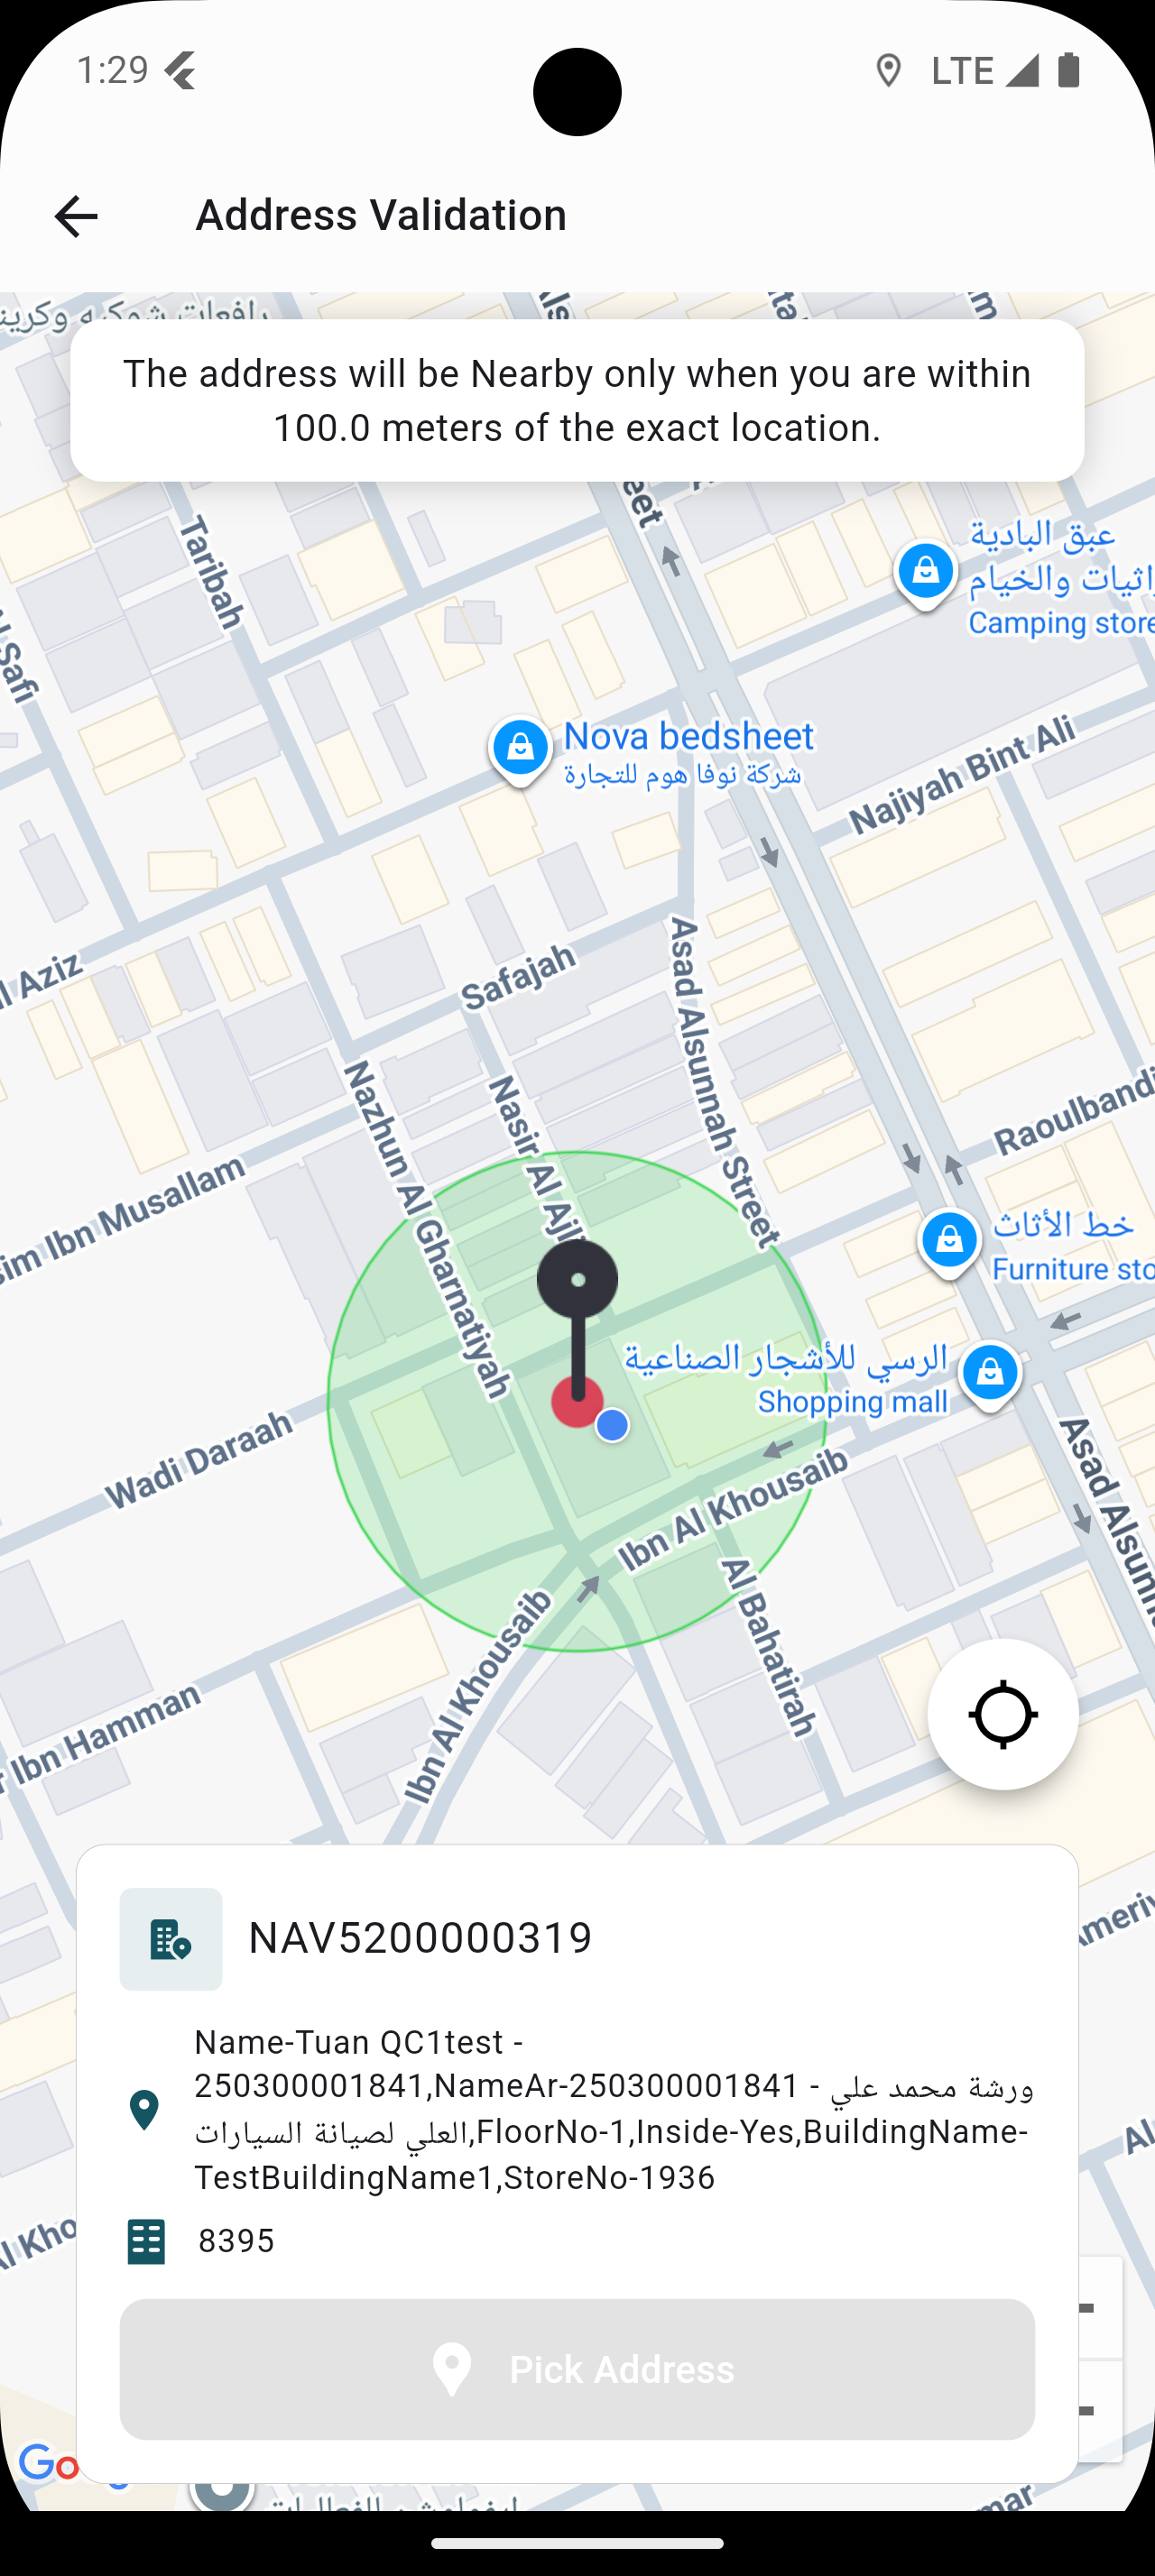
4.3.1 Address Validation
The courier can choose the reason for the location being "Nearby" if they are certain that the location is at least 1000 meters away from the specified location.
-
Once the courier confirms the address and clicks on "Pick Address" to verify the location, the system will automatically prompt the courier to attach pictures of the exact location.
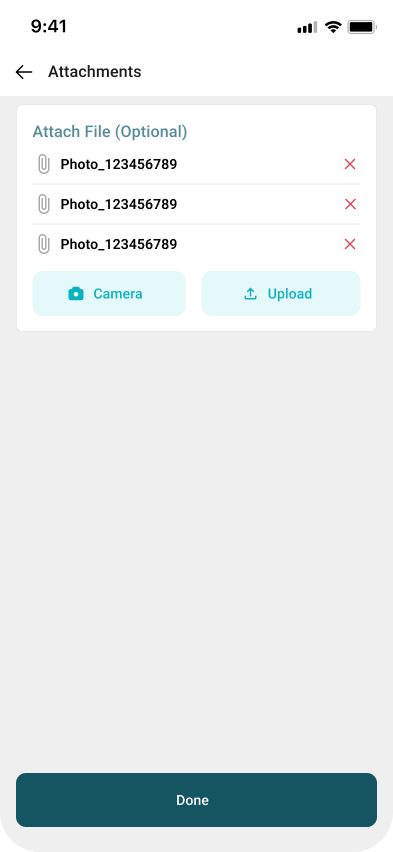
By clicking on Done, the location will be updated to the correct location, and the trip will be highlighted in red as Unverified on the trip tab.
5. Lockers
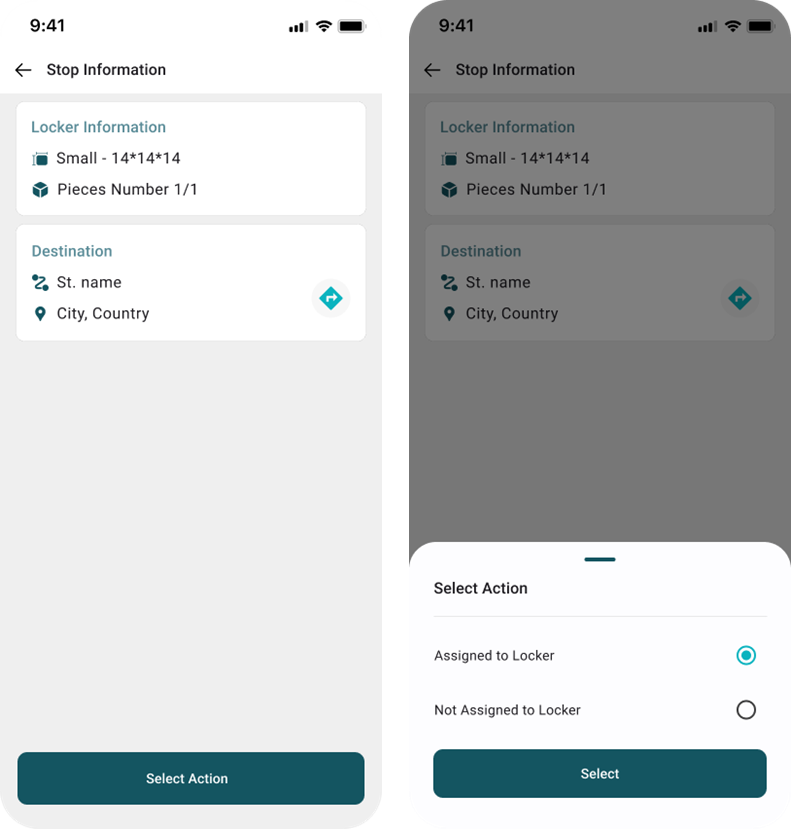
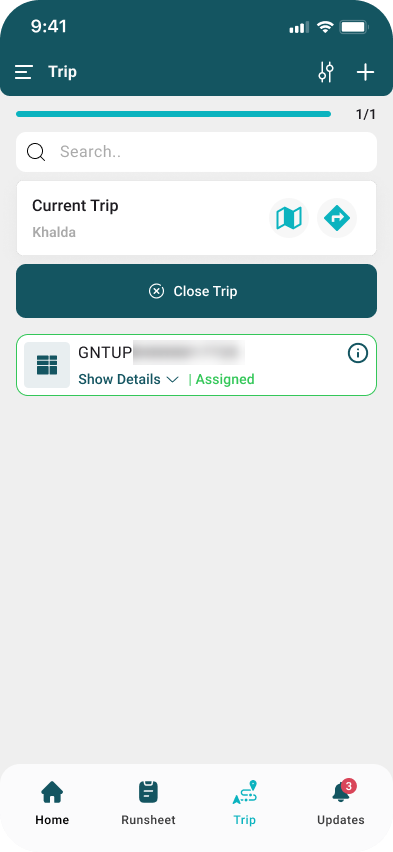
5.1 Assigned To Locker
The courier can assign lockers. Upon arrival, the courier must select the “Assign To Locker” option in the system.
5.1.1 Scan To Assign
The courier must scan shipments to assign shipments to the locker.
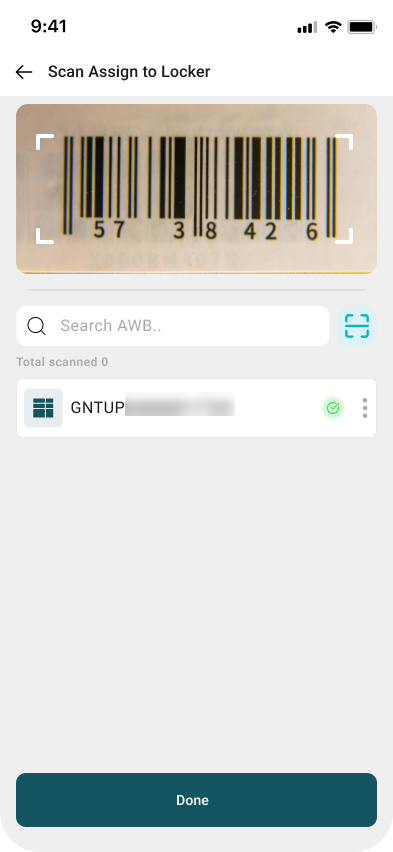
By clicking on Done, the shipment will be successfully assigned to the locker, and the trip will be highlighted in green as Assigned on the trip tab.
5.2 Unassign To Locker
The courier can unassign lockers. Upon arrival, the courier must select the 'Not Assigned to Locker' option in the system.
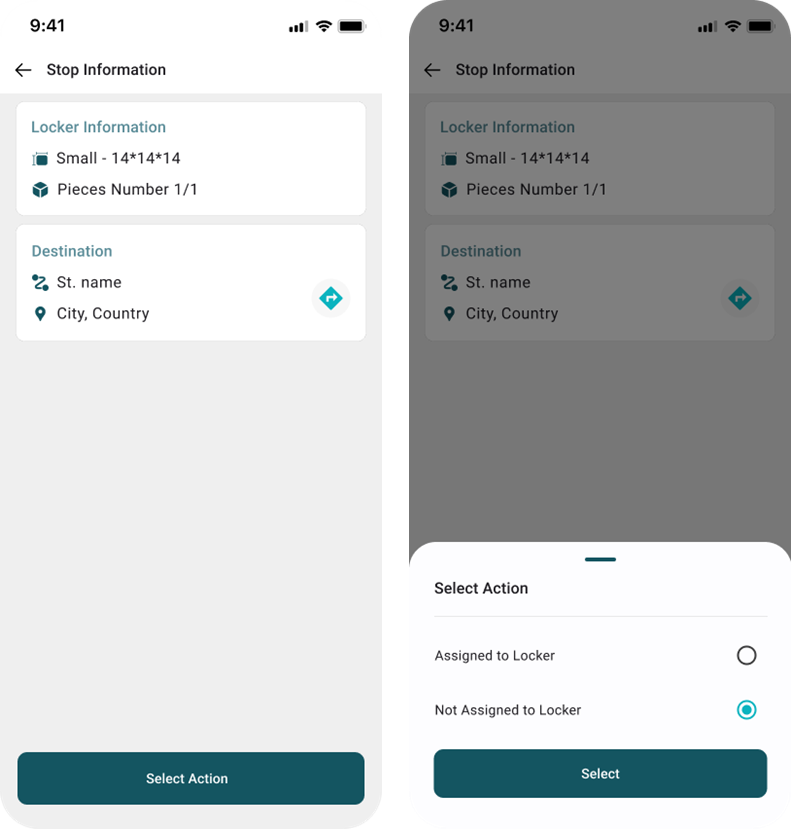
5.2.1 Assign To Locker Exception
The courier must select a reason for the not assign exception to continue the process.
-20250504-134423.png?cb=b4c08b1f79b39d346edc16a541c0c8a6)
By clicking on Submit, the shipment will not be assigned and the trip will be highlighted in red as Unassigned on the trip tab.