
Case System
Version | Author | Reviewer/Approver | Date of Issue | Page / Section | Brief Description |
|---|---|---|---|---|---|
1.0 | Jameel.S | Deema.Z \ Asma.L | 30/5/2025 | Case System | First Version |
1. Global Case Creation Overview
Video 1- Add New Case
2. Dashboard
The user can view the defined cases in the system by navigating to the ‘Global case System’ screen in the Case System from the left navigation panel as follows:
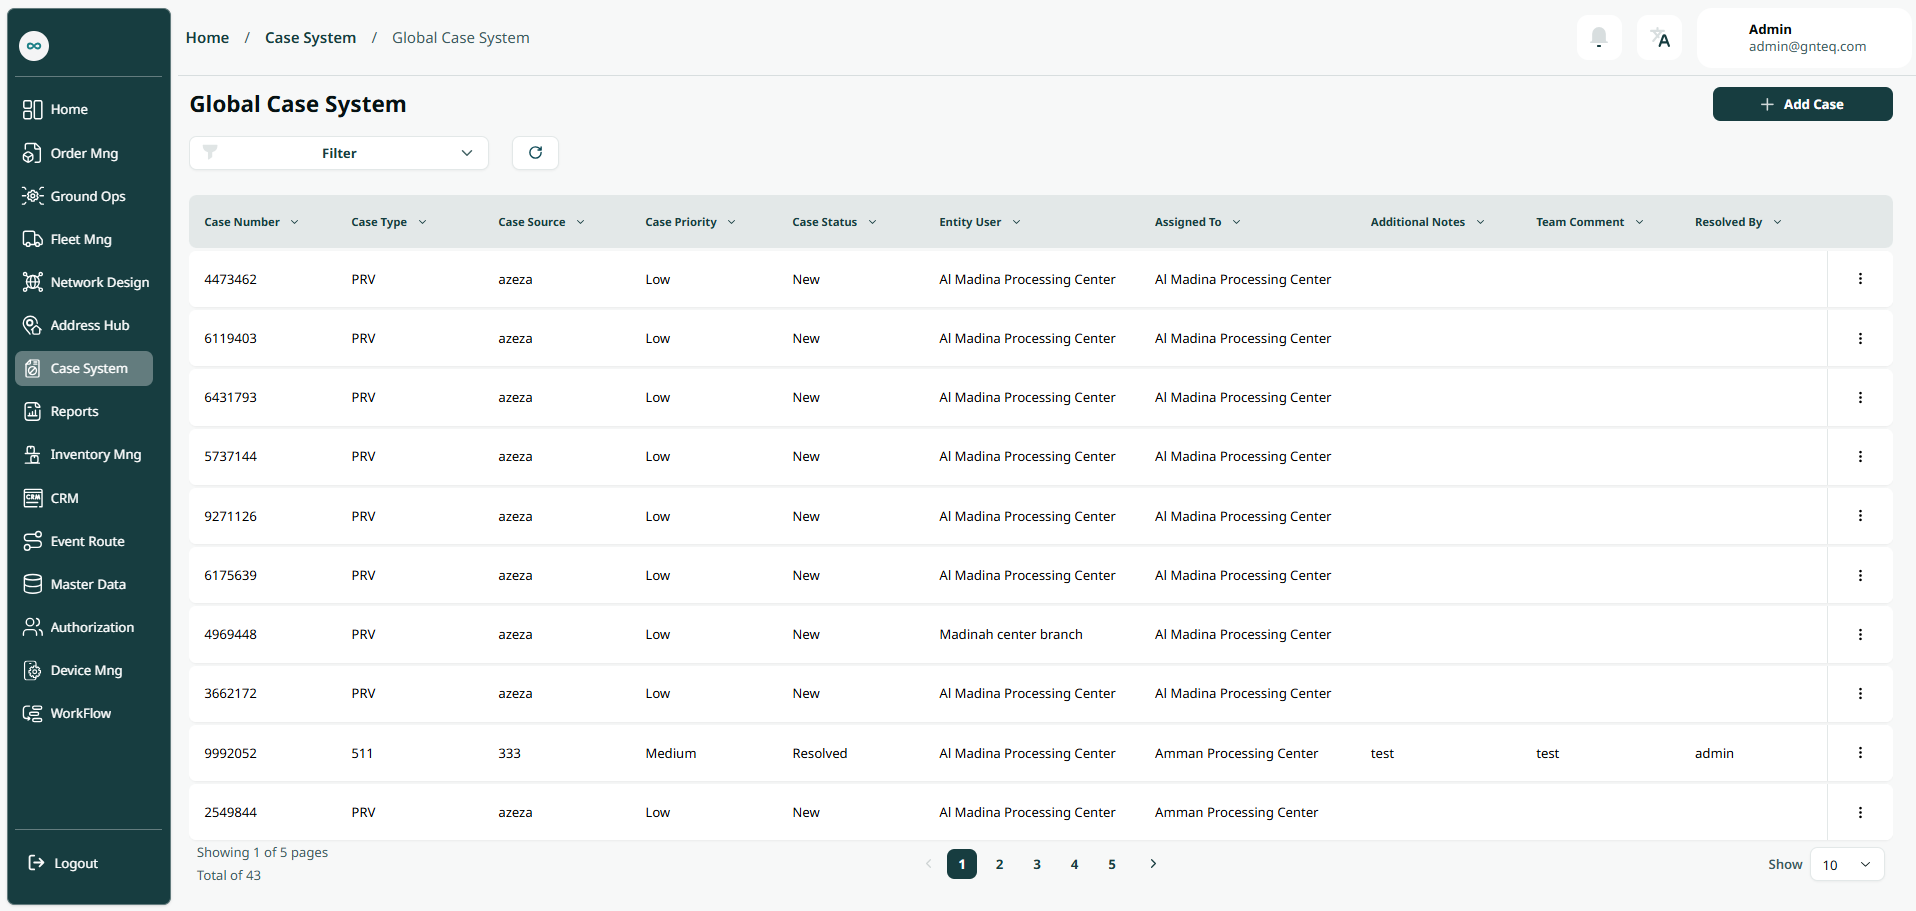
Figure 1- Global Case System Dashboard
Add Case: the user can add a new case by clicking "Add Case."
New Cases: the user can view the new cases screen by clicking on "New Cases"
Assigned Cases: the user can view the assigned cases screen by clicking on "Assigned Cases"
In Progress Cases: the user can view the processing cases screen by clicking on "In Progress Cases"
Resolved Cases: the user can view the resolved cases screen by clicking on "Resolved Cases"
Cancelled Cases: the user can view the canceled cases screen by clicking on "Cancelled Cases"
Objected Cases: the user can view the objected cases screen by clicking on "Objected Cases"
Filters: The user can search for a case by the case type, case number, case source……etc.
Search: the user can search for the global case by entering the airwaybill number.
Rows per Page: The user can specify the number of items to display on each page.
Actions: By clicking on Actions, the user can edit the case by going to the edit case section, resolve case, view the case details, and add comments.
2.1 View Details
The user can view details of an existing case by navigating to the ‘Global Case System’ screen via the Case System and clicking on View Details button:
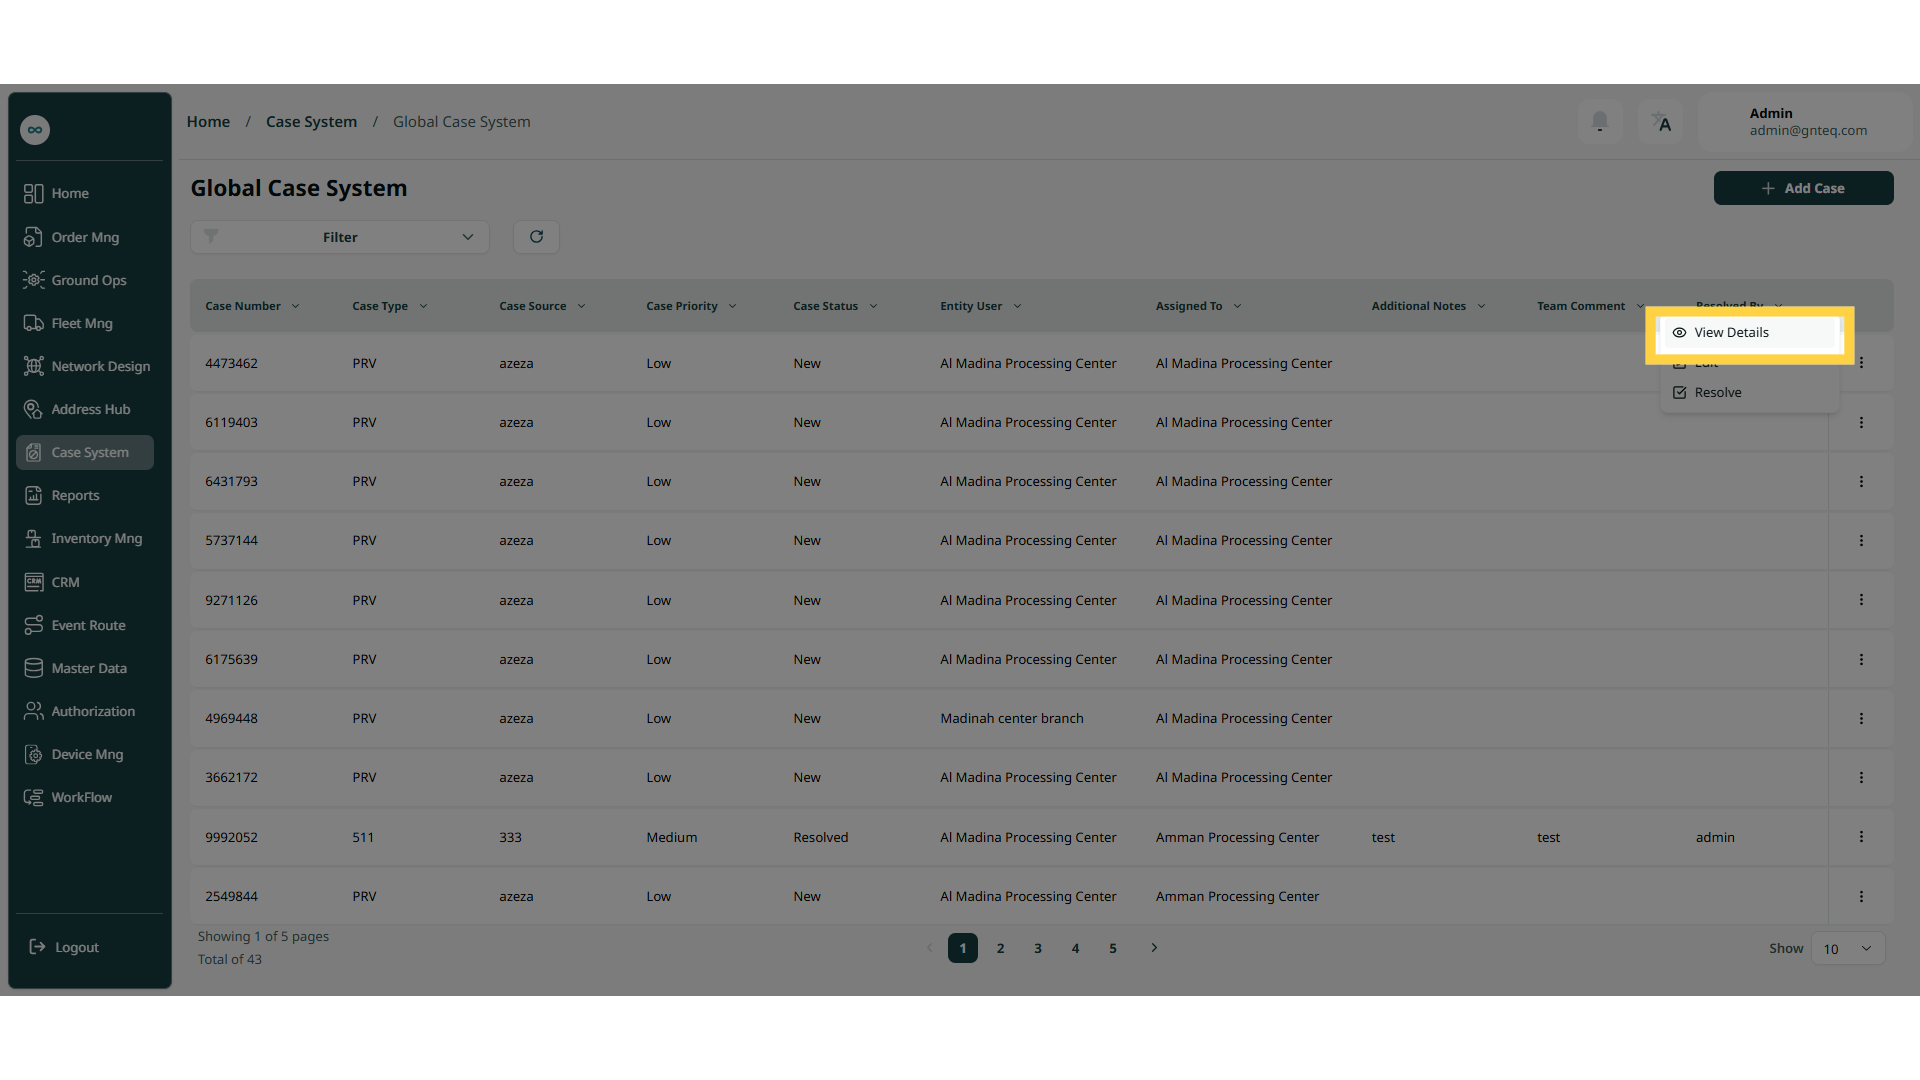
Figure 2- View Details Action
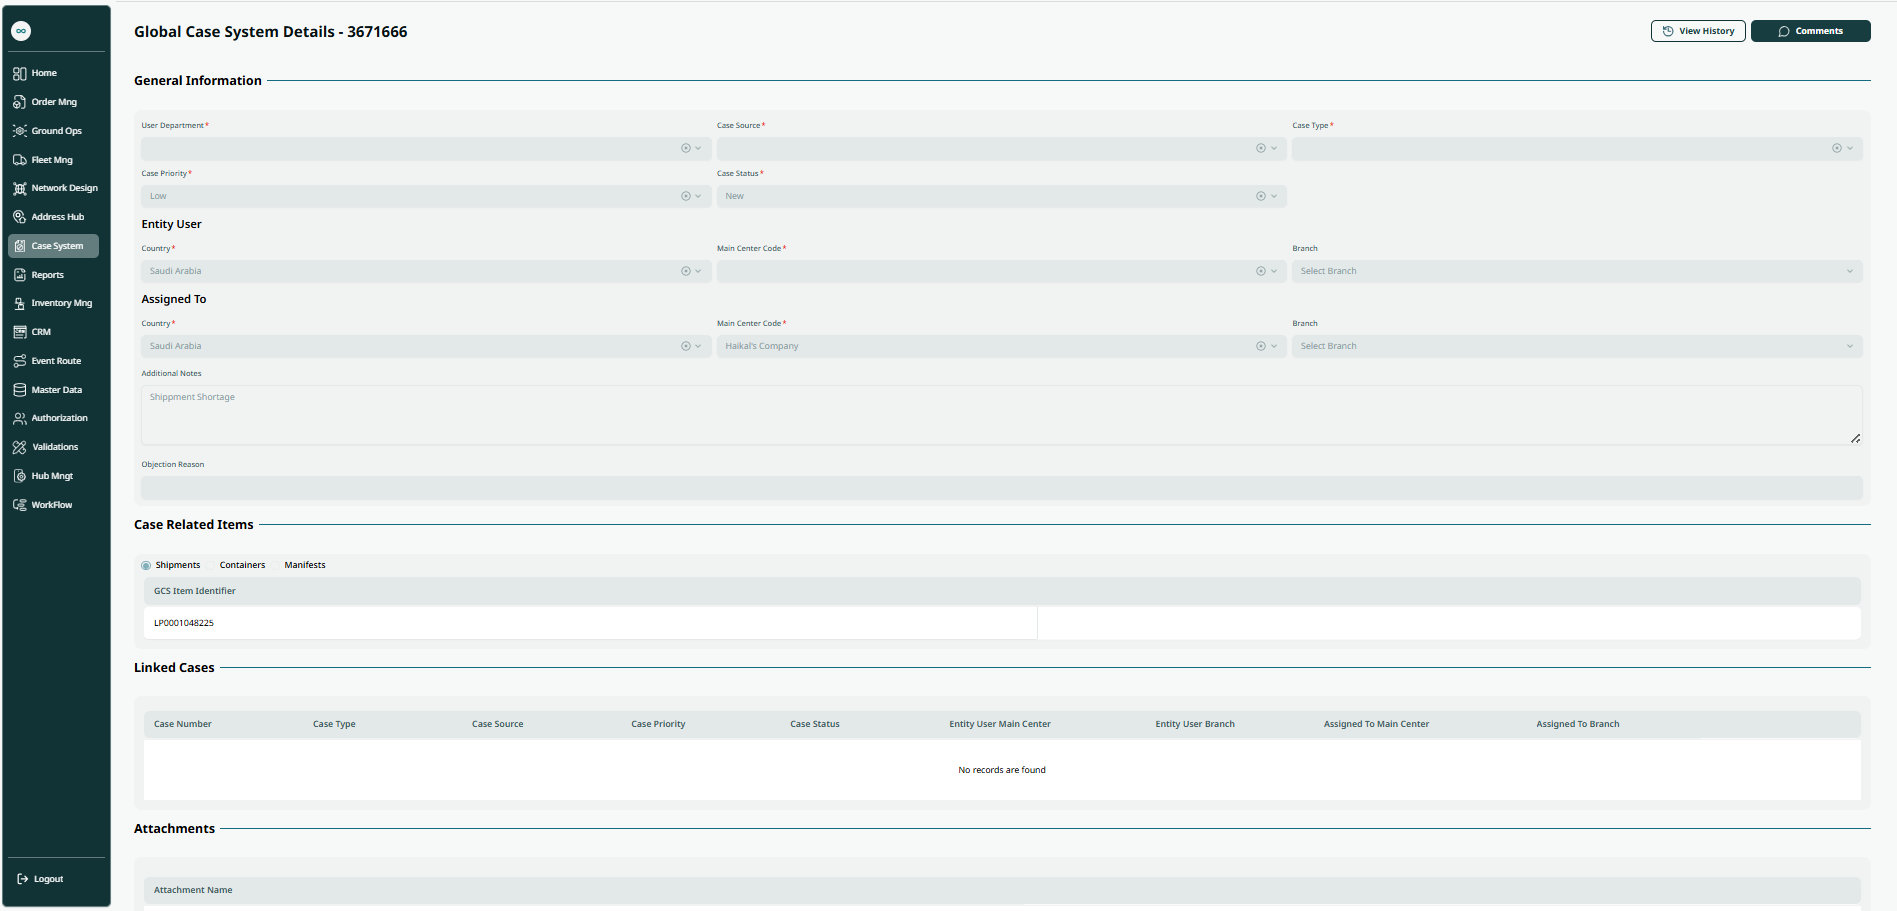
Figure 3- View Details
2.1.1 View History
The user can view history of an existing case by navigating to the ‘Global Case System’ screen via the Case System and clicking on View Details then click on View History.
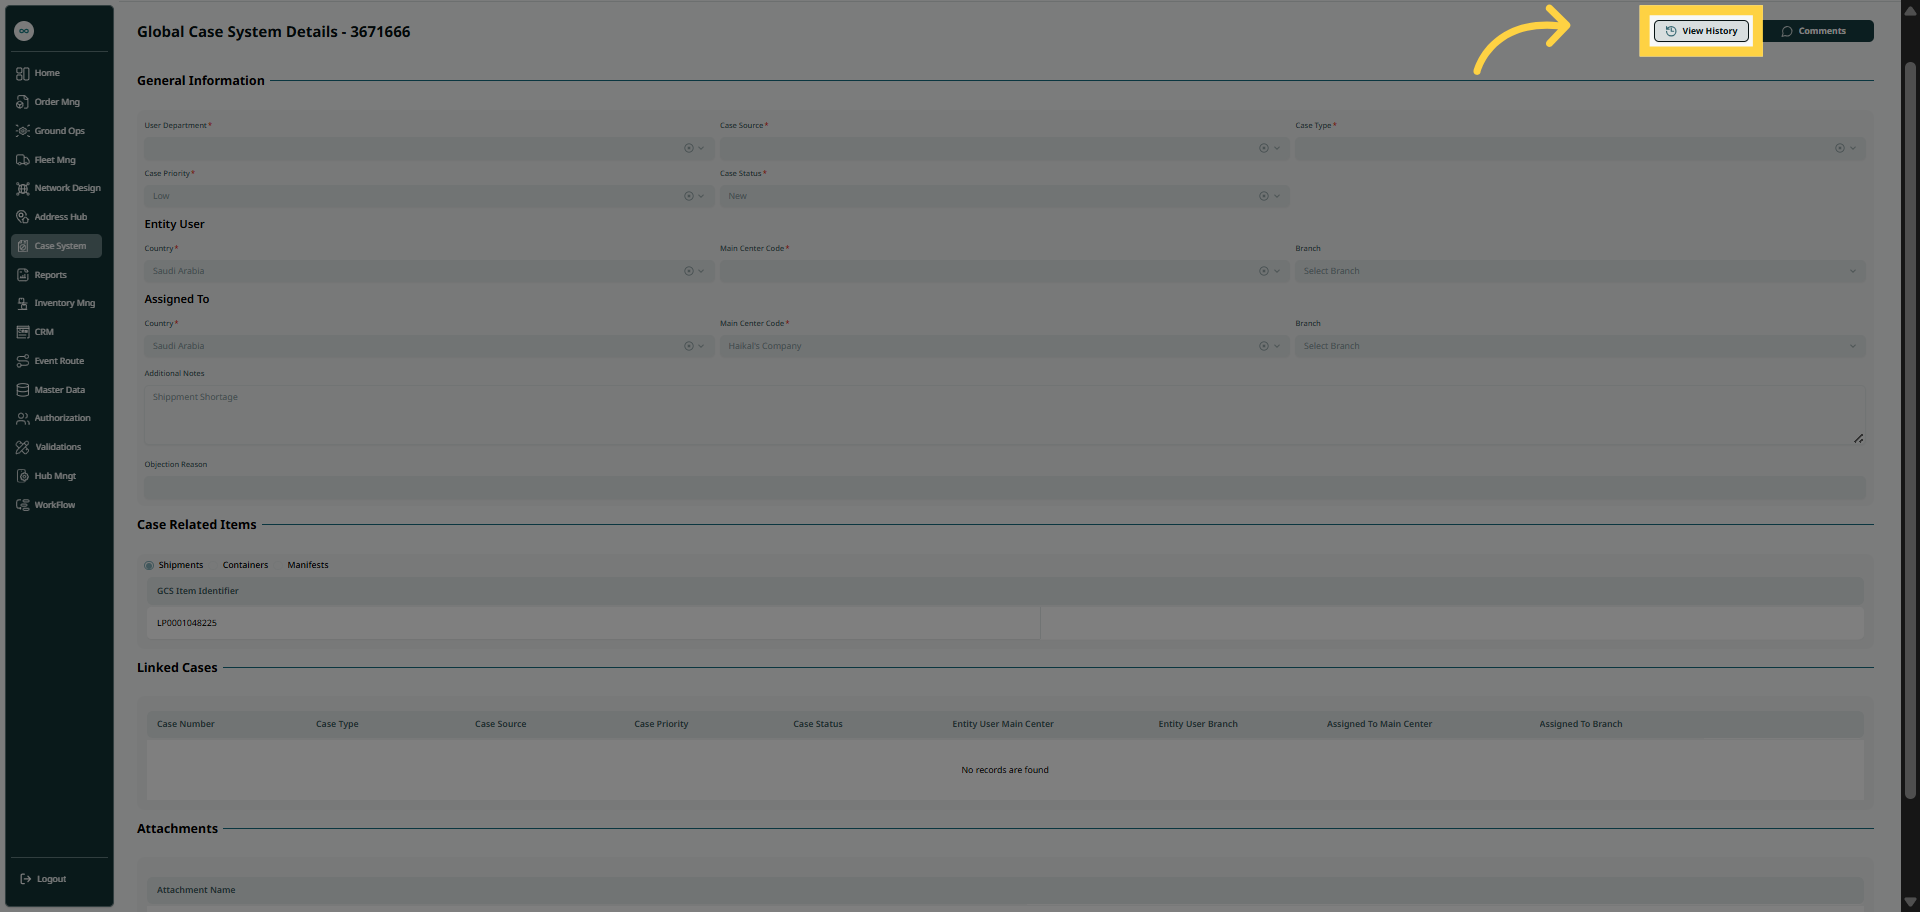
Figure 4- View History Action
2.1.2 Comment
The user can add comments to an existing case by navigating to the ‘Global Case System’ screen via the Case System and clicking on View Details then click on Comment.
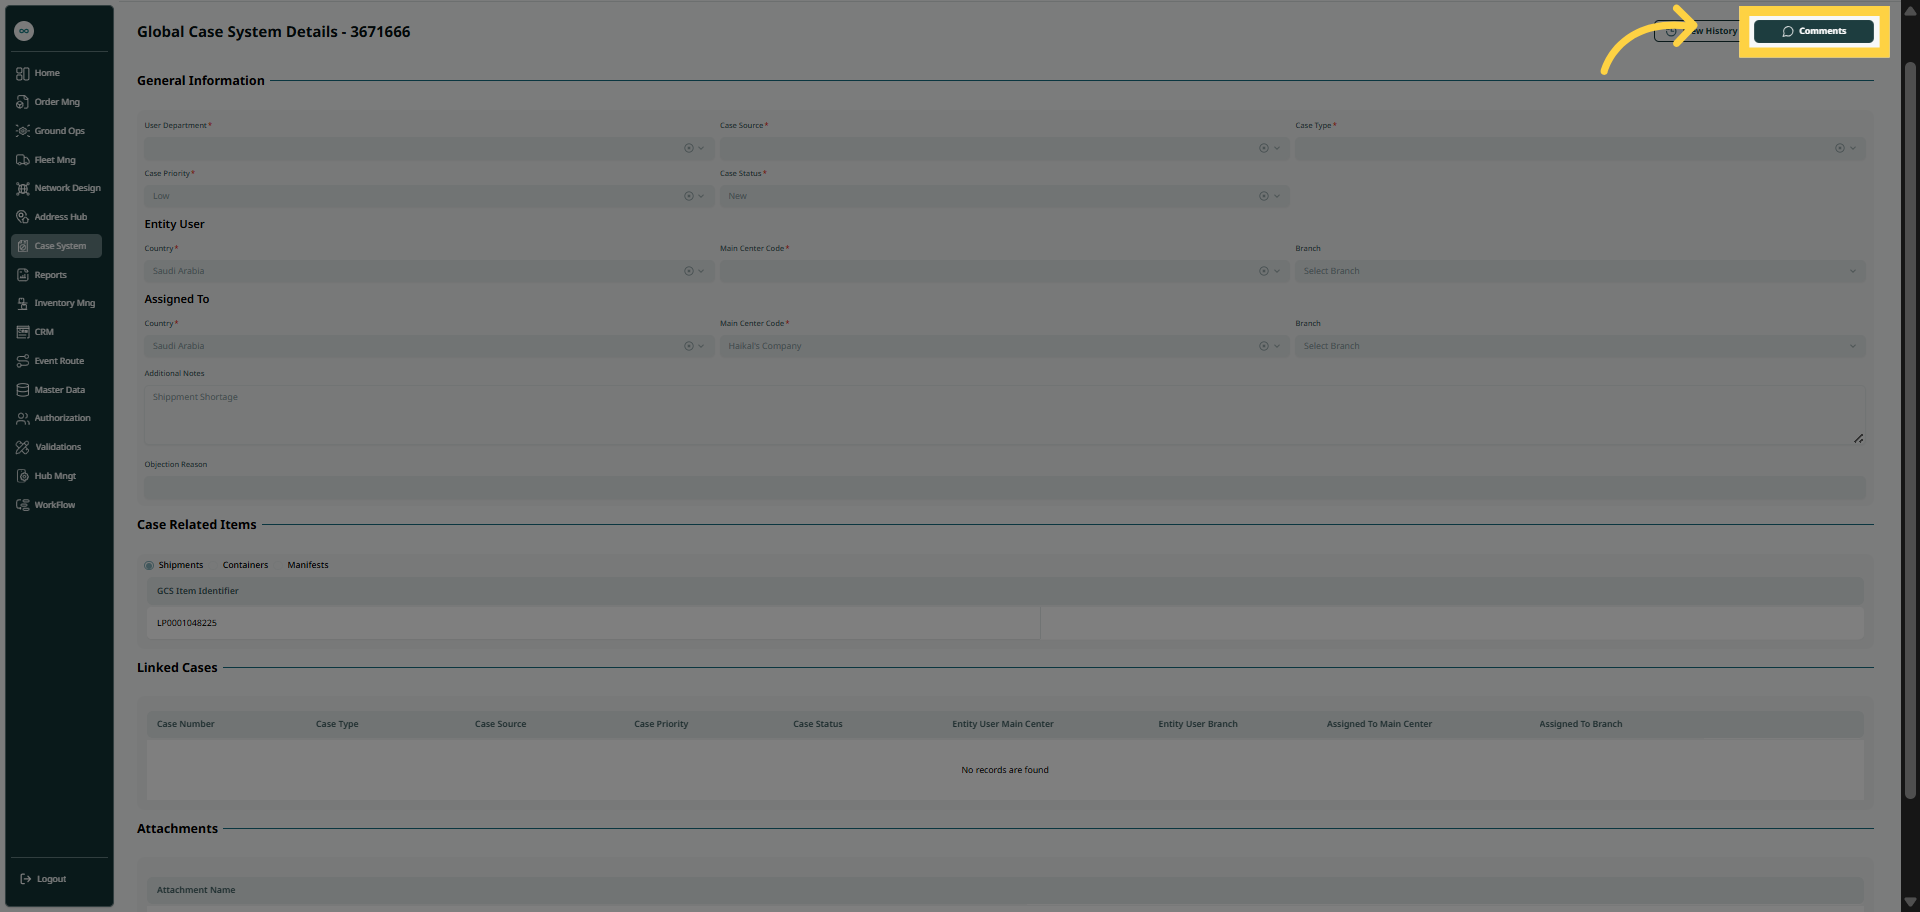
Figure 5- Comment Action
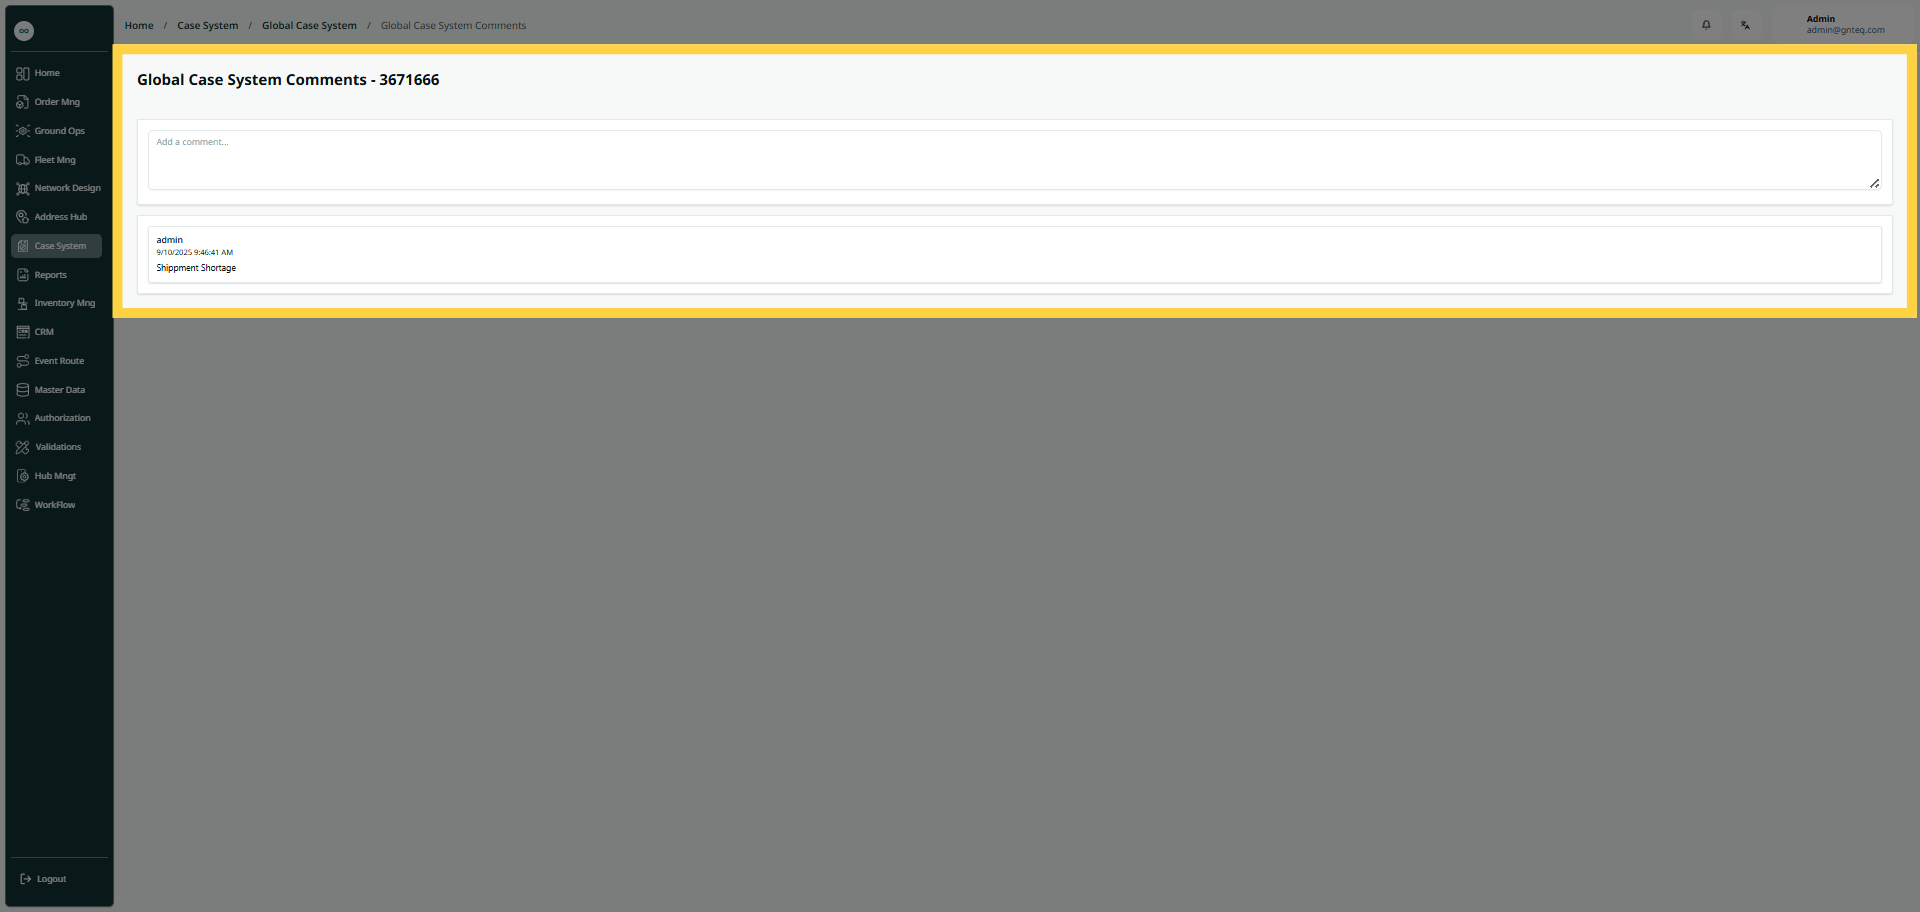
Figure 6- Comment
2.2 Edit Information
The user can edit information of an existing case by navigating to the ‘Global Case System’ screen via the Case System and clicking on Edit Information button:
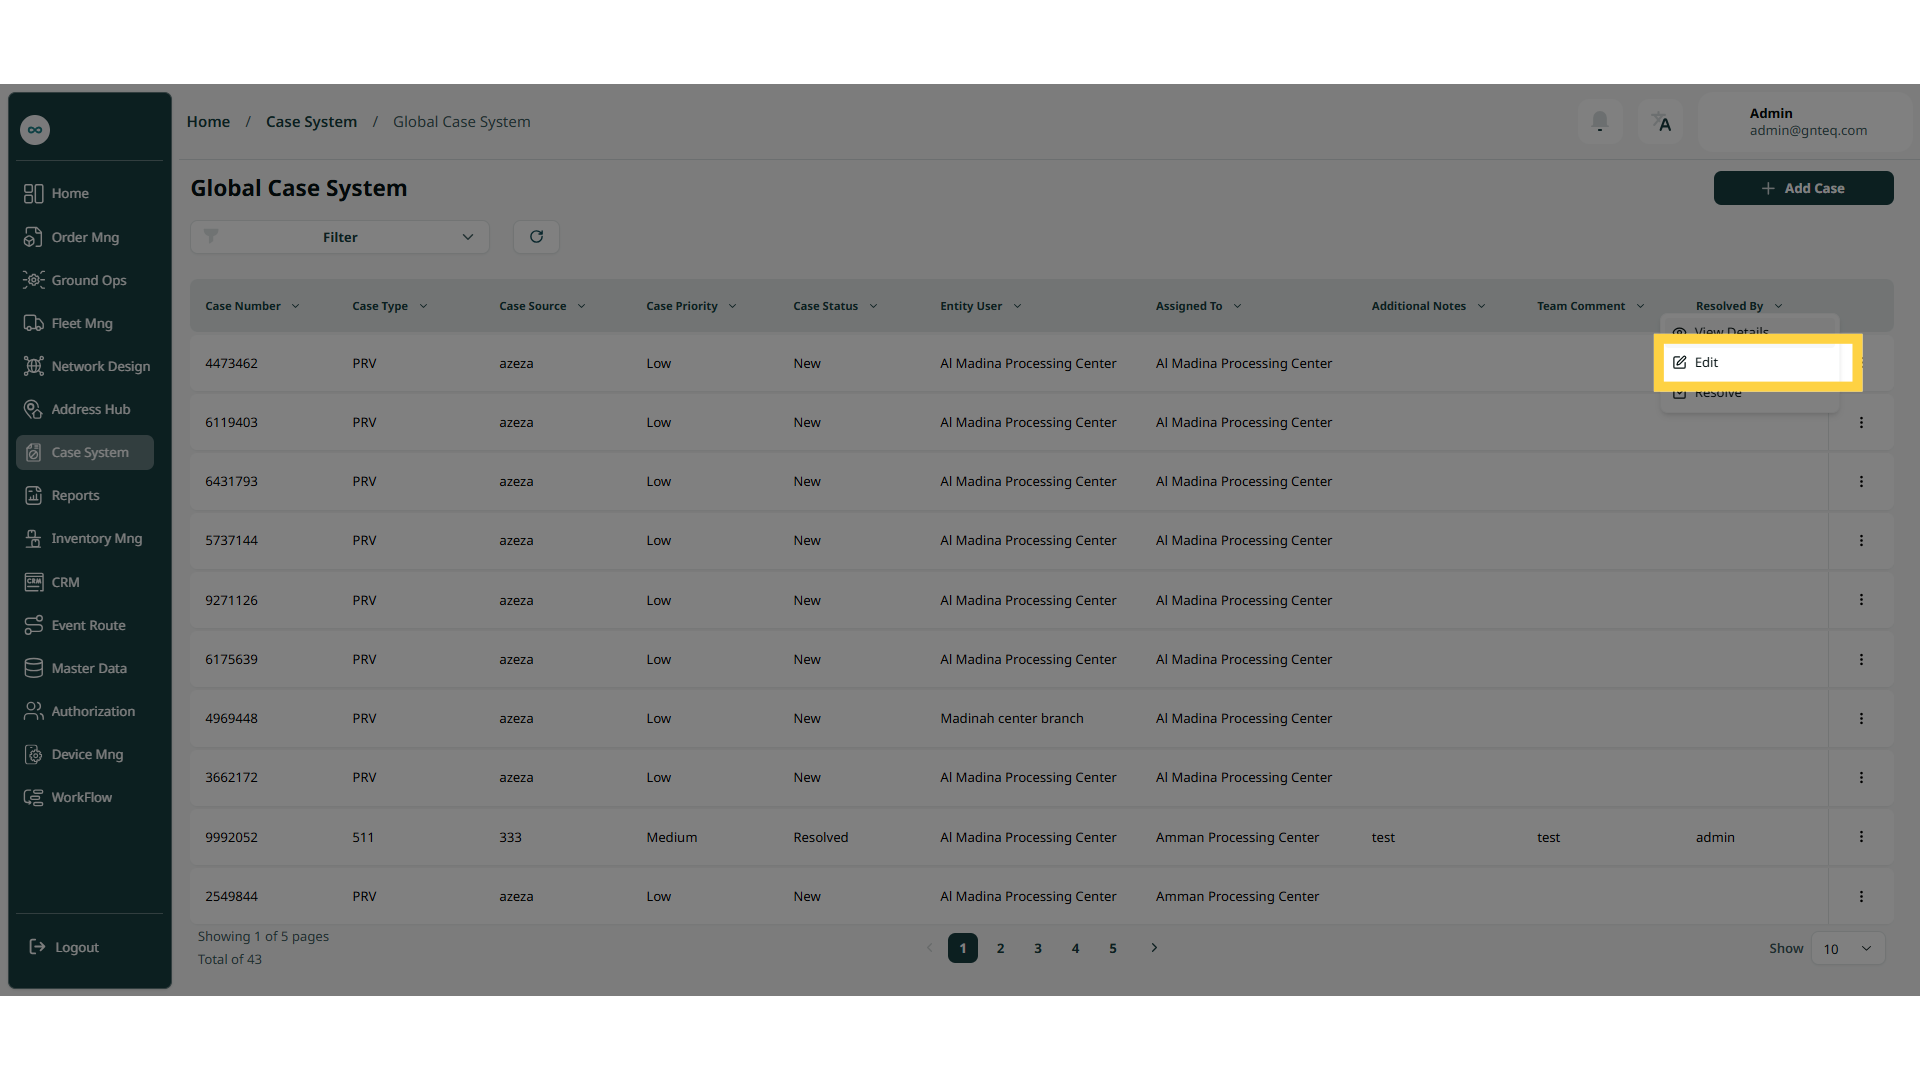
Figure 7- Edit Information Action
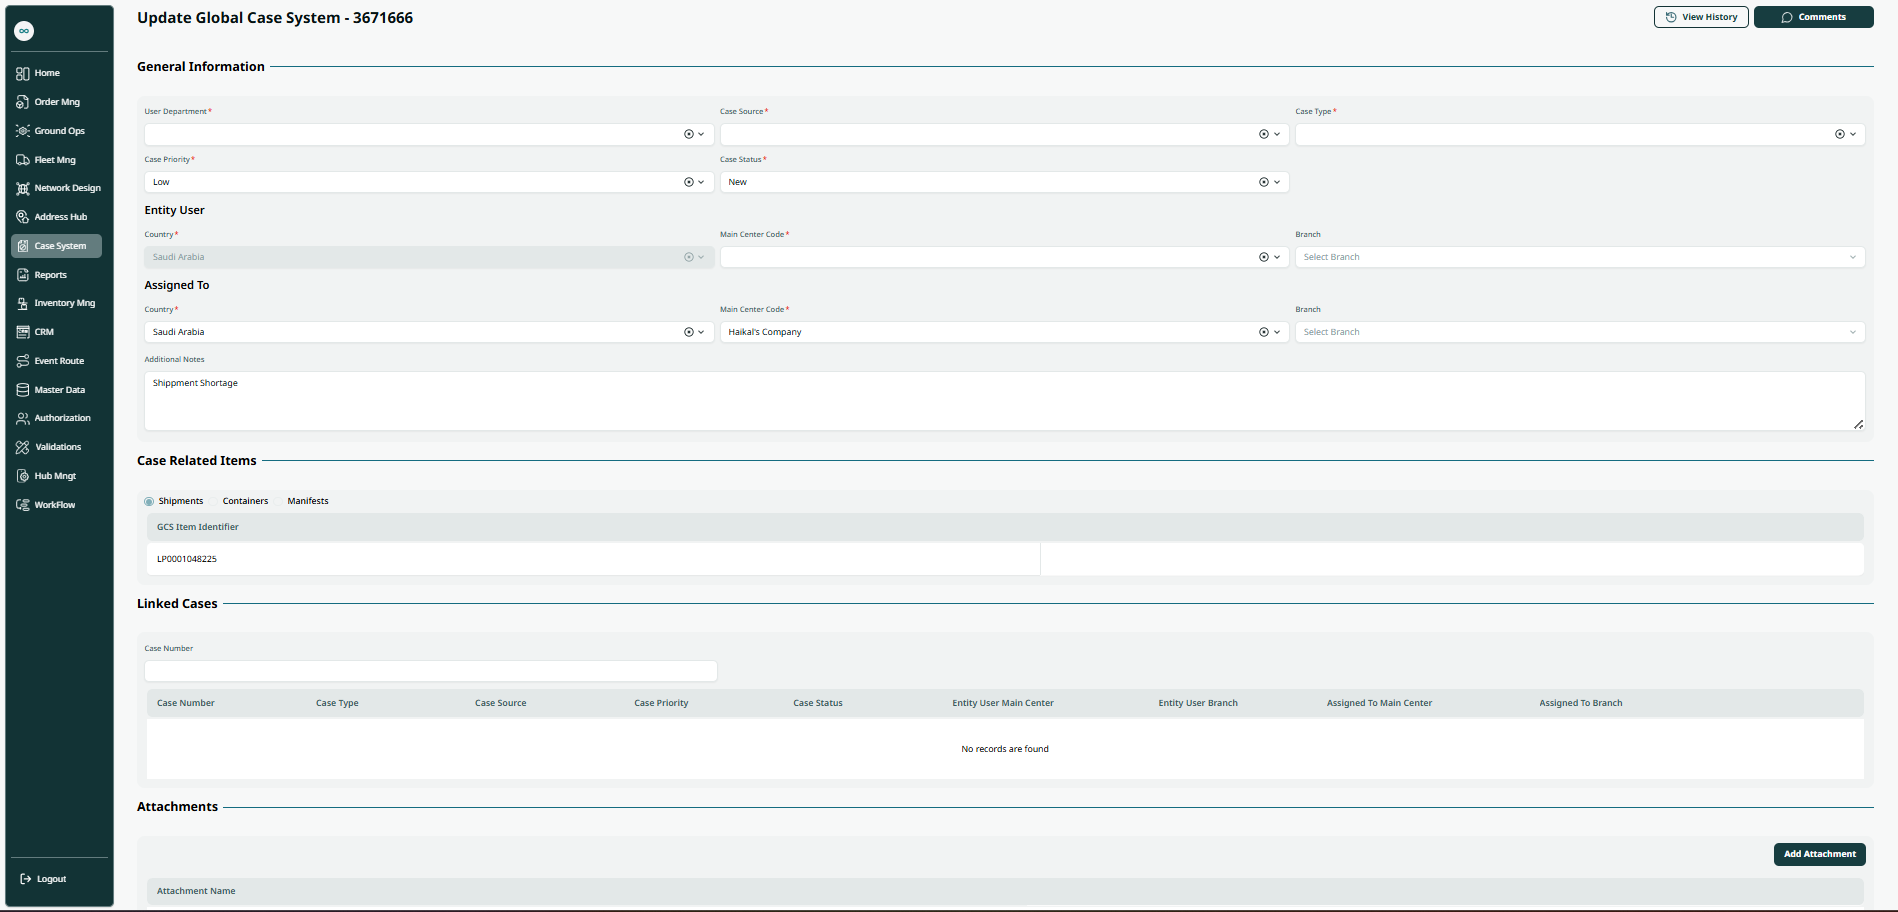
Figure 8- Edit Information
2.2.1 View History
The user can view history of an existing case by navigating to the ‘Global Case System’ screen via the Case System and clicking on Edit then click on View History.
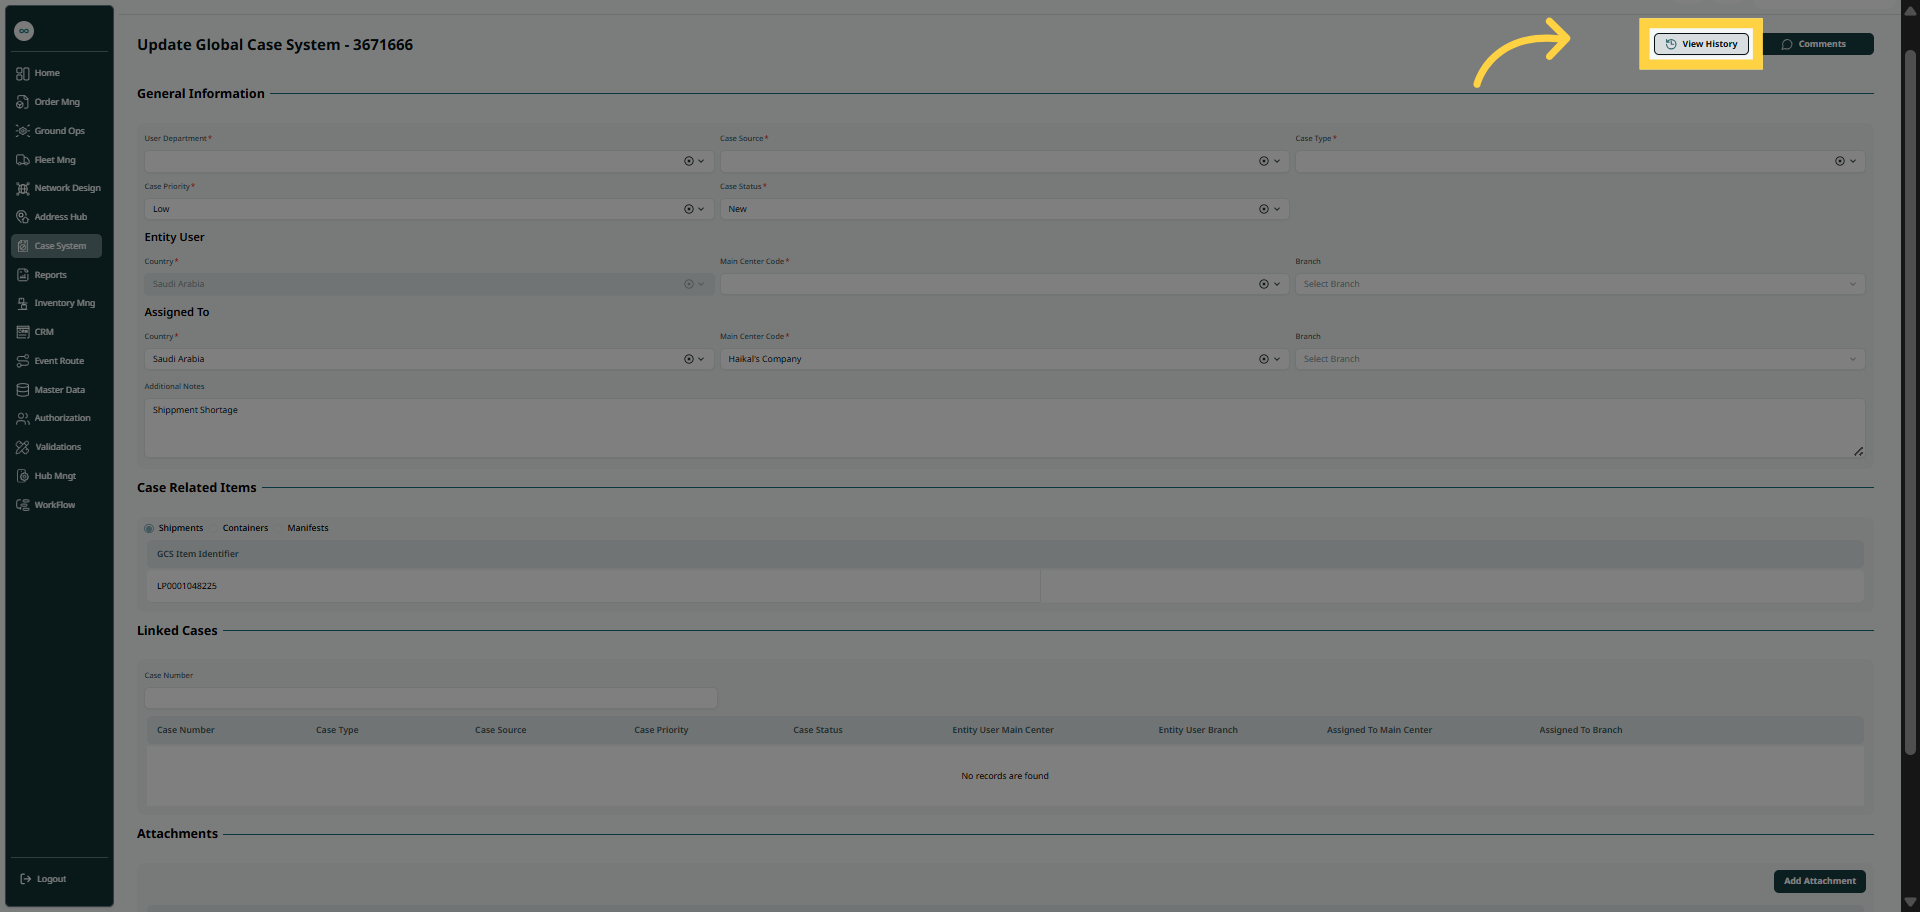
Figure 9- View History Action
2.2.2 Comment
The user can add comments to an existing case by navigating to the ‘Case System’ screen via the Case System and clicking on Edit then click on Comment.
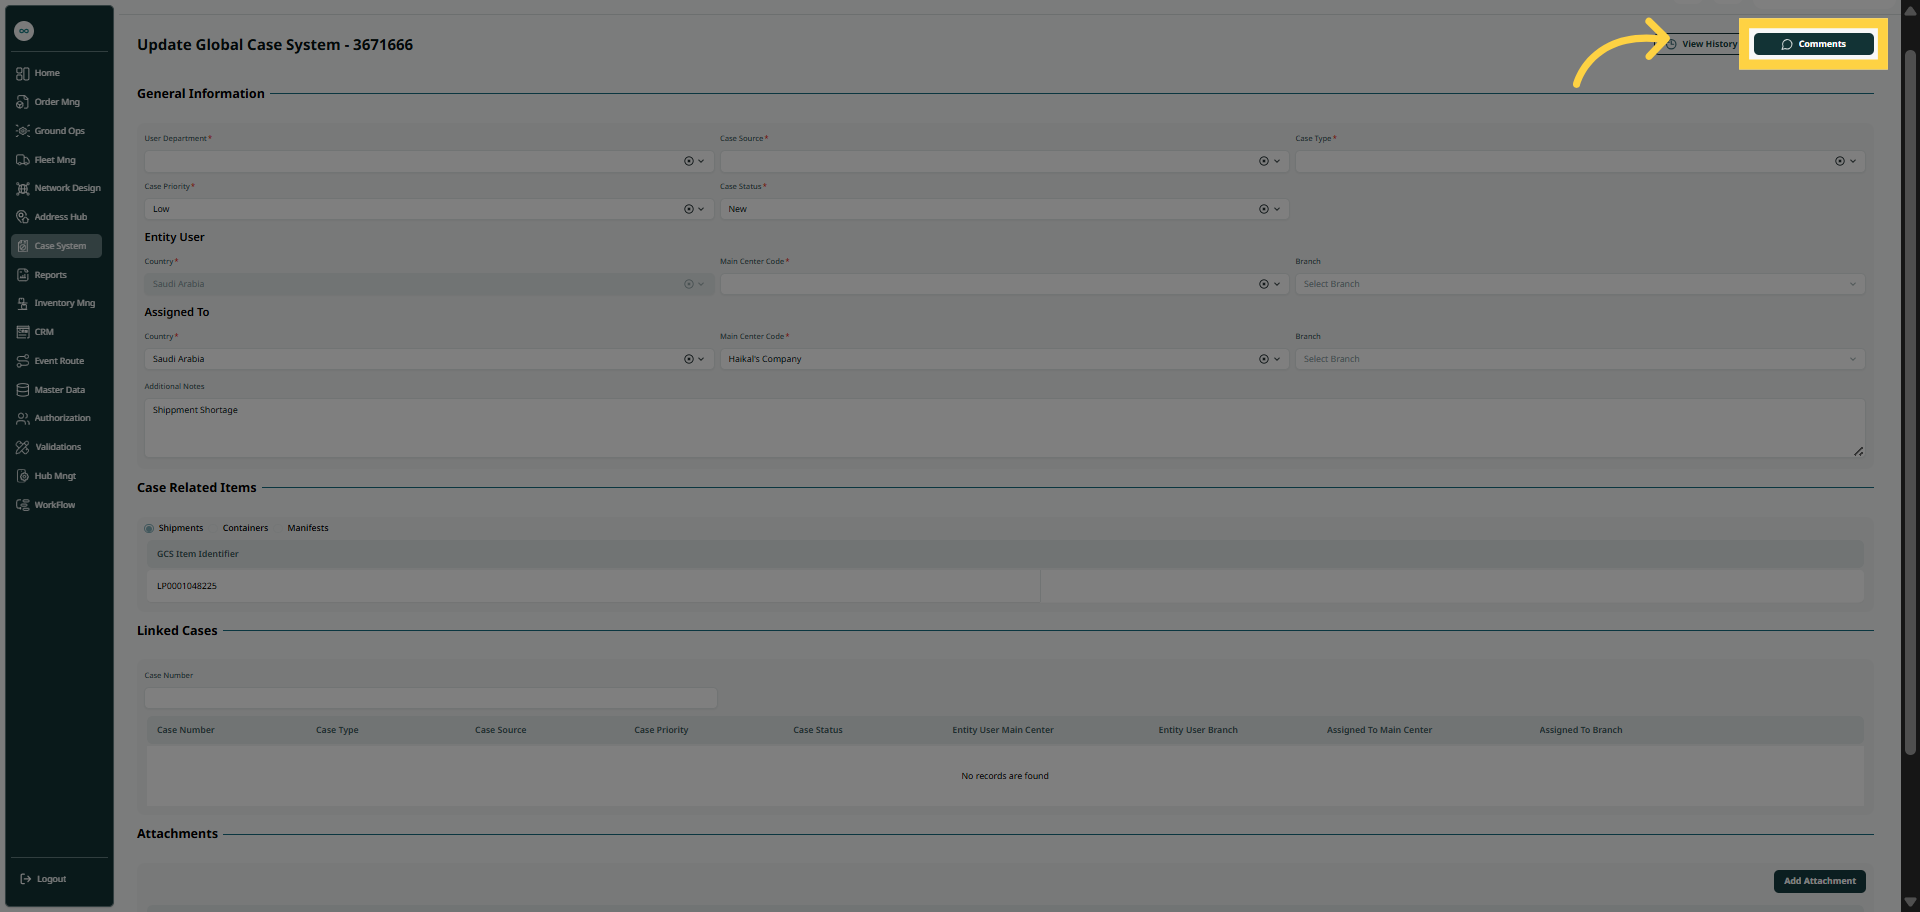
Figure 10- Comment Action
Figure 11- Comment
2.2.3 Add Attachment
The user can add attachments to an existing case by navigating to the ‘Case System’ screen via the Case System and clicking on Edit then click on Add Attachment.
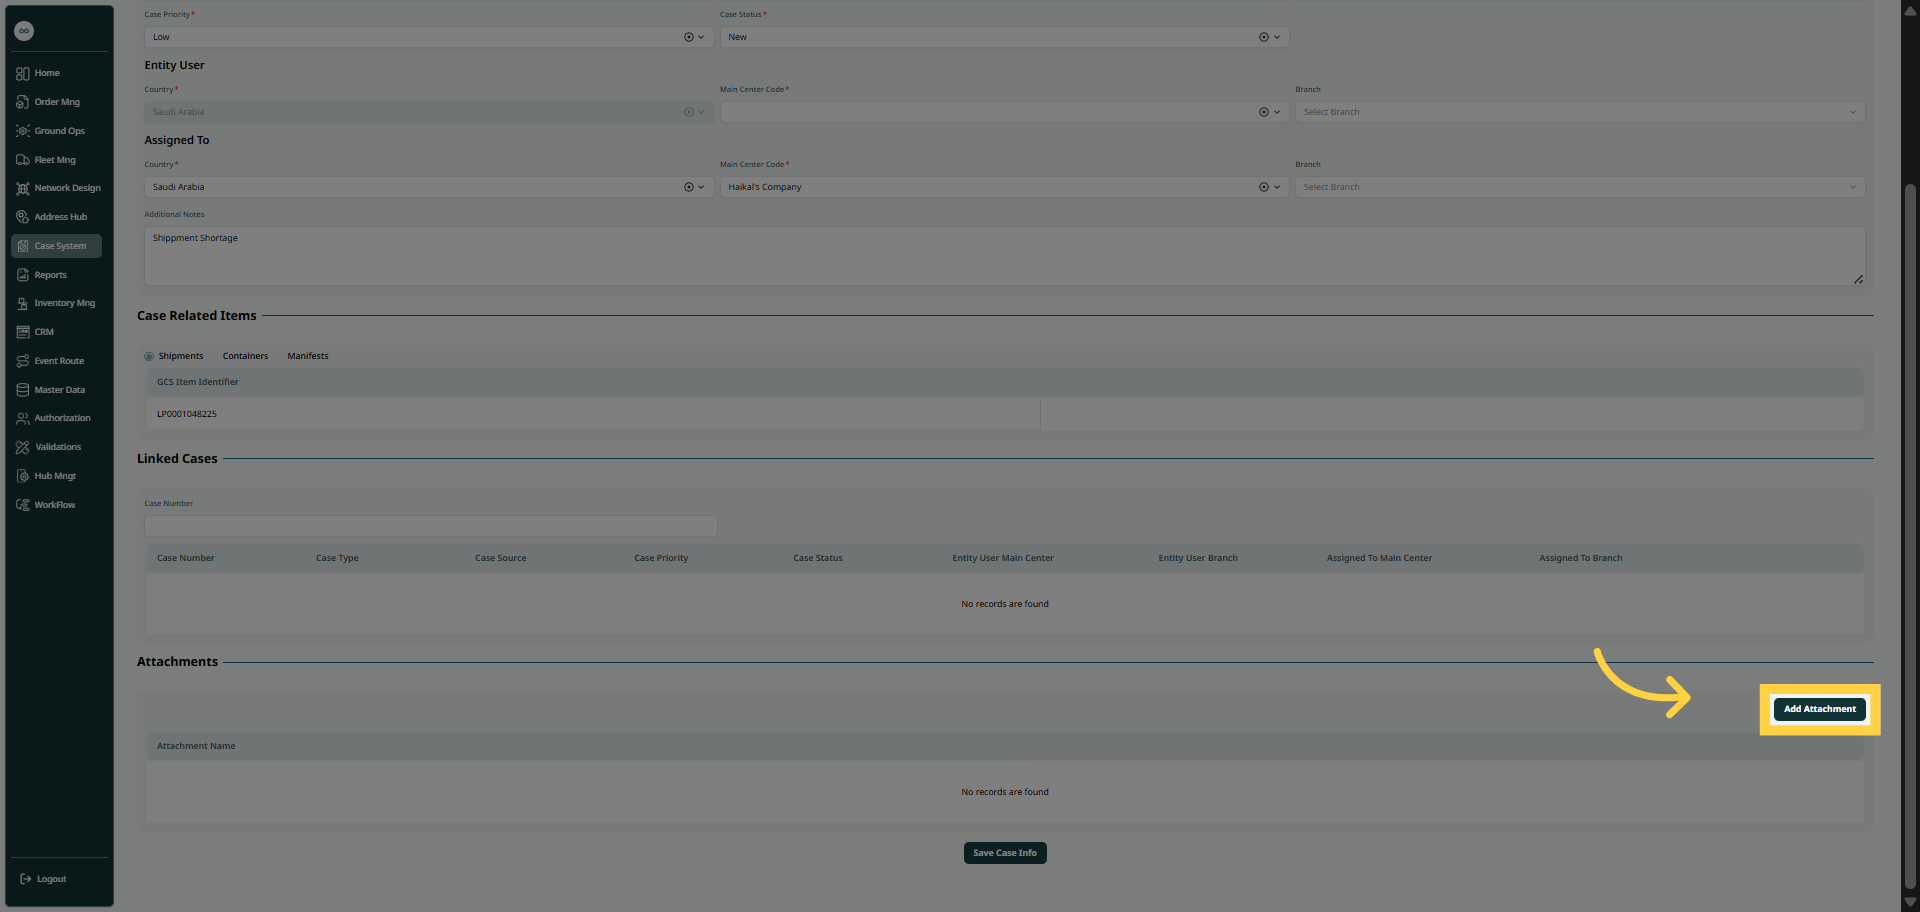
Figure 12- Add Attachment Action
2.3 Resolve Case
The user can resolve an existing case by navigating to the ‘Global Case System’ screen via the Case System and clicking on Resolve button:

Figure 13- Resolve Action
2.4 Comment
The user can add comments to an existing case by navigating to the ‘Global Case System’ screen via the Case System and clicking on Resolve button:
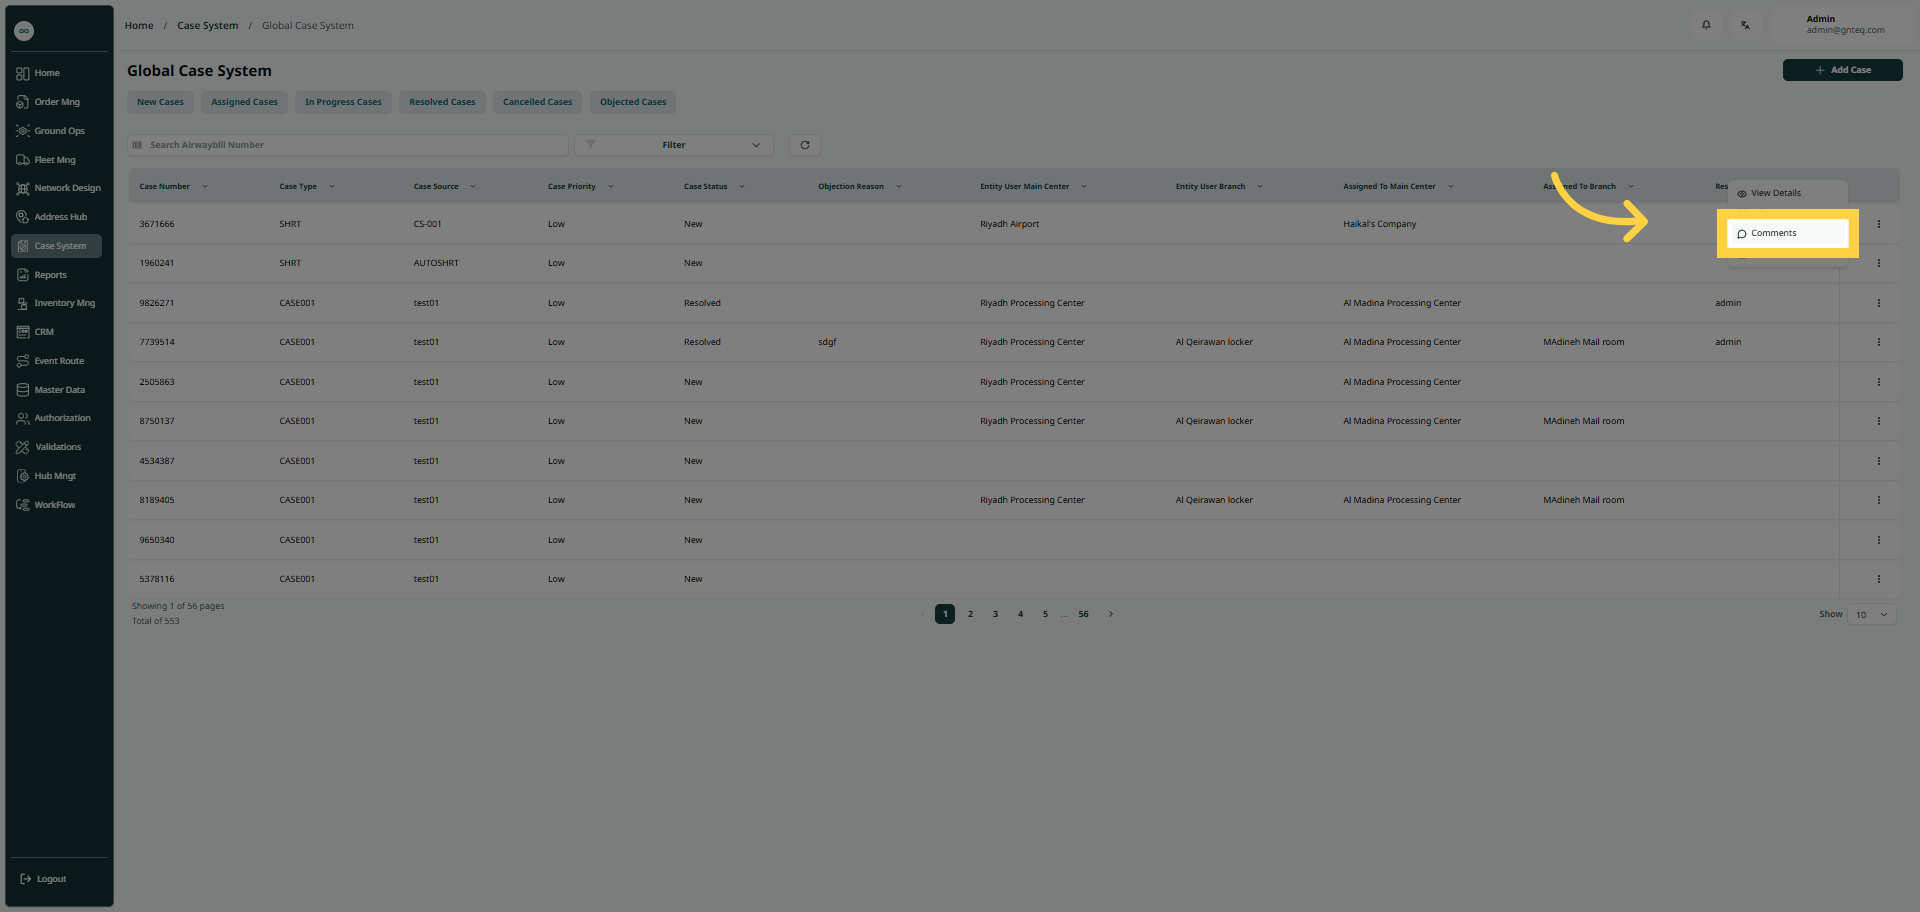
Figure 14- Comment Action
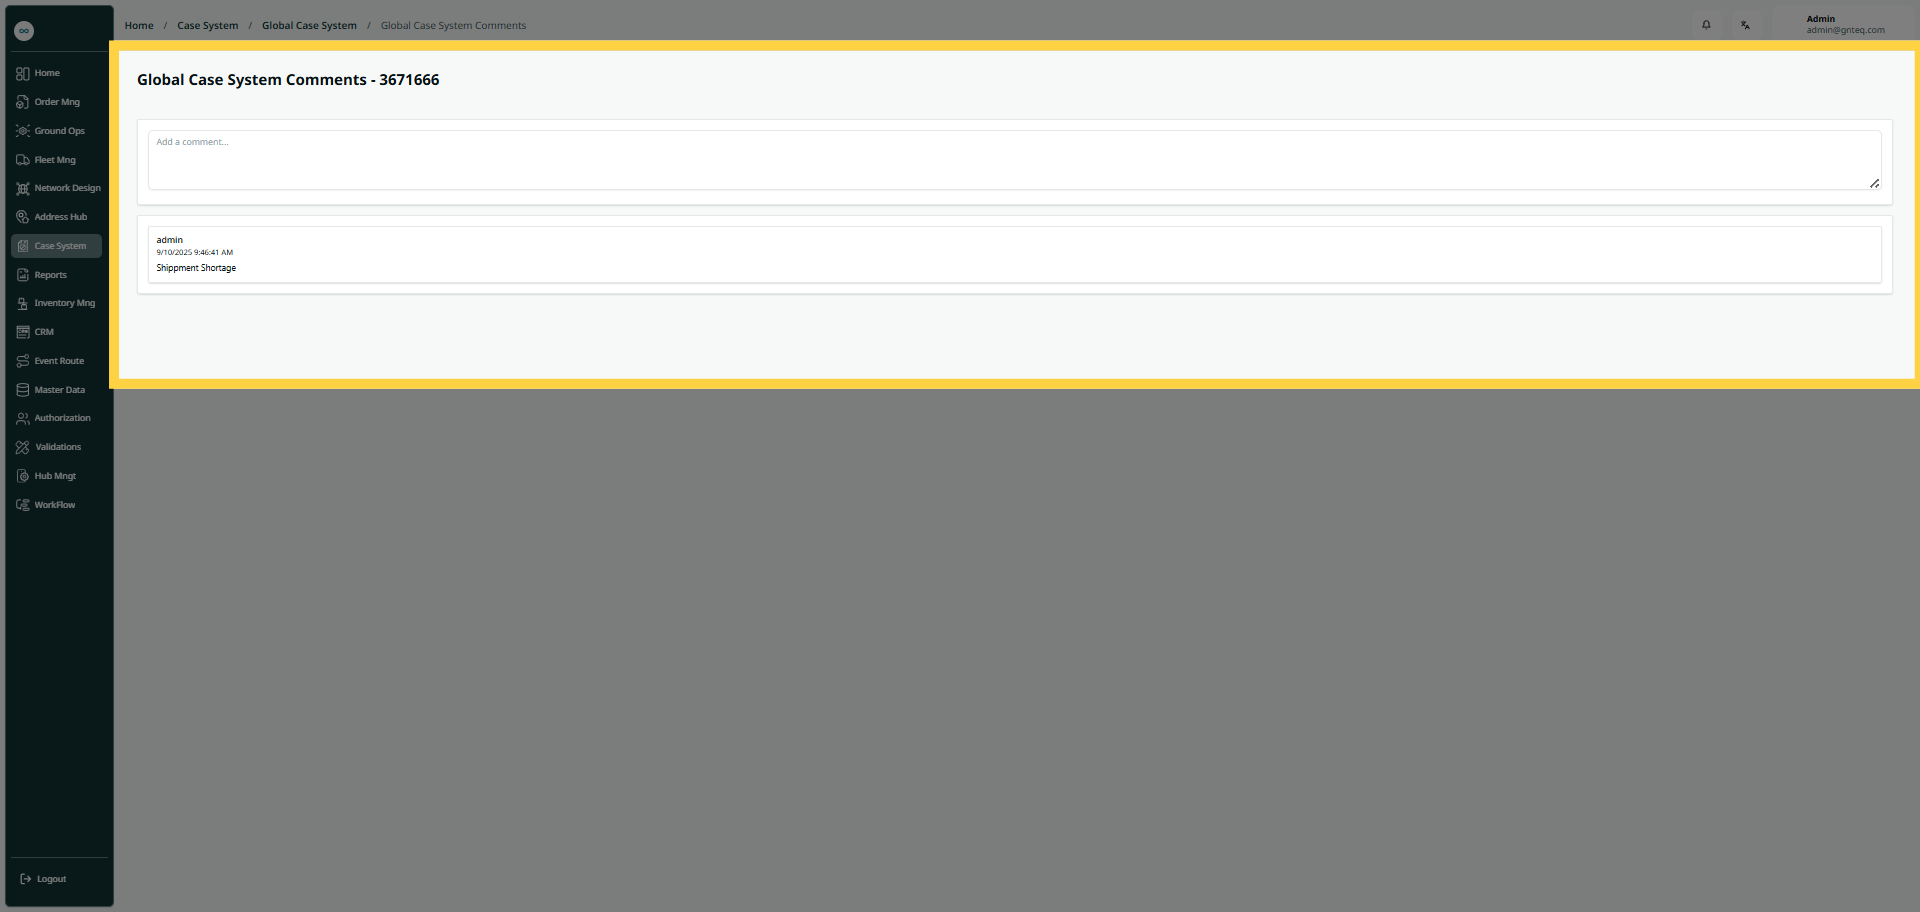
Figure 15- Comment
3. Add New Global Case
The user can create a new case by navigating to the ‘Global Case System’ screen via the Case System and clicking on Add Case button:
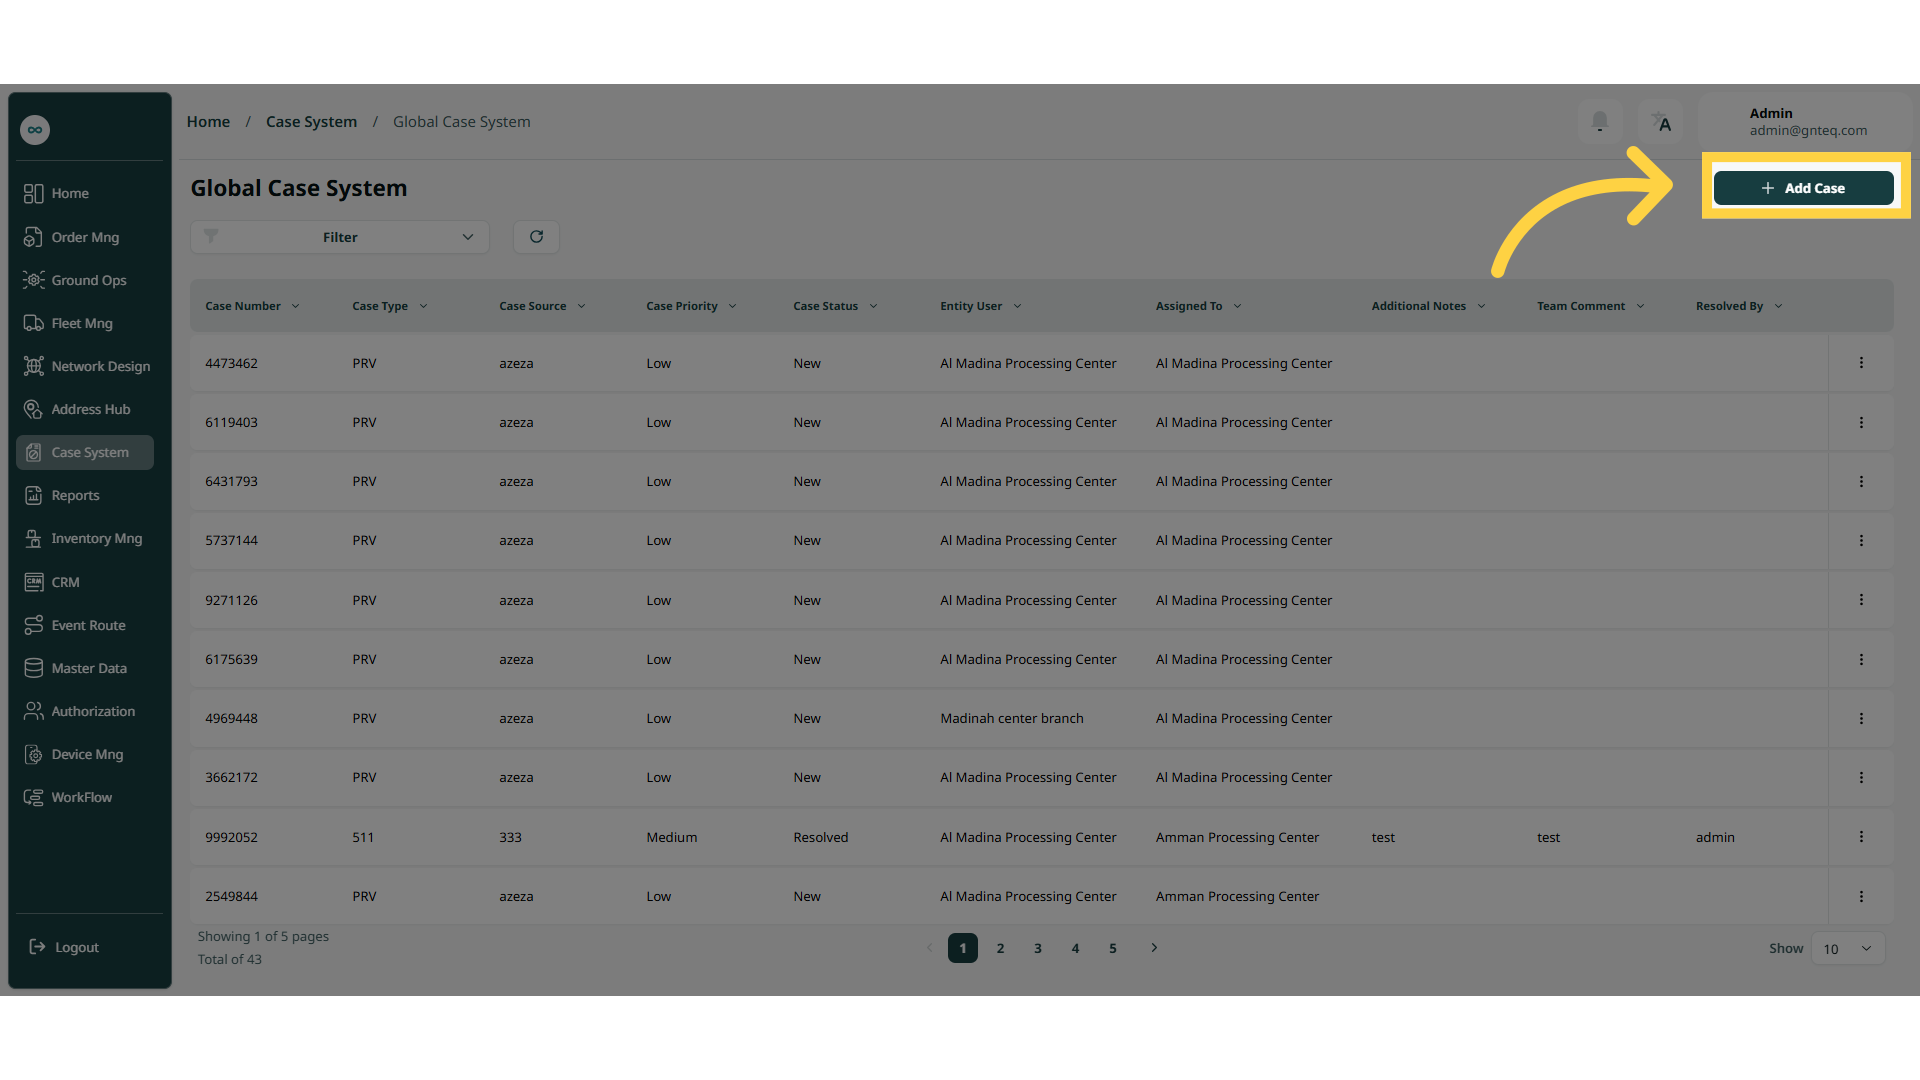
Figure 16- Add New Global Case
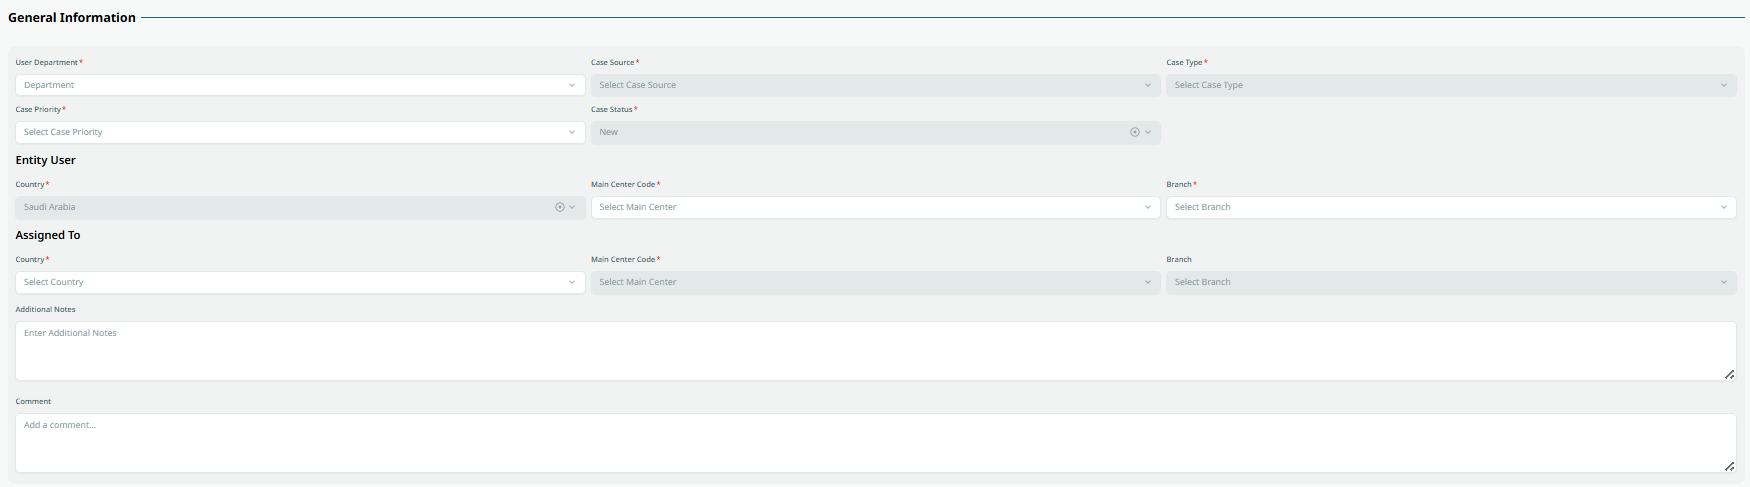
Figure 17- General Information
3.1 General Information
User Department: this field represents the user department.
Case Type: this field represents the type of the case (damaged shipment, process violation….etc.)
Case Source: this field represents the source of the case ( call center, operation……etc.)
Case Priority: this field represents the priority of the case (low, medium, high, critical)
Case Status: this field represents the status of the case (active, inactive).
3.2 Entity User
Country: this field represents the place that the case discovered.
Main Centre code: this field represents the city where the case is registered or primarily operates.
Branch Code: this field represents the station or route that the case discovered.
3.3 Assigned To
Country: this field represents the place where the case was discovered.
Main Centre code: this field represents the city where the case is registered or primarily operates.
Branch Code: this field represents the station or route where the case was discovered.
Additional Notes: this field represents extra notes about the case.
Comments: this field represents comments from the case assigned to.
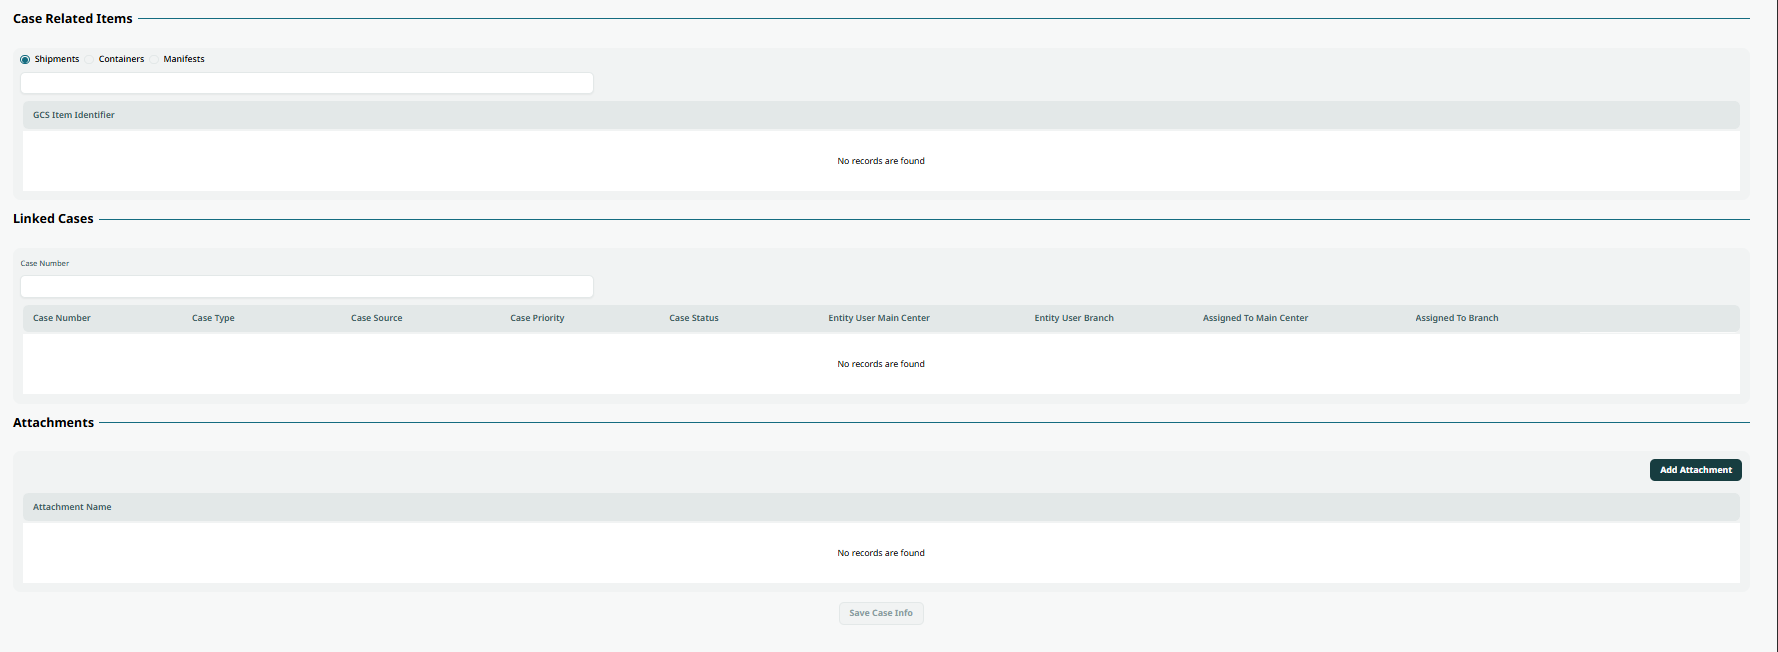
Figure 18- Case Related Items
Case Related Items: this field represents the case associated with a shipment, container, or manifest. When selecting the related case, the user must enter the corresponding Air Waybill (AWB) number.
Case Number: if there are any related cases, the user must enter the corresponding case number in this field.
Add Attachment: this button allows the user to upload any attachments relevant to the case.
By clicking on Save Case Info the case will be added successfully.